在OpenSUSE中安装LAMP——Apache、PHP、MariaDB和PhpMyAdmin
介绍
LAMP架构,代表Linux、Apache、MySQL/MariaDB和PHP,是一个强大的开源软件组合,广泛用于Web开发和托管。本教程将指导您在流行的Linux发行版openSUSE上安装和配置LAMP架构。我们将介绍Apache、PHP、MariaDB和PhpMyAdmin的安装过程,提供详细的示例和命令输出,以确保安装过程顺利进行。
步骤1:更新系统软件包
在开始之前,务必更新系统软件包,以确保我们拥有最新的软件版本和安全补丁。打开终端并执行以下命令:
sudo zypper refresh
sudo zypper update
步骤2:安装Apache
Apache是一个广泛使用的Web服务器,是LAMP架构的基石。要安装Apache,请执行以下命令:
示例
sudo zypper install apache2
输出
Loading repository data...
Reading installed packages...
Resolving package dependencies...

The following NEW package is going to be installed:
  apache2

1 new package to install.
Overall download size: XXX MiB. Already cached: 0 B. After the operation, additional XXX MiB will be used.
Continue? [y/n/...? shows all options] (y):

Retrieving package apache2-2.x.x-x.x.x.x.x.x.x.x.x.x.x.x.x.x.x.x.x.x.x.x.x.x.x.x
安装完成后,使用以下命令启动并启用Apache服务:
sudo systemctl start apache2
sudo systemctl enable apache2
输出
$ sudo systemctl start apache2
[sudo] password for user:
Starting apache2.service...

$ sudo systemctl enable apache2
Created symlink /etc/systemd/system/multi-user.target.wants/apache2.service → /usr/lib/systemd/system/apache2.service.
步骤3:安装PHP
PHP是一种流行的用于Web开发的脚本语言。要安装PHP及其必要的依赖项,请运行以下命令:
示例
sudo zypper install php7 php7-mysql apache2-mod_php7
输出
$ sudo zypper install php7 php7-mysql apache2-mod_php7
Loading repository data...
Reading installed packages...
Resolving package dependencies...

The following 3 NEW packages are going to be installed:
  apache2-mod_php7 php7 php7-mysql

3 new packages to install.
Overall download size: XXX MiB. Already cached: XXX MiB. After the operation, additional XXX MiB will be used.
Continue? [y/n/...? shows all options] (y):

Retrieving package apache2-mod_php7-XXX...
Retrieving package php7-XXX...
Retrieving package php7-mysql-XXX...
Installing package apache2-mod_php7-XXX...
Installing package php7-XXX...
Installing package php7-mysql-XXX...

Checking for file conflicts: [done]
(1/3) Installing: apache2-mod_php7-XXX..................................................................[done]
(2/3) Installing: php7-XXX....................................................................................[done]
(3/3) Installing: php7-mysql-XXX..............................................................................[done]

Additional rpm output:
...
...
...

Installation of packages was successful.
步骤4:安装MariaDB
MariaDB是MySQL的替代品,提供了一个强大而健壮的关系数据库管理系统。使用以下命令安装MariaDB:
示例
sudo zypper install mariadb mariadb-client
输出
Loading repository data...
Reading installed packages...
Resolving package dependencies...

The following 2 NEW packages are going to be installed:
  mariadb mariadb-client

2 new packages to install.
Overall download size: 150.1 MiB. Already cached: 0 B. After the operation, additional 672.9 MiB will be used.
Continue? [y/n/v/...? shows all options] (y): y
...
Retrieving package mariadb-10.6.5-2.1.x86_64 (1/2), 140.6 MiB (373.7 MiB unpacked)
Retrieving: mariadb-10.6.5-2.1.x86_64.rpm ..........................................................................................................................[done]
Retrieving package mariadb-client-10.6.5-2.1.x86_64 (2/2), 9.5 MiB (299.3 MiB unpacked)
Retrieving: mariadb-client-10.6.5-2.1.x86_64.rpm ...................................................................................................................[done]
...
Checking for file conflicts: .................................................................................................................................[done]
(1/2) Installing: mariadb-10.6.5-2.1.x86_64 ..............................................................................................................................[done]
(2/2) Installing: mariadb-client-10.6.5-2.1.x86_64 ...................................................................................................................[done]
...
Executing post-install scripts.....................................................................................................................................[done]
Additional rpm output:
  Installing MySQL system tables...
  OK
  Filling help tables...
  OK
  ...
执行以下命令启动并启用MariaDB服务:
示例
sudo systemctl start mariadb
sudo systemctl enable mariadb
输出
$ sudo systemctl start mariadb
[sudo] password for user:
$ sudo systemctl enable mariadb
Created symlink /etc/systemd/system/multi-user.target.wants/mariadb.service → /usr/lib/systemd/system/mariadb.service.
要保护您的MariaDB安装,请运行安全脚本并按照提示操作:
示例
sudo mysql_secure_installation
输出
$ sudo mysql_secure_installation

Securing the MySQL server deployment.

Connecting to MySQL using a Unix socket.

MySQL server found running with a Unix socket at /var/run/mysqld/mysqld.sock. Continue with the MySQL secure installation? [Y/n] Y

Please enter the MySQL root password:
Validating password...

The existing password for the user account root has expired. Please set a new password.

New password:
Re-enter new password:

Estimated strength of the password: 100
Do you wish to continue with the password provided? [Y/n] Y

Remove anonymous users? [Y/n] Y
Disallow root login remotely? [Y/n] Y
Remove test database and access to it? [Y/n] Y
Reload privilege tables now? [Y/n] Y

All done! MySQL should now be secured.
步骤5:安装PhpMyAdmin
PhpMyAdmin是一个基于Web的界面,用于管理MySQL/MariaDB数据库。运行以下命令安装PhpMyAdmin:
sudo zypper install phpMyAdmin
在安装过程中,系统会提示您选择Web服务器。选择“apache2”并按Enter键。然后,选择“yes”为phpMyAdmin配置数据库。
步骤6:为PhpMyAdmin配置Apache
要配置Apache以识别PhpMyAdmin,请在文本编辑器中打开配置文件:
sudo nano /etc/apache2/conf.d/phpMyAdmin.conf
将`Require ip 127.0.0.1`一行替换为`Require all granted`。保存并关闭文件。
步骤7:重启Apache
重启Apache服务以使更改生效:
sudo systemctl restart apache2
步骤8:访问PhpMyAdmin
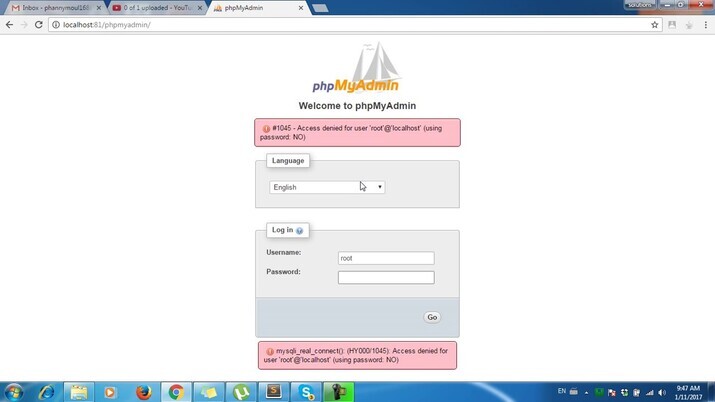
打开Web浏览器并输入以下URL:https:///phpMyAdmin。您应该看到PhpMyAdmin登录页面。使用您的MariaDB root用户名和密码登录。

恭喜!您已成功在openSUSE上安装LAMP——Apache、PHP、MariaDB和PhpMyAdmin。您现在可以开始开发和托管Web应用程序了。
结论
在openSUSE上设置LAMP架构是一个简单的过程,可以让您利用开源软件的强大功能进行Web开发。通过遵循本文中概述的步骤,您已经获得了构建和部署Web应用程序的坚实基础。享受LAMP架构提供的无限可能性!


 数据结构
数据结构 网络
网络 关系数据库管理系统 (RDBMS)
 操作系统
操作系统 Java
Java iOS
iOS HTML
HTML CSS
CSS Android
 Python
 C语言编程
C语言编程 C++
C++ C#
C# MongoDB
 MySQL
MySQL Javascript
 PHP
PHP