如何在OpenCV Python中查找和绘制图像轮廓的凸包?
凸包看起来类似于轮廓逼近,但它并非完全是轮廓逼近。凸包是围绕物体的凸曲线。凸曲线总是凸出的,或者至少是平的。凸包查找凸性缺陷并对其进行修正。
语法
要查找凸包,我们使用以下函数:
hull = cv2.convexHull(cnt, hull, clockwise, returnPoints)
参数
cnt是轮廓点。它表示为轮廓点的数组。
hull是输出,通常我们避免使用它。
clockwise – 方向标志。如果为True,则输出凸包的方向为顺时针方向,否则为逆时针方向。
returnPoints – 默认设置为True。
输出 – 当returnPoints设置为True时,它返回凸包点的坐标。如果设置为False,则返回对应于凸包点的轮廓点的索引。
因此,为了获得凸包,我们通常使用以下方法:
hull = cv2.convexHull(cnt)
要绘制凸包点的轮廓,请使用此函数:
cv2.drawContours(img, [hull], -1, (0,255,255), 3)
步骤
您可以使用以下步骤查找并绘制图像轮廓的凸包:
导入所需的库。在所有以下Python示例中,所需的Python库是OpenCV。确保您已经安装了它。
import cv2
使用cv2.imread()读取输入图像并将其转换为灰度图像。
img = cv2.imread('shape.png')
gray = cv2.cvtColor(img, cv2.COLOR_BGR2GRAY)
对灰度图像应用阈值处理以创建二值图像。
ret,thresh = cv2.threshold(gray,150,255,0)
使用cv2.findContours()函数查找图像中的轮廓。
contours, _ = cv2.findContours(thresh, cv2.RETR_TREE,cv2.CHAIN_APPROX_SIMPLE)
选择轮廓cnt或循环遍历所有轮廓。使用cv2.convexHull(cnt)函数查找轮廓cnt的凸包。
cnt = contours[0]
hull = cv2.convexHull(cnt)
将凸包点传递给以下函数,在输入图像上绘制凸包。
cv2.drawContours(img, [hull], -1, (0,255,255), 3)
显示绘制了凸包的图像。
cv2.imshow("Convex Hull", img)
cv2.waitKey(0)
cv2.destroyAllWindows()
让我们来看一些例子以便更好地理解。
示例1
在下面的Python程序中,我们检测图像中的轮廓并查找第一个轮廓的凸包。我们还在图像上绘制第一个轮廓和凸包。
# import required libraries
import cv2

# load the input image
img = cv2.imread('six-point-star.png')

# convert the input image to grayscale
gray = cv2.cvtColor(img, cv2.COLOR_BGR2GRAY)

# apply thresholding to convert grayscale to binary image
ret,thresh = cv2.threshold(img1,150,255,0)

# find the contours
contours,hierarchy = cv2.findContours(thresh, cv2.RETR_TREE,cv2.CHAIN_APPROX_SIMPLE)
print("Number of contours detected:", len(contours))

# select the first contour
cnt = contours[0]

# find the convex hull using the contour
hull = cv2.convexHull(cnt)

# draw contour and convex hull on the input image
img = cv2.drawContours(img,[cnt],0,(255,0,0),2)
img = cv2.drawContours(img,[hull],0,(0,255,255),3)

# display the image with drawn contour and convex hull
cv2.imshow("Convex Hull", img)
cv2.waitKey(0)
cv2.destroyAllWindows()
我们将在上面的程序代码中使用以下图像作为输入文件。

输出
执行上述代码后,将产生以下输出:
Number of contours detected: 1
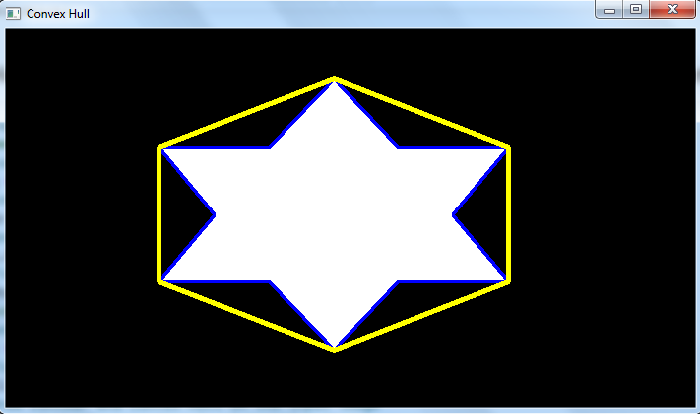
我们将得到以下输出窗口,显示图像中检测到的第一个轮廓和凸包:

轮廓以蓝色绘制,凸包以黄色绘制。注意轮廓和凸包之间的区别。
示例2
在这个例子中,我们检测图像中的轮廓并查找所有轮廓的凸包。我们还在图像上绘制所有轮廓和凸包。
import cv2
img = cv2.imread('convexhull.png')
gray = cv2.cvtColor(img, cv2.COLOR_BGR2GRAY)

ret,thresh = cv2.threshold(gray,100,255,0)
contours,hierarchy = cv2.findContours(thresh, cv2.RETR_TREE,cv2.CHAIN_APPROX_SIMPLE)
print("Number of contours detected:", len(contours))

# Find the convex hull for all the contours
for cnt in contours:
   hull = cv2.convexHull(cnt)
   img = cv2.drawContours(img,[cnt],0,(0,255,0),2)
   img = cv2.drawContours(img,[hull],0,(0,0,255),3)

# Display the image with convex hull drawn on it
cv2.imshow("Convex Hull", img)
cv2.waitKey(0)
cv2.destroyAllWindows()
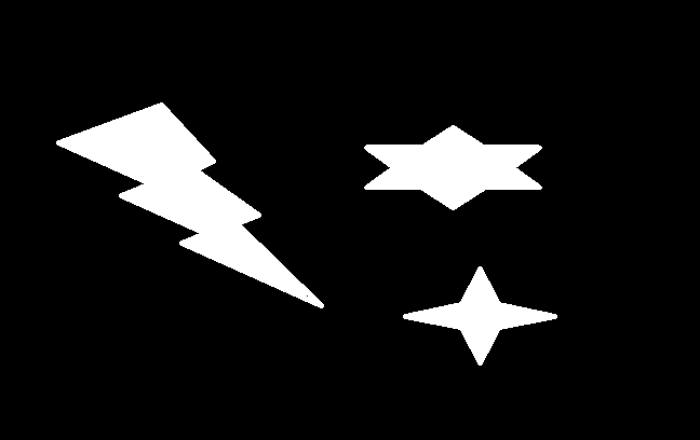
我们将在本程序中使用此图像作为输入文件:

输出
执行上述代码后,将产生以下输出:
Number of contours detected: 3
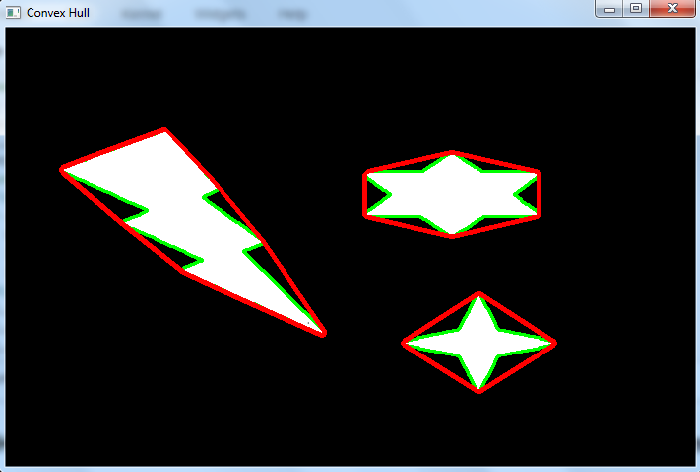
我们将得到以下输出窗口,显示图像中检测到的轮廓和凸包:

凸包以红色显示,轮廓以绿色显示。注意轮廓和凸包之间的区别。


 数据结构
数据结构 网络
网络 关系数据库管理系统 (RDBMS)
 操作系统
操作系统 Java
Java iOS
iOS HTML
HTML CSS
CSS Android
 Python
 C语言编程
C语言编程 C++
C++ C#
C# MongoDB
 MySQL
MySQL Javascript
 PHP
PHP