如何在 Swift 中移除视图的所有子视图?
在 Swift 中,您可以通过使用循环遍历每个子视图来移除视图的子视图。Swift 提供了一个名为 removeFromSuperview() 的方法来从其父视图中移除视图。在本文中,您将学习如何使用此方法以及一些示例。
removeFromSuperview()
此方法属于 Swift 中的 UIView 类。这可以用于从其父视图中移除视图对象。要调用此方法,您需要从需要从父视图中移除的视图对象调用它。
当您在视图上运行 removeFromSuperview() 时,它会向其父视图发送一条消息,请求将该视图从其子视图数组中移除。这表示父视图不再保留该视图,并且如果不存在对它的其他强引用,则可以将其释放。视图的 window 属性也设置为 nil,以表示它不再在屏幕上可见。
语法
以下是使用 removeFromSuperview() 的语法
// create a view object
let subView = UIView()

// add it to the parent view
parentView.addSubview(subView)
// ...some other code…

// remove this subView from the parent view
subView.removeFromSuperview()
在此示例中,创建了一个名为 subView 的 UIView 实例,然后使用 addSubview() 方法将其添加为 parentView 的子视图。之后,在 subView 上调用 removeFromSuperview() 以将其从 parentView 中移除。在执行此代码行之后,subView 将不再显示在屏幕上。它不再是 parentView 的子视图。
以下是一个包含更多上下文和更详细的示例
步骤 1 − 创建一个 ViewController 来测试此方法
步骤 2 − 创建一些 UIView 属性
步骤 3 − 配置 redView 并将其添加到 superView 以及一些约束
步骤 4 − 配置 yellowView 并将其添加到 superView 以及一些约束
示例
import UIKit
class TestController: UIViewController {

   // creating some views
   let redView = UIView()
   let yellowView = UIView()

   override func viewDidLoad() {
      super.viewDidLoad()
      initialSetup()
   }
   private func initialSetup() {

      view.backgroundColor = .white
      navigationItem.title = "UIView"

      // configuring the redView and adding it to the superView along with some constraints
      redView.backgroundColor = .red
      redView.translatesAutoresizingMaskIntoConstraints = false
      redView.layer.cornerRadius = 6
      redView.clipsToBounds = true
      view.addSubview(redView)
      redView.heightAnchor.constraint(equalToConstant: 150).isActive = true
      redView.widthAnchor.constraint(equalToConstant: 150).isActive = true
      redView.topAnchor.constraint(equalTo: view.safeAreaLayoutGuide.topAnchor, constant: 100).isActive = true
      redView.centerXAnchor.constraint(equalTo: view.centerXAnchor).isActive = true

      // configuring the yellowView and adding it to superView along with some constraints
      yellowView.backgroundColor = .yellow
      yellowView.translatesAutoresizingMaskIntoConstraints = false
      yellowView.layer.cornerRadius = 6
      yellowView.clipsToBounds = true
      view.addSubview(yellowView)
      yellowView.heightAnchor.constraint(equalToConstant: 150).isActive = true
      yellowView.widthAnchor.constraint(equalToConstant: 150).isActive = true
      yellowView.topAnchor.constraint(equalTo: redView.bottomAnchor, constant: 50).isActive = true
      yellowView.centerXAnchor.constraint(equalTo: view.centerXAnchor).isActive = true
   }
}
输出
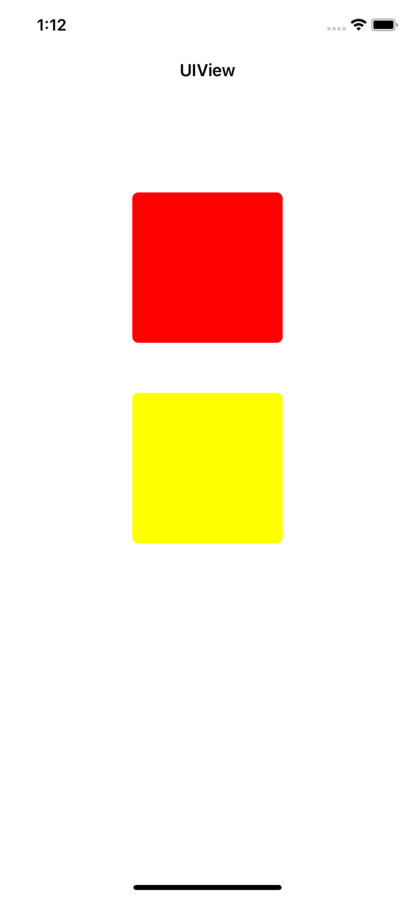
运行上述代码后,您将看到两个子视图都显示在主屏幕上。以下是输出。

如果要移除视图的所有子视图但保留视图本身,您可以添加以下代码:
func removeAllSubviews() {

   // perform a loop to iterate each subView
   view.subviews.forEach { subView in

   // removing subView from its parent view
      subView.removeFromSuperview()
   }
}
此代码使用 forEach 方法迭代 parentView 的 subviews 数组并从 parentView 中移除每个子视图。此代码与上一段代码的区别在于,它使用闭包在每个子视图上调用 removeFromSuperview(),而不是使用 for 循环。
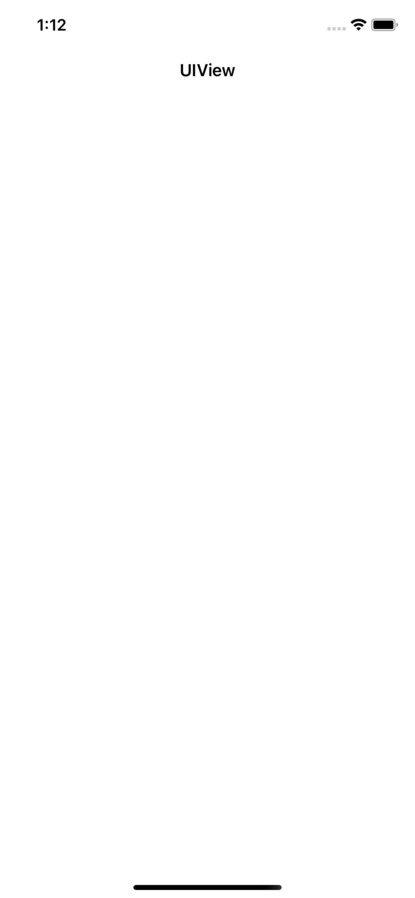
运行上述代码后,您将看到两个子视图都从主屏幕消失。以下是输出:

以下是一些更多涉及根据特定条件移除子视图的示例
示例 1:移除特定类型的全部子视图
假设您有一个包含多个不同类型子视图的 parentView,例如 UILabel、UIButton 和 UIImageView。您想要移除所有 UILabel 子视图。您可以使用以下代码来实现此目的:
for case let label as UILabel in parentView.subviews {
   label.removeFromSuperview()
}
此代码使用带有 case let 模式匹配语法的 for 循环迭代 parentView 的 subviews 数组。case let 语法检查每个子视图是否为 UILabel 的实例。如果子视图是 UILabel,则调用其 removeFromSuperview() 方法将其从 parentView 中移除。
示例 2:移除满足特定条件的所有子视图
例如,您有一个包含许多不同类型子视图的 parentView。您想要移除所有具有特定属性值的子视图。例如,假设您想要移除所有标题属性等于“删除”的 UIButton 子视图。您可以使用以下代码来实现此目的:
for case let button as UIButton in parentView.subviews where button.title(for: .normal) == "Delete" {
   button.removeFromSuperview()
}
此代码使用带有 case let 模式匹配语法和 where 子句的 for 循环迭代 parentView 的 subviews 数组。case let 语法检查每个子视图是否为 UIButton 的实例。where 子句检查按钮的 title 属性是否等于“删除”。如果这两个条件都为真,则调用按钮的 removeFromSuperview() 方法将其从 parentView 中移除。
结论
总之,在 Swift 中移除视图的所有子视图有多种方法。您可以使用 for 循环、while 循环、guard 语句或递归来从视图层次结构中移除每个子视图。您选择的方法将取决于您的特定需求和编码风格。无论您使用哪种方法,请确保彻底测试您的代码以确保其按预期工作。


 数据结构
数据结构 网络
网络 关系型数据库管理系统
 操作系统
操作系统 Java
Java iOS
iOS HTML
HTML CSS
CSS Android
 Python
 C 编程
C 编程 C++
C++ C#
C# MongoDB
 MySQL
MySQL Javascript
 PHP
PHP