
 数据结构
数据结构 网络
网络 关系型数据库管理系统 (RDBMS)
 操作系统
操作系统 Java
Java iOS
iOS HTML
HTML CSS
CSS Android
 Python
 C 编程
C 编程 C++
C++ C#
C# MongoDB
 MySQL
MySQL Javascript
 PHP
PHP带不同颜色的标准 Android 按钮?
本例演示了如何创建带不同颜色的标准 Android 按钮。
步骤 1 − 在 Android Studio 中创建一个新项目,转到文件 ⇒ 新建项目,并填写所有必需的详细信息以创建新项目。
步骤 2 − 将以下代码添加到 res/layout/activity_main.xml。
<?xml version = "1.0" encoding = "utf-8"?>
<LinearLayout xmlns:android = "http://schemas.android.com/apk/res/android"
   xmlns:app = "http://schemas.android.com/apk/res-auto"
   xmlns:tools = "http://schemas.android.com/tools"
   android:layout_width = "match_parent"
   android:gravity = "center"
   android:layout_height = "match_parent"
   tools:context = ".MainActivity"
   android:orientation = "vertical">
   <Button
      android:id = "@+id/parcleObject"
      android:layout_width = "wrap_content"
      android:layout_height = "wrap_content"
      android:layout_alignParentTop = "true"
      android:layout_centerHorizontal = "true"
      android:layout_marginTop = "27dp"
      android:background = "@drawable/background"
      android:text = "Click here"/>
</LinearLayout>
在上面的代码中,我们使用了按钮视图来显示不同的颜色。
步骤 3 − 将以下代码添加到 drawable/background.xml
<?xml version = "1.0" encoding = "utf-8"?>
<selector
   xmlns:android = "http://schemas.android.com/apk/res/android">
   <item android:state_pressed = "true" >
      <shape>
         <gradient
            android:startColor = "#f0ff00"
            android:endColor = "#d9dd95"
            android:angle = "270" />
         <stroke
            android:width = "3dp"
            android:color = "#d1d3e3" />
         <corners
            android:radius = "3dp" />
         <padding
            android:left = "10dp"
            android:top = "10dp"
            android:right = "10dp"
            android:bottom = "10dp" />
      </shape>
   </item>
   <item android:state_focused = "true" >
      <shape>
         <gradient
            android:endColor = "#fd5900"
            android:startColor = "#eca680"
            android:angle = "270" />
         <stroke
            android:width = "3dp"
            android:color = "#d1d3e3" />
         <corners
            android:radius = "3dp" />
         <padding
            android:left = "10dp"
            android:top = "10dp"
            android:right = "10dp"
            android:bottom = "10dp" />
      </shape>
   </item>
   <item>
      <shape>
         <gradient
            android:endColor = "#4356e7"
            android:startColor = "#a1aaee"
            android:angle = "270" />
         <stroke
            android:width = "3dp"
            android:color = "#d1d3e3" />
         <corners
            android:radius = "3dp" />
         <padding
            android:left = "10dp"
            android:top = "10dp"
            android:right = "10dp"
            android:bottom = "10dp" />
      </shape>
   </item>
</selector>
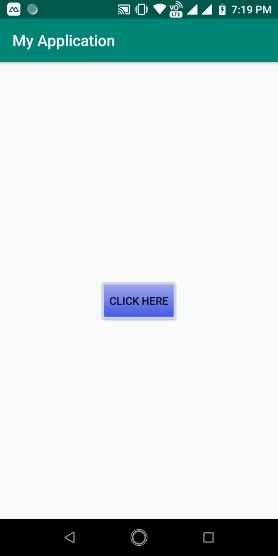
让我们尝试运行您的应用程序。我假设您已将实际的 Android 移动设备连接到您的计算机。要在 Android Studio 中运行应用程序,请打开项目的某个活动文件,然后单击运行 ![]() 工具栏中的图标。选择您的移动设备作为选项,然后检查您的移动设备,它将显示您的默认屏幕 –
工具栏中的图标。选择您的移动设备作为选项,然后检查您的移动设备,它将显示您的默认屏幕 –
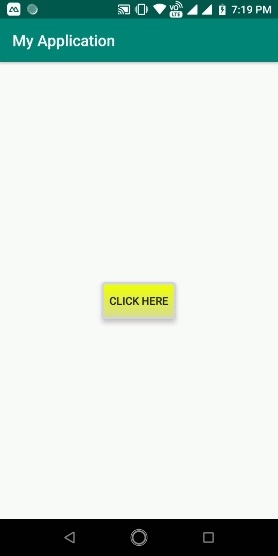
现在点击按钮,结果将如下所示 –
点击 这里 下载项目代码

更新于:2019年7月30日
356 次浏览

广告