- TestNG 教程
- TestNG - 首页
- TestNG - 概述
- TestNG - 环境配置
- TestNG -编写测试用例
- TestNG - 基本注解
- TestNG - 执行流程
- TestNG - 执行测试
- TestNG - 套件测试
- TestNG - 忽略测试
- TestNG - 组测试
- TestNG - 异常测试
- TestNG - 依赖测试
- TestNG - 参数化测试
- TestNG - 运行 JUnit 测试
- TestNG - 测试结果
- TestNG - 注解转换器
- TestNG - 断言
- TestNG - 并行执行
- TestNG - Ant 插件
- TestNG - Eclipse 插件
- TestNG - TestNG 与 JUnit 的比较
- TestNG 有用资源
- TestNG - 快速指南
- TestNG - 有用资源
- TestNG - 讨论
TestNG - Eclipse 插件
要使用 Eclipse 设置 TestNG,请按照以下步骤操作:
步骤 1:下载 TestNG 归档文件
从 http://www.testng.org 下载最新版本的 TestNG jar 文件
| 操作系统 | 归档文件名 |
|---|---|
| Windows | testng-7.4.jar |
| Linux | testng-7.4.jar |
| Mac | testng-7.4.jar |
我们假设您已将上述 JAR 文件复制到 /work/testng 文件夹中。
步骤 2:设置 Eclipse 环境
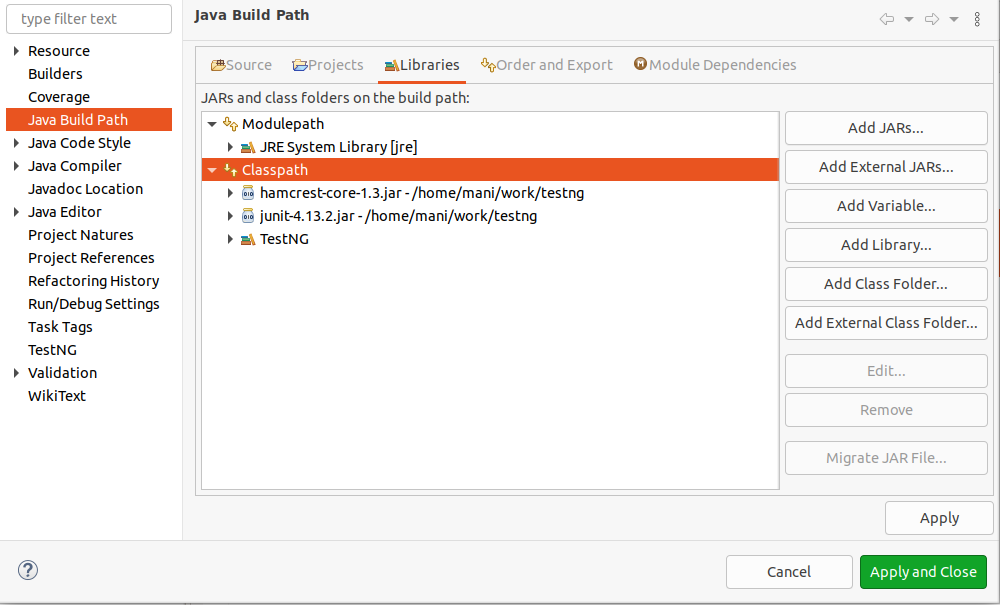
打开 Eclipse → 右键单击项目,然后转到属性 → 构建路径 → 配置构建路径,并使用添加外部 JAR 按钮将 testng-7.4.jar 添加到库中。

我们假设您的 Eclipse 已内置 TestNG 插件;如果不可用,请使用更新站点获取最新版本。
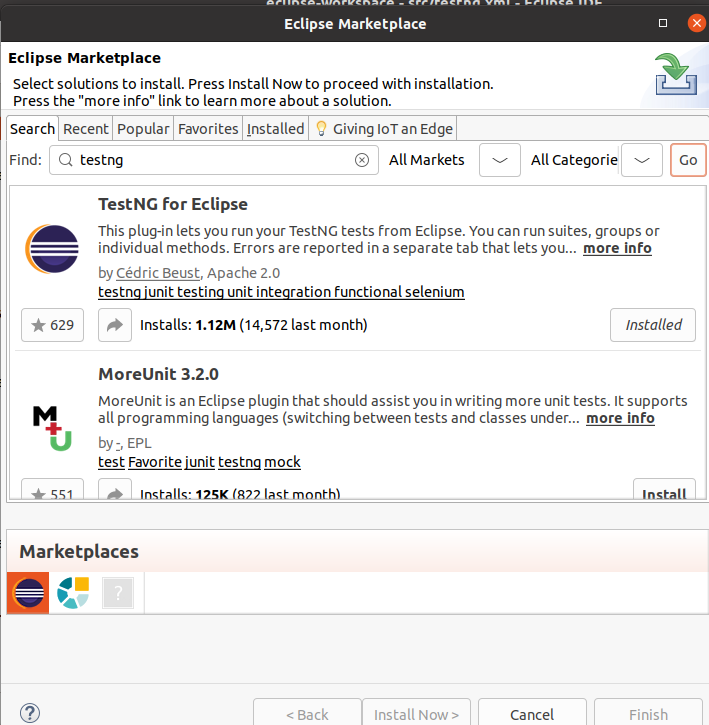
在您的 Eclipse IDE 中,选择帮助/Eclipse 市场。
搜索 TestNG。您将在列表中找到 TestNG。单击“安装”,如下所示

现在,您的 Eclipse 已准备好用于开发 TestNG 测试用例。
步骤 3:验证 Eclipse 中 TestNG 的安装
在 Eclipse 中任意位置创建一个名为 TestNGProject 的项目。
在项目中创建一个名为 MessageUtil 的类进行测试。
/*
* This class prints the given message on console.
*/

public class MessageUtil {

   private String message;

   //Constructor
   //@param message to be printed
   public MessageUtil(String message) {
      this.message = message;
   }

   // prints the message
   public String printMessage() {
      System.out.println(message);
      return message;
   }
}
在项目中创建一个名为 TestNGExample 的测试类。
import org.testng.Assert;
import org.testng.annotations.Test;

public class TestNGExample {
   String message = "Hello World";
   MessageUtil messageUtil = new MessageUtil(message);

   @Test
   public void testPrintMessage() {
      Assert.assertEquals(message,messageUtil.printMessage());
   }
}
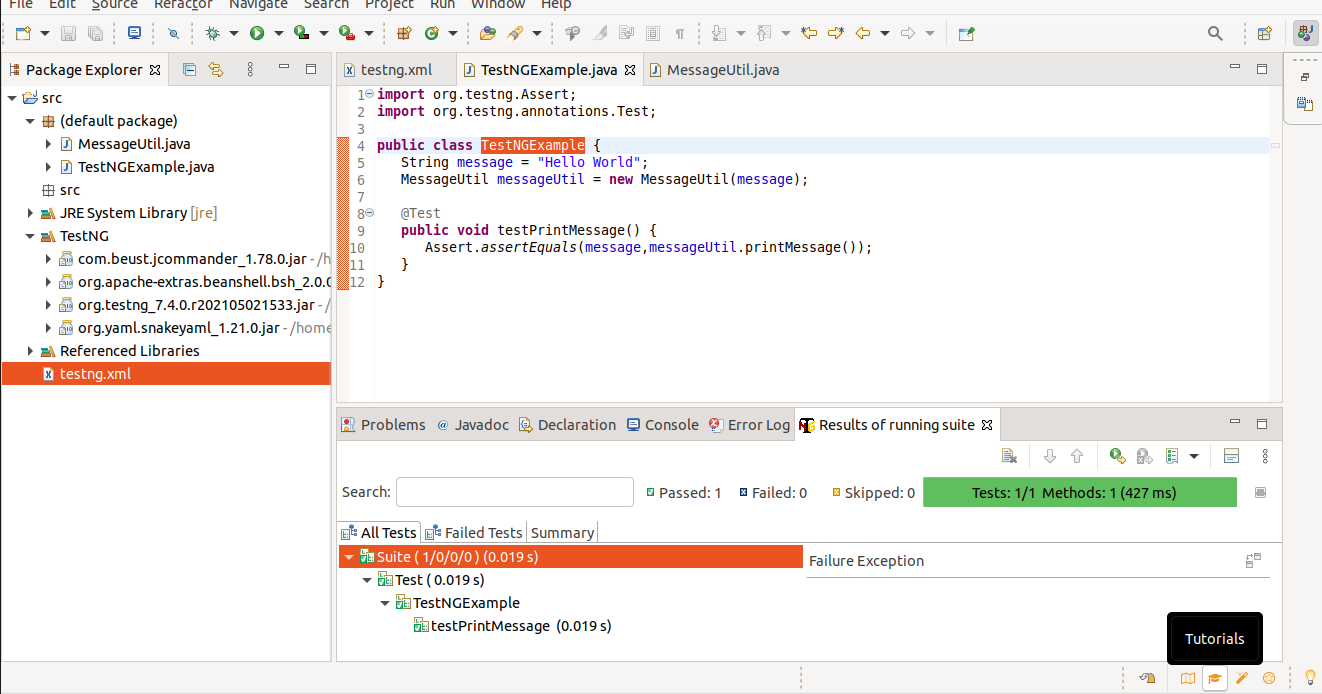
项目结构应如下所示:

最后,通过右键单击程序并以 TestNG 运行来验证程序的输出。
验证结果。

广告