在 Pygame 中创建滚动背景
Pygame 是一个流行的 Python 库,用于构建游戏和多媒体应用程序。游戏开发最重要的方面之一是能够创建滚动背景。在本文中,我们将介绍在 Pygame 中创建滚动背景的基本步骤。我们还将提供现实世界的示例和代码片段,以帮助您更好地理解这些概念。
其他也可用于 Python 游戏开发的库 -
Arcade - Arcade 是一个现代、易于使用的库,用于创建 2D 街机风格的游戏。它旨在易于学习和使用,并提供一系列功能,包括图形、声音和输入处理。
PyOpenGL - PyOpenGL 是 OpenGL 3D 图形库的 Python 包装器。它提供了一系列用于创建 3D 游戏的功能,包括图形、照明和纹理映射。
Panda3D - Panda3D 是一个游戏引擎和图形框架,提供了一系列用于创建 3D 游戏的功能。它旨在易于使用,并支持一系列平台,包括 Windows、Mac 和 Linux。
Pyglet - Pyglet 是一个跨平台游戏库,提供了一系列用于创建 2D 和 3D 游戏的功能。它旨在快速高效,并提供了一系列用于处理图形、声音和输入的工具。
这些库的优势可能因您的特定需求而异。使用这些库的一些优势可能包括 -
易用性 - 许多这些库都旨在易于使用和学习,这使得它们成为初学者或刚接触游戏开发的开发人员的理想选择。
灵活性 - 这些库提供了一系列用于创建游戏的特性和工具,这可以更容易地创建适合您特定需求的游戏。
性能 - 其中一些库旨在快速高效,这可以帮助提高游戏的性能。
跨平台支持 - 许多这些库都支持各种平台和操作系统,这可以帮助您的游戏更容易被更广泛的受众所访问。
先决条件
在我们深入了解在 Pygame 中创建滚动背景的细节之前,让我们回顾一些先决条件。
pip install pygame
预计用户可以访问任何独立的 IDE,例如 VS-Code、PyCharm、Atom 或 Sublime text。
甚至可以使用在线 Python 编译器,例如 Kaggle.com、Google Cloud 平台或任何其他编译器。
更新版本的 Python。在撰写本文时,我使用了 3.10.9 版本。
了解 Jupyter notebook 的使用方法。
熟悉 Pygame 库
对 2D 图形和游戏开发概念的基本理解
如果您不熟悉这些先决条件中的任何一个,我们建议您花一些时间熟悉它们,然后再继续。
创建滚动背景的步骤
创建滚动背景涉及几个步骤。我们将详细介绍每一个步骤,并提供一些现实世界的例子来帮助您入门。
步骤 1:设置游戏窗口
创建滚动背景的第一步是设置您的游戏窗口。这可以使用 `pygame.display.set_mode()` 函数完成。以下是一个示例 -
import pygame
pygame.init()
设置游戏窗口
screen_width = 800
screen_height = 600
screen = pygame.display.set_mode((screen_width, screen_height))
pygame.display.set_caption("Scrolling Background Tutorial")
在这个例子中,我们导入了 Pygame 库并初始化它。然后,我们将游戏窗口的宽度和高度分别设置为 800 像素和 600 像素。最后,我们将 `screen` 变量设置为新创建的游戏窗口,标题为“滚动背景教程”。
步骤 2:加载背景图像
下一步是加载将要滚动的背景图像。这可以使用 `pygame.image.load()` 函数完成。以下是一个示例 -
#Load background image
background_img = pygame.image.load("background.jpg")
在这个例子中,我们加载名为“background.jpg”的图像,并将其存储在 `background_img` 变量中。
步骤 3:滚动背景
下一步是滚动背景图像。这可以通过更改背景图像在游戏窗口中的位置来完成。以下是一个示例 -
# Scroll the background
scroll_x = 0
scroll_y = 0
background_x = 0

while True:
   for event in pygame.event.get():
      if event.type == pygame.QUIT:
         pygame.quit()

   # Scroll the background horizontally
   scroll_x -= 1
   background_x -= 1

   #Draw the background twice to create seamless scrolling effect
   screen.blit(background_img, (scroll_x, scroll_y))
   screen.blit(background_img, (background_x, scroll_y))

   #Reset the background position when it goes off screen
   if scroll_x <= -screen_width:
      scroll_x = screen_width

   if background_x <= -screen_width:
      background_x = screen_width

   pygame.display.update()
在这个例子中,我们将背景图像的初始位置设置为 `(0,0)`。然后,我们创建一个 `while` 循环,它将持续运行,直到游戏关闭。在 `while` 循环内,我们将 `scroll_x` 和 `background_x` 变量递增 `-1` 以将背景图像向左移动。然后,我们使用 `screen.blit()` 函数绘制两次背景图像。这会产生一个无缝的滚动效果。
步骤 4:添加游戏对象
最后一步是将游戏对象添加到窗口中。这可以使用 Pygame 库的各种绘图函数来完成。以下是一个示例 -
 #Add game objects
player_img = pygame.image.load("player.png")
player_x = 400
player_y = 300

while True:
    for event in pygame.event.get():
        if event.type == pygame.QUIT:
            pygame.quit()

     #Scroll the background horizontally
    scroll_x -= 1
    background_x -= 1

     #Draw the background twice to create seamless scrolling effect
    screen.blit(background_img, (scroll_x, scroll_y))
    screen.blit(background_img, (background_x, scroll_y))

     #Reset the background position when it goes off screen
    if scroll_x <= -screen_width:
        scroll_x = screen_width

    if background_x <= -screen_width:
        background_x = screen_width

     #Add game objects
    screen.blit(player_img, (player_x, player_y))

    pygame.display.update()
在这个例子中,我们使用 `screen.blit()` 函数将一个玩家对象添加到屏幕上。我们还将玩家对象的初始位置设置为 `(400,300)`。
最终程序,代码
# libraries
import pygame
pygame.init()

#Setting up the window
screen_width = 800
screen_height = 600
screen = pygame.display.set_mode((screen_width, screen_height))
pygame.display.set_caption("Scrolling Background Tutorial")

#Load background image
background_img = pygame.image.load("background.jpg")

# Scroll the background
scroll_x = 0
scroll_y = 0
background_x = 0

while True:
   for event in pygame.event.get():
      if event.type == pygame.QUIT:
      pygame.quit()

   # Scroll the background horizontally
   scroll_x -= 1
   background_x -= 1

   #Draw the background twice to create seamless scrolling effect
   screen.blit(background_img, (scroll_x, scroll_y))
   screen.blit(background_img, (background_x, scroll_y))

   #Reset the background position when it goes off screen
   if scroll_x <= -screen_width:
      scroll_x = screen_width

   if background_x <= -screen_width:
      background_x = screen_width

   pygame.display.update()

#Add game objects
player_img = pygame.image.load("player.png")
player_x = 400
player_y = 300

while True:
   for event in pygame.event.get():
      if event.type == pygame.QUIT:
         pygame.quit()

   #Scroll the background horizontally
   scroll_x -= 1
   background_x -= 1

   #Draw the background twice to create seamless scrolling effect
   screen.blit(background_img, (scroll_x, scroll_y))
   screen.blit(background_img, (background_x, scroll_y))

   #Reset the background position when it goes off screen
   if scroll_x <= -screen_width:
      scroll_x = screen_width

   if background_x <= -screen_width:
      background_x = screen_width

   #Add game objects
   screen.blit(player_img, (player_x, player_y))

   pygame.display.update()
输出


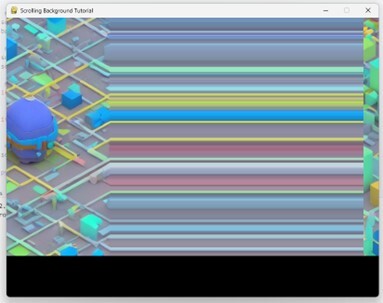
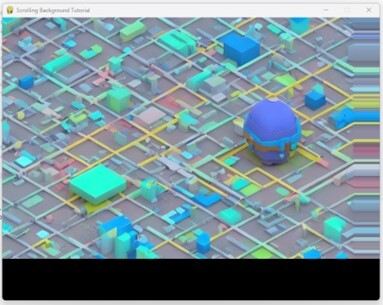
在上一节中,我们可以看到有两个输出显示了背景图像的过渡或滚动,因此程序可以正确地输出预期的结果。
结论
在本教程中,我们介绍了在 Pygame 中创建滚动背景的基本步骤。我们还提供了一些现实世界的例子和代码片段,以帮助您更好地理解这些概念。有了这些知识,您应该能够创建具有滚动背景的引人入胜的游戏。编码愉快!


 数据结构
数据结构 网络
网络 关系数据库管理系统 (RDBMS)
 操作系统
操作系统 Java
Java iOS
iOS HTML
HTML CSS
CSS Android
 Python
 C 语言编程
 C++
C++ C#
C# MongoDB
 MySQL
MySQL Javascript
 PHP
PHP