
 数据结构
数据结构 网络
网络 关系数据库管理系统 (RDBMS)
 操作系统
操作系统 Java
Java iOS
iOS HTML
HTML CSS
CSS Android
 Python
 C语言编程
C语言编程 C++
C++ C#
C# MongoDB
 MySQL
MySQL Javascript
 PHP
PHP使用Python的Pygame创建雷达扫描动画
Pygame是一个跨平台的Python模块集,用于编写视频游戏。它包含专为Python编程语言设计的计算机图形和声音库。Pygame不是游戏开发引擎,而是一套工具和库,允许开发者用Python创建2D游戏。
Pygame提供了各种函数和类来帮助开发者创建游戏,包括图像加载和处理、声音播放和录制、键盘和鼠标输入处理、精灵和组管理以及碰撞检测。它还包含对动画、滚动和基于平铺的地图等常见游戏开发任务的内置支持。
Pygame是开源的且免费使用,它可以在Windows、macOS、Linux和其他平台上运行。它经常在教育环境中用作游戏开发入门或教学编程概念的工具。
雷达扫描动画的组成部分
基本的雷达扫描动画包括以下组件:
雷达圆圈 - 代表雷达范围的圆圈。它以原点为中心,具有固定半径。
雷达扫描线 - 围绕圆心旋转的线。它代表雷达发射的光束,并扫描360度。
雷达目标 - 我们想用雷达检测的对象。它们以屏幕上的点表示。
现在我们知道了雷达扫描动画的组成部分,让我们深入研究使用Pygame的实现。
先决条件
在我们深入任务之前,需要在您的系统上安装一些东西:
系统:
推荐设置列表:
pip install Numpy, pygame 和 Math
用户应该能够访问任何独立的IDE,例如VSCode、PyCharm、Atom或Sublime text。
也可以使用在线Python编译器,例如Kaggle.com、Google Cloud Platform或任何其他编译器。
更新版本的Python。在撰写本文时,我使用了3.10.9版本。
Jupyter notebook的使用知识。
虚拟环境的知识和应用将是有益的,但不是必需的。
还期望使用者对统计学和数学有良好的理解。
实现细节
导入库 - 我们将首先导入必要的库 - Pygame、NumPy和Math。
import pygame
import math
import random
初始化游戏窗口 - 我们将使用Pygame库初始化具有所需宽度和高度的游戏窗口。
WIDTH = 800
HEIGHT = 600
pygame.init()
screen = pygame.display.set_mode((WIDTH, HEIGHT))
pygame.display.set_caption("Radar Sweep Animation")
clock = pygame.time.Clock()
设置游戏环境 - 我们将通过定义动画的颜色、背景和帧率来设置游戏环境。
WHITE = (255, 255, 255)
BLACK = (0, 0, 0)
RED = (255, 0, 0)
BLUE = (0, 0, 255)
设置动画的帧率
定义雷达圆圈 - 我们将定义具有所需半径和中心坐标的雷达圆圈。我们还将设置圆圈的颜色和线粗细。
radar_circle_radius = 200
radar_circle_center_x = int(WIDTH / 2)
radar_circle_center_y = int(HEIGHT / 2)
定义雷达扫描线 - 我们将通过将初始角度设置为零度并在每一帧中递增它来定义雷达扫描线,使其扫描360度。我们还将设置扫描线的颜色和粗细。
定义雷达扫描线
radar_sweep_angle = 0
radar_sweep_length = radar_circle_radius + 50
def update():
   # Increment the angle in each frame
   global radar_sweep_angle
   radar_sweep_angle += 1
# Draw the radar sweep line
def draw_radar_sweep():
   x = radar_circle_center_x + radar_sweep_length *
math.sin(math.radians(radar_sweep_angle))
   y = radar_circle_center_y + radar_sweep_length *
math.cos(math.radians(radar_sweep_angle))
   pygame.draw.line(screen, BLACK, (radar_circle_center_x,
radar_circle_center_y), (x, y), 3)
定义雷达目标 - 我们将使用雷达圆圈范围内的随机x和y坐标来定义雷达目标。我们还将设置目标的颜色和半径。
num_targets = 10
target_radius = 10
targets = []
for i in range(num_targets):
   x = random.randint(radar_circle_center_x - radar_circle_radius,
radar_circle_center_x + radar_circle_radius)
   y = random.randint(radar_circle_center_y - radar_circle_radius,
radar_circle_center_y + radar_circle_radius)
   targets.append((x, y))
   # Draw the radar targets
def draw_radar_targets():
   for target in targets:
      pygame.draw.circle(screen, BLUE, target, target_radius)
      distance_to_target = math.sqrt((target[0] - x) ** 2 + (target[1] - y) ** 2)
      if distance_to_target <= target_radius:
         pygame.draw.rect(screen, RED, (target[0], target[1], 60, 20))
         font = pygame.font.SysFont(None, 25)
         text = font.render("DETECTED", True, BLACK)
         screen.blit(text, (target[0], target[1]))
运行游戏 - 我们将通过创建pygame窗口、设置必要的事件处理程序和运行游戏循环来运行游戏。
# Main game loop
running = True
while running:
   for event in pygame.event.get():
      if event.type == pygame.QUIT:
         running = False
   screen.fill(WHITE)
   update()
   draw_radar_sweep()
   draw_radar_targets()
   pygame.display.update()
   clock.tick(FPS)
# Quit the game
pygame.quit()
最终程序代码
import pygame
import math
import random
# Initializing the Game Window:
WIDTH = 800
HEIGHT = 600
pygame.init()
screen = pygame.display.set_mode((WIDTH, HEIGHT))
pygame.display.set_caption("Radar Sweep Animation")
clock = pygame.time.Clock()
# Defining colors:
WHITE = (255, 255, 255)
BLACK = (0, 0, 0)
RED = (255, 0, 0)
BLUE = (0, 0, 255)
# Set the frame rate of the animation
FPS = 60
# Defining the Radar Circle:
radar_circle_radius = 200
radar_circle_center_x = int(WIDTH / 2)
radar_circle_center_y = int(HEIGHT / 2)
# Define the radar sweep
radar_sweep_angle = 0
radar_sweep_length = radar_circle_radius + 50
# Define the radar targets
num_targets = 10
target_radius = 10
targets = []
for i in range(num_targets):
   x = random.randint(radar_circle_center_x - radar_circle_radius,
radar_circle_center_x + radar_circle_radius)
   y = random.randint(radar_circle_center_y - radar_circle_radius,
radar_circle_center_y + radar_circle_radius)
targets.append((x, y))
def update():
   # Increment the angle in each frame
   global radar_sweep_angle
   radar_sweep_angle += 1
# Draw the radar sweep line
def draw_radar_sweep():
   x = radar_circle_center_x + radar_sweep_length *
math.sin(math.radians(radar_sweep_angle))
   y = radar_circle_center_y + radar_sweep_length *
math.cos(math.radians(radar_sweep_angle))
   pygame.draw.line(screen, BLACK, (radar_circle_center_x,
radar_circle_center_y), (x, y), 3)
# Draw the radar targets
def draw_radar_targets():
   for target in targets:
      pygame.draw.circle(screen, BLUE, target, target_radius)
      distance_to_target = math.sqrt((target[0] - x) ** 2 + (target[1] - y)** 2)
      if distance_to_target <= target_radius:
         pygame.draw.rect(screen, RED, (target[0], target[1], 60, 20))
         font = pygame.font.SysFont(None, 25)
         text = font.render("DETECTED", True, BLACK)
         screen.blit(text, (target[0], target[1]))
# Main game loop
running = True
while running:
   for event in pygame.event.get():
      if event.type == pygame.QUIT:
         running = False
         screen.fill(WHITE)
         update()
         draw_radar_sweep()
         draw_radar_targets()
      pygame.display.update()
      clock.tick(FPS)
# Quit the game
pygame.quit()
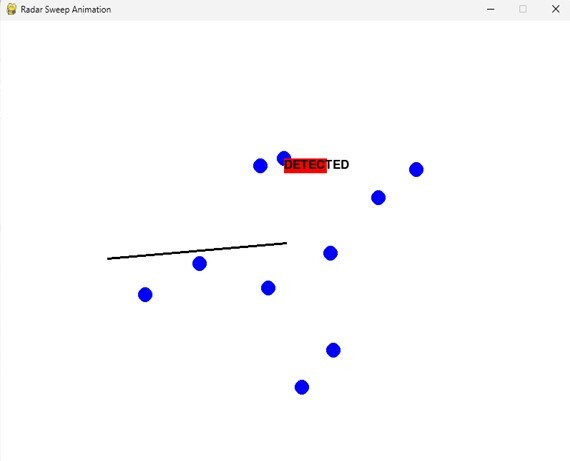
我们可以看到程序的输出,其中可以观察到游戏的动画。
结论
在本文件中,我们探讨了如何使用Python中的Pygame创建雷达扫描动画。我们了解了雷达扫描动画的组成部分,并使用代码片段和实际示例逐步讲解了实现细节。Pygame提供了一个用户友好的游戏开发API,是创建2D视频游戏和动画的绝佳选择。通过从本文获得的知识,您现在应该能够使用Pygame创建自己的雷达扫描动画。

635 次浏览
