
 数据结构
数据结构 网络
网络 关系型数据库管理系统
 操作系统
操作系统 Java
Java iOS
iOS HTML
HTML CSS
CSS Android
 Python
 C 编程
C 编程 C++
C++ C#
C# MongoDB
 MySQL
MySQL Javascript
 PHP
PHP如何在 PyTorch 中在图像上绘制边界框?
torchvision.utils 包提供了 draw_bounding_boxes() 函数,用于在图像上绘制边界框。它支持形状为 (C x H x W) 的 torch 张量类型的图像,其中 C 是通道数,W 和 H 分别是图像的宽度和高度。
如果我们使用 Pillow 或 OpenCV 读取图像,则需要先将其转换为 torch 张量。我们可以在图像上绘制一个或多个边界框。此函数返回一个 dtype 为 uint8 的图像张量,其中绘制了边界框。
边界框应为大小为 [N,4] 的 torch 张量,其中 N 是要绘制的边界框的数量。每个边界框应包含 (xmin, ymin, xmax, ymax) 格式的四个点。换句话说:0 ≤ xmin < xmax < W,且 0 ≤ ymin < ymax < H。
我们也可以在边界框上添加标签。我们可以调整边界框的颜色和宽度。此外,我们还可以使用指定的颜色填充边界框区域。
语法
torch.utils.draw_bounding_boxes(image, boxes)
参数
image - 形状为 (C x H x W) 的张量类型图像。
boxes - 大小为 [N,4] 的张量,包含 (xmin, ymin, xmax, ymax) 格式的边界框坐标。
它还接受更多可选参数,例如 labels、colors、fill、width 等。
输出
它返回一个大小为 [C,H,W] 的图像张量,其中绘制了边界框。
步骤
导入所需的库。在以下所有示例中,所需的 Python 库为 torch 和 torchvision。确保您已安装它们。
import torch
import torchvision
from torchvision.io import read_image
from torchvision.utils import draw_bounding_boxes
使用 image_read() 函数读取 JPEG 或 PNG 图像。使用图像类型 (.jpg 或 .png) 指定完整的图像路径。此函数的输出是一个大小为 [image_channels, image_height, image_width] 的 torch 张量。
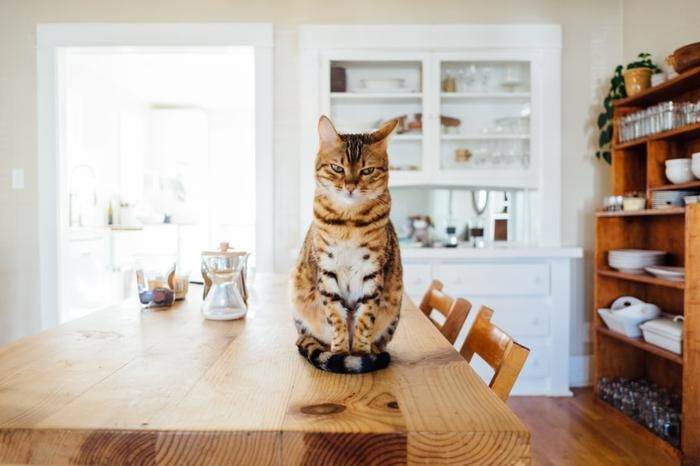
img = read_image('cat.png')将边界框定义为 torch 张量。边界框张量的 dtype 应为 torch.int。如果只需要绘制一个边界框,则对张量进行 unsqueeze 操作。
bbox = [290, 115, 405, 385]
bbox = torch.tensor(bbox, dtype=torch.int)
使用 draw_bounding_boxes() 函数在图像上绘制边界框。可以选择将绘制了边界框的图像分配给一个新变量。
img=draw_bounding_boxes(img, bbox, width=3, colors=(255,255,0))
将绘制了边界框的图像张量转换为 PIL 图像并显示它。
img = torchvision.transforms.ToPILImage()(img)
img.show()
输入图像
我们将在以下示例中使用这些图像作为输入文件。

示例 1
以下程序演示了如何在图像上绘制边界框。
# Import the required libraries
import torch
import torchvision
from torchvision.io import read_image
from torchvision.utils import draw_bounding_boxes

# read input image
img = read_image('cat.png')

# bounding box in (xmin, ymin, xmax, ymax) format
# top-left point=(xmin, ymin), bottom-right point = (xmax, ymax)
bbox = [290, 115, 405, 385]
bbox = torch.tensor(bbox, dtype=torch.int)
print(bbox)
print(bbox.size())
bbox = bbox.unsqueeze(0)
print(bbox.size())

# draw bounding box on the input image
img=draw_bounding_boxes(img, bbox, width=3, colors=(255,255,0))

# transform it to PIL image and display
img = torchvision.transforms.ToPILImage()(img)
img.show()
输出
tensor([290, 115, 405, 385], dtype=torch.int32)
torch.Size([4])
torch.Size([1, 4])

示例 2
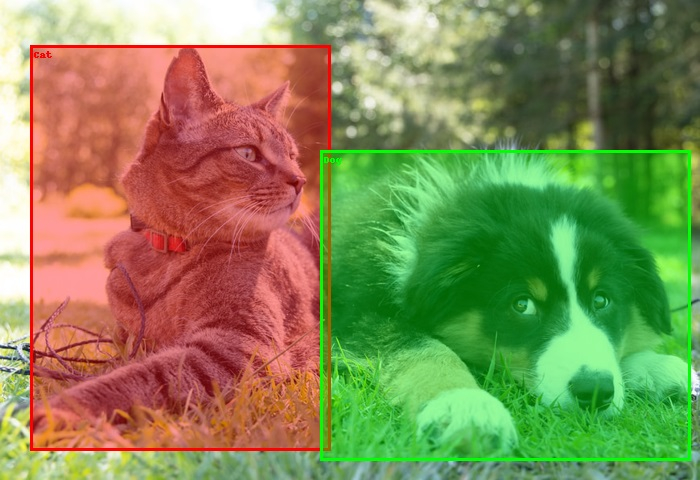
以下程序演示了如何在图像上绘制多个边界框。
import torch
import torchvision
from torchvision.io import read_image
from torchvision.utils import draw_bounding_boxes

img = read_image('catndog.png')

# bounding box in (xmin, ymin, xmax, ymax) format
bbox1 = [30, 45, 330, 450]
bbox2 = [320, 150, 690, 460]
bbox = [bbox1, bbox2]
bbox = torch.tensor(bbox, dtype=torch.int)
print(bbox)
print(bbox.size())

# draw bounding boxes on the input image
img=draw_bounding_boxes(img, bbox, width=3,
colors=[(255,0,0),(0,255,0)])
img = torchvision.transforms.ToPILImage()(img)
img.show()
输出
tensor([[ 30, 45, 330, 450],
   [320, 150, 690, 460]], dtype=torch.int32)
torch.Size([2, 4])

示例 3
以下程序演示了如何在图像上绘制和填充多个边界框。
import torch
import torchvision
from torchvision.io import read_image
from torchvision.utils import draw_bounding_boxes
img = read_image('catndog.png')

# bounding box in (xmin, ymin, xmax, ymax) format
bbox1 = [30, 45, 330, 450]
bbox2 = [320, 150, 690, 460]
bbox = [bbox1, bbox2]
labels = ['Cat', 'Dog']
bbox = torch.tensor(bbox, dtype=torch.int)
print(bbox)
print(bbox.size())

# draw bounding boxes with fill color
img=draw_bounding_boxes(img, bbox,width=3,labels= labels,colors=[(255,0,0),(0,255,0)],fill =True,font_size=20)
img = torchvision.transforms.ToPILImage()(img)
img.show()
输出
tensor([[ 30, 45, 330, 450],
   [320, 150, 690, 460]], dtype=torch.int32)
torch.Size([2, 4])

7K+ 次浏览
