
 数据结构
数据结构 网络
网络 关系型数据库管理系统
 操作系统
操作系统 Java
Java iOS
iOS HTML
HTML CSS
CSS Android
 Python
 C 语言编程
 C++
C++ C#
C# MongoDB
 MySQL
MySQL Javascript
 PHP
PHP如何在 Android 上通过 Intent 启动 Google Maps 导航?
介绍
在 Android 应用中,很多时候商店或特定地点的地址会以图标的形式显示。点击该 Google 地图图标后,应用会重定向到 Google Maps 应用,用户可以在其中查看从其当前位置到商店位置的路线。本文将探讨如何在 Android 上通过 Intent 启动 Google Maps 导航。
实现
我们将创建一个简单的应用,其中包含一个 TextView 用于显示应用标题。之后,我们将创建两个文本输入字段,用于获取用户的起点和终点位置。然后,我们显示一个按钮,该按钮将启动 Google Maps Intent 并绘制这两个位置之间的路线。现在,让我们转向 Android Studio 创建一个新项目。
步骤 1:在 Android Studio 中创建新项目
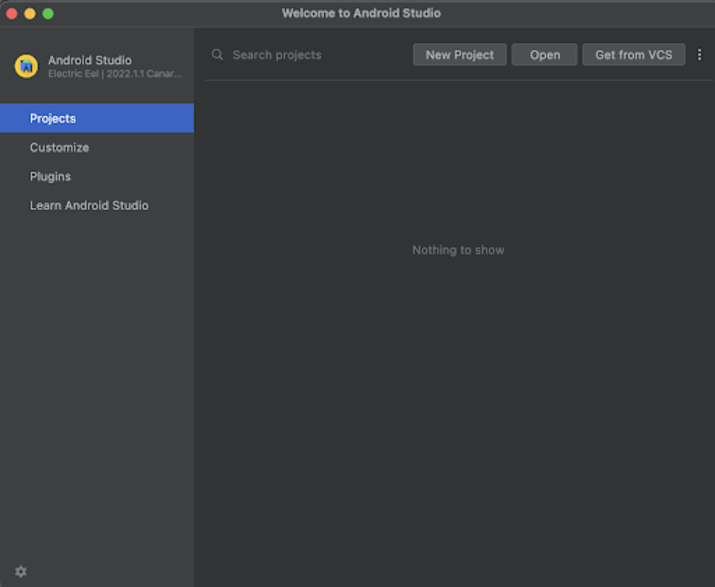
导航到 Android Studio,如下面的屏幕截图所示。在下面的屏幕截图中,点击“新建项目”以创建一个新的 Android Studio 项目。
点击“新建项目”后,您将看到下面的屏幕。

在此屏幕中,我们只需选择“空活动”并点击“下一步”。点击“下一步”后,您将看到下面的屏幕。
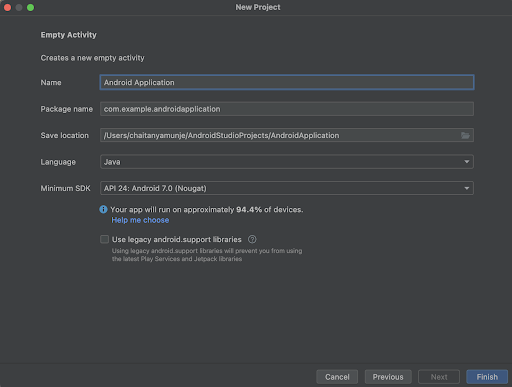
在此屏幕中,我们只需指定项目名称。然后,包名将自动生成。
注意 - 确保将语言选择为 Java。
指定所有详细信息后,点击“完成”以创建一个新的 Android Studio 项目。
项目创建完成后,我们将看到 2 个打开的文件,即 activity_main.xml 和 MainActivity.java 文件。
步骤 2:使用 activity_main.xml
导航到 activity_main.xml。如果此文件不可见,要打开此文件,请在左侧窗格中导航到 app > res > layout > activity_main.xml 以打开此文件。打开此文件后,将以下代码添加到其中。代码中添加了注释以详细了解。
<?xml version="1.0" encoding="utf-8"?>
<RelativeLayout xmlns:android="http://schemas.android.com/apk/res/android"
   xmlns:tools="http://schemas.android.com/tools"
   android:layout_width="match_parent"
   android:layout_height="match_parent"
   android:orientation="vertical"
   tools:context=".MainActivity">
   <!-- on below line creating a text view for displaying the heading of our application -->
   <TextView
       android:id="@+id/idTVHeading"
       android:layout_width="match_parent"
       android:layout_height="wrap_content"
       android:layout_marginStart="10dp"
       android:layout_marginTop="100dp"
       android:layout_marginEnd="10dp"
       android:gravity="center"
       android:padding="4dp"
       android:text="Google Maps Direction Intent in Android"
       android:textAlignment="center"
       android:textColor="@color/black"
       android:textSize="20sp"
       android:textStyle="bold" />
   <!-- on below line creating edit text for source location -->
   <EditText
       android:id="@+id/idEdtSourceLocation"
       android:layout_width="match_parent"
       android:layout_height="wrap_content"
       android:layout_below="@id/idTVHeading"
       android:layout_margin="10dp"
       android:hint="Enter Source Location" />
   <!-- on below line creating edit text for destination location -->
   <EditText
       android:id="@+id/idEdtDestinationLocation"
       android:layout_width="match_parent"
       android:layout_height="wrap_content"
       android:layout_below="@id/idEdtSourceLocation"
       android:layout_margin="10dp"
       android:hint="Enter Destination Location" />
   <!-- on below line creating a button to show direction on maps-->
   <Button
       android:id="@+id/idBtnShowDirection"
       android:layout_width="match_parent"
       android:layout_height="wrap_content"
       android:layout_below="@id/idEdtDestinationLocation"
       android:layout_margin="10dp"
       android:padding="4dp"
       android:text="Show Direction on Maps"
       android:textAllCaps="false" />
</RelativeLayout>
说明 - 在上面的代码中,我们创建一个根布局作为相对布局。在此布局内,我们创建一个 TextView 用于显示应用标题。之后,我们创建两个 EditText 字段,用于获取用户的起点和终点位置。然后,我们创建一个按钮,用于打开 Google Maps Intent 并在地图应用上绘制路线。
步骤 3:使用 MainActivity.java 文件
导航到 MainActivity.java。如果此文件不可见,要打开此文件,请在左侧窗格中导航到 app > res > layout > MainActivity.java 以打开此文件。打开此文件后,将以下代码添加到其中。代码中添加了注释以详细了解。
package com.example.java_test_application;
import android.app.Activity;
import android.content.ActivityNotFoundException;
import android.content.Intent;
import android.net.Uri;
import android.os.Bundle;
import android.util.Log;
import android.view.View;
import android.widget.Button;
import android.widget.EditText;
import android.widget.Toast;
import androidx.appcompat.app.AppCompatActivity;
public class MainActivity extends AppCompatActivity {
   // creating variables for edit text on below line.
   private EditText sourceEdt, destinationEdt;
   // creating variable for button on below line.
   private Button directionBtn;
   @Override
   protected void onCreate(Bundle savedInstanceState) {
       super.onCreate(savedInstanceState);
       setContentView(R.layout.activity_main);
       // initializing variables for edit text on below line.
       sourceEdt = findViewById(R.id.idEdtSourceLocation);
       destinationEdt = findViewById(R.id.idEdtDestinationLocation);
       // initializing variables for button on below line.
       directionBtn = findViewById(R.id.idBtnShowDirection);
       // adding click listener for button on below line.
       directionBtn.setOnClickListener(new View.OnClickListener() {
           @Override
           public void onClick(View v) {
               if (sourceEdt.getText().toString().isEmpty() && destinationEdt.getText().toString().isEmpty()) {
                   // displaying toast message to enter source and destination location.
                   Toast.makeText(MainActivity.this, "Please enter source and destination location..", Toast.LENGTH_SHORT).show();
               } else {
                   // on below line calling open maps intent method to open maps intent and passing source and destination location to it.
                   openMapsIntent(sourceEdt.getText().toString(), destinationEdt.getText().toString());
               }
           }
       });
   }
   // on below line creating an open maps intent method.
   private void openMapsIntent(String source, String destination) {
       try {
           // create a uri on below line and passing a google maps url to open with source and destination location.
           Uri uri = Uri.parse("https://www.google.co.in/maps/dir/" + source + "/" + destination);
           // initializing a intent with action view and uri on below line.
           Intent i = new Intent(Intent.ACTION_VIEW, uri);
           // below line is to set maps package name for google maps.
           i.setPackage("com.google.android.apps.maps");
           // below line is to set flags to create a new task for google maps.
           i.setFlags(Intent.FLAG_ACTIVITY_NEW_TASK);
           // start activity on below line.
           startActivity(i);
       } catch (ActivityNotFoundException e) {
           // when the google maps is not installed on users device
           // we will redirect our user to google play to download google maps.
           Uri uri = Uri.parse("https://play.google.com/store/apps/details?id=com.google.android.apps.maps");
           // initializing intent with action view.
           Intent i = new Intent(Intent.ACTION_VIEW, uri);
           // set flags on below line.
           i.setFlags(Intent.FLAG_ACTIVITY_NEW_TASK);
           // on below line we are starting the activity.
           startActivity(i);
       }
   }
}
说明:在上面的代码中,首先我们为按钮和 EditText 创建变量。现在,我们将看到 onCreate 方法。这是每个 Android 应用的默认方法。当应用视图创建时,会调用此方法。在此方法内,我们设置内容视图,即名为 activity_main.xml 的布局文件,以从该文件设置 UI。在 onCreate 方法内,我们使用我们在 activity_main.xml 文件中指定的 id 初始化按钮和 EditText 的变量。之后,我们为按钮添加一个点击监听器。在点击监听器内,我们首先检查起点和终点 EditText 是否为空。如果为空,则显示一条吐司消息,提示用户输入起点和终点位置。如果起点和终点 EditText 不为空,则调用 openMapsIntent 方法,我们向其中传递起点和终点位置以打开 Google Maps Intent。
现在,在 openMapsIntent 方法中,我们创建一个 uri,我们在其中传递起点和终点位置。之后,我们创建一个 Intent,我们在其中设置 Google Maps 应用的包名。然后,我们调用 startActivity 方法以启动 Google Maps 应用。同时,我们将其放入 try 和 catch 块中。在 catch 块中,我们检查用户设备上是否未安装 Google Maps 应用。在这种情况下,我们将打开 Google Play 应用并将用户重定向到 Google Maps 应用安装页面以安装 Google Maps 应用。
添加上述代码后,我们只需点击顶部栏中的绿色图标即可在移动设备上运行应用。
注意 - 确保您已连接到您的真实设备或模拟器。
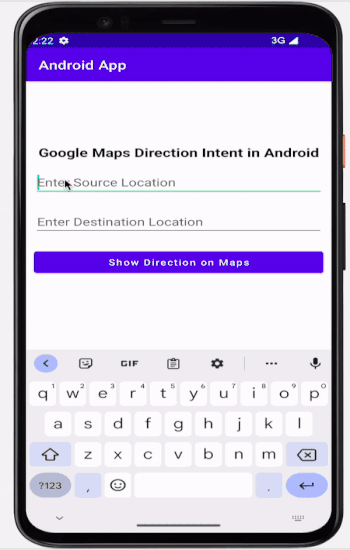
输出
结论
在本文中,我们探讨了如何在 Android 应用中通过 Intent 启动 Google Maps 导航。

2K+ 浏览量
