Swift 中键盘出现时移动文本字段
在真实的 iOS 应用程序中,大多数情况下您会使用 UITextFields 来获取各种输入。为了在编辑时使文本字段可见,您可以通过更新约束来管理它们。要管理约束,您必须为键盘显示和隐藏添加观察者。
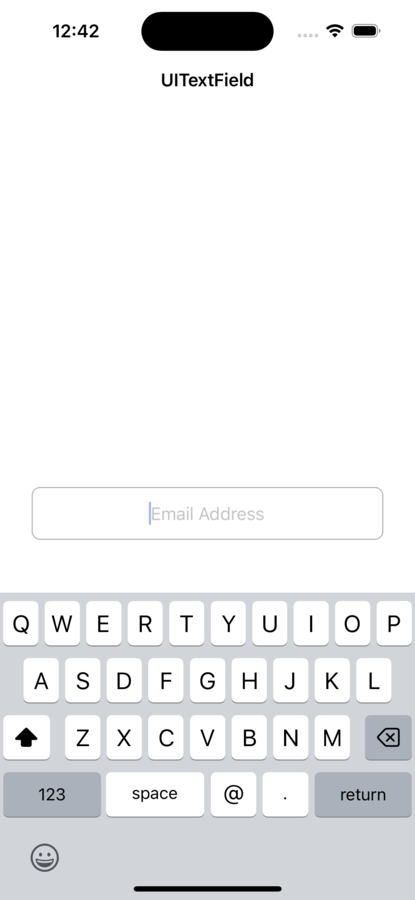
在本文中,我们将通过以下步骤在键盘出现时移动文本字段。
步骤 1 - 基本设置
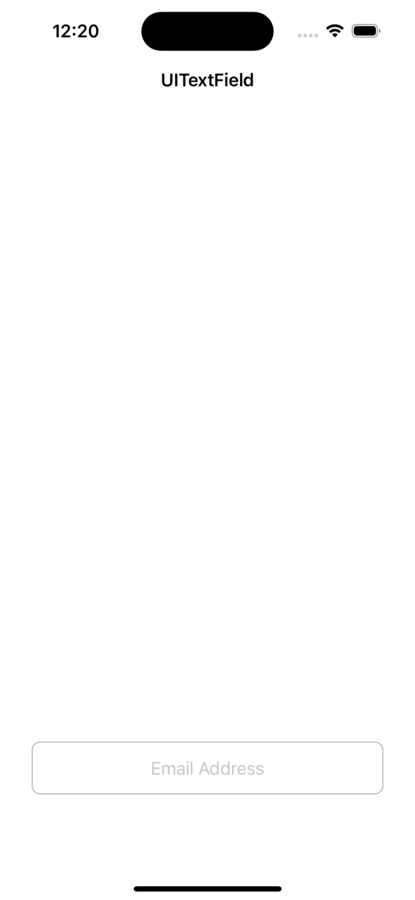
在此步骤中,我们将通过添加一个文本字段来输入电子邮件地址进行一些基本设置。我们将文本字段添加到屏幕底部,以便在键盘出现时可以移动它。
示例
import UIKit
class TestController: UIViewController {

   private lazy var emailTextField: UITextField = {
      let textField = UITextField()
      textField.keyboardType = .emailAddress
      textField.layer.cornerRadius = 8
      textField.layer.masksToBounds = true
      textField.layer.borderWidth = 1.0
      textField.layer.borderColor = UIColor(white: 0, alpha: 0.3).cgColor
      textField.placeholder = "Email Address"
      textField.textAlignment = .center
      textField.autocorrectionType = .no
      textField.delegate = self
      return textField
   }()

   private var textFieldBottomConstraint: NSLayoutConstraint?
   override func viewDidLoad() {
      super.viewDidLoad()
      initialSetup()
   }

   override func viewWillAppear(_ animated: Bool) {
      super.viewWillAppear(animated)

      // adding notification observers for keyboard show and hide
      NotificationCenter.default.addObserver(self,
      selector: #selector(keyboardWillShow),
      name: UIResponder.keyboardWillShowNotification,
      object: nil)

      NotificationCenter.default.addObserver(self,
      selector: #selector(self.keyboardWillHide),
      name: UIResponder.keyboardWillHideNotification,
      object: nil)
   }

   override func viewWillDisappear(_ animated: Bool) {
      super.viewWillDisappear(animated)

      // removing all the notification observers
      NotificationCenter.default.removeObserver(self)
   }

   private func initialSetup() {

      // basic setup
      view.backgroundColor = .white
      navigationItem.title = "UITextField"

      // adding constraints to emailTextField
      view.addSubview(emailTextField)
      emailTextField.translatesAutoresizingMaskIntoConstraints = false
      emailTextField.leadingAnchor.constraint(equalTo: view.leadingAnchor, constant: 30).isActive = true
      emailTextField.trailingAnchor.constraint(equalTo: view.trailingAnchor, constant: -30).isActive = true
      emailTextField.heightAnchor.constraint(equalToConstant: 50).isActive = true
      textFieldBottomConstraint = emailTextField.bottomAnchor.constraint(equalTo: view.bottomAnchor, constant: -100)
      textFieldBottomConstraint?.isActive = true
   }

   @objc private func keyboardWillShow(_ notification: NSNotification) {

      // write code to complete the implementation
   }

   @objc private func keyboardWillHide(_ notification: NSNotification) {

      // write code to complete the implementation
   }

   func updateViewWithKeyboard(notification: NSNotification,
   viewBottomConstraint: NSLayoutConstraint,
   keyboardWillShow: Bool) {

      // write code to complete the implementation
   }
}
输出

在上面的代码中,我们做了以下事情:
向视图添加了一个电子邮件文本字段,并设置了一些约束。
声明了一个变量“textFieldBottomConstraint”来保存对电子邮件文本字段底部约束的引用。
现在键盘显示和隐藏的通知观察者可用。在 viewWillAppear 方法中添加了这些观察者。
在 viewWillDisappear 中移除通知观察者,以避免不必要的方法调用。
步骤 2 - 完成 keyboardWillShow 和 keyboardWillHide 方法的实现
在此步骤中,我们将完成这两种方法的代码。以下是这两种方法的完整代码。
@objc private func keyboardWillShow(_ notification: NSNotification) {

   // move the text field when the email text field is being edited
   if emailTextField.isEditing {
      updateViewWithKeyboard(notification: notification,
      viewBottomConstraint: self.textFieldBottomConstraint!,
      keyboardWillShow: true)
   }
}
@objc private func keyboardWillHide(_ notification: NSNotification) {

   // move the field back to the previous position after editing is done
   updateViewWithKeyboard(notification: notification,
   viewBottomConstraint: self.textFieldBottomConstraint!,
   keyboardWillShow: false)
}
步骤 3 - 完成 updateViewWithKeyboard 方法的实现
我们将完成 updateViewWithKeyboard 方法的代码,以支持键盘移动并返回到以前的位置。代码如下。
private func updateViewWithKeyboard(notification: NSNotification,
viewBottomConstraint: NSLayoutConstraint,
keyboardWillShow: Bool) {

   // getting keyboard size
   guard let userInfo = notification.userInfo,
   let keyboardSize = userInfo[UIResponder.keyboardFrameEndUserInfoKey] as? NSValue else {
      return
   }

   // getting duration for keyboard animation
   guard let keyboardDuration = userInfo[UIResponder.keyboardAnimationDurationUserInfoKey] as? Double else {
      return
   }

   // getting keyboard animation's curve
   guard let keyboardCurve = UIView.AnimationCurve(rawValue: userInfo[UIResponder.keyboardAnimationCurveUserInfoKey] as! Int) else {
      return
   }

   // getting keyboard height
   let keyboardHeight = keyboardSize.cgRectValue.height

   // setting constant for keyboard show and hide
   if keyboardWillShow {
      viewBottomConstraint.constant = -(keyboardHeight + 50)
   } else {
      viewBottomConstraint.constant = -100
   }

   // animate the view the same way the keyboard animates
   let animator = UIViewPropertyAnimator(duration: keyboardDuration, curve: keyboardCurve) {
      [weak self] in self?.view.layoutIfNeeded()
   }

   // perform the animation
   animator.startAnimation()
}
在上面的代码中,我们做了以下事情:
从通知对象提供的用户信息中获取键盘大小。
从用户信息对象中获取键盘动画的持续时间。
从用户信息对象中获取键盘动画的动画类型。
获取键盘高度并更改 viewBottomConstraint 对象的常量值。
通过执行 startAnimation 方法使用 UIViewPropertyAnimator 类为视图设置动画。
输出

步骤 4 - 实现 UITextFieldDelegate 方法
在此步骤中,我们将实现委托方法,通过点击 Return 按钮来隐藏键盘。代码如下。
extension TestController: UITextFieldDelegate {

   func textFieldShouldReturn(_ textField: UITextField) -> Bool {
      textField.resignFirstResponder()
   }
}
结论
要接收键盘出现和消失时的键盘通知,您可以使用键盘通知观察者。您可以从在通知对象中接收的 userInfo 对象中获取键盘高度以及其他值。获取键盘高度后,您可以使用 constant 属性更新约束值。


 数据结构
数据结构 网络
网络 关系数据库管理系统
 操作系统
操作系统 Java
Java iOS
iOS HTML
HTML CSS
CSS Android
 Python
 C 编程
C 编程 C++
C++ C#
C# MongoDB
 MySQL
MySQL Javascript
 PHP
PHP