
 数据结构
数据结构 网络
网络 关系数据库管理系统 (RDBMS)
 操作系统
操作系统 Java
Java iOS
iOS HTML
HTML CSS
CSS Android
 Python
 C 编程
C 编程 C++
C++ C#
C# MongoDB
 MySQL
MySQL Javascript
 PHP
PHPJavaScript 中服务器发送事件有哪些可用事件?
服务器发送事件允许开发者在服务器和客户端之间打开连接,并从服务器向客户端发送数据。基本上,它是一种单向通信,这意味着我们可以从服务器向客户端发送数据,但不能从客户端向服务器发送数据。
在这里,我们将讨论 JavaScript 中服务器发送事件的所有可用事件。
JavaScript 中服务器发送事件的可用事件
JavaScript 中服务器发送事件共有 4 个不同的可用事件。
‘onopen’ − 当客户端和服务器之间的连接成功建立时,将触发 ‘open’ 事件。我们可以使用 ‘open’ 事件来确保连接成功。
newEvent.onopen = () => {
   // perform some action
}
‘onmessage’ − 每当服务器向客户端发送任何消息或数据时,都会触发 ‘message’ 事件。我们可以使用 ‘message’ 事件从服务器获取更新的数据并在客户端处理它。
newEvent.onmessage = message => {
   // handle the message data
};
‘onerror’ − 每当在连接服务器和客户端时出现问题时,都会触发 ‘error’ 事件。我们可以使用 ‘error’ 事件来捕获错误,并在连接成功建立之前每隔一段时间重试连接。
newEvent.onerror = event => {
   // handle error
}
‘onclose’ − 当服务器或客户端关闭客户端和服务器之间的连接时,将触发 ‘close’ 事件。当 ‘close’ 事件触发时,我们可以清除浏览器缓存和其他数据。
newEvent.onclose = event => {
   // clear the data
}
所有四个事件都可以在客户端使用。在这里,我们将学习通过下面的示例在客户端使用上述事件。
示例
首先,用户需要创建一个 index.html 文件并将以下代码添加到其中。
在下面的示例中,我们使用 EventSource() 构造函数创建了 ‘newEvent’ 对象。之后,我们将 ‘onopen’ 事件添加到代码中,当它触发时,我们打印一条简单的消息。
接下来,我们添加了 ‘onmessage’ 事件,当客户端从服务器接收消息时,该事件将被触发,我们在触发时处理数据。
文件名 – index.html
<html>
<body>
   <h2>Using the <i> Server-sent events </i> for unidirectional communication in JavaScript.</h2>
   <div id = "output"> </div>
   <script>
      let output = document.getElementById('output');
      const newEvent = new EventSource('https://:3000/connect');
      // open event is fired when the connection is established.
      newEvent.onopen = () => {
         output.innerHTML += 'Connection to the server is successfully established. <br>';
      }

      // message event is fired when the server sends the data to the client.
      newEvent.onmessage = message => {
         output.innerHTML += "Updated message data is: " + message.data + "<br>";
      };

      // error event is fired when the connection is closed.
      newEvent.onerror = event => {
         output.innerHTML += `Error in the server-sent event: ${event}`;
      }

      // close event is fired when the connection is closed.
      newEvent.onclose = event => {
         output.innerHTML += 'Connection of the client with the server is closed.';
      }
   </script>
</body>
</html>
现在,用户需要创建一个 Node 应用程序,并使用以下命令安装 ‘express’ 和 ‘cors’ NPM 包。
npm i express cors
之后,在 Node 应用程序中创建一个 server.js 文件,并在文件中添加以下代码。
在下面的代码中,我们创建了 ‘connect’ API 端点,它调用 manageClient() 函数。在 manageClient() 函数中,我们将必需的 header 添加到响应中。此外,我们将客户端添加到响应中。
接下来,我们使用 for 循环使用服务器发送的通知向客户端发送 5 次更新。
const express = require("express");
const cors = require("cors");

const app = express();
// use cors
app.use(cors());
const PORT = 3000;

// array to store all connected clients
let clients = [];

// add the client to the list
async function manageClient(req, res) {

   // set headers
   const requiredHeaders = {
      "Content-Type": "text/event-stream",
      Connection: "keep-alive",
   };

   //  adding 200 response code
   res.writeHead(200, requiredHeaders);

   // create a client object and add it to the list
   const client = {
      id: Math.random(),
      res,
   };
   clients.push(client);
   console.log(`Client is connected Successfully`);
   for (let i = 0; i < 5; i++) {

      // send data to the client
      res.write(`data: test${i}

`);
   }
}

// adding endpoints
app.get("/connect", manageClient);

// run the server
app.listen(PORT, () => {
   console.log(`App listening on port ${PORT}`);
});
现在使用以下命令运行 Node 应用程序的服务器。
node server.js
输出
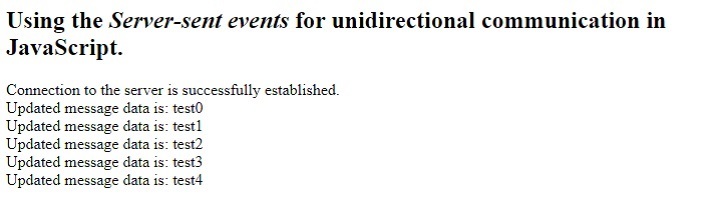
当用户在浏览器中刷新 index.html 文件时,它会在服务器和客户端之间建立连接。此外,它还会打印一条消息,表明连接已成功建立,因为 ‘onopen’ 事件已被触发。
之后,当 ‘onmessage’ 事件触发时,它会打印数据。用户可以观察下面的输出。
用户学习了如何在客户端使用服务器发送事件的所有四个事件。第一个事件是 ‘open’,它确保连接已建立。第二个是 ‘message’ 事件,允许我们处理从服务器获取的数据。第三个事件是 ‘error’ 用于处理错误,最后一个事件是 ‘close’ 用于了解连接何时终止。

252 次浏览
