
 数据结构
数据结构 网络
网络 关系数据库管理系统
 操作系统
操作系统 Java
Java iOS
iOS HTML
HTML CSS
CSS Android
 Python
 C 语言编程
 C++
C++ C#
C# MongoDB
 MySQL
MySQL Javascript
 PHP
PHP如何在 iPhone/iOS 中以编程方式截屏?
虽然 iOS 没有提供任何以编程方式在 iOS 设备上截屏的官方方法,但它提供了一种使用主屏幕按钮和电源按钮截屏的方法,只需同时按下这两个按钮即可。
要截屏,我们需要执行一系列步骤。
我们将获取 keyWindow 的图层 – UIApplication.shared.keyWindow!.layer
我们将获取屏幕的缩放比例 – UIApplication.main.scale
创建一个与视图大小相同的新的图像。
渲染并保存图像。
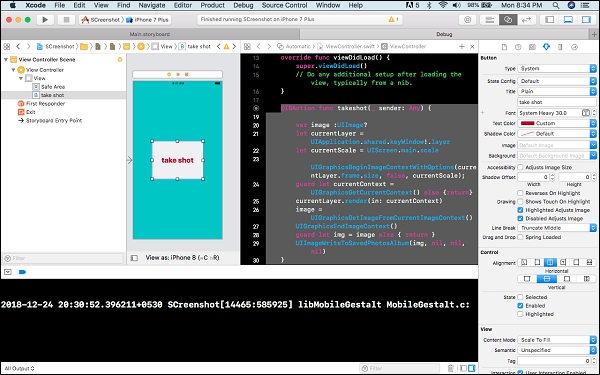
让我们创建一个新项目,在主视图控制器中设置一些背景颜色,然后拖动一个按钮并连接到其类的创建操作。在操作中添加以下代码。
@IBAction func takeshot(_ sender: Any) {
   var image :UIImage?
   let currentLayer = UIApplication.shared.keyWindow!.layer
   let currentScale = UIScreen.main.scale
   UIGraphicsBeginImageContextWithOptions(currentLayer.frame.size, false, currentScale);
   guard let currentContext = UIGraphicsGetCurrentContext() else {return}
   currentLayer.render(in: currentContext)
   image = UIGraphicsGetImageFromCurrentImageContext()
   UIGraphicsEndImageContext()
   guard let img = image else { return }
   UIImageWriteToSavedPhotosAlbum(img, nil, nil, nil)
}
第一次使用时,您需要允许照片权限才能保存图像。保存的图像将为 .jpg 格式。
还要在应用程序的 info.plist 中添加一个 **“NSPhotoLibraryAddUsageDescription”**。
这可以转换为一个函数,并在多个地方或作为扩展使用。
这就是应用程序运行时的外观。
第一次运行并点击“截屏”按钮后
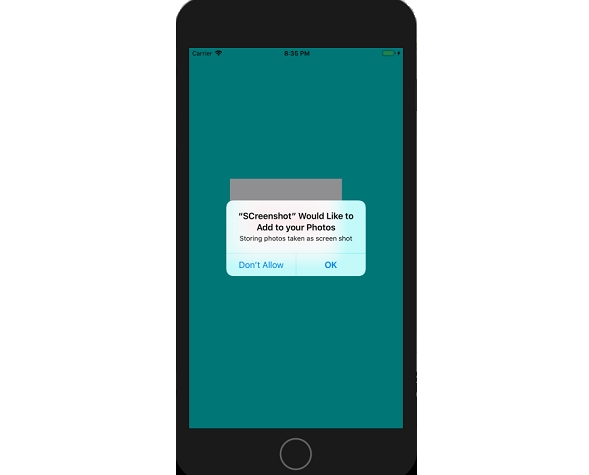
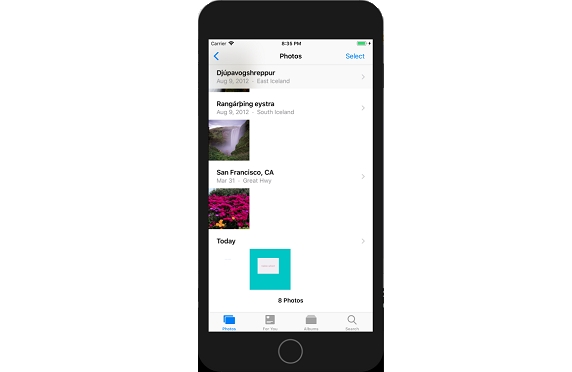
允许访问后,转到 iPhone 上的照片应用程序,您将在那里找到图片。

更新于: 2020年6月27日
1K+ 浏览量

广告