
 数据结构
数据结构 网络
网络 RDBMS
RDBMS 操作系统
操作系统 Java
Java iOS
iOS HTML
HTML CSS
CSS Android
 Python
 C 编程
C 编程 C++
C++ C#
C# MongoDB
 MySQL
MySQL Javascript
 PHP
PHP图像处理/OpenCV 图像膨胀 Java 示例。
侵蚀和膨胀是两个基本的形态学操作。顾名思义,形态学操作是一组根据形状来处理图像的操作。
在膨胀操作期间,其他像素添加到图像边界中,在膨胀过程中添加的像素总数取决于所用结构单元的尺寸。
你可以利用 Imgproc 类的 dilate() 方法膨胀图像,此方法表示源、目的地和内核的三个 mat 对象。
示例
import java.awt.Image;
import java.awt.image.BufferedImage;
import java.io.IOException;
import javafx.application.Application;
import javafx.embed.swing.SwingFXUtils;
import javafx.scene.Group;
import javafx.scene.Scene;
import javafx.scene.image.ImageView;
import javafx.scene.image.WritableImage;
import javafx.stage.Stage;
import org.opencv.core.Core;
import org.opencv.core.Mat;
import org.opencv.core.Size;
import org.opencv.highgui.HighGui;
import org.opencv.imgcodecs.Imgcodecs;
import org.opencv.imgproc.Imgproc;
public class ImageDilation extends Application {
   public void start(Stage stage) throws IOException {
      //Loading the OpenCV core library
      System.loadLibrary( Core.NATIVE_LIBRARY_NAME );
      //Reading image data
      String file ="D:\Images\lamma2.jpg";
      Mat src = Imgcodecs.imread(file);
      //Creating destination matrix
      Mat dst = new Mat(src.rows(), src.cols(), src.type());
      //Preparing the kernel matrix object
      Mat kernel = Imgproc.getStructuringElement(Imgproc.MORPH_RECT, new Size((2*2) + 1, (2*2)+1));
      //Applying dilate on the Image
      Imgproc.dilate(src, dst, kernel);
      //Converting matrix to JavaFX writable image
      Image img = HighGui.toBufferedImage(dst);
      WritableImage writableImage= SwingFXUtils.toFXImage((BufferedImage) img, null);
      //Setting the image view
      ImageView imageView = new ImageView(writableImage);
      imageView.setX(10);
      imageView.setY(10);
      imageView.setFitWidth(575);
      imageView.setPreserveRatio(true);
      //Setting the Scene object
      Group root = new Group(imageView);
      Scene scene = new Scene(root, 595, 400);
      stage.setTitle("Dilation Example");
      stage.setScene(scene);
      stage.show();
   }
   public static void main(String args[]) {
      launch(args);
   }
}
输入图像

Learn Java in-depth with real-world projects through our Java certification course. Enroll and become a certified expert to boost your career.
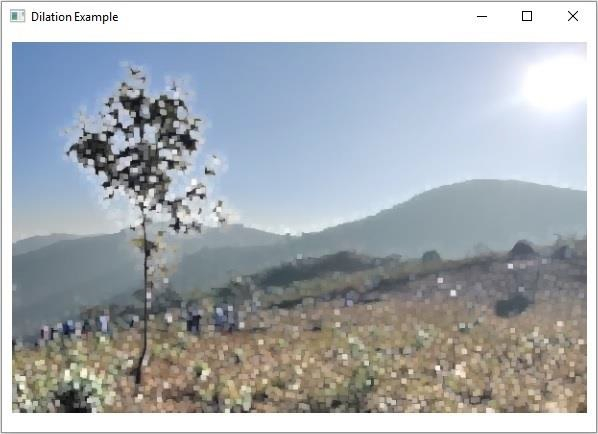
输出
在执行时,以上示例生成以下输出 −

更新于: 09-4-2020
856 人浏览

广告