在 Python 中使用 Tkinter 加载 Pygame Surface 中的图像
结合 Pygame 的图形渲染能力和 Tkinter 的 GUI 创建功能,可以创建具有吸引人视觉元素的强大应用程序。在本教程中,我们将探讨将 Pygame 表面集成到 Tkinter 应用程序中的方法,重点介绍加载图像,特别是使用 Pygame 圆形演示该过程。
什么是 Pygame?
Pygame 是一套用于编写视频游戏的 Python 模块。它提供了处理图形、用户输入、声音等功能。另一方面,Tkinter 是 Python 的标准 GUI(图形用户界面)工具包。通过结合 Pygame 和 Tkinter,开发人员可以利用这两个库的优势来创建交互式且视觉上吸引人的应用程序。
在继续之前,请确保已安装 Pygame 和 Pillow (PIL)。您可以使用以下命令安装它们:
pip install pygame Pillow
现在,让我们深入了解分步过程。
步骤 1:初始化 Pygame
第一步是初始化 Pygame。这将设置 Pygame 模块并为图形操作准备环境。
import pygame

# Initialize Pygame
pygame.init()
步骤 2:创建 Pygame Surface
接下来,我们创建一个 Pygame Surface,我们将在其中绘制图形。在本例中,我们将在 Surface 上绘制一个蓝色圆形。如有需要,请确保将此代码替换为您自己的 Surface 创建逻辑。
width, height = 300, 200

# Create a Pygame surface with an alpha channel
pygame_surface = pygame.Surface((width, height), pygame.SRCALPHA)

# Draw a blue circle on the surface
pygame.draw.circle(pygame_surface, (0, 0, 255), (150, 100), 50)
在上面的代码中,pygame.Surface 用于创建具有 alpha 通道 (pygame.SRCALPHA) 的 Surface。alpha 通道允许图像透明。然后使用 pygame.draw.circle 函数在此 Surface 上绘制一个蓝色圆形。
步骤 3:初始化 Tkinter
我们需要创建一个 Tkinter 窗口,在其中显示我们的 Pygame Surface。
import tkinter as tk

# Create a Tkinter window
root = tk.Tk()
root.title("Loading Image in Tkinter from Pygame Surface")
root.geometry("720x250")
步骤 4:将 Pygame Surface 转换为 PIL Image
要在 Tkinter 中显示 Pygame Surface,我们需要将其转换为 Tkinter 能够理解的格式。我们将使用 Pillow 库 (PIL) 将 Pygame Surface 转换为 PIL Image。
from PIL import Image

# Convert Pygame surface to PIL Image
pygame_image = pygame.image.tostring(pygame_surface, 'RGBA')
pil_image = Image.frombytes('RGBA', (width, height), pygame_image)
这里,pygame.image.tostring 将 Pygame Surface 转换为像素数据的字符串,Image.frombytes 从此像素数据创建 PIL Image。
步骤 5:将 PIL Image 转换为 Tkinter PhotoImage
现在我们有了 PIL Image,我们可以使用 ImageTk 模块将其转换为 Tkinter PhotoImage。
from PIL import ImageTk

# Convert PIL Image to Tkinter PhotoImage
tk_image = ImageTk.PhotoImage(pil_image)
步骤 6:创建 Tkinter Label 并显示图像
最后一步是创建一个 Tkinter Label 并将其上显示转换后的图像。
# Create a Tkinter label to display the image
label = tk.Label(root, image=tk_image)
label.pack()
步骤 7:运行 Tkinter 主循环
为了使 Tkinter 窗口保持打开并响应,我们需要运行 Tkinter 主循环。
# Run the Tkinter main loop
root.mainloop()
将所有步骤整合在一起
让我们将所有这些步骤整合在一起并检查输出:
示例
import pygame
from PIL import Image, ImageTk
import tkinter as tk

# Initialize Pygame
pygame.init()

# Create a Pygame Surface
width, height = 400, 300
pygame_surface = pygame.Surface((width, height), pygame.SRCALPHA)
pygame.draw.circle(pygame_surface, (0, 0, 255), (150, 100), 50)

# Initialize Tkinter
root = tk.Tk()
root.title("Loading Image in Tkinter from Pygame Surface")
root.geometry("720x250")

# Convert Pygame Surface to PIL Image
pygame_image = pygame.image.tostring(pygame_surface, 'RGBA')
pil_image = Image.frombytes('RGBA', (width, height), pygame_image)

# Convert PIL Image to Tkinter PhotoImage
tk_image = ImageTk.PhotoImage(pil_image)

# Create a Tkinter Label and Display the Image
label = tk.Label(root, image=tk_image)
label.pack()

# Run the Tkinter Main Loop
root.mainloop()

# Quit Pygame
pygame.quit()
输出
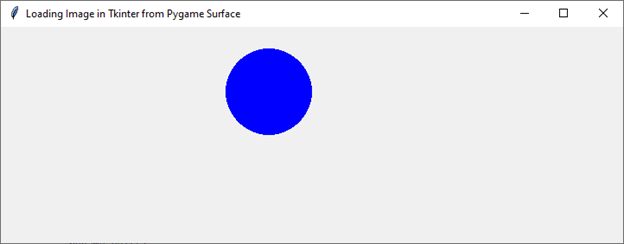
上面的脚本初始化 Pygame,创建一个带有蓝色圆形的 Pygame Surface,使用 Pillow 将其转换为 Tkinter 兼容格式,然后在 Tkinter 窗口中显示它。

结论
在本教程中,我们探讨了将 Pygame Surface 集成到 Tkinter 应用程序中的过程。通过结合这两个库的优势,开发人员可以创建视觉上吸引人且交互式的应用程序。提供的示例演示了如何在 Surface 上绘制 Pygame 圆形,将其转换为 Tkinter 兼容格式,并在 Tkinter 窗口中显示它。


 数据结构
数据结构 网络
网络 关系型数据库管理系统
 操作系统
操作系统 Java
Java iOS
iOS HTML
HTML CSS
CSS Android
 Python
 C 编程
C 编程 C++
C++ C#
C# MongoDB
 MySQL
MySQL Javascript
 PHP
PHP