如何在 iOS 中为 ImageView 设置边框?
为图像视图设置边框很简单,在这篇文章中,我们将学习如何在 iOS 中为图像视图设置边框。
让我们开始吧。
步骤 1 - 打开 Xcode → 新建项目 → 单视图应用程序 → 我们将其命名为“BorderToImage”
我们将在情节提要中创建一个图像视图和一个按钮,点按按钮即可为图像视图添加边框。我们可以在 viewDidLoad 中执行相同的操作,但为了看出差别,我们正在这样做。
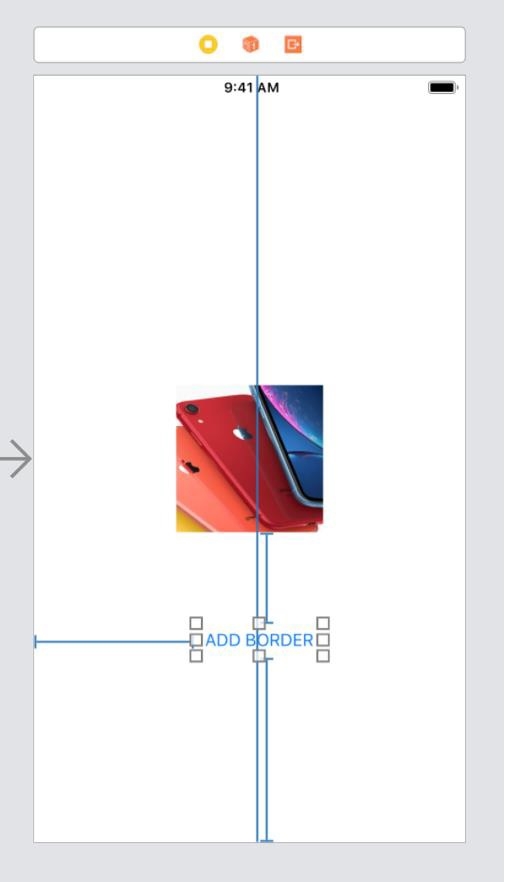
步骤 2 - 在 Main.storyboard 中添加一个图像视图和一个按钮,如下所示。

步骤 3 - 为图像创建 @IBOutlet 并将其命名为 imgView,并为按钮创建并将其命名为 btnAddBorder。
步骤 4 - 在 btnAddBorder 函数中添加以下代码
@IBAction func btnAddBorder(_ sender: Any) {
   imgView.layer.borderColor = UIColor(red: 0.5, green: 0.5, blue: 0.5, alpha: 1.0).cgColor
   imgView.layer.masksToBounds = true
   imgView.contentMode = .scaleToFill
   imgView.layer.borderWidth = 5
}
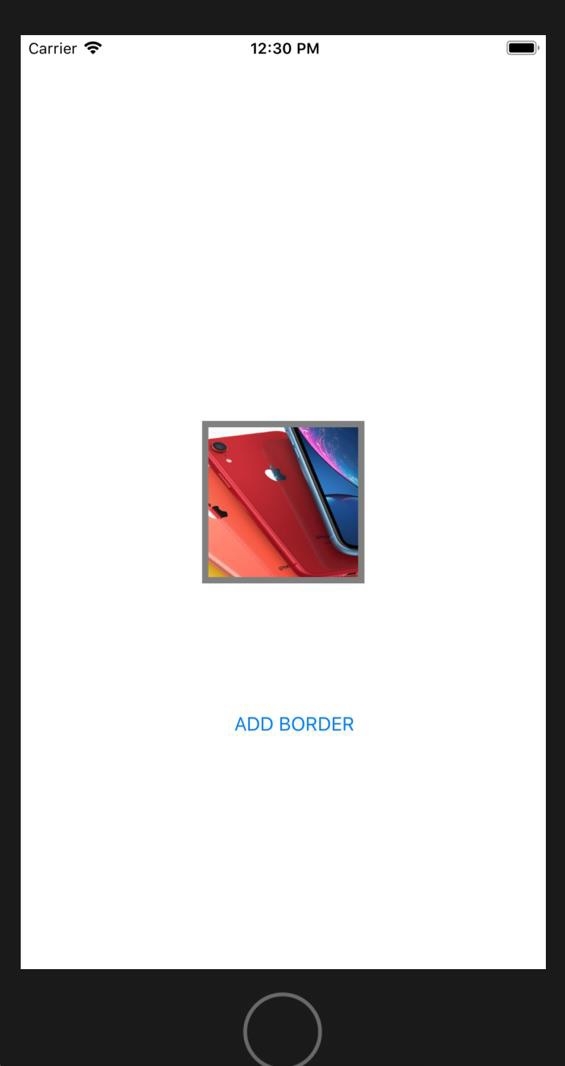
完成上述操作后,运行代码以查看输出。
示例
import UIKit
class ViewController: UIViewController {
   @IBOutlet var imgView: UIImageView!
   override func viewDidLoad() {
      super.viewDidLoad()
   }
   @IBAction func btnAddBorder(_ sender: Any) {
      imgView.layer.borderColor = UIColor(red: 0.5, green: 0.5, blue: 0.5, alpha: 1.0).cgColor
      imgView.layer.masksToBounds = true
      imgView.contentMode = .scaleToFill
      imgView.layer.borderWidth = 5
   }
}
输出


广告

 数据结构
数据结构 网络
网络 RDBMS
RDBMS 操作系统
操作系统 Java
Java iOS
iOS HTML
HTML CSS
CSS Android
 Python
 C 编程
C 编程 C++
C++ C#
C# MongoDB
 MySQL
MySQL Javascript
 PHP
PHP