使用MATLAB中的一阶导数算子进行边缘检测
在数字图像处理中,边缘检测是用于识别数字图像中物体边界的过程。我们有多种图像处理技术可以检测图像中的边缘,但在本教程中,我们将学习使用MATLAB中的一阶导数算子进行边缘检测。
什么是MATLAB中的边缘检测?
MATLAB是一个执行复杂图像处理任务的高效工具。其中一项任务是边缘检测,它只不过是检测图像中物体边界的过程。
在图像中,物体的边缘通常是强度发生突然变化的区域。
边缘检测是一个至关重要的过程,因为它在工程和技术领域的各个方面发挥着至关重要的作用,例如图像分割、特征提取、图像质量增强、自动驾驶汽车和机器人技术等等。
现在,让我们讨论使用MATLAB中的一阶导数算子进行边缘检测的过程。
使用MATLAB中的一阶导数算子进行边缘检测
在MATLAB中,我们可以按照以下步骤使用一阶导数算子进行边缘检测
步骤(1)——使用“imread”函数读取输入图像。为此,请使用以下语法
img = imread('Image.jpg');
步骤(2)——将输入图像转换为灰度图像以使用MATLAB等数字工具进行处理。为此,请使用“rgb2gray”函数。
gray_img = rgb2gray(img);
步骤(3)——将灰度图像转换为双精度以进行计算。按如下方式执行此操作
gray_img = double(gray_img);
步骤(4)——定义一阶导数算子“D”以执行边缘检测。它可以是“前向算子”、“中心算子”或“后向算子”。
步骤(5)——将图像与一阶导数算子进行卷积以检测图像中物体的边缘。为此,请按如下方式使用“conv2”函数
edge_img = conv2(gray_img, D);
步骤(6)——调整边缘检测图像,使其适合可视化。为此,可以使用“abs”函数取卷积图像的绝对值,然后可以将生成的图像转换为8位无符号整型格式进行显示。按如下方式执行此操作
edge_img = abs(edge_img);
edge_img = uint8(edge_img);
步骤(7)——最后,使用“imshow”函数显示生成的边缘检测图像,如下所示
imshow(edge_img);
现在,让我们考虑一些MATLAB中的示例程序,以便实际了解如何使用一阶导数算子进行边缘检测。
示例(1)——使用前向算子进行边缘检测
% MATLAB code to perform edge detection using first derivative forward operator
% Read the input image
img = imread('https://tutorialspoint.com/assets/questions/media/14304-1687425236.jpg');

% Convert the input image to grayscale for processing
gray_img = rgb2gray(img);

% Convert the grayscale image to double data type for calculation
gray_img = double(gray_img);

% Create the first derivative operator
D = [1 -1 0];	% Forward operator

% Convolve the image with forward operator to detect edges
Cx = conv2(gray_img, D, 'same');	% Convolve along x-axis
Cy = conv2(gray_img, D, 'same');	%Convolve along y-axis

% Compute the edge magnitude (edge image)
edge_img = sqrt(Cx.^2 + Cy.^2);

% Display the original and edge detected images
figure;
subplot(2, 1, 1);
imshow(img);
title('Original Image');

subplot(2, 1, 2);
imshow(edge_img, []);
title('Edge Image');
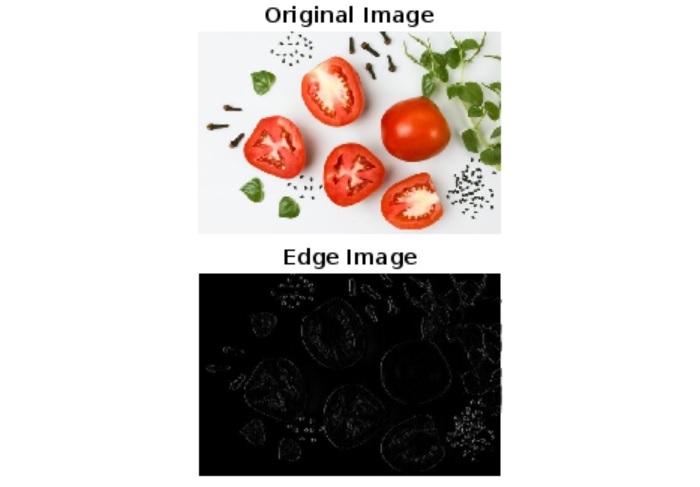
输出
它将生成以下输出图像

代码解释
在此MATLAB代码中,我们首先使用“imread”函数读取输入图像。然后,我们将输入图像从RGB颜色比例转换为灰度图像进行处理,并将其转换为双精度数据类型进行计算。
之后,定义前向一阶导数算子“D”,并使用“conv2”函数将灰度图像沿x轴和y轴与该算子进行卷积以检测边缘。之后我们计算边缘幅度以获得完整的边缘检测图像。
最后,我们使用“imshow”函数显示原始图像和边缘检测图像。
示例(2)——使用中心算子进行边缘检测
% MATLAB code to perform edge detection using first derivative central operator
% Read the input image
img = imread('https://tutorialspoint.com/assets/questions/media/14304-1687425236.jpg');

% Convert the input image to grayscale for processing
gray_img = rgb2gray(img);

% Convert the grayscale image to double data type for calculation
gray_img = double(gray_img);

% Create the first derivative operator
D = [1 0 -1];	% Central operator

% Convolve the image with forward operator to detect edges
Cx = conv2(gray_img, D, 'same');	% Convolve along x-axis
Cy = conv2(gray_img, D, 'same');	%Convolve along y-axis

% Compute the edge magnitude (edge image)
edge_img = sqrt(Cx.^2 + Cy.^2);

% Display the original and edge detected images
figure;
subplot(2, 1, 1);
imshow(img);
title('Original Image');

subplot(2, 1, 2);
imshow(edge_img, []);
title('Edge Image');
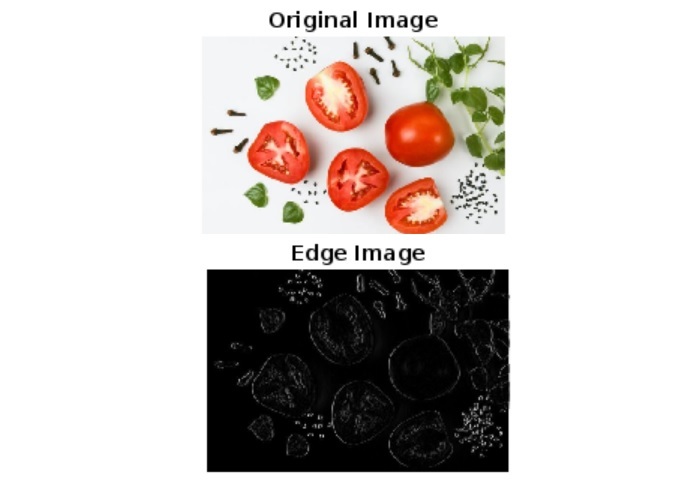
输出
它将生成以下输出图像

代码解释:此MATLAB代码的实现和执行与之前的代码相同。唯一的区别在于此处使用一阶导数中心算子进行边缘检测。
示例(3)——使用后向算子进行边缘检测
% Read the input image
img = imread('https://tutorialspoint.com/assets/questions/media/14304-1687425236.jpg');

% Convert the input image to grayscale for processing
gray_img = rgb2gray(img);

% Convert the grayscale image to double data type for calculation
gray_img = double(gray_img);

% Create the first derivative operator
D = [0 1 -1];	% Backward operator

% Convolve the image with forward operator to detect edges
Cx = conv2(gray_img, D, 'same');	% Convolve along x-axis
Cy = conv2(gray_img, D, 'same');	%Convolve along y-axis

% Compute the edge magnitude (edge image)
edge_img = sqrt(Cx.^2 + Cy.^2);

% Display the original and edge detected images
figure;
subplot(2, 1, 1);
imshow(img);
title('Original Image');

subplot(2, 1, 2);
imshow(edge_img, []);
title('Edge Image');
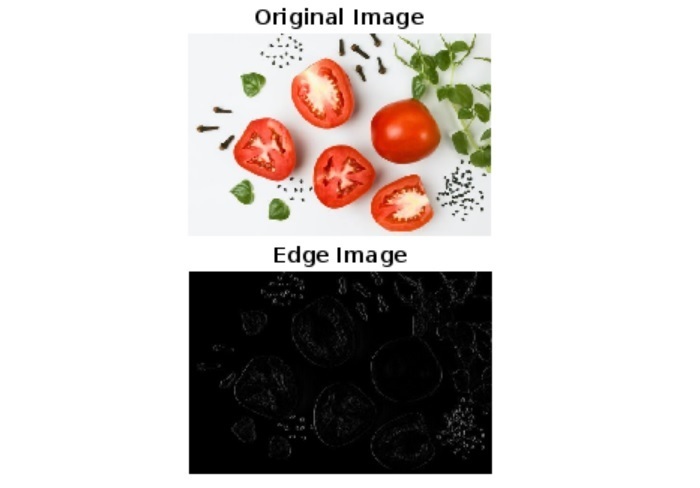
输出
它将生成以下输出图像

代码解释:此MATLAB代码的实现和执行与前两个代码相同。唯一的区别在于此处使用一阶导数后向算子进行边缘检测。
结论
总之,边缘检测是突出图像中物体边界的过程。可以使用MATLAB进行边缘检测。在本教程中,我借助MATLAB中的示例程序解释了使用一阶导数算子进行边缘检测的过程。您可以使用您自己的图像尝试所有这些代码。


 数据结构
数据结构 网络
网络 关系数据库管理系统 (RDBMS)
 操作系统
操作系统 Java
Java iOS
iOS HTML
HTML CSS
CSS Android
 Python
 C语言编程
C语言编程 C++
C++ C#
C# MongoDB
 MySQL
MySQL Javascript
 PHP
PHP