
 数据结构
数据结构 网络
网络 关系型数据库管理系统
 操作系统
操作系统 Java
Java iOS
iOS HTML
HTML CSS
CSS Android
 Python
 C语言编程
C语言编程 C++
C++ C#
C# MongoDB
 MySQL
MySQL Javascript
 PHP
PHP如何在Android中使用Activity实现底部导航?
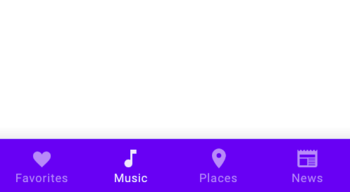
Android 应用中的底部导航是设计可导航和用户友好界面时常用的功能。它通常涉及在屏幕底部放置一个导航栏,以便快速访问应用的不同部分。
本教程探讨了如何在 Android 中使用 Activity 实现底部导航。它涉及创建多个 Activity,每个 Activity 代表应用的不同屏幕或部分,并利用底部导航视图在它们之间切换。在本教程结束时,读者将对使用 Android 上的 Activity 构建带有底部导航栏的应用有一个扎实的了解。
底部导航
底部导航是移动应用界面中常用的设计模式。此 UI 功能涉及在屏幕底部放置一个导航栏,通常使用图标或标签来表示应用的不同部分。底部导航的目的是允许用户轻松访问应用内的关键功能或屏幕,并在各个部分之间导航,而无需花费太多精力。
此外,通过将其放置在底部,用户可以轻松触及它,减少在与应用交互时需要重新调整手势的需求。通常与各种 Activity、片段或屏幕一起使用,这些 Activity、片段或屏幕代表应用程序中的不同功能。
方法
在 Android 中使用 Activity 实现底部导航有多种方法。以下是一些常见的方法
使用导航组件
使用 Intent 管理 Activity
在 Activity 中使用片段
自定义视图和事件处理
使用导航组件
使用导航组件,您可以定义一个导航图,该图表示 Activity 或片段之间的流程。通过合并 BottomNavigationView,您可以轻松处理 Activity 之间的导航,方法是在图中指定目标,并让导航组件管理过渡。
算法
定义一个表示 Activity 或片段之间流程的导航图。
在您的布局中包含 BottomNavigationView。
设置导航组件以根据 BottomNavigationView 中选定的项目处理 Activity 或片段之间的导航。
示例
MainActivity.kt
class MainActivity : AppCompatActivity() {

   override fun onCreate(savedInstanceState: Bundle?) {
      super.onCreate(savedInstanceState)
      setContentView(R.layout.activity_main)

      val navController = findNavController(R.id.navHostFragment)
      val bottomNavigationView = findViewById<BottomNavigationView>(R.id.bottomNavigationView)
      bottomNavigationView.setupWithNavController(navController)
   }
}
activity_main.xml
<RelativeLayout
xmlns:android="http://schemas.android.com/apk/res/android"
   xmlns:app="http://schemas.android.com/apk/res-auto"
   xmlns:tools="http://schemas.android.com/tools"
   android:layout_width="match_parent"
   android:layout_height="match_parent"
   tools:context=".MainActivity">

   <androidx.fragment.app.FragmentContainerView
      android:id="@+id/navHostFragment"
      android:name="androidx.navigation.fragment.NavHostFragment"
      android:layout_width="match_parent"
      android:layout_height="match_parent"
      app:defaultNavHost="true"
      app:navGraph="@navigation/nav_graph" />

   <
com.google.android.material.bottomnavigation.BottomNavigationView
      android:id="@+id/bottomNavigationView"
      android:layout_width="match_parent"
      android:layout_height="wrap_content"
      android:layout_alignParentBottom="true"
      app:menu="@menu/bottom_navigation_menu" />

</RelativeLayout>
输出

使用 Intent 管理 Activity
此方法涉及为 BottomNavigationView 中的项目分配点击监听器。当用户选择一个项目时,您可以使用显式 Intent 启动相应的 Activity。此方法允许您为每个部分创建单独的 Activity,并直接在它们之间导航。
算法
为 BottomNavigationView 中的项目分配点击监听器。
当用户选择一个项目时,创建一个显式 Intent 以启动相应的 Activity。
使用 Intent 启动 Activity,这将引导用户导航到所需的部分。
示例
MainActivity.kt
class MainActivity : AppCompatActivity() {

   override fun onCreate(savedInstanceState: Bundle?) {
      super.onCreate(savedInstanceState)
      setContentView(R.layout.activity_main)

      val bottomNavigationView = findViewById<
BottomNavigationView>(R.id.bottomNavigationView)
      bottomNavigationView.setOnNavigationItemSelectedListener {
menuItem ->
         when (menuItem.itemId) {
            R.id.homeItem -> {
               val intent = Intent(this, HomeActivity::class.java)
               startActivity(intent)
               true
            }
            R.id.profileItem -> {
               val intent = Intent(this,
ProfileActivity::class.java)
               startActivity(intent)
               true
            }
            else -> false
         }
      }
   }
}
输出

在 Activity 中使用片段
您可以使用单个 Activity 并使用片段来表示应用的不同部分,而不是创建多个 Activity。通过替换 Activity 内的片段容器,您可以根据 BottomNavigationView 中选定的项目动态地在不同的片段之间切换。
算法
创建一个承载片段容器的单个 Activity。
为应用的每个部分定义单独的片段。
当单击 BottomNavigationView 中的项目时,用选定的片段替换片段容器,从而在各个部分之间提供无缝过渡。
示例
MainActivity.kt
class MainActivity : AppCompatActivity() {

   override fun onCreate(savedInstanceState: Bundle?) {
      super.onCreate(savedInstanceState)
      setContentView(R.layout.activity_main)

      val bottomNavigationView = findViewById<
BottomNavigationView>(R.id.bottomNavigationView)
      bottomNavigationView.setOnNavigationItemSelectedListener {
menuItem ->
         when (menuItem.itemId) {
            R.id.homeItem -> {
               supportFragmentManager.beginTransaction()
                  .replace(R.id.fragmentContainer, HomeFragment())
                  .commit()
               true
            }
            R.id.profileItem -> {
               supportFragmentManager.beginTransaction()
                  .replace(R.id.fragmentContainer,
ProfileFragment())
                  .commit()
               true
            }
            else -> false
         }
      }
   }
}
activity_main.xml
<RelativeLayout
xmlns:android="http://schemas.android.com/apk/res/android"
   xmlns:tools="http://schemas.android.com/tools"
   android:layout_width="match_parent"
   android:layout_height="match_parent"
   tools:context=".MainActivity">

   <FrameLayout
      android:id="@+id/fragmentContainer"
      android:layout_width="match_parent"
      android:layout_height="match_parent" />

   <
com.google.android.material.bottomnavigation.BottomNavigationView
      android:id="@+id/bottomNavigationView"
      android:layout_width="match_parent"
      android:layout_height="wrap_content"
      android:layout_alignParentBottom="true"
      app:menu="@menu/bottom_navigation_menu" />

</RelativeLayout>
输出

自定义视图和事件处理
对于更自定义的方法,您可以创建一个类似于底部导航栏的自定义视图。这涉及设计一个布局,在底部放置按钮或图标,并手动处理用户点击。您需要管理 Activity 内不同部分的可见性和状态,并自行处理导航逻辑。此方法提供了更大的灵活性,但需要更多手动实现。
算法
设计一个自定义视图以类似于底部导航栏。
为自定义视图中的按钮或图标实现点击监听器。
维护 Activity 内不同部分的状态和可见性。
根据选定的按钮或图标更新内容或 UI,手动管理导航逻辑和过渡。
示例
MainActivity.kt
class MainActivity : AppCompatActivity() {

   override fun onCreate(savedInstanceState: Bundle?) {
      super.onCreate(savedInstanceState)
      setContentView(R.layout.activity_main)

      val customBottomNavigationView = findViewById<CustomBottomNavigationView>(R.id.customBottomNavigationView)
      customBottomNavigationView.setOnButtonClickListener { button ->
         when (button) {
            Button.HOME -> {
               // Handle home button click
               Toast.makeText(this, "Home Button Clicked", Toast.LENGTH_SHORT).show()
            }
            Button.PROFILE -> {
               // Handle profile button click
               Toast.makeText(this, "Profile Button Clicked", Toast.LENGTH_SHORT).show()
            }
         }
      }
   }
}
custom_bottom_navigation_view.xml
<LinearLayout
xmlns:android="http://schemas.android.com/apk/res/android"
   android:layout_width="match_parent"
   android:layout_height="wrap_content"
   android:orientation="horizontal">

   <Button
      android:id="@+id/homeButton"
      android:layout_width="0dp"
      android:layout_height="wrap_content"
      android:layout_weight="1"
      android:text="Home" />

   <Button
      android:id="@+id/profileButton"
      android:layout_width="0dp"
      android:layout_height="wrap_content"
      android:layout_weight="1"
      android:text="Profile" />

</LinearLayout>
CustomBottomNavigationView.kt
class CustomBottomNavigationView(context: Context, attrs: AttributeSet) : LinearLayout(context, attrs) {

   init {
      LayoutInflater.from(context).inflate(R.layout.custom_bottom_navigation_view, this, true)
      setListeners()
   }

   private fun setListeners() {
      val homeButton = findViewById<Button>(R.id.homeButton)
      val profileButton = findViewById<Button>(R.id.profileButton)

      homeButton.setOnClickListener {
         onButtonClickListener?.invoke(Button.HOME)
      }

      profileButton.setOnClickListener {
         onButtonClickListener?.invoke(Button.PROFILE)
      }
   }

   private var onButtonClickListener: ((Button) -> Unit)? = null

   fun setOnButtonClickListener(listener: (Button) -> Unit) {
      onButtonClickListener = listener
   }

   companion object {
      enum class Button {
         HOME,
         PROFILE
      }
   }
}
输出
结论
在本教程中,可以通过不同的方法在 Android 中实现底部导航,例如使用导航组件、使用 Intent 管理 Activity、在 Activity 中使用片段或创建自定义视图和事件处理。
每种方法在实现应用各个部分之间的无缝导航方面都具有其自身的优势和灵活性。开发人员可以根据其项目需求和偏好选择最合适的方法,为其 Android 应用程序创建用户友好且直观的导航体验。

2K+ 阅读量
