OpenCV Python – 如何对图像执行按位非运算?
我们可以使用cv2.bitwise_not()对图像执行按位非运算。以下是按位非图像运算的语法:
cv2.bitwise_not(img)
步骤
要计算图像的按位非,您可以按照以下步骤操作:
导入所需的库。在以下所有示例中,所需的Python库是OpenCV。确保您已安装它。
使用cv2.imread()方法将输入图像读取为灰度图像。使用图像类型(即png或jpg)指定图像的完整路径。
使用cv2.bitwise_not(img)计算输入图像的按位非。
显示按位非图像
让我们借助一些Python示例来了解输入图像上的按位非运算。
示例
在此示例中,我们计算输入图像的按位非。
# import required libraries
import cv2

# read an input image.
img = cv2.imread('not.png')

# compute bitwise NOT on input image
not_img = cv2.bitwise_not(img)

# display the computed bitwise NOT image
cv2.imshow('Bitwise NOT Image', not_img)
cv2.waitKey(0)
cv2.destroyAllWindows()
我们将使用以下图像作为此示例的输入文件:

输出
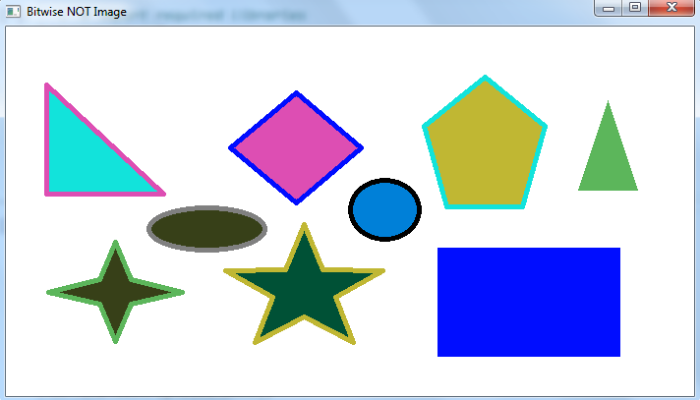
运行以上程序后,将产生以下输出。

注意输出窗口中不同形状的颜色反转。
示例
在此示例中,我们计算输入图像的按位非。使用此方法,您可以创建图像的负片。
# import required libraries
import cv2

# read an input image
img = cv2.imread('sketch.jpg')

# compute bitwise NOT on input image
not_img = cv2.bitwise_not(img)

# display the computed bitwise NOT image
cv2.imshow('Bitwise NOT Image', not_img)
cv2.waitKey(0)
cv2.destroyAllWindows()
我们将使用以下图像作为此程序的输入文件:

输出
运行以上程序后,将产生以下输出:

请注意,以上输出图像是原始输入图像的负片。
示例
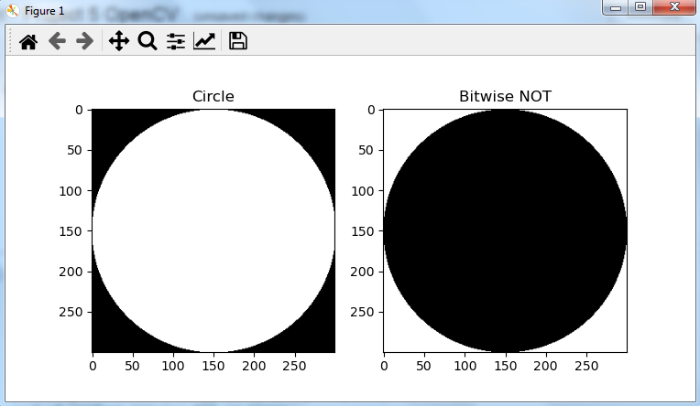
在此示例中,我们定义了一个大小为300×300的图像圆圈。我们对此图像执行按位非。
%matplotlib qt
# import required libraries
import cv2
import numpy as np
import matplotlib.pyplot as plt

# define an image as a circle
img = np.zeros((300, 300), dtype = "uint8")
img = cv2.circle(img, (150, 150), 150, 255, -1)

# perform bitwise NOT on image
not_img = cv2.bitwise_not(img)

# Display the bitwise NOT output image
plt.subplot(121), plt.imshow(img, 'gray'), plt.title("Circle")
plt.subplot(122), plt.imshow(not_img, 'gray'),
plt.title("Bitwise NOT")
plt.show()
输出
运行以上程序后,将产生以下输出:

以上输出显示“按位非”图像是“圆圈”图像的反转图像。

广告

 数据结构
数据结构 网络
网络 关系数据库管理系统 (RDBMS)
 操作系统
操作系统 Java
Java iOS
iOS HTML
HTML CSS
CSS Android
 Python
 C语言编程
C语言编程 C++
C++ C#
C# MongoDB
 MySQL
MySQL Javascript
 PHP
PHP