- FastAPI 教程
- FastAPI - 主页
- FastAPI - 简介
- FastAPI - Hello World
- FastAPI - OpenAPI
- FastAPI - Uvicorn
- FastAPI - 类型提示
- FastAPI - IDE 支持
- FastAPI - Rest 架构
- FastAPI - 路径参数
- FastAPI - 查询参数
- FastAPI - 参数验证
- FastAPI - Pydantic
- FastAPI - 请求正文
- FastAPI - 模板
- FastAPI - 静态文件
- FastAPI - HTML 表单模板
- FastAPI - 访问表单数据
- FastAPI - 上传文件
- FastAPI - Cookie 参数
- FastAPI - 头参数
- FastAPI - 响应模型
- FastAPI - 嵌套模型
- FastAPI - 依赖关系
- FastAPI - CORS
- FastAPI - Crud 操作
- FastAPI - SQL 数据库
- FastAPI - 使用 MongoDB
- FastAPI - 使用 GraphQL
- FastAPI - Websockets
- FastAPI - FastAPI 事件处理程序
- FastAPI - 装载子应用程序
- FastAPI - 中间件
- FastAPI - 装载 Flast 应用程序
- FastAPI - 部署
- FastAPI 有用资源
- FastAPI - 快速指南
- FastAPI - 有用资源
- FastAPI - 讨论
FastAPI - HTML 表单模板
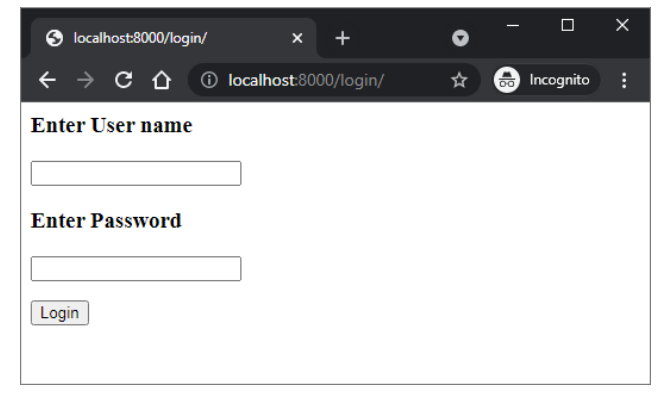
让我们向应用程序添加另一个路由"/login",该路由渲染具有简单登录表单的 html 模板。登录页面的 HTML 代码如下所示 −
<html>
   <body>
      <form action="/submit" method="POST">
         <h3>Enter User name</h3>
         <p><input type='text' name='nm'/></p>
         <h3>Enter Password</h3>
         <p><input type='password' name='pwd'/></p>
         <p><input type='submit' value='Login'/></p>
      </form>
   </body>
</html>
请注意,action 参数设置为 "/submit" 路由且 action 设置为 POST。这对于进一步的讨论很重要。
在main.py文件中添加login()函数如下 −
@app.get("/login/", response_class=HTMLResponse)
async def login(request: Request):
   return templates.TemplateResponse("login.html", {"request": request})
网址 https://:8000/login 将按如下方式呈现登录表单 −

广告