- FastAPI 教程
- FastAPI - 首页
- FastAPI - 简介
- FastAPI - Hello World
- FastAPI - OpenAPI
- FastAPI - Uvicorn
- FastAPI - 类型提示
- FastAPI - IDE 支持
- FastAPI - REST 架构
- FastAPI - 路径参数
- FastAPI - 查询参数
- FastAPI - 参数验证
- FastAPI - Pydantic
- FastAPI - 请求体
- FastAPI - 模板
- FastAPI - 静态文件
- FastAPI - HTML 表单模板
- FastAPI - 访问表单数据
- FastAPI - 上传文件
- FastAPI - Cookie 参数
- FastAPI - 头部参数
- FastAPI - 响应模型
- FastAPI - 嵌套模型
- FastAPI - 依赖项
- FastAPI - CORS
- FastAPI - CRUD 操作
- FastAPI - SQL 数据库
- FastAPI - 使用 MongoDB
- FastAPI - 使用 GraphQL
- FastAPI - WebSockets
- FastAPI - FastAPI 事件处理器
- FastAPI - 挂载子应用
- FastAPI - 中间件
- FastAPI - 挂载 Flask 应用
- FastAPI - 部署
- FastAPI 有用资源
- FastAPI - 快速指南
- FastAPI - 有用资源
- FastAPI - 讨论
FastAPI - 模板
默认情况下,FastAPI 向客户端呈现 JSON 响应。但是,它可以转换为 HTML 响应。为此,FastAPI 在fastapi.responses 模块中定义了HTMLResponse 类。我们需要将response_class作为附加参数添加到操作装饰器中,并将HTMLResponse对象作为其值。
在以下示例中,@app.get() 装饰器具有“/hello/”端点和 HTMLResponse 作为 response_class。在 hello() 函数内部,我们有一个 Hello World 消息的 HTML 代码的字符串表示形式。该字符串以 HTML 响应的形式返回。
from fastapi.responses import HTMLResponse
from fastapi import FastAPI
app = FastAPI()
@app.get("/hello/")
async def hello():
   ret='''
<html>
<body>
<h2>Hello World!</h2>
</body>
</html>
'''
   return HTMLResponse(content=ret)
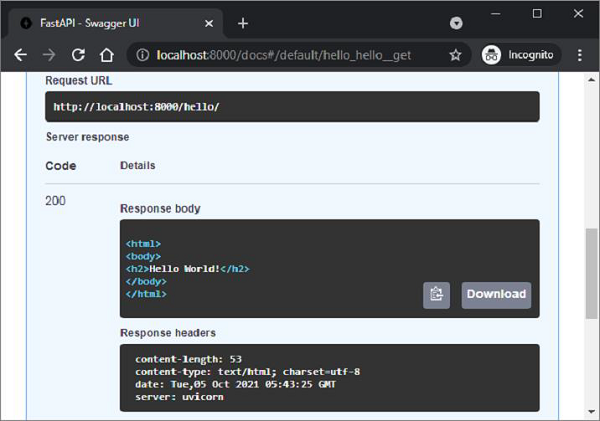
检查 API 文档后,可以看出服务器的响应正文为 HTML。
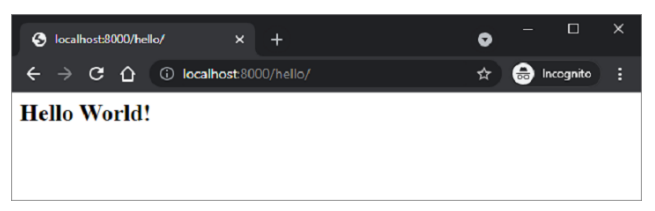
请求 URL (https://:8000/hello/) 也应该在浏览器中呈现消息。但是,呈现原始 HTML 响应非常繁琐。或者,可以呈现预构建的 HTML 页面作为模板。为此,我们需要使用 Web 模板库。
Web 模板库有一个模板引擎,它合并具有占位符变量的静态网页。来自任何来源(例如数据库)的数据都被合并以动态生成和呈现网页。FastAPI 没有任何预打包的模板库。因此,您可以自由使用任何适合您需求的库。在本教程中,我们将使用jinja2,一个非常流行的 Web 模板库。让我们首先使用 pip 安装程序安装它。
pip3 install jinja2
FastAPI 对 Jinja 模板的支持以fastapi.templates 模块中定义的jinja2Templates 类形式提供。
from fastapi.templating import Jinja2Templates
要声明模板对象,应将存储 html 模板的文件夹作为参数提供。在当前工作目录中,我们将创建一个“templates”目录。
templates = Jinja2Templates(directory="templates")
一个简单的网页“hello.html”用于呈现 Hello World 消息,也放在“templates”文件夹中。
<html>
<body>
<h2>Hello World!</h2>
</body>
</html>
我们现在将从该页面呈现 html 代码作为 HTMLResponse。让我们修改 hello() 函数如下:
from fastapi.responses import HTMLResponse
from fastapi.templating import Jinja2Templates
from fastapi import FastAPI, Request
app = FastAPI()
templates = Jinja2Templates(directory="templates")
@app.get("/hello/", response_class=HTMLResponse)
async def hello(request: Request):
   return templates.TemplateResponse("hello.html", {"request": request})
这里,模板对象的templateResponse()方法收集模板代码和请求上下文以呈现 http 响应。当我们启动服务器并访问 https://:8000/hello/ URL 时,我们可以在浏览器中看到Hello World 消息,这实际上是hello.html 的输出。
如前所述,jinja2 模板允许在 HTML 代码中嵌入某些占位符。jinja2 代码元素放在花括号内。一旦浏览器的 HTML 解析器遇到此代码,模板引擎就会接管并使用 HTTP 响应提供的变量数据填充这些代码元素。Jinja2 提供以下代码元素:
{% %} – 语句
{{ }} – 打印到模板输出的表达式
{# #} − 注释,不包含在模板输出中
# # # − 行语句
hello.html 修改如下,通过替换 name 参数来显示动态消息。
<html>
<body>
<h2>Hello {{name}} Welcome to FastAPI</h2>
</body>
</html>
操作函数hello()也修改为接受 name 作为路径参数。TemplateResponse还应包含“name”:name 的 JSON 表示以及请求上下文。
from fastapi.responses import HTMLResponse
from fastapi.templating import Jinja2Templates
from fastapi import FastAPI, Request
app = FastAPI()
templates = Jinja2Templates(directory="templates")
@app.get("/hello/{name}", response_class=HTMLResponse)
async def hello(request: Request, name:str):
   return templates.TemplateResponse("hello.html", {"request": request, "name":name})
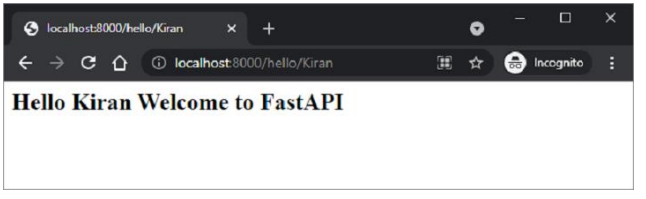
重新启动服务器并访问 https://:8000/hello/Kiran。浏览器现在使用此 URL 中的路径参数填充 jinja2 占位符。