使用Python和OpenCV在图像中查找圆形
该OpenCV平台为Python提供了一个cv2库。这可用于各种形状分析,在计算机视觉中非常有用。为了使用OpenCV识别圆形的形状,我们可以使用cv2.HoughCircles()函数。它使用霍夫变换在灰度图像中查找圆形。
常用方法
使用OpenCV在图像中查找圆形的一些常用方法如下:
-
使用霍夫变换OpenCV进行圆检测
-
使用SimpleBlobDetector进行圆检测
使用霍夫变换进行圆检测
霍夫变换是一种流行的圆检测技术。它的工作原理是将图像转换到参数空间,其中每个点代表一个可能的圆心。然后,该技术搜索定义适合图像的圆的最佳参数。
该'cv2.HoughCircles()'函数具有以下语法。
cv2.HoughCircles(image, method, dp, minDist)
其中:
-
method:这是用于检测圆的方法,默认为cv2.HOUGH_GRADIENT。
-
dp:这是累加器分辨率与图像分辨率的倒数。
-
minDist:这是检测到的圆的中心之间的最小距离。
示例
我们将以图像作为输入。然后复制它并应用此变换函数以识别输出中的圆。
下面的程序检测图像文件中是否存在圆。如果存在圆,则会突出显示它。
import cv2
import numpy as np
image = cv2.imread('circle_ellipse_2.JPG')
output = image.copy()
img = cv2.cvtColor(image, cv2.COLOR_BGR2GRAY)
# Find circles
circles = cv2.HoughCircles(img, cv2.HOUGH_GRADIENT, 1.3, 100)
# If some circle is found
if circles is not None:
   # Get the (x, y, r) as integers
   circles = np.round(circles[0, :]).astype("int")
   print(circles)
   # loop over the circles
   for (x, y, r) in circles:
      cv2.circle(output, (x, y), r, (0, 255, 0), 2)
# show the output image
cv2.imshow("circle",output)
cv2.waitKey(0)
输入图像

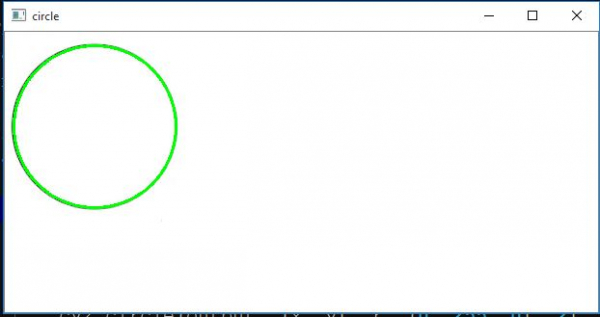
输出
代码将打印圆的坐标(93,98)和半径(84像素)。
[[93 98 84]]
我们得到以下输出:

使用SimpleBlobDetector进行圆检测
SimpleBlobDetector算法是另一种在图像中检测圆的方法,它检测图像中的斑点(或感兴趣区域)。此方法通过扫描图像以查找符合特定条件(例如最小尺寸、圆度和凸度)的斑点来工作。
步骤包括
执行SimpleBlobDetector算法所涉及的步骤如下。
-
使用OpenCV的imread()函数读取图像。
-
将输入图像转换为灰度。
-
使用cv2.SimpleBlobDetector_create()函数创建一个对象。
-
使用SimpleBlobDetector对象的detect()函数检测图像中的斑点。
-
使用检测到的斑点中心和半径在原始图像上绘制圆。
示例
在下面的示例代码中,我们首先使用imread()函数加载图像,然后使用cvtColor()函数将其转换为灰度。然后,我们使用SimpleBlobDetector_create()函数创建一个SimpleBlobDetector对象,并使用detect()函数检测图像中的斑点。
import cv2
import numpy as np

# Load image
img = cv2.imread('circles.jpg')

# Convert the image to grayscale
gray = cv2.cvtColor(img, cv2.COLOR_BGR2GRAY)

# Create a SimpleBlobDetector object
detector = cv2.SimpleBlobDetector_create()

# Detect blobs in the image
keypoints = detector.detect(gray)

# Draw circles on the original image
for keypoint in keypoints:
    x = int(keypoint.pt[0])
    y = int(keypoint.pt[1])
    r = int(keypoint.size / 2)
    cv2.circle(img, (x, y), r, (0, 255, 0), 2)

# Display the image
cv2.imshow("Detected Circles", img)
cv2.waitKey(0)
cv2.destroyAllWindows()


 数据结构
数据结构 网络
网络 关系数据库管理系统 (RDBMS)
 操作系统
操作系统 Java
Java iOS
iOS HTML
HTML CSS
CSS Android
 Python
 C语言编程
C语言编程 C++
C++ C#
C# MongoDB
 MySQL
MySQL Javascript
 PHP
PHP