- MVVM 教程
- MVVM - 首页
- MVVM – 简介
- MVVM - 优势
- MVVM - 职责
- MVVM - 第一个应用程序
- MVVM - 连接视图
- MVVM - 连接ViewModel
- MVVM - WPF 数据绑定
- MVVM - WPF 数据模板
- MVVM - ViewModel 通信
- MVVM - 层次结构和导航
- MVVM – 验证
- MVVM - 依赖注入
- MVVM - 事件
- MVVM - 单元测试
- MVVM - 框架
- MVVM - 面试问题
- MVVM 有用资源
- MVVM - 快速指南
- MVVM - 有用资源
- MVVM - 讨论
MVVM – 验证
本章将学习验证。我们还将研究一种利用 WPF 绑定已支持的功能但将其与 MVVM 组件结合起来进行验证的简洁方法。
MVVM 中的验证
当您的应用程序开始接受来自最终用户的的数据输入时,您需要考虑验证该输入。
确保它符合您的整体要求。
WPF 在绑定系统中具有一些出色的内置功能和特性,用于验证输入,并且在使用 MVVM 时您仍然可以利用所有这些特性。
请记住,支持您的验证并定义哪些规则适用于哪些属性的逻辑应该是模型或 ViewModel 的一部分,而不是视图本身。
您仍然可以使用 WPF 数据绑定支持的所有表达验证的方式,包括:
- 在设置属性时抛出异常。
- 实现 IDataErrorInfo 接口。
- 实现 INotifyDataErrorInfo。
- 使用 WPF 验证规则。
一般来说,建议使用 INotifyDataErrorInfo,它是在 WPF .NET 4.5 中引入的,它支持查询对象的与属性关联的错误,并且它还修复了所有其他选项的一些缺陷。具体来说,它允许异步验证。它允许属性与多个错误关联。
添加验证
让我们来看一个示例,在这个示例中,我们将向我们的输入视图添加验证支持,在大型应用程序中,您可能需要在应用程序的许多地方使用此功能。有时在视图上,有时在 ViewModel 上,有时在这些围绕模型对象的包装器帮助器对象上。
将验证支持放在您可以从中继承不同场景的公共基类中是一个好习惯。
基类将支持 INotifyDataErrorInfo,以便在属性更改时触发验证。
创建一个名为 ValidatableBindableBase 的新类。由于我们已经有一个用于属性更改处理的基类,让我们从它派生基类,并实现 INotifyDataErrorInfo 接口。
以下是 ValidatableBindableBase 类的实现。
using System;
using System.Collections.Generic;
using System.ComponentModel;

//using System.ComponentModel.DataAnnotations;
using System.Linq;
using System.Runtime.CompilerServices;
using System.Text;
using System.Threading.Tasks;
using System.Windows.Controls;

namespace MVVMHierarchiesDemo {

   public class ValidatableBindableBase : BindableBase, INotifyDataErrorInfo {
      private Dictionary<string, List<string>> _errors = new Dictionary<string, List<string>>();

      public event EventHandler<DataErrorsChangedEventArgs>
         ErrorsChanged = delegate { };

      public System.Collections.IEnumerable GetErrors(string propertyName) {

         if (_errors.ContainsKey(propertyName))
            return _errors[propertyName];
         else
            return null;
      }

      public bool HasErrors {
         get { return _errors.Count > 0; }
      }

      protected override void SetProperty<T>(ref T member, T val,
         [CallerMemberName] string propertyName = null) {

         base.SetProperty<T>(ref member, val, propertyName);
         ValidateProperty(propertyName, val);
      }

      private void ValidateProperty<T>(string propertyName, T value) {
         var results = new List<ValidationResult>();

         //ValidationContext context = new ValidationContext(this);
         //context.MemberName = propertyName;
         //Validator.TryValidateProperty(value, context, results);

         if (results.Any()) {
            //_errors[propertyName] = results.Select(c => c.ErrorMessage).ToList();
         } else {
            _errors.Remove(propertyName);
         }

         ErrorsChanged(this, new DataErrorsChangedEventArgs(propertyName));
      }
   }
}
现在在各自的文件夹中添加 AddEditCustomerView 和 AddEditCustomerViewModel。以下是 AddEditCustomerView.xaml 的代码。
<UserControl x:Class = "MVVMHierarchiesDemo.Views.AddEditCustomerView"
   xmlns = "http://schemas.microsoft.com/winfx/2006/xaml/presentation"
   xmlns:x = "http://schemas.microsoft.com/winfx/2006/xaml"
   xmlns:mc = "http://schemas.openxmlformats.org/markup-compatibility/2006"
   xmlns:d = "http://schemas.microsoft.com/expression/blend/2008"
   xmlns:local = "clr-namespace:MVVMHierarchiesDemo.Views"
   mc:Ignorable = "d"
   d:DesignHeight = "300" d:DesignWidth = "300">

   <Grid>
      <Grid.RowDefinitions>
         <RowDefinition Height = "Auto" />
         <RowDefinition Height = "Auto" />
      </Grid.RowDefinitions>

      <Grid x:Name = "grid1"
         HorizontalAlignment = "Left"
         DataContext = "{Binding Customer}"
         Margin = "10,10,0,0"
         VerticalAlignment = "Top">

         <Grid.ColumnDefinitions>
            <ColumnDefinition Width = "Auto" />
            <ColumnDefinition Width = "Auto" />
         </Grid.ColumnDefinitions>

         <Grid.RowDefinitions>
            <RowDefinition Height = "Auto" />
            <RowDefinition Height = "Auto" />
            <RowDefinition Height = "Auto" />
            <RowDefinition Height = "Auto" />
         </Grid.RowDefinitions>

         <Label Content = "First Name:"
            Grid.Column = "0"
            HorizontalAlignment = "Left"
            Margin = "3"
            Grid.Row = "0"
            VerticalAlignment = "Center" />

         <TextBox x:Name = "firstNameTextBox"
            Grid.Column = "1"
            HorizontalAlignment = "Left"
            Height = "23"
            Margin = "3"
            Grid.Row = "0"
            Text = "{Binding FirstName, ValidatesOnNotifyDataErrors = True}"
            VerticalAlignment = "Center"
            Width = "120" />

         <Label Content = "Last Name:"
            Grid.Column = "0"
            HorizontalAlignment = "Left"
            Margin = "3"
            Grid.Row = "1"
            VerticalAlignment = "Center" />

         <TextBox x:Name = "lastNameTextBox"
            Grid.Column = "1"
            HorizontalAlignment = "Left"
            Height = "23"
            Margin = "3"
            Grid.Row = "1"
            Text = "{Binding LastName, ValidatesOnNotifyDataErrors = True}"
            VerticalAlignment = "Center"
            Width = "120" />

         <Label Content = "Email:"
            Grid.Column = "0"
            HorizontalAlignment = "Left"
            Margin = "3"
            Grid.Row = "2"
            VerticalAlignment = "Center" />

         <TextBox x:Name = "emailTextBox"
            Grid.Column = "1"
            HorizontalAlignment = "Left"
            Height = "23"
            Margin = "3"
            Grid.Row = "2"
            Text = "{Binding Email, ValidatesOnNotifyDataErrors = True}"
            VerticalAlignment = "Center"
            Width = "120" />

         <Label Content = "Phone:"
            Grid.Column = "0"
            HorizontalAlignment = "Left"
            Margin = "3"
            Grid.Row = "3"
            VerticalAlignment = "Center" />

         <TextBox x:Name = "phoneTextBox"
            Grid.Column = "1"
            HorizontalAlignment = "Left"
            Height = "23"
            Margin = "3"
            Grid.Row = "3"
            Text = "{Binding Phone, ValidatesOnNotifyDataErrors = True}"
            VerticalAlignment = "Center"
            Width = "120" />

      </Grid>

      <Grid Grid.Row = "1">
         <Button Content = "Save"
            Command = "{Binding SaveCommand}"
            HorizontalAlignment = "Left"
            Margin = "25,5,0,0"
            VerticalAlignment = "Top"
            Width = "75" />

         <Button Content = "Add"
            Command = "{Binding SaveCommand}"
            HorizontalAlignment = "Left"
            Margin = "25,5,0,0"
            VerticalAlignment = "Top"
            Width = "75" />

         <Button Content = "Cancel"
            Command = "{Binding CancelCommand}"
            HorizontalAlignment = "Left"
            Margin = "150,5,0,0"
            VerticalAlignment = "Top"
            Width = "75" />
      </Grid>

   </Grid>

</UserControl>
以下是 AddEditCustomerViewModel 的实现。
using MVVMHierarchiesDemo.Model;

using System;
using System.Collections.Generic;
using System.Linq;
using System.Text;
using System.Threading.Tasks;

namespace MVVMHierarchiesDemo.ViewModel {

   class AddEditCustomerViewModel : BindableBase {

      public AddEditCustomerViewModel() {
         CancelCommand = new MyIcommand(OnCancel);
         SaveCommand = new MyIcommand(OnSave, CanSave);
      }

      private bool _EditMode;

      public bool EditMode {
         get { return _EditMode; }
         set { SetProperty(ref _EditMode, value);}
      }

      private SimpleEditableCustomer _Customer;

      public SimpleEditableCustomer Customer {
         get { return _Customer; }
         set { SetProperty(ref _Customer, value);}
      }

      private Customer _editingCustomer = null;

      public void SetCustomer(Customer cust) {
         _editingCustomer = cust;

         if (Customer != null) Customer.ErrorsChanged -= RaiseCanExecuteChanged;
         Customer = new SimpleEditableCustomer();
         Customer.ErrorsChanged += RaiseCanExecuteChanged;
         CopyCustomer(cust, Customer);
      }

      private void RaiseCanExecuteChanged(object sender, EventArgs e) {
         SaveCommand.RaiseCanExecuteChanged();
      }

      public MyIcommand CancelCommand { get; private set; }
      public MyIcommand SaveCommand { get; private set; }

      public event Action Done = delegate { };

      private void OnCancel() {
         Done();
      }

      private async void OnSave() {
         Done();
      }

      private bool CanSave() {
         return !Customer.HasErrors;
      }
   }
}
以下是 SimpleEditableCustomer 类的实现。
using System;
using System.Collections.Generic;
using System.Linq;
using System.Text;
using System.Threading.Tasks;

namespace MVVMHierarchiesDemo.Model {

   public class SimpleEditableCustomer : ValidatableBindableBase {
      private Guid _id;

      public Guid Id {
         get { return _id; }
         set { SetProperty(ref _id, value); }
      }

      private string _firstName;
      [Required]

      public string FirstName {
         get { return _firstName; }
         set { SetProperty(ref _firstName, value); }
      }

      private string _lastName;
      [Required]

      public string LastName {
         get { return _lastName; }
         set { SetProperty(ref _lastName, value); }
      }

      private string _email;
      [EmailAddress]

      public string Email {
         get { return _email; }
         set { SetProperty(ref _email, value); }
      }

      private string _phone;
      [Phone]

      public string Phone {
         get { return _phone; }
         set { SetProperty(ref _phone, value); }
      }
   }
}
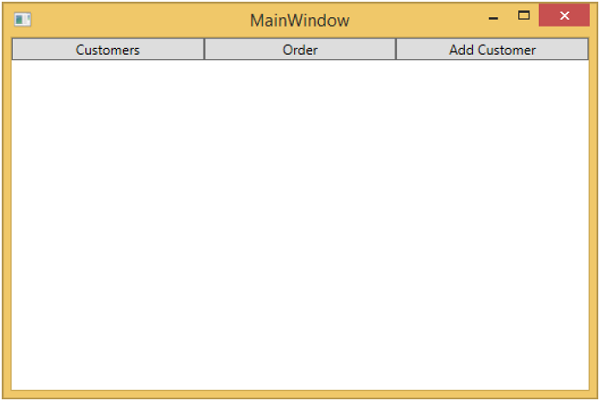
编译并执行上述代码后,您将看到以下窗口。
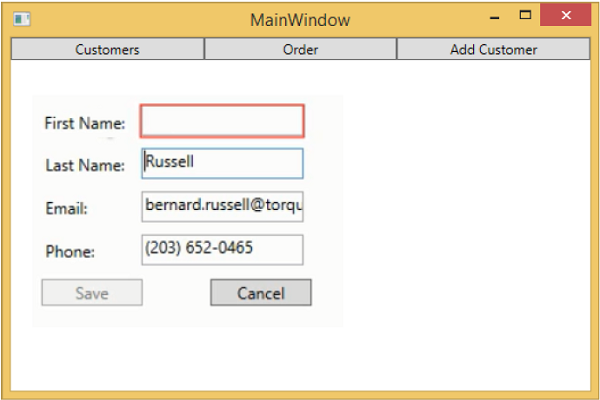
当您按下“添加客户”按钮时,您将看到以下视图。当用户留下任何字段为空时,它将被高亮显示,并且保存按钮将被禁用。