- BabylonJS 教程
- BabylonJS - 首页
- BabylonJS - 简介
- BabylonJS - 环境设置
- BabylonJS - 概述
- BabylonJS - 基本元素
- BabylonJS - 材质
- BabylonJS - 动画
- BabylonJS - 相机
- BabylonJS - 光源
- BabylonJS - 参数化形状
- BabylonJS - 网格
- 矢量位置和旋转
- BabylonJS - 贴花
- BabylonJS - Curve3
- BabylonJS - 动态纹理
- BabylonJS - 视差贴图
- BabylonJS - 镜头光晕
- BabylonJS - 创建屏幕截图
- BabylonJS - 反射探针
- 标准渲染管线
- BabylonJS - ShaderMaterial
- BabylonJS - 骨骼和骨架
- BabylonJS - 物理引擎
- BabylonJS - 播放声音和音乐
- BabylonJS 有用资源
- BabylonJS - 快速指南
- BabylonJS - 有用资源
- BabylonJS - 讨论
BabylonJS - 标准渲染管线
StandardRenderingPipeline 提供了一组与现实世界相关的后处理效果。 存在不同的后处理效果,例如灯光效果和照明效果。
在下面给出的示例中,您将看到各种效果,例如镜头效果、灯光的后处理效果等。
它使用 HDR 立方体纹理,并且纹理必须是 .hdr。 此纹理提供全景效果,您可以在旋转相机时看到。
var hdrTexture = new BABYLON.HDRCubeTexture("images/GravelPlaza_REF.hdr", scene, 512);
调用标准渲染管线类以使用以下代码行获取效果:
// Create rendering pipeline
var pipeline = new BABYLON.StandardRenderingPipeline("standard", scene, 1.0 / devicePixelRatio, null, [camera]);
pipeline.lensTexture = new BABYLON.Texture("images/lensdirt.jpg", scene)
在下面显示的演示中,我们将创建 cubetexture 环境。 我们将为此使用地面网格并将标准渲染管线应用于整个场景。
使用 lensTexture(一个图像)将其提供给它,并且您可以在移动场景时看到相同的纹理。
演示
<!doctype html>
<html>
   <head>
      <meta charset = "utf-8">
      <title>BabylonJs - Basic Element-Creating Scene</title>
      <script src = "babylon.js"></script>
      <style>
         canvas {width: 100%; height: 100%;}
      </style>
   </head>

   <body>
      <canvas id = "renderCanvas"></canvas>
      <script type = "text/javascript">
         var canvas = document.getElementById("renderCanvas");
         var engine = new BABYLON.Engine(canvas, true);

         var createScene  = function() {
            var scene = new BABYLON.Scene(engine);
            var camera = new BABYLON.ArcRotateCamera("Camera", -Math.PI / 4, Math.PI / 2.5, 200, BABYLON.Vector3.Zero(), scene);
            camera.attachControl(canvas, true);
            camera.minZ = 0.1;

            // Light
            new BABYLON.PointLight("point", new BABYLON.Vector3(0, 40, 0), scene);

            // Environment Texture
            var hdrTexture = new BABYLON.HDRCubeTexture("images/GravelPlaza_REF.hdr", scene, 512);

            // Skybox
            var hdrSkybox = BABYLON.Mesh.CreateBox("hdrSkyBox", 1000.0, scene);
            var hdrSkyboxMaterial = new BABYLON.PBRMaterial("skyBox", scene);
            hdrSkyboxMaterial.backFaceCulling = false;
            hdrSkyboxMaterial.reflectionTexture = hdrTexture.clone();
            hdrSkyboxMaterial.reflectionTexture.coordinatesMode = BABYLON.Texture.SKYBOX_MODE;
            hdrSkyboxMaterial.microSurface = 1.0;
            hdrSkyboxMaterial.cameraExposure = 0.6;
            hdrSkyboxMaterial.cameraContrast = 1.6;
            hdrSkyboxMaterial.disableLighting = true;
            hdrSkybox.material = hdrSkyboxMaterial;
            hdrSkybox.infiniteDistance = true;

            // Create mesh
            var woodbox = BABYLON.MeshBuilder.CreateBox("plane", {
               width: 40,
               height: 50,
               depth: 65
            }, scene);

            var wood = new BABYLON.PBRMaterial("wood", scene);
            wood.reflectionTexture = hdrTexture;
            wood.directIntensity = 1.5;
            wood.environmentIntensity = 0.5;
            wood.specularIntensity = 0.3;
            wood.cameraExposure = 0.9;
            wood.cameraContrast = 1.6;

            wood.reflectivityTexture = new BABYLON.Texture("images/reflectivity.png", scene);
            wood.useMicroSurfaceFromReflectivityMapAlpha = true;

            wood.albedoColor = BABYLON.Color3.White();
            wood.albedoTexture = new BABYLON.Texture("images/albedo.png", scene);
            woodbox.material = wood;

            // Create rendering pipeline
            var pipeline = new BABYLON.StandardRenderingPipeline("standard", scene, 1.0 / devicePixelRatio, null, [camera]);
            pipeline.lensTexture = new BABYLON.Texture("images/lensdirt.jpg", scene);

            // Return scene
            return scene;
         };
         var scene = createScene();
         engine.runRenderLoop(function() {
            scene.render();
         });
      </script>
   </body>
</html>
创建 images 文件夹并将 .hdr 文件存储在其中。 我们使用了来自 www.hdrlabs.com 的 images/GravelPlaza_REF.hdr。
您可以下载您选择的 .hdr 类型文件并在演示链接中使用。
输出
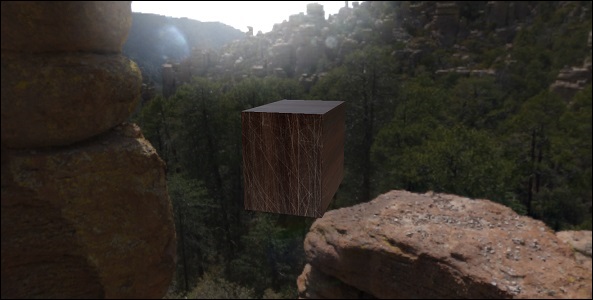
以上代码行将生成以下输出:

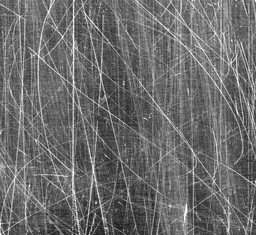
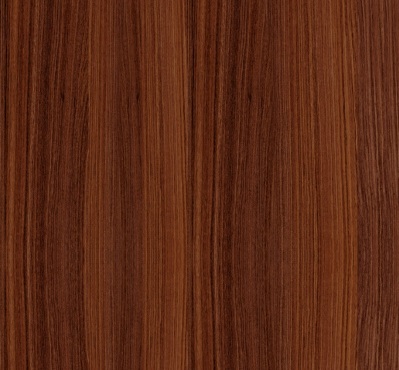
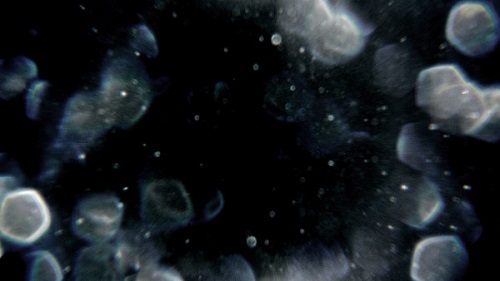
在此演示中,我们使用了图像 images/GravelPlaza_REF.hdr、images/reflectivity.png、images/albedo.png、images/lensdirt.jpg。 这些图像存储在本地 images/ 文件夹中,并在下面粘贴以供参考。 您可以下载您选择的任何图像并在演示链接中使用。 请注意,很难在这里粘贴 .hdr 文件,因为它的尺寸非常大。
Images/reflectivity.png

Images/albedo.png

Images/lensdirt.png

广告