- BabylonJS 教程
- BabylonJS - 首页
- BabylonJS - 简介
- BabylonJS - 环境搭建
- BabylonJS - 概述
- BabylonJS - 基本元素
- BabylonJS - 材质
- BabylonJS - 动画
- BabylonJS - 相机
- BabylonJS - 光照
- BabylonJS - 参数化形状
- BabylonJS - 网格
- 矢量位置和旋转
- BabylonJS - 贴花
- BabylonJS - Curve3
- BabylonJS - 动态纹理
- BabylonJS -视差贴图
- BabylonJS - 镜头光晕
- BabylonJS - 创建屏幕截图
- BabylonJS - 反射探针
- 标准渲染管线
- BabylonJS - ShaderMaterial
- BabylonJS - 骨骼和骨架
- BabylonJS - 物理引擎
- BabylonJS - 播放声音和音乐
- BabylonJS 有用资源
- BabylonJS 快速指南
- BabylonJS - 有用资源
- BabylonJS - 讨论
BabylonJS 快速指南
BabylonJS - 简介
Babylon.js 是一个用于开发 Web 端 3D 应用/视频游戏的开源 JavaScript 框架。BabylonJS 的官方网站是 www.babylonjs.com。
使用 Babylon.js 框架对用户来说很容易。它包含创建和管理 3D 对象、特效和声音等所需的所有工具。
Babylon.js 是最流行的 3D 游戏引擎之一,被广泛用于开发者。作为一个 3D 库,它提供内置函数。这些函数帮助你以高效和准确的方式实现常见的 3D 功能。
它使用基于 WebGL 和 JavaScript 的 TypeScript 语言开发。
什么是 WebGL?
WebGL(Web 图形库)是 Web 上 3D 图形的最新标准。它旨在用于渲染 2D 图形和交互式 3D 图形。它源自 OpenGL ES 2.0 库,这是一个针对手机和其他移动设备的低级 3D API。WebGL 提供与 ES 2.0(嵌入式系统)类似的功能,并在现代 3D 图形硬件上表现良好。
TypeScript
根据定义,“TypeScript 是用于应用程序规模开发的 JavaScript”。
TypeScript 是一种强类型、面向对象、编译型语言。TypeScript 既是一种语言,也是一组工具。TypeScript 是 JavaScript 的类型超集,编译成 JavaScript。换句话说,TypeScript 是 JavaScript 加上一些附加功能。
TypeScript 语言的目标是改进和确保 JavaScript 代码的生产。由于 BabylonJS 使用 TypeScript 开发,因此它具有健壮性和安全性。
BabylonJS - 环境搭建
在本章中,我们将学习如何为 BabylonJS 设置环境。
首先,访问 Babylon.js 的官方网站:www.babylonjs.com。转到下载部分,选择最新版本的 Babylon.js 并将其存储在您的文件夹中。
相应的截图如下:
你也可以去 GITHUB 并克隆 babylonjs 项目:
在你的命令行中输入:
git clone https://github.com/BabylonJS/Babylon.js.git
go to cd BabylonJS/
npm install
所需的文将会在 BabylonJS 文件夹中。
您可以使用 VSCode(Microsoft Visual Studio Code)进行编辑。代码具有内置功能,例如突出显示任何错误、突出显示语法等。您可以使用您选择的编辑器,并且不必强制使用 VSCode。
BabylonJS - 概述
BabylonJS 是一个使用 HTML5 和 WebGL 构建 3D 游戏的开源 JavaScript 框架。它托管在 github 上。BabylonJS 的官方网站是 www.babylonjs.com。
在 3D 动画的世界中,形状是用三角形绘制的。使用 WebGL,编码过程的复杂性会随着代码量的增加而增加。BabylonJS 是一个简单的解决方案,可以帮助减轻增加的复杂性。在这里,灯光、相机、引擎的 API 易于处理和创建 3D 对象。
babylonJS 的源代码是用 typescript 编写的。它被编译成 Javascript 并提供给最终用户。
要开始使用 Babylonjs,请下载 babylonjs 文件,在您的端托管它,然后您就可以开始编写您的 3D 代码了。
BabylonJS 由微软员工于 2016 年开发。微软 Windows 和设备部门的首席项目经理 David Catuhe 是 BabylonJs 开发和取得巨大成功的主要负责人。
要运行 BabylonJS,我们需要支持 WebGL 的现代浏览器。最新的浏览器,即 Internet Explorer 11+、Firefox 4+、Google Chrome 9+、Opera 15+ 等都支持 WebGL,演示可以在同一平台上执行以查看输出。
BabylonJs 提供以下功能,有助于创建不同类型的 3D 场景:
- 形状,如盒子、球体、圆柱体、锥体、高度地面
- 相机、灯光
- 网格、纹理、材质
- 精灵
- 变形
- 网格相交和碰撞检测
- 物理引擎插件
- 动作管理器
- SolidParticles
- 实例和粒子
- 支持骨骼和骨架
- 向场景添加音乐和声音
除了它自己的网格之外,BabylonJS 还允许使用从 Blender、FBX 和 3DS Max 等第三方 3D 软件创建的网格。
Blender
Blender 是一款开源的 3D 计算机图形软件产品,用于创建动画场景、3D 打印模型、视频游戏等。Blender 提供 babylon 文件,这些文件将与 Babylon 一起用于渲染网格。本教程后续章节将解释如何将 Blender 文件转换为 babylon 文件。
FBX
也称为 filmbox,它有助于 3D 动画和纹理绘画软件。FBX 文件以 .fbx 扩展名保存。
MAX
MAX 软件可以帮助您在游戏中创建庞大的世界、为设计创建令人惊叹的场景以及引人入胜的虚拟现实体验。
BabylonJS - 基本元素
Babylon.js 是一个流行的框架,可以帮助开发者构建 3D 游戏。它具有内置函数来实现 3D 功能。让我们使用 Babylon.js 构建一个简单的演示,并了解入门所需的基本功能。
我们将首先创建一个包含 Babylon.js 基本元素的演示。此外,我们还将学习 Babylon.js 的各种功能。
示例演示 1
在本节中,我们将学习如何创建一个包含 BabylonJS 基本元素的演示。
<!doctype html>
<html>
   <head>
      <meta charset = "utf-8">
      <title> Babylon.JS : Demo2</title>
      <script src = "babylon.js"></script>
      <style>
         canvas { width: 100%; height: 100%;}
      </style>
   </head>

   <body>
      <canvas id = "renderCanvas"></canvas>
      <script type = "text/javascript">
         var canvas = document.getElementById("renderCanvas");
         var engine = new BABYLON.Engine(canvas, true);
         var createScene  = function() {
            var scene = new BABYLON.Scene(engine);
            scene.clearColor = new BABYLON.Color3(1, 0.8, 0.8);

            var camera = new BABYLON.ArcRotateCamera("Camera", 1, 0.8, 10, new BABYLON.Vector3(0, 0, 0), scene);
            scene.activeCamera.attachControl(canvas);

            var light0 = new BABYLON.PointLight("Omni", new BABYLON.Vector3(0, 0, 10), scene);

            var origin = BABYLON.Mesh.CreateSphere("origin", 10, 1.0, scene);

            var torus = BABYLON.Mesh.CreateTorus("torus", 5, 1, 10, scene, false);

            var box = BABYLON.Mesh.CreateBox("box", 3.0, scene);
            box.position = new BABYLON.Vector3(-5, 0, 0);

            var cylinder = BABYLON.Mesh.CreateCylinder("cylinder", 3, 3, 3, 6, 1, scene, false);

            cylinder.position = new BABYLON.Vector3(5, 0, 0);
            return scene;
         };
         var scene = createScene();
         engine.runRenderLoop(function() {
            scene.render();
         });
      </script>
   </body>
</html>
要运行 BabylonJS,我们需要支持 WebGL 的现代浏览器。最新的浏览器 - Internet Explorer 11+、Firefox 4+、Google Chrome 9+、Opera 15+ 等都支持 WebGL,演示可以在相同的平台上执行以查看输出。创建一个目录来存储 babylonjs 的文件。从 BabylonJS 网站获取最新的 BabylonJS 脚本文件。本教程中的所有演示链接都使用 babylonjs 3.3 版本进行了测试。
步骤 1
创建一个简单的 html 页面并包含 Babylon.js 文件。
创建一个 canvas 标签,BabylonJS 用于在 body 标签内渲染内容,如下所示。
向 canvas 添加 css 以占据屏幕的全部宽度和高度。
<!doctype html>
<html>
   <head>
      <meta charset = "utf-8">
      <title>MDN Games: Babylon.js demo - shapes</title>
      <script src = "babylon.js"></script>

      <style>
         canvas {width: 100%; height: 100%;}
      </style>
   </head>
   <body>
      <canvas id = "renderCanvas"></canvas>
   </body>
</html>
步骤 2
现在让我们开始使用 BabylonJS 代码在画布上渲染内容。
<!doctype html>
<html>
   <head>
      <meta charset = "utf-8">
      <title>MDN Games: Babylon.js demo - shapes</title>
      <script src = "babylon.js"></script>
      <style>
         canvas {width: 100%; height: 100%;}
      </style>
   </head>
   <body>
      <canvas id = "renderCanvas"></canvas>
      <script type = "text/javascript">
         var canvas = document.getElementById("renderCanvas");
         var engine = new BABYLON.Engine(canvas, true);
      </script>
   </body>
</html>
现在,将脚本标签添加到 html 结构中,并将画布引用存储在变量 canvas 中。
要开始使用 Babylon.js,请创建一个引擎实例并将画布引用传递给它以进行渲染。
<script type = "text/javascript">
   var canvas = document.getElementById("renderCanvas");
   var engine = new BABYLON.Engine(canvas, true);
</script>
BABYLON 全局对象包含引擎中可用的所有 Babylon.js 函数。
步骤 3
在此步骤中,我们将首先创建一个场景。
场景是所有内容将显示的地方。我们将创建不同类型的对象并将它们添加到场景中,使其在屏幕上可见。要创建场景,请将以下代码添加到已创建的 html 结构中。目前,我们将把它作为对上面 html 结构的延续添加到已创建的代码中。
var createScene  = function() {
   var scene = new BABYLON.Scene(engine);
   scene.clearColor = new BABYLON.Color3(1, 0.8, 0.8);
};
var scene = createScene();
最终的 html 文件如下所示:
<!doctype html>
<html>
   <head>
      <meta charset = "utf-8">
      <title>MDN Games: Babylon.js demo - shapes</title>
      <script src = "babylon.js"></script>
      <style>
         canvas {width: 100%; height: 100%;}
      </style>
   </head>

   <body>
      <canvas id = "renderCanvas"></canvas>
      <script type = "text/javascript">
         var canvas = document.getElementById("renderCanvas");
         var engine = new BABYLON.Engine(canvas, true);

         var createScene  = function() {
            var scene = new BABYLON.Scene(engine);
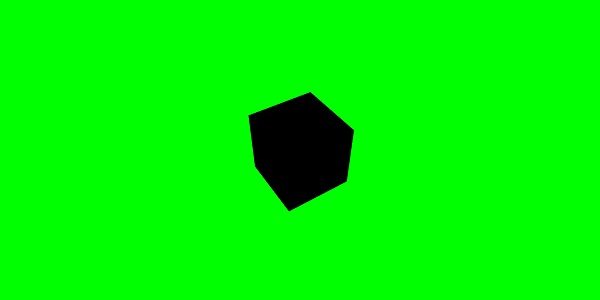
            scene.clearColor = new BABYLON.Color3(0, 1, 0);
            return scene;
         };
         var scene = createScene();
      </script>
   </body>
</html>
在上面的示例中,定义了 CreateScene 函数,而 var scene = createScene() 正在调用该函数。
CreateScene 函数在其内部创建了场景,下一行使用 BABYLON.Color3(1, 0.8, 0.8) 为场景添加颜色,这里的颜色是粉红色。
var scene = new BABYLON.Scene(engine);
scene.clearColor = new BABYLON.Color3(1, 0.8, 0.8);
目前在浏览器中执行上述演示链接不会在浏览器屏幕上显示任何内容。还需要向代码中添加一个步骤,即 engine.runRenderLoop,如步骤 4 所示。
步骤 4
要使场景实际在屏幕上可见,我们需要使用 engine.runRenderLoop 调用来渲染它。现在让我们看看这是如何完成的。
渲染循环
engine.runRenderLoop(function() {
   scene.render();
});
Engine.runRenderLoop 函数调用 scene.render,这将渲染场景并使其对用户可见。最终的 .html 文件如下所示:
<!doctype html>
<html>
   <head>
      <meta charset = "utf-8">
      <title>BabylonJs - Basic Element-Creating Scene</title>
      <script src = "babylon.js"></script>
      <style>
         canvas {width: 100%; height: 100%;}
      </style>
   </head>

   <body>
      <canvas id = "renderCanvas"></canvas>
      <script type = "text/javascript">
         var canvas = document.getElementById("renderCanvas");
         var engine = new BABYLON.Engine(canvas, true);
         var createScene  = function() {
            var scene = new BABYLON.Scene(engine);
            scene.clearColor = new BABYLON.Color3(1, 0.8, 0.8);
            return scene;
         };
         var scene = createScene();
         engine.runRenderLoop(function() {
            scene.render();
         });
      </script>
   </body>
</html>
将上述文件保存为 basicscene.html 并检查浏览器中的输出。显示的屏幕为粉红色,如下所示:

步骤 5
现在我们有了场景,我们必须向其中添加相机。
添加相机和灯光
下面给出的代码将相机添加到场景中。Babylon 中可以使用许多类型的相机。
ArcRotateCamera 是一种围绕目标旋转的相机。它可以使用鼠标、光标或触摸事件进行控制。所需的参数是名称、alpha、beta、radius、target 和 scene。我们将在后续部分讨论相机的详细信息。
var camera = new BABYLON.ArcRotateCamera("Camera", 1, 0.8, 10, new BABYLON.Vector3(0, 0, 0), scene);
现在,我们需要了解如何添加灯光。
灯光用于产生每个像素接收到的漫射和镜面颜色。有许多类型的灯光。我们将在灯光部分学习不同类型的灯光。
这里我在场景中使用 PointLight。PointLight 像太阳一样向各个方向发射。参数是名称、位置和要使用的场景。
要添加灯光,请执行以下代码:
var light0 = new BABYLON.PointLight("Omni", new BABYLON.Vector3(0, 0, 10), scene);
步骤 6
现在让我们看看如何添加形状。
添加形状
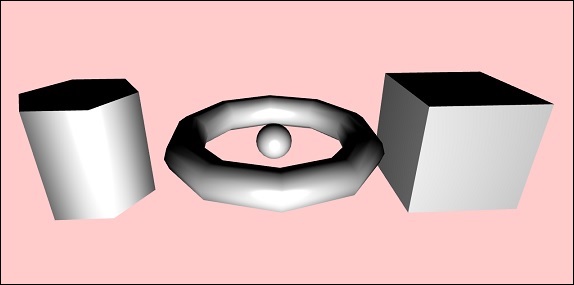
上面共享的演示添加了 4 个形状。
- 球体
- 环面
- 盒子
- 圆柱体
要添加球体,请执行以下代码:
var origin = BABYLON.Mesh.CreateSphere("origin", 10, 1.0, scene);
添加球体后,代码如下所示:
<!doctype html>
<html>
   <head>
      <meta charset="utf-8">
      <title>MDN Games: Babylon.js demo - shapes</title>
      <script src = "babylon.js"></script>
      <style>
         html,body,canvas { margin: 0; padding: 0; width: 100%; height: 100%; font-size: 0; }
      </style>
   </head>

   <body>
      <canvas id = "renderCanvas"></canvas>
      <script type = "text/javascript">
         var canvas = document.getElementById("renderCanvas");
         var engine = new BABYLON.Engine(canvas, true);

         var createScene  = function() {
            var scene = new BABYLON.Scene(engine);
            scene.clearColor = new BABYLON.Color3(1, 0.8, 0.8);
            var camera = new BABYLON.ArcRotateCamera("Camera", 1, 0.8, 10, new BABYLON.Vector3(0, 0, 0), scene);
            var light0 = new BABYLON.PointLight("Omni", new BABYLON.Vector3(0, 0, 10), scene);
            var origin = BABYLON.Mesh.CreateSphere("origin", 10, 1.0, scene);
            scene.activeCamera.attachControl(canvas);
            return scene;
         };
         var scene = createScene();
         engine.runRenderLoop(function() {
            scene.render();
         });
      </script>
   </body>
</html>
输出
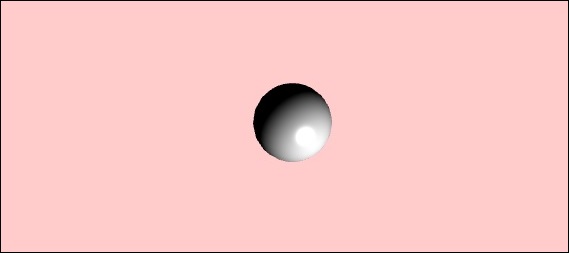
以上代码生成以下输出:
现在让我们添加其他形状 - 环面和盒子。执行以下代码以添加环面形状。
var torus = BABYLON.Mesh.CreateTorus("torus", 5, 1, 10, scene, false);
var box = BABYLON.Mesh.CreateBox("box", 3.0, scene);
box.position = new BABYLON.Vector3(-5, 0, 0);
我们将向盒子添加一个位置。BABYLON.Vector3(-5, 0, 0) 获取 x、y 和 z 方向。
执行后,上述代码生成以下输出:
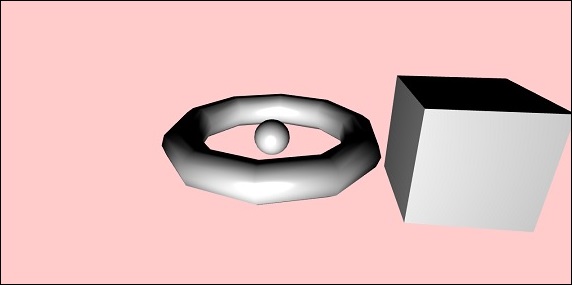
现在让我们添加上图截图中显示的最终形状 - 圆柱体。
var cylinder = BABYLON.Mesh.CreateCylinder("cylinder", 3, 3, 3, 6, 1, scene, false);
cylinder.position = new BABYLON.Vector3(5, 0, 0);
位置被添加到圆柱体,它是 x 方向 5。最终代码如下所示:
<!doctype html>
<html>
   <head>
      <meta charset = "utf-8">
      <title> Babylon.JS : Demo2</title>
      <script src = "babylon.js"></script>
      <style>
         canvas { width: 100%; height: 100%;}
      </style>
   </head>

   <body>
      <canvas id = "renderCanvas"></canvas>
      <script type = "text/javascript">
         var canvas = document.getElementById("renderCanvas");
         var engine = new BABYLON.Engine(canvas, true);
         var createScene  = function() {
            var scene = new BABYLON.Scene(engine);
            scene.clearColor = new BABYLON.Color3(1, 0.8, 0.8);

            var camera = new BABYLON.ArcRotateCamera("Camera", 1, 0.8, 10, new BABYLON.Vector3(0, 0, 0), scene);
            scene.activeCamera.attachControl(canvas);

            var light0 = new BABYLON.PointLight("Omni", new BABYLON.Vector3(0, 0, 10), scene);

            var origin = BABYLON.Mesh.CreateSphere("origin", 10, 1.0, scene);

            var torus = BABYLON.Mesh.CreateTorus("torus", 5, 1, 10, scene, false);

            var box = BABYLON.Mesh.CreateBox("box", 3.0, scene);
            box.position = new BABYLON.Vector3(-5, 0, 0);

            var cylinder = BABYLON.Mesh.CreateCylinder("cylinder", 3, 3, 3, 6, 1, scene, false);
            cylinder.position = new BABYLON.Vector3(5, 0, 0);
            return scene;
         };
         var scene = createScene();
         engine.runRenderLoop(function() {
            scene.render();
         });
      </script>
   </body>
</html>
输出
执行后,上述代码将生成以下输出:
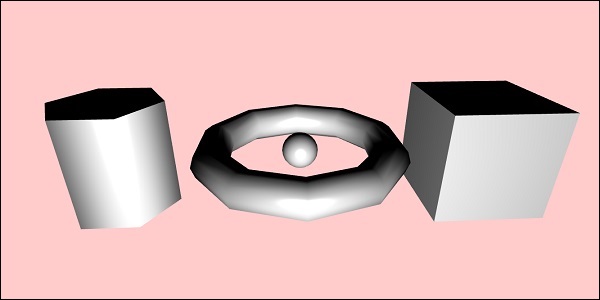
形状将根据您移动光标的方向移动;这是通过将相机的附加控件附加到场景来完成的。
scene.activeCamera.attachControl(canvas);
现在让我们详细讨论每个形状。
以下是所有形状和语法的摘要:
| 序号 | 形状 | 语法 |
|---|---|---|
| 1 | 盒子 | var box = BABYLON.Mesh.CreateBox( "box", 6.0, scene, false, BABYLON.Mesh.DEFAULTSIDE); |
| 2 | 球体 | var sphere = BABYLON.Mesh.CreateSphere( "sphere", 10.0, 10.0, scene, false, BABYLON.Mesh.DEFAULTSIDE); |
| 3 | 平面 | var plane = BABYLON.Mesh.CreatePlane( "plane", 10.0, scene, false, BABYLON.Mesh.DEFAULTSIDE); |
| 4 | 圆盘 | var disc = BABYLON.Mesh.CreateDisc( "disc", 5, 30, scene, false, BABYLON.Mesh.DEFAULTSIDE); |
| 5 | 圆柱体 | var cylinder = BABYLON.Mesh.CreateCylinder( "cylinder", 3, 3, 3, 6, 1, scene, false, BABYLON.Mesh.DEFAULTSIDE); |
| 6 | 环面 | var torus = BABYLON.Mesh.CreateTorus( "torus", 5, 1, 10, scene, false, BABYLON.Mesh.DEFAULTSIDE); |
| 7 | 纽结 | var knot = BABYLON.Mesh.CreateTorusKnot( "knot", 2, 0.5, 128, 64, 2, 3, scene, false, BABYLON.Mesh.DEFAULTSIDE); |
| 8 | 线网格 | var lines = BABYLON.Mesh.CreateLines("lines", [
new BABYLON.Vector3(-10, 0, 0),
new BABYLON.Vector3(10, 0, 0),
new BABYLON.Vector3(0, 0, -10),
new BABYLON.Vector3(0, 0, 10)
], scene);
|
| 9 | 虚线 | var dashedlines = BABYLON.Mesh.CreateDashedLines( "dashedLines", [v1, v2, ... vn], dashSize, gapSize, dashNb, scene); |
| 10 | 飘带 | var ribbon = BABYLON.Mesh.CreateRibbon( "ribbon", [path1, path2, ..., pathn], false, false, 0, scene, false, BABYLON.Mesh.DEFAULTSIDE); |
| 11 | 管 | var tube = BABYLON.Mesh.CreateTube( "tube", [V1, V2, ..., Vn], radius, tesselation, radiusFunction, cap, scene, false, BABYLON.Mesh.DEFAULTSIDE); |
| 12 | 地面 | var ground = BABYLON.Mesh.CreateGround( "ground", 6, 6, 2, scene); |
| 13 | 来自高度图的地面 | var ground = BABYLON.Mesh.CreateGroundFromHeightMap( "ground", "heightmap.jpg", 200, 200, 250, 0, 10, scene, false, successCallback); |
| 14 | 平铺地面 | var precision = {"w" : 2, "h" : 2};
var subdivisions = {'h' : 8, 'w' : 8};
var tiledGround = BABYLON.Mesh.CreateTiledGround(
"Tiled Ground", -3, -3, 3, 3,
subdivisions, precision, scene, false);
|
基本元素 - 位置、旋转和缩放
在本节中,我们将学习如何定位、旋转或缩放到目前为止我们添加的元素。
我们创建了盒子、球体、圆柱体、纽结等。现在,我们将看到如何定位、缩放和旋转形状。
基本元素 - 父子关系
使用父子关系,我们将创建网格之间的父子关系,并观察它们的行为。因此,你对父对象应用的任何变换,也将应用于子对象。让我们通过下面的演示来了解这一点。
演示
<!doctype html>
<html>
   <head>
      <meta charset = "utf-8">
      <title>BabylonJs - Basic Element-Creating Scene</title>
      <script src = "babylon.js"></script>
      <style>
         canvas {width: 100%; height: 100%;}
      </style>
   </head>

   <body>
      <canvas id = "renderCanvas"></canvas>
      <script type = "text/javascript">
         var canvas = document.getElementById("renderCanvas");
         var engine = new BABYLON.Engine(canvas, true);
         var createScene  = function() {
            var scene = new BABYLON.Scene(engine);
            scene.clearColor = new BABYLON.Color3(0, 1, 0);

            var camera = new BABYLON.ArcRotateCamera("Camera", 1, 0.8, 10, new BABYLON.Vector3(0, 0, 0), scene);
            scene.activeCamera.attachControl(canvas);

            var light = new BABYLON.PointLight("Omni", new BABYLON.Vector3(0, 100, 100), scene);

            var boxa = BABYLON.Mesh.CreateBox("BoxA", 1.0, scene);
            boxa.position = new BABYLON.Vector3(0,0.5,0);

            var boxb = BABYLON.Mesh.CreateBox("BoxB", 1.0, scene);
            boxb.position = new BABYLON.Vector3(3,0.5,0);
            boxb.scaling = new BABYLON.Vector3(2,1,2);

            var boxc = BABYLON.Mesh.CreateBox("BoxC", 1.0, scene);
            boxc.parent = boxb;
            boxc.position.z = -3;

            var ground = BABYLON.Mesh.CreateGround("ground1", 10, 6, 2, scene);
            ground.position = new BABYLON.Vector3(0,0,0);
            return scene;
         };
         var scene = createScene();
         engine.runRenderLoop(function() {
            scene.render();
         });
      </script>
   </body>
</html>
输出
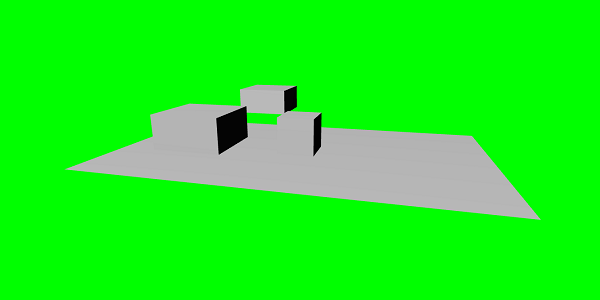
解释
我们在上面的网格中创建了3个盒子。在演示中,应用了boxb的缩放,并将其设置为boxc的父对象,由于其父对象boxb也进行了缩放,因此boxc也会缩放。你可以使用演示来查看父子链接是如何工作的。
要创建网格,你必须使用另一个网格的父对象:
child.parent = parentmesh;
基本元素 - 环境
在本节中,让我们讨论场景环境。我们将讨论场景中的场景背景颜色、环境色、天空盒、雾模式等。
我们已经看到了我们目前为止创建的场景背景颜色演示。
场景背景颜色
让我们看看场景背景颜色是如何工作的。
语法
以下是场景背景颜色的语法:
scene.clearColor = new BABYLON.Color3(0.5, 0.8, 0.5);
or
scene.clearColor = BABYLON.Color3.Blue();
上述属性将更改场景的背景颜色。
场景环境色
让我们看看场景环境色是如何工作的。
语法
以下是场景环境色的语法:
scene.ambientColor = new BABYLON.Color3(0.3, 0.3, 0.3);
AmbientColor与StandardMaterial的环境色和纹理一起使用。如果场景没有ambientColor,则StandardMaterial.ambientColor和StandardMaterial.ambientTexture无效。一旦应用了场景的ambientColor,StandardMaterial环境色/环境纹理将被激活。默认情况下,场景的scene.ambientColor设置为Color3 (0, 0, 0),这意味着没有环境色。
场景雾模式
我们现在将了解场景雾模式是如何工作的。
语法
以下是场景雾模式的语法。
scene.fogMode = BABYLON.Scene.FOGMODE_EXP;
以下是可用的雾模式列表:
BABYLON.Scene.FOGMODE_NONE - 默认值,雾被禁用。
BABYLON.Scene.FOGMODE_EXP - 雾密度遵循指数函数。
BABYLON.Scene.FOGMODE_EXP2 - 与上面相同,但速度更快。
BABYLON.Scene.FOGMODE_LINEAR - 雾密度遵循线性函数。
如果定义了雾模式EXP或EXP2,则可以如下定义其密度:
scene.fogDensity = 0.01;
如果雾模式为LINEAR,则可以如下定义雾的起始和结束位置:
scene.fogStart = 20.0;
scene.fogEnd = 60.0;
要为雾着色,请执行以下代码:
scene.fogColor = new BABYLON.Color3(0.9, 0.9, 0.85);
天空盒
天空盒是在游戏中创建背景的一种方法,它使场景看起来更逼真。它更像是你屏幕周围的一个包装器,用作材质的纹理覆盖它。选择合适的图像,以使你想要创建的场景看起来更逼真。要创建天空盒,你必须创建一个盒子并应用材质。我们将在后续章节中详细讨论不同的材质。
现在,我们将看到如何使用盒子和材质创建天空盒。
var skybox = BABYLON.Mesh.CreateBox("skyBox", 100.0, scene);
我们将创建一个大小为100的盒子,以便它覆盖整个场景。我们将首先为盒子赋予材质,操作如下:
var skyboxMaterial = new BABYLON.StandardMaterial("skyBox", scene);
我们将为此材质分配属性。
skyboxMaterial.reflectionTexture = new BABYLON.CubeTexture("images/cubetexture/skybox", scene);
我们必须使用反射纹理,它基本上用于创建类似镜子的材质。反射纹理属性使用CubeTexture,它以图像作为输入。由于立方体有6个面,因此天空盒所需的图像必须是6个,即内部必须存储为skybox_nx、skybox_ny、skybox_nz、skybox_px、skybox_py、skybox_pz。用于天空盒的图像粘贴在下面;它们是立方体六个面上所有面的图像。当你将纹理应用于形状时,它会提供所用图像的细节,并使场景看起来更逼真。我们使用了SKYBOX_MODE作为坐标模式,如下所示:
skyboxMaterial.reflectionTexture.coordinatesMode = BABYLON.Texture.SKYBOX_MODE;
材质还使用了其他属性,例如backfaceCulling、diffuseColor、specularColor、disableLighting等。这些属性将在材质部分详细解释。
在演示中,我们将展示一个使用天空盒创建的环境场景,其中一个球体在场景中旋转,一个平面四处移动。雾被应用于场景,当你旋转时你会注意到。
演示环境场景
<!doctype html>
<html>
   <head>
      <meta charset = "utf-8">
      <title> Babylon.JS : Demo</title>
      <script src = "babylon.js"></script>
      <style>
         canvas { width: 100%; height: 100%;}
      </style>
   </head>

   <body>
      <canvas id = "renderCanvas"></canvas>
      <script type = "text/javascript">
         var canvas = document.getElementById("renderCanvas");
         var engine = new BABYLON.Engine(canvas, true);
         var createScene  = function() {
            var scene = new BABYLON.Scene(engine);
            var light = new BABYLON.PointLight("Omni",
            new BABYLON.Vector3(10, 50, 50), scene);

            var camera = new BABYLON.ArcRotateCamera("Camera", 0.4, 1.2, 20, new BABYLON.Vector3(-10, 0, 0), scene);
            camera.attachControl(canvas, true);

            var material1 = new BABYLON.StandardMaterial("mat1", scene);
            material1.diffuseTexture = new BABYLON.Texture("images/tsphere.jpg", scene);

            var sphere = BABYLON.Mesh.CreateSphere("red", 32, 2, scene);
            sphere.setPivotMatrix(BABYLON.Matrix.Translation(2, 0, 0));
            sphere.material = material1;

            // Fog
            scene.fogMode = BABYLON.Scene.FOGMODE_EXP;
            scene.fogColor = new BABYLON.Color3(0.9, 0.9, 0.85);
            scene.fogDensity = 0.01;

            //skybox
            var skybox = BABYLON.Mesh.CreateBox("skyBox", 100.0, scene);

            var skyboxMaterial = new BABYLON.StandardMaterial("skyBox", scene);
            skyboxMaterial.backFaceCulling = false;

            skyboxMaterial.reflectionTexture = new BABYLON.CubeTexture("images/cubetexture/skybox", scene);
            skyboxMaterial.reflectionTexture.coordinatesMode = BABYLON.Texture.SKYBOX_MODE;

            skyboxMaterial.diffuseColor = new BABYLON.Color3(0, 0, 0);

            skyboxMaterial.specularColor = new BABYLON.Color3(0, 0, 0);

            skyboxMaterial.disableLighting = true;
            skybox.material = skyboxMaterial;


            var spriteManagerPlayer = new BABYLON.SpriteManager("playerManager", "images/plane.png", 8, 1000, scene);

            var plane = new BABYLON.Sprite("plane", spriteManagerPlayer);
            plane.position.x = -2;
            plane.position.y = 2;
            plane.position.z = 0;


            var alpha = 0;
            var x = 2;
            var y = 0;
            scene.registerBeforeRender(function () {
               scene.fogDensity = Math.cos(alpha) / 10;
               alpha += 0.02;
               sphere.rotation.y += 0.01;
               y += 0.05;
               if (x > 50) {
                  x = -2;
               }
               plane.position.x = -x;
               x += 0.02;
            });
            return scene;
         };
         var scene = createScene();
         engine.runRenderLoop(function() {
            scene.render();
         });
      </script>
   </body>
</html>
输出

解释
在上面的示例中,我们使用以下代码进行雾化:
scene.fogMode = BABYLON.Scene.FOGMODE_EXP;
scene.fogColor = new BABYLON.Color3(0.9, 0.9, 0.85);
scene.fogDensity = 0.01;
scene.fogMode = BABYLON.Scene.FOGMODE_EXP - 在这里,雾密度遵循指数函数。
scene.registerBeforeRender = 通过此方法,雾密度将如下变化:
var alpha = 0;
scene.registerBeforeRender(function () {
   scene.fogDensity = Math.cos(alpha) / 10;
   alpha += 0.02;
});
alpha的值随着循环的进行而以0.02递增,如上函数所示。
在这里,我们添加了一个平面精灵图像,并使用scene.registerBeforeRender函数更改其位置,如下所示:
var alpha = 0;
var x = 2;
var y = 0;
scene.registerBeforeRender(function () {
   scene.fogDensity = Math.cos(alpha) / 10;
   alpha += 0.02;
   sphere.rotation.y += 0.01;
   y += 0.05;
   if (x > 50) {
      x = -2;
   }
   plane.position.x = -x;
   x += 0.02;
});
return scene;
};s
我们将更改平面的x轴,并在其超过50时重置它。
此外,球体沿y轴旋转。这在上例中显示。值使用sphere.rotation.y更改。
球体使用的纹理是:images/tshphere.jpg。这些图像是本地存储在images/文件夹中,并在下面粘贴以供参考。你可以下载任何你选择的图像,并在演示链接中使用。
我们需要六张立方体图像。这些图像是本地存储在images/cubetexture/文件夹中。你可以下载任何你选择的图像,但是当你保存它时,请将其保存为nameoftheimage_nx、nameoftheimage_ny、nameoftheimage_nz、nameoftheimage_px、nameoftheimage_py、nameoftheimage_pz。请注意,选择的图像应按顺序排列,以便背景看起来像天空盒显示的那样逼真。
用于制作天空盒的图像是:images/cubetexture/skybox
skybox_nx
skybox_ny

skybox_nz

skybox_px

skybox_py
skybox_pz
BabylonJS - 材质
材质就像物体的衣服。你可以添加颜色、纹理并用它包裹你的网格。你可以使用相同的材质覆盖许多网格。网格可以是我们在上一章示例中看到的场景 - 穿过天空的平面。
在本章中,我们将学习如何为网格添加颜色、纹理和反射。
我们将为已创建的场景添加材质。我们将通过为我们创建的所有形状添加材质来进行。
让我们考虑一些示例,看看如何添加材质。
语法
var materialforshapes = new BABYLON.StandardMaterial("texture1", scene);
由于这是默认材质,因此上述材质不会更改任何内容。我们将使用可用的属性使对象看起来更吸引人。
可用的属性如下:
看看这些应用于材质的属性如何改变网格的外观和感觉。
基本材质属性 - FresnelParameters
菲涅尔是BabylonJS在standardmaterial上添加的新功能。它允许更改应用于形状的颜色。你可以通过使用简单的菲涅尔获得类似玻璃的反射。菲涅尔将使你在边缘获得更多反射,而不是在中心获得所有反射。
菲涅尔可用的属性如下:
StandardMaterial.diffuseFresnelParameters
StandardMaterial.opacityFresnelParameters
StandardMaterial.reflectionFresnelParameters
StandardMaterial.emissiveFresnelParameters
StandardMaterial.refractionFresnelParameters
演示
<!doctype html>
<html>
   <head>
      <meta charset = "utf-8">
      <title>BabylonJs - Basic Element-Creating Scene</title>
      <script src = "babylon.js"></script>
      <style>
         canvas {width: 100%; height: 100%;}
      </style>
   </head>

   <body>
      <canvas id = "renderCanvas"></canvas>
      <script type = "text/javascript">
         var canvas = document.getElementById("renderCanvas");
         var engine = new BABYLON.Engine(canvas, true);
         var createScene  = function() {
            var scene = new BABYLON.Scene(engine);

            var camera = new BABYLON.ArcRotateCamera("camera1", 0, 0, 10, BABYLON.Vector3.Zero(), scene);

            camera.setPosition(new BABYLON.Vector3(0, 5, -10));

            camera.attachControl(canvas);
            camera.upperBetaLimit = Math.PI / 2;
            camera.lowerRadiusLimit = 4;

            var light = new BABYLON.HemisphericLight("light1", new BABYLON.Vector3(0, 1, 0), scene);
            light.intensity = 0.7;

            var knot = BABYLON.Mesh.CreateTorusKnot("knot", 1, 0.4, 128, 64, 2, 3, scene);
            var yellowSphere = BABYLON.Mesh.CreateSphere("yellowSphere", 16, 1.5, scene);
            yellowSphere.setPivotMatrix(BABYLON.Matrix.Translation(3, 0, 0));
            var yellowMaterial = new BABYLON.StandardMaterial("yellowMaterial", scene);
            yellowMaterial.diffuseColor = BABYLON.Color3.Yellow();
            yellowSphere.material = yellowMaterial;

            // Ground
            var ground = BABYLON.Mesh.CreateBox("Mirror", 1.0, scene);
            ground.scaling = new BABYLON.Vector3(100.0, 0.01, 100.0);
            ground.material = new BABYLON.StandardMaterial("ground", scene);
            ground.material.diffuseTexture = new BABYLON.Texture("images/rainbow.png", scene);
            ground.material.diffuseTexture.uScale = 10;
            ground.material.diffuseTexture.vScale = 10;
            ground.position = new BABYLON.Vector3(0, -2, 0);

            // Main material
            var mainMaterial = new BABYLON.StandardMaterial("main", scene);
            knot.material = mainMaterial;

            var probe = new BABYLON.ReflectionProbe("main", 512, scene);
            probe.renderList.push(yellowSphere);
            probe.renderList.push(ground);
            mainMaterial.diffuseColor = new BABYLON.Color3(1, 0.5, 0.5);
            mainMaterial.refractionTexture = probe.cubeTexture;
            mainMaterial.refractionFresnel<h3>Parameters</h3> = new BABYLON.Fresnel<h3>Parameters</h3>();
            mainMaterial.refractionFresnel<h3>Parameters</h3>.bias = 0.5;
            mainMaterial.refractionFresnel<h3>Parameters</h3>.power = 16;
            mainMaterial.refractionFresnel<h3>Parameters</h3>.leftColor = BABYLON.Color3.Black();
            mainMaterial.refractionFresnel<h3>Parameters</h3>.rightColor = BABYLON.Color3.White();
            mainMaterial.indexOfRefraction = 1.05;

            // Fog
            scene.fogMode = BABYLON.Scene.FOGMODE_LINEAR;
            scene.fogColor = scene.clearColor;
            scene.fogStart = 20.0;
            scene.fogEnd = 50.0;

            // Animations
            scene.registerBeforeRender(function () {
               yellowSphere.rotation.y += 0.01;
               //  greenSphere.rotation.y += 0.01;
            });
            return scene;
         };
         var scene = createScene();
         engine.runRenderLoop(function() {
            scene.render();
         });
      </script>
   </body>
</html>
输出
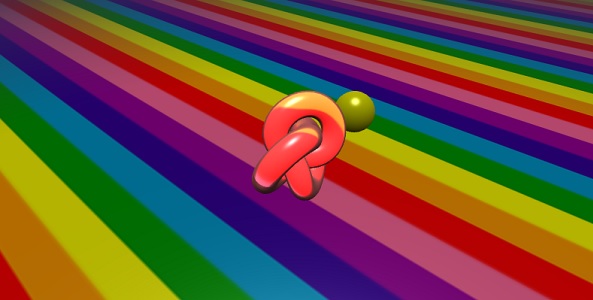
以上代码行生成以下输出:
解释
以下代码应用菲涅尔效果。左侧和右侧的颜色应用于网格的边缘。
mainMaterial.refractionFresnelParameters = new BABYLON.FresnelParameters();
mainMaterial.refractionFresnelParameters.bias = 0.5;
mainMaterial.refractionFresnelParameters.power = 16;
mainMaterial.refractionFresnelParameters.leftColor = BABYLON.Color3.Black();
mainMaterial.refractionFresnelParameters.rightColor = BABYLON.Color3.White();
Bias和power属性控制表面上的菲涅尔效果。
在此演示中,我们使用了一个名为rainbow.png的图像。这些图像是本地存储在images/文件夹中。你可以下载任何你选择的图像,并在演示链接中使用。
BabylonJS - 动画
动画使场景更具交互性,也使它更令人印象深刻,使其看起来更逼真。让我们现在详细了解动画。我们将对形状应用动画,以将其从一个位置移动到另一个位置。要使用动画,你需要使用所需的參數创建一个动画对象。
让我们现在看看相同的语法:
var animationBox = new BABYLON.Animation(
   "myAnimation",
   "scaling.x",
   30,
   BABYLON.Animation.ANIMATIONTYPE_FLOAT,
   BABYLON.Animation.ANIMATIONLOOPMODE_CYCLE
);
参数
考虑与BabylonJS动画相关的以下参数:
动画的名称。
形状的属性 - 例如,缩放、更改位置等。语法中显示的是缩放;在这里,它将沿x轴缩放盒子。
请求的每秒帧数:此动画中可能的最高FPS。
在这里,你决定并输入将修改哪种类型的数值:是浮点数(例如,平移)、向量(例如,方向)还是四元数。
确切的值是:
BABYLON.Animation.ANIMATIONTYPE_FLOAT
BABYLON.Animation.ANIMATIONTYPE_VECTOR2
BABYLON.Animation.ANIMATIONTYPE_VECTOR3
BABYLON.Animation.ANIMATIONTYPE_QUATERNION
BABYLON.Animation.ANIMATIONTYPE_COLOR3
动画的行为 - 停止或再次启动动画。
使用先前的值并递增它:
BABYLON.Animation.ANIMATIONLOOPMODE_RELATIVE
从初始值重新开始:
BABYLON.Animation.ANIMATIONLOOPMODE_CYCLE
保持它们的最终值
BABYLON.Animation.ANIMATIONLOOPMODE_CONSTANT
让我们现在创建动画对象:
var animationBox = new BABYLON.Animation(
   "myAnimation",
   "scaling.x",
   30,
   BABYLON.Animation.ANIMATIONTYPE_FLOAT,
   BABYLON.Animation.ANIMATIONLOOPMODE_CYCLE
);
动画演示
<!doctype html>
<html>
   <head>
      <meta charset = "utf-8">
      <title>BabylonJs - Basic Element-Creating Scene</title>
      <script src = "babylon.js"></script>
      <style>
         canvas {width: 100%; height: 100%;}
      </style>
   </head>

   <body>
      <canvas id = "renderCanvas"></canvas>
      <script type = "text/javascript">
         var canvas = document.getElementById("renderCanvas");
         var engine = new BABYLON.Engine(canvas, true);

         var createScene  = function() {
            var scene = new BABYLON.Scene(engine);
            scene.clearColor = new BABYLON.Color3(0, 1, 0);

            var camera = new BABYLON.ArcRotateCamera("Camera", 1, 0.8, 10, new BABYLON.Vector3(0, 0, 0), scene);
            camera.attachControl(canvas, true);

            var light = new BABYLON.HemisphericLight("light1", new BABYLON.Vector3(0, 1, 0), scene);
            light.intensity = 0.7;

            var pl = new BABYLON.PointLight("pl", BABYLON.Vector3.Zero(), scene);
            pl.diffuse = new BABYLON.Color3(1, 1, 1);
            pl.specular = new BABYLON.Color3(1, 1, 1);
            pl.intensity = 0.8;

            var box = BABYLON.Mesh.CreateBox("box", '3', scene);
            box.position = new BABYLON.Vector3(-10,0,0);

            var box1 = BABYLON.Mesh.CreateBox("box1", '3', scene);
            box1.position = new BABYLON.Vector3(0,0,0);

            var animationBox = new BABYLON.Animation("myAnimation", "scaling.x", 30, BABYLON.Animation.ANIMATIONTYPE_FLOAT, BABYLON.Animation.ANIMATIONLOOPMODE_CYCLE);

            var animationBox1 = new BABYLON.Animation("myAnimation1", "scaling.z", 10, BABYLON.Animation.ANIMATIONTYPE_FLOAT, BABYLON.Animation.ANIMATIONLOOPMODE_CYCLE);

            // An array with all animation keys
            var keys = [];

            //At the animation key 0, the value of scaling is "1"
            keys.push({
               frame: 0,
               value: 1
            });

            //At the animation key 20, the value of scaling is "0.2"
            keys.push({
               frame: 20,
               value: 0.2
            });

            keys.push({
               frame: 60,
               value: 0.4
            });

            //At the animation key 100, the value of scaling is "1"
            keys.push({
               frame: 100,
               value: 1
            });

            animationBox.setKeys(keys);
            box.animations = [];
            box.animations.push(animationBox);
            scene.beginAnimation(box, 0, 100, true);

            // An array with all animation keys
            var keys = [];

            //At the animation key 0, the value of scaling is "1"
            keys.push({
               frame: 0,
               value: 1
            });

            //At the animation key 20, the value of scaling is "0.2"
            keys.push({
               frame: 60,
               value: 0.2
            });

            //At the animation key 100, the value of scaling is "1"
            keys.push({
               frame: 100,
               value: 1
            });
            animationBox1.setKeys(keys);
            box1.animations = [];
            box1.animations.push(animationBox1);
            scene.beginAnimation(box1, 0, 100, true);
            return scene;
         };
         var scene = createScene();
         engine.runRenderLoop(function() {
            scene.render();
         });
      </script>
   </body>
</html>
输出
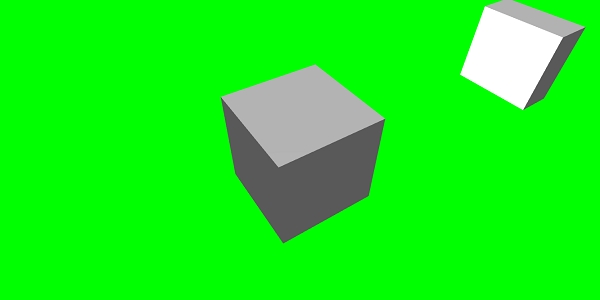
// An array with all animation keys
var keys = [];

//At the animation key 0, the value of scaling is "1"
keys.push({
   frame: 0,
   value: 1
});

//At the animation key 20, the value of scaling is "0.2"
keys.push({
   frame: 20,
   value: 0.2
});

//At the animation key 100, the value of scaling is "1"
keys.push({
   frame: 100,
   value: 1
});

animationBox.setKeys(keys);

box.animations = [];

box.animations.push(animationBox);

scene.beginAnimation(box, 0, 100, true); //defines the start and the end on the target shape box.
以下是动画对象上可用的其他函数:
- pause()
- restart()
- stop()
- reset()
我们可以将beginAnimation引用存储在一个变量中,并使用该引用来停止、暂停或重置动画。
var newAnimation = scene.beginAnimation(box1, 0, 100, true);
例如:
newAnimation.pause();
动画对象上有一些函数可用于控制关键帧。
BABYLON.Animation.prototype.floatInterpolateFunction = function (startValue, endValue, gradient) {
   return startValue + (endValue - startValue) * gradient;
};

BABYLON.Animation.prototype.quaternionInterpolateFunction = function (startValue, endValue, gradient) {
   return BABYLON.Quaternion.Slerp(startValue, endValue, gradient);
};

BABYLON.Animation.prototype.vector3InterpolateFunction = function (startValue, endValue, gradient) {
   return BABYLON.Vector3.Lerp(startValue, endValue, gradient);
};
以下是可以更改的函数列表:
- floatInterpolateFunction
- quaternionInterpolateFunction
- quaternionInterpolateFunctionWithTangents
- vector3InterpolateFunction
- vector3InterpolateFunctionWithTangents
- vector2InterpolateFunction
- vector2InterpolateFunctionWithTangents
- sizeInterpolateFunction
- color3InterpolateFunction
- matrixInterpolateFunction
要创建快速动画,可以使用一个可以直接使用的函数。
例如:
Animation.CreateAndStartAnimation = function(name, mesh, tartgetProperty, framePerSecond, totalFrame, from, to, loopMode);
在这里,你只能使用2个关键帧 - 开始和结束。
演示
<!doctype html>
<html>
   <head>
      <meta charset = "utf-8">
      <title>BabylonJs - Basic Element-Creating Scene</title>
      <script src = "babylon.js"></script>
      <style>
         canvas {width: 100%; height: 100%;}
      </style>
   </head>

   <body>
      <canvas id = "renderCanvas"></canvas>
      <script type = "text/javascript">
         var canvas = document.getElementById("renderCanvas");
         var engine = new BABYLON.Engine(canvas, true);

         var createScene  = function() {
            var scene = new BABYLON.Scene(engine);
            scene.clearColor = new BABYLON.Color3(0, 1, 0);

            var camera = new BABYLON.ArcRotateCamera("Camera", 1, 0.8, 10, new BABYLON.Vector3(0, 0, 0), scene);
            camera.attachControl(canvas, true);

            var light = new BABYLON.HemisphericLight("light1", new BABYLON.Vector3(0, 1, 0), scene);
            light.intensity = 0.7;

            var pl = new BABYLON.PointLight("pl", BABYLON.Vector3.Zero(), scene);
            pl.diffuse = new BABYLON.Color3(1, 1, 1);
            pl.specular = new BABYLON.Color3(1, 1, 1);
            pl.intensity = 0.8;

            var box = BABYLON.Mesh.CreateBox("box", '3', scene);
            box.position = new BABYLON.Vector3(0,0,0);
            BABYLON.Animation.CreateAndStartAnimation('boxscale', box, 'scaling.x', 30, 120, 1.0, 1.5);
            return scene;
         };
         var scene = createScene();
         engine.runRenderLoop(function() {
            scene.render();
         });
      </script>
   </body>
</html>
输出
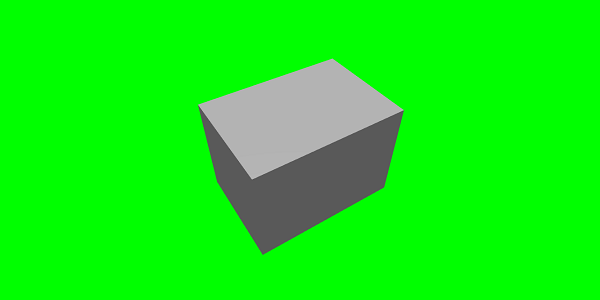
动画混合
你可以借助enableBlending = true;实现动画混合;
此混合动画将从当前对象状态更改。
缓动函数
为了使动画更令人印象深刻,我们之前已经在CSS中使用了一些缓动函数。
以下是缓动函数列表:
BABYLON.CircleEase ()
BABYLON.BackEase (amplitude)
BABYLON.BounceEase (bounces, bounciness)
BABYLON.CubicEase ()
BABYLON.ElasticEase (oscillations, springiness)
BABYLON.ExponentialEase (exponent)
BABYLON.PowerEase (power)
BABYLON.QuadraticEase ()
BABYLON.QuarticEase ()
BABYLON.QuinticEase ()
BABYLON.SineEase ()
演示
<!doctype html>
<html>
   <head>
      <meta charset = "utf-8">
      <title>BabylonJs - Basic Element-Creating Scene</title>
      <script src = "babylon.js"></script>
      <style>
         canvas {width: 100%; height: 100%;}
      </style>
   </head>

   <body>
      <canvas id = "renderCanvas"></canvas>
      <script type = "text/javascript">
         var canvas = document.getElementById("renderCanvas");
         var engine = new BABYLON.Engine(canvas, true);
         var createScene  = function() {
            var scene = new BABYLON.Scene(engine);
            scene.clearColor = new BABYLON.Color3(0, 1, 0);

            var camera = new BABYLON.ArcRotateCamera("Camera", 1, 0.8, 10, new BABYLON.Vector3(0, 0, 0), scene);
            camera.attachControl(canvas, true);

            var light = new BABYLON.HemisphericLight("light1", new BABYLON.Vector3(0, 1, 0), scene);
            light.intensity = 0.7;

            var pl = new BABYLON.PointLight("pl", BABYLON.Vector3.Zero(), scene);
            pl.diffuse = new BABYLON.Color3(1, 1, 1);
            pl.specular = new BABYLON.Color3(1, 1, 1);
            pl.intensity = 0.8;

            var box1 = BABYLON.Mesh.CreateTorus("torus", 5, 1, 10, scene, false);
            box1.position = new BABYLON.Vector3(0,0,0);

            var animationBox1 = new BABYLON.Animation("myAnimation1", "scaling.z", 10, BABYLON.Animation.ANIMATIONTYPE_FLOAT, BABYLON.Animation.ANIMATIONLOOPMODE_CYCLE);

            // An array with all animation keys
            var keys = [];

            //At the animation key 0, the value of scaling is "1"
            keys.push({
               frame: 0,
               value: 1
            });

            //At the animation key 20, the value of scaling is "0.2"
            keys.push({
               frame: 60,
               value: 0.2
            });

            //At the animation key 100, the value of scaling is "1"
            keys.push({
               frame: 100,
               value: 1
            });

            animationBox1.setKeys(keys);
            box1.animations = [];
            // box1.animations.push(animationBox1);

            var easingFunction = new BABYLON.QuarticEase();
            easingFunction.setEasingMode(BABYLON.EasingFunction.EASINGMODE_EASEINOUT);

            animationBox1.setEasingFunction(easingFunction);
            box1.animations.push(animationBox1);
            scene.beginAnimation(box1, 0, 100, true);
            return scene;
         };
         var scene = createScene();
         engine.runRenderLoop(function() {
            scene.render();
         });
      </script>
   </body>
</html>
输出
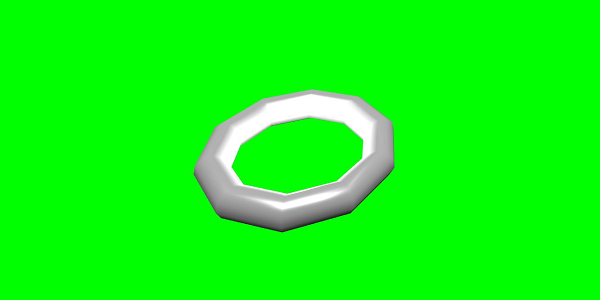
动画事件
您可以在动画事件中执行任何必要的操作。如果您想在帧更改或动画完成时更改任何内容,可以通过向动画添加事件来实现。
var event1 = new BABYLON.AnimationEvent(50, function() { console.log("Yeah!"); }, true);
// You will get hte console.log when the frame is changed to 50 using animation.

animation.addEvent(event1); //attaching event to the animation.
BabylonJS - 精灵
在计算机图形学中,“精灵”指的是什么?它基本上是一个集成到更大场景中的二维位图。当多个较小的图像组合成单个位图以节省内存时,生成的图像称为精灵图。让我们开始学习精灵及其使用方法。
使用精灵的第一步是创建一个精灵管理器。
var spriteManagerTrees = new BABYLON.SpriteManager("treesManagr", "Assets/Palm-arecaceae.png", 2000, 800, scene);
创建精灵管理器时,请考虑以下参数:
名称 - 此管理器的名称。
URL - 要使用的图像URL。
管理器容量 - 此管理器中的最大实例数。例如,上述实例将创建 2000 棵树。
单元格大小 - 图像所占的大小。
场景 - 将添加管理器的场景。
var spriteManagerPlayer = new BABYLON.SpriteManager("playerManagr","Assets/Player.png", 2, 64, scene);
看看上面的对象。我们提供了一个玩家图像,现在正在创建它的 2 个实例。图像大小为 64 像素。精灵的每个图像都必须包含在 64 像素的正方形中,不多不少。
现在让我们创建与精灵管理器链接的相同实例。
var player = new BABYLON.Sprite("player", spriteManagerPlayer);
您可以像操作其他任何形状或网格一样操作此玩家对象。您可以分配位置、大小、角度等。
player.size = 0.3;
player.angle = Math.PI/4;
player.invertU = -1;
player.width = 0.3;
player.height = 0.4;
演示
<!doctype html>
<html>
   <head>
      <meta charset = "utf-8">
      <title>BabylonJs - Basic Element-Creating Scene</title>
      <script src = "babylon.js"></script>
      <style>
         canvas {width: 100%; height: 100%;}
      </style>
   </head>

   <body>
      <canvas id = "renderCanvas"></canvas>
      <script type = "text/javascript">
         var canvas = document.getElementById("renderCanvas");
         var engine = new BABYLON.Engine(canvas, true);
         var createScene  = function() {
            var scene = new BABYLON.Scene(engine);
            //scene.clearColor = new BABYLON.Color3(0, 1, 0);
            // Create camera and light
            var light = new BABYLON.PointLight("Point", new BABYLON.Vector3(5, 10, 5), scene);

            var camera = new BABYLON.ArcRotateCamera("Camera", 1, 0.8, 8, new BABYLON.Vector3(0, 0, 0), scene);
            camera.attachControl(canvas, true);

            var spriteManagerTrees = new BABYLON.SpriteManager("trees", "images/tree.png", 1000, 400, scene);

            for (var i = 0; i < 1000; i++) {
               var tree = new BABYLON.Sprite("tree", spriteManagerTrees);
               tree.position.x = Math.random() * 100 - 50;
               tree.position.z = Math.random() * 100 - 50;
               tree.isPickable = true;

               //Some "dead" trees
               if (Math.round(Math.random() * 5) === 0) {
                  tree.angle = Math.PI * 90 / 180;
                  tree.position.y = -0.3;
               }
            }

            var spriteManagerTrees1 = new BABYLON.SpriteManager("trees1", "images/tree1.png", 1000,400, scene);

            for (var i = 0; i < 1000; i++) {
               var tree1 = new BABYLON.Sprite("tree1", spriteManagerTrees1);
               if (i %2 == 0) {
               tree1.position.x = Math.random() * 100 - 50;
               } else {
                  tree1.position.z = Math.random() * 100 - 50;
               }
               tree1.isPickable = true;
            }

            spriteManagerTrees.isPickable = true;
            spriteManagerTrees1.isPickable = true;

            var spriteManagerPlayer = new BABYLON.SpriteManager("playerManager", "images/bird.png", 2, 200, scene);

            var player = new BABYLON.Sprite("player", spriteManagerPlayer);
            player.position.x = 2;
            player.position.y = 2;
            player.position.z = 0;


            var spriteManagerPlayer1 = new BABYLON.SpriteManager("playerManager1", "images/bird.png", 2, 200, scene);

            var player1 = new BABYLON.Sprite("player", spriteManagerPlayer1);
            player1.position.x = 1;
            player1.position.y = 2;
            player1.position.z = 0;

            var spriteManagerPlayer2 = new BABYLON.SpriteManager("playerManager2", "images/bird.png", 2, 200, scene);

            var player2 = new BABYLON.Sprite("player", spriteManagerPlayer2);
            player2.position.x = 0;
            player2.position.y = 1;
            player2.position.z = 0;

            scene.onPointerDown = function (evt) {
               var pickResult = scene.pickSprite(this.pointerX, this.pointerY);
               if (pickResult.hit) {
                  pickResult.pickedSprite.angle += 1;
               }
            };
            return scene;
         };
         var scene = createScene();
         engine.runRenderLoop(function() {
            scene.render();
         });
      </script>
   </body>
</html>
输出
在这个演示中,我们使用了名为 tree.png、tree1.png 的图像来显示树木,使用 bird.png 来显示场景中的鸟。这些图像存储在本地 images/ 文件夹中,并在下面粘贴以供参考。您可以下载任何您选择的图像并在演示链接中使用。
下面显示了用于树的图像。
images/tree.png

images/tree1.png

images/bird.png

现在让我们再看看一个带有精灵的气球演示。
带有精灵的气球演示
<!doctype html>
<html>
   <head>
      <meta charset = "utf-8">
      <title>BabylonJs - Basic Element-Creating Scene</title>
      <script src = "babylon.js"></script>
      <style>
         canvas {width: 100%; height:100%;}
      </style>
   </head>

   <body>
      <canvas id = "renderCanvas"></canvas>
      <script type = "text/javascript">
         var canvas = document.getElementById("renderCanvas");
         var engine = new BABYLON.Engine(canvas, true);

         var createScene  = function() {
            var scene = new BABYLON.Scene(engine);

            var light = new BABYLON.PointLight("Point", new BABYLON.Vector3(5, 10, 5), scene);

            var camera = new BABYLON.ArcRotateCamera("Camera", -3.4, 1.0, 82, new BABYLON.Vector3(0, -15, 0), scene);
            camera.setPosition(new BABYLON.Vector3(30, 0,100));
            camera.attachControl(canvas, true);

            var spriteManagerTrees = new BABYLON.SpriteManager("trees", "images/balloon.png", 50, 450, scene);

            var treearray = [];
            for (var i = 0; i < 50; i++) {
               var tree = new BABYLON.Sprite("tree", spriteManagerTrees);
               tree.position.x = Math.random() * 100 - 10;
               tree.position.z = Math.random() * 100 - 10;
               tree.position.y = -35;
               tree.isPickable = true;
               treearray.push(tree);
            }

            spriteManagerTrees.isPickable = true;
            scene.onPointerDown = function (evt) {
               var pickResult = scene.pickSprite(this.pointerX, this.pointerY);
               if (pickResult.hit) {
                  pickResult.pickedSprite.position.y = -3000;
               }
            };

            k = -35;
            var animate = function() {
               if (k > 3) return;
               k += 0.05;
               for (var i = 0; i < treearray.length; i++) {
                  treearray[i].position.y = k;
               }
            };
            scene.registerBeforeRender(animate);
            return scene;
         };
         var scene = createScene();
         engine.runRenderLoop(function() {
            scene.render();
         });
      </script>
   </body>
</html>
输出
在这个演示中,我们使用了名为 ballon.png 的图像。这些图像存储在本地 images/ 文件夹中,并在下面粘贴以供参考。您可以下载任何您选择的图像并在演示链接中使用。
images/balloon.png
气球将升上天空,一旦它们停止,您可以单击它们,它们就会消失。这是使用 pickSprite 函数完成的,该函数在单击创建的精灵时提供详细信息。
当鼠标操作发生时,将调用 onPointerDown 函数,并更改精灵的位置。
var animate = function() {
   if (k > 3) return;
   k += 0.05;
   for (var i = 0; i < treearray.length; i++) {
      treearray[i].position.y = k;
   }
};
scene.registerBeforeRender(animate);
animate 函数在 registerBeforeRender 中调用,它负责将气球从初始 -35 移动到 +3。通过将其递增 0.05 来缓慢移动它。
BabylonJS - 粒子
粒子系统是计算机图形学中的一种技术,它使用大量非常小的精灵、3D 模型或其他图形对象来模拟某些类型的“模糊”现象,否则很难用传统的渲染技术再现。
要创建粒子系统,您必须按如下方式调用该类:
var particleSystem = new BABYLON.ParticleSystem("particles", 2000, scene);//2000 refers to the total number of particles to be produced.
粒子系统需要考虑以下属性:
particleSystem.particleTexture = new BABYLON.Texture("Flare.png", scene);
particleSystem.textureMask = new BABYLON.Color4(0.1, 0.8, 0.8, 1.0);
particleSystem.emitter = fountain
particleSystem.color1 = new BABYLON.Color4(0.7, 0.8, 1.0, 1.0);
particleSystem.color2 = new BABYLON.Color4(0.2, 0.5, 1.0, 1.0);
particleSystem.colorDead = new BABYLON.Color4(0, 0, 0.2, 0.0);
发射器属性采用必须从中发射粒子的网格。color1 和 color2 是粒子的颜色。
ColorDead 是在粒子从场景中消失之前应用于粒子的颜色,因此称为 colorDead。
particleSystem.minSize = 0.1;
particleSystem.maxSize = 0.5;
particleSystem.minLifeTime = 0.3;
particleSystem.maxLifeTime = 1.5;
MinSize 和 maxSize 是赋予粒子的尺寸。MinlifeTime 和 maxLifeTime 是赋予粒子的生命周期。
particleSystem.emitRate = 1500;
emitRate 是发射粒子的速率。
我们在下面显示的演示中使用了圆环体。我们使用了粒子系统及其属性来获取圆环体周围的所有粒子。
演示 1
<!doctype html>
<html>
   <head>
      <meta charset = "utf-8">
      <title>BabylonJs - Basic Element-Creating Scene</title>
      <script src = "babylon.js"></script>
      <style>
         canvas {width: 100%; height: 100%;}
      </style>
   </head>

   <body>
      <canvas id = "renderCanvas"></canvas>
      <script type = "text/javascript">
         var canvas = document.getElementById("renderCanvas");
         var engine = new BABYLON.Engine(canvas, true);
         var createScene  = function() {
            var scene = new BABYLON.Scene(engine);
            // Setup environment

            var light0 = new BABYLON.PointLight("Omni", new BABYLON.Vector3(0, 2, 8), scene);

            var camera = new BABYLON.ArcRotateCamera("ArcRotateCamera", 1, 0.8, 20, new BABYLON.Vector3(0, 0, 0), scene);
            camera.attachControl(canvas, true);

            var fountain = BABYLON.Mesh.CreateTorus("torus", 2, 1, 8, scene, false);

            var particleSystem = new BABYLON.ParticleSystem("particles", 2000, scene);
            particleSystem.particleTexture = new BABYLON.Texture("images/dot.jpg", scene);

            particleSystem.textureMask = new BABYLON.Color4(0.1, 0.8, 0.8, 1.0);
            particleSystem.emitter = fountain;


            particleSystem.minEmitBox = new BABYLON.Vector3(-1, 0, 0); // Starting all from
            particleSystem.maxEmitBox = new BABYLON.Vector3(1, 0, 0); // To...

            particleSystem.color1 = new BABYLON.Color4(0.7, 0.8, 1.0, 1.0);
            particleSystem.color2 = new BABYLON.Color4(0.2, 0.5, 1.0, 1.0);
            particleSystem.colorDead = new BABYLON.Color4(0, 0, 0.2, 0.0);

            particleSystem.minSize = 0.1;
            particleSystem.maxSize = 0.5;

            particleSystem.minLifeTime = 0.3;
            particleSystem.maxLifeTime = 1.5;

            particleSystem.emitRate = 1500;

            particleSystem.blendMode = BABYLON.ParticleSystem.BLENDMODE_ONEONE;

            particleSystem.gravity = new BABYLON.Vector3(0, -9.81, 0);

            particleSystem.direction1 = new BABYLON.Vector3(-7, 8, 3);
            particleSystem.direction2 = new BABYLON.Vector3(7, 8, -3);


            particleSystem.minAngularSpeed = 0;
            particleSystem.maxAngularSpeed = Math.PI;

            particleSystem.minEmitPower = 1;
            particleSystem.maxEmitPower = 3;
            particleSystem.updateSpeed = 0.005;

            particleSystem.start();
            var keys = [];
            var animation = new BABYLON.Animation("animation", "rotation.x", 30, BABYLON.Animation.ANIMATIONTYPE_FLOAT,
                                   BABYLON.Animation.ANIMATIONLOOPMODE_CYCLE);

            // At the animation key 0, the value of scaling is "1"
            keys.push({
               frame: 0,
               value: 0
            });

            // At the animation key 50, the value of scaling is "0.2"
            keys.push({
               frame: 50,
               value: Math.PI
            });

            // At the animation key 100, the value of scaling is "1"
            keys.push({
               frame: 100,
               value: 0
            });

            // Launch animation
            animation.setKeys(keys);
            fountain.animations.push(animation);
            scene.beginAnimation(fountain, 0, 100, true);
            return scene;
         }
         var scene = createScene();
         engine.runRenderLoop(function() {
            scene.render();
         });
      </script>
   </body>
</html>
输出
以上代码行生成以下输出:
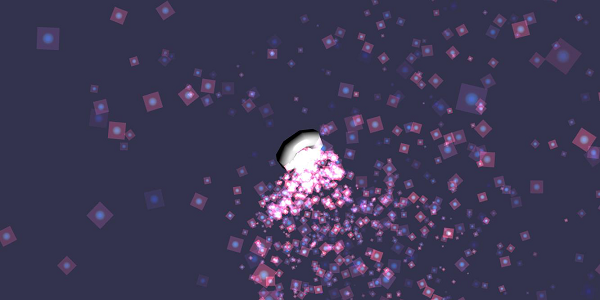
在这个演示中,我们使用了名为 dot.jpg 的图像。这些图像存储在本地 images/ 文件夹中,并在下面粘贴以供参考。您可以下载任何您选择的图像并在演示链接中使用。
以下是用于粒子纹理的图像:images/dot.jpg
演示 2
<!doctype html>
<html>
   <head>
      <meta charset = "utf-8">
      <title>BabylonJs - Ball/Ground Demo</title>
      <script src = "babylon.js"></script>
      <style>
         canvas {width: 100%; height: 100%;}
      </style>
   </head>

   <body>
      <canvas id = "renderCanvas"></canvas>
      <script type = "text/javascript">
         var canvas = document.getElementById("renderCanvas");
         var engine = new BABYLON.Engine(canvas, true);

         var createScene  = function() {
            var scene = new BABYLON.Scene(engine);
            scene.clearColor = new BABYLON.Color3( .5, .5, .5);

            var camera = new BABYLON.ArcRotateCamera("camera1",  0, 0, 0, new BABYLON.Vector3(0, 0, -0), scene);
            camera.setPosition(new BABYLON.Vector3(-100, 0,-100));
            camera.attachControl(canvas, true);

            var light = new BABYLON.HemisphericLight("light1", new BABYLON.Vector3(1, 0.5, 0), scene);
            var pl = new BABYLON.PointLight("pl", new BABYLON.Vector3(0, 0, 0), scene);

            var gmat = new BABYLON.StandardMaterial("mat1", scene);
            gmat.alpha = 1.0;

            var ground =  BABYLON.Mesh.CreateGround("ground", 100, 100, 20, scene);
            ground.material = gmat;
            gmat.wireframe = true;

            var particleSystem = new BABYLON.ParticleSystem("particles", 2000, scene);
            particleSystem.particleTexture = new BABYLON.Texture("images/dot.jpg", scene);

            particleSystem.textureMask = new BABYLON.Color4(0.1, 0.8, 0.8, 1.0);
            particleSystem.emitter = ground;

            particleSystem.minEmitBox = new BABYLON.Vector3(-1, 0, 0); // Starting all from
            particleSystem.maxEmitBox = new BABYLON.Vector3(1, 0, 0); // To...

            particleSystem.color1 = new BABYLON.Color4(0.7, 0.8, 1.0, 1.0);
            particleSystem.color2 = new BABYLON.Color4(0.2, 0.5, 1.0, 1.0);
            particleSystem.colorDead = new BABYLON.Color4(0, 0, 0.2, 0.0);

            particleSystem.minSize = 0.1;
            particleSystem.maxSize = 0.5;

            particleSystem.minLifeTime = 0.3;
            particleSystem.maxLifeTime = 1.5;

            particleSystem.emitRate = 1500;

            particleSystem.blendMode = BABYLON.ParticleSystem.BLENDMODE_ONEONE;

            particleSystem.gravity = new BABYLON.Vector3(0, -9.81, 0);

            particleSystem.direction1 = new BABYLON.Vector3(-7, 8, 3);
            particleSystem.direction2 = new BABYLON.Vector3(7, 8, -3);

            particleSystem.minAngularSpeed = 0;
            particleSystem.maxAngularSpeed = Math.PI;

            particleSystem.minEmitPower = 1;
            particleSystem.maxEmitPower = 3;
            particleSystem.updateSpeed = 0.005;

            particleSystem.start();


            var keys = [];
            var animation = new BABYLON.Animation("animation", "rotation.x", 30, BABYLON.Animation.ANIMATIONTYPE_FLOAT,
                           BABYLON.Animation.ANIMATIONLOOPMODE_CYCLE);

            // At the animation key 0, the value of scaling is "1"
            keys.push({
               frame: 0,
               value: 0
            });

            // At the animation key 50, the value of scaling is "0.2"
            keys.push({
               frame: 50,
               value: Math.PI
            });

            // At the animation key 100, the value of scaling is "1"
            keys.push({
               frame: 100,
               value: 0
            });

            // Launch animation
            animation.setKeys(keys);
            ground.animations.push(animation);

            //scene.beginAnimation(ground, 0, 100, true);
            return scene;
         };
         var scene = createScene();
         engine.runRenderLoop(function() {
            scene.render();
         });
      </script>
   </body>
</html>
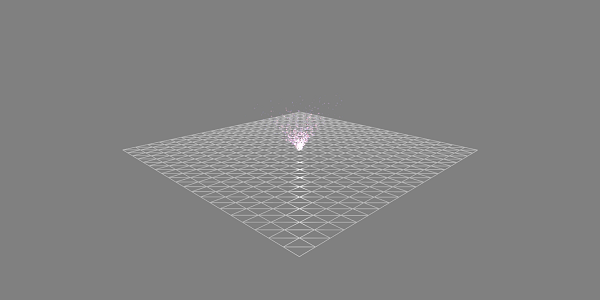
输出
带动画的演示
<!doctype html>
<html>
   <head>
      <meta charset = "utf-8">
      <title>BabylonJs - Ball/Ground Demo</title>
      <script src = "babylon.js"></script>
      <style>
         canvas {width: 100%; height: 100%;}
      </style>
   </head>

   <body>
      <canvas id = "renderCanvas"></canvas>
      <script type = "text/javascript">
         var canvas = document.getElementById("renderCanvas");
         var engine = new BABYLON.Engine(canvas, true);

         var createScene  = function() {
            var scene = new BABYLON.Scene(engine);
            scene.clearColor = new BABYLON.Color3( .5, .5, .5);

            var camera = new BABYLON.ArcRotateCamera("camera1",  0, 0, 0, new BABYLON.Vector3(0, 0, -0), scene);
            camera.setPosition(new BABYLON.Vector3(-100, 0, -100));
            camera.attachControl(canvas, true);

            var light = new BABYLON.HemisphericLight("light1", new BABYLON.Vector3(1, 0.5, 0), scene);
            var pl = new BABYLON.PointLight("pl", new BABYLON.Vector3(0, 0, 0), scene);

            var gmat = new BABYLON.StandardMaterial("mat1", scene);
            gmat.alpha = 1.0;

            var ground =  BABYLON.Mesh.CreateGround("ground", 100, 100, 20, scene);
            ground.material = gmat;
            gmat.wireframe = true;

            var particleSystem = new BABYLON.ParticleSystem("particles", 2000, scene);
            particleSystem.particleTexture = new BABYLON.Texture("images/dot.jpg", scene);

            particleSystem.textureMask = new BABYLON.Color4(0.1, 0.8, 0.8, 1.0);
            particleSystem.emitter = ground;

            particleSystem.minEmitBox = new BABYLON.Vector3(-1, 0, 0); // Starting all from
            particleSystem.maxEmitBox = new BABYLON.Vector3(1, 0, 0); // To...

            particleSystem.color1 = new BABYLON.Color4(0.7, 0.8, 1.0, 1.0);
            particleSystem.color2 = new BABYLON.Color4(0.2, 0.5, 1.0, 1.0);
            particleSystem.colorDead = new BABYLON.Color4(0, 0, 0.2, 0.0);

            particleSystem.minSize = 0.1;
            particleSystem.maxSize = 0.5;

            particleSystem.minLifeTime = 0.3;
            particleSystem.maxLifeTime = 1.5;

            particleSystem.emitRate = 1500;

            particleSystem.blendMode = BABYLON.ParticleSystem.BLENDMODE_ONEONE;

            particleSystem.gravity = new BABYLON.Vector3(0, -9.81, 0);//gravity for the particle.

            particleSystem.direction1 = new BABYLON.Vector3(-7, 8, 3);
            particleSystem.direction2 = new BABYLON.Vector3(7, 8, -3);

            //random direction for the particles on the scene
            particleSystem.minAngularSpeed = 0;
            particleSystem.maxAngularSpeed = Math.PI;
            particleSystem.minEmitPower = 1;
            particleSystem.maxEmitPower = 3;
            particleSystem.updateSpeed = 0.005;

            particleSystem.start();

            var keys = [];
            var animation = new BABYLON.Animation("animation", "rotation.x", 30, BABYLON.Animation.ANIMATIONTYPE_FLOAT,
                           BABYLON.Animation.ANIMATIONLOOPMODE_CYCLE);

            // At the animation key 0, the value of scaling is "1"
            keys.push({
               frame: 0,
               value: 0
            });

            // At the animation key 50, the value of scaling is "0.2"
            keys.push({
               frame: 50,
               value: Math.PI
            });

            // At the animation key 100, the value of scaling is "1"
            keys.push({
               frame: 100,
               value: 0
            });

            // Launch animation
            animation.setKeys(keys);
            ground.animations.push(animation);
            scene.beginAnimation(ground, 0, 100, true);
            return scene;
         };
         var scene = createScene();
         engine.runRenderLoop(function() {
            scene.render();
         });
      </script>
   </body>
</html>
输出
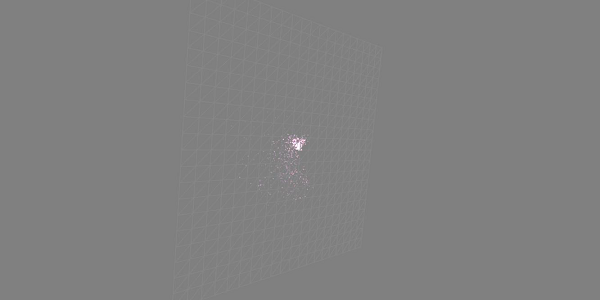
以上代码行生成以下输出:
解释
上述演示显示了一个带有线框材质的地面,粒子系统是从中心产生的。
BabylonJS - 相机
BabylonJS 有许多可用的相机。一次只有一个相机对场景处于活动状态。
在本章中,我们将学习如何在 BabylonJS 中使用相机。
自由相机
现在让我们看看自由相机是如何工作的。
语法
以下是自由相机的语法:
var camera = new BABYLON.FreeCamera("FreeCamera", new BABYLON.Vector3(0, 1, -15), scene);
这是放置相机的位置 - new BABYLON.Vector3(0, 1, -15)。
更改方向将更改方向。您可以更改值并查看相机在场景中的行为。
以下是自由相机使用的参数:
- 名称
- 位置
- 场景
弧形旋转相机
此相机围绕给定的目标枢轴旋转。可以使用光标和鼠标或触摸事件控制它。参数是名称、alpha、beta、半径和目标。
语法
var camera = new BABYLON.ArcRotateCamera("ArcRotateCamera", 1, 0.8, 10, new BABYLON.Vector3(0, 0, 0), scene);
ArcRotateCamera 指向 +x 方向。要更改相机的位置,请使用 setPosition 属性。
camera.setPosition(new BABYLON.Vector3(0, 0, -100));
ArcRotateCamera 是一个非常适合制作动画的相机。以下命令将帮助您围绕目标旋转相机:
scene.activeCamera.alpha += .01;
触摸相机
触摸是一种“手势”。它可以是在触控板或屏幕上,用手指、触笔、手套、脚或激光笔进行操作。任何可以感知到的运动……都可以被认为是一种手势。
语法
以下是触摸相机的语法:
var camera = new BABYLON.TouchCamera("TouchCamera", new BABYLON.Vector3(0, 1, -15), scene);
游戏手柄相机
此相机专为与游戏手柄一起使用而设计。
语法
以下是游戏手柄相机的语法:
var camera = new BABYLON.GamepadCamera("Camera", new BABYLON.Vector3(0, 15, -45), scene);
设备方向相机
此相机专为响应设备方向事件而设计,例如当您前后、左右倾斜设备时。
语法
var camera = new BABYLON.DeviceOrientationCamera("DevOr_camera", new BABYLON.Vector3(0, 1, -15), scene);
跟随相机
跟随相机旨在跟随任何具有位置的场景项目。它可以从后方、前方或任何角度跟随。
语法
以下是跟随相机的语法:
var camera = new BABYLON.FollowCamera("FollowCam", new BABYLON.Vector3(0, 15, -45), scene);
虚拟摇杆相机
此相机设计为响应虚拟摇杆事件。虚拟摇杆是用于控制相机或其他场景项目的屏幕上二维图形。
语法
以下是虚拟摇杆相机的语法:
var camera = new BABYLON.VirtualJoysticksCamera("VJ_camera", new BABYLON.Vector3(0, 1, -15), scene);
立体眼镜相机
立体眼镜相机适用于红色和青色 3D 眼镜。它使用后处理滤镜技术。
立体眼镜弧形旋转相机
以下是立体眼镜弧形旋转相机的语法:
var camera = new BABYLON.AnaglyphArcRotateCamera("aar_cam", -Math.PI/2, Math.PI/4, 20, new BABYLON.Vector3.Zero(), 0.033, scene);
立体眼镜自由相机
以下是立体眼镜自由相机的语法:
var camera = new BABYLON.AnaglyphFreeCamera("af_cam", new BABYLON.Vector3(0, 1, -15), 0.033, scene);
VR 设备方向自由相机
VR 设备方向自由相机使用自由相机作为其基础,因此自由相机的属性和方法也存在于我们的 VR 设备方向自由相机中。
语法
以下是VR 设备方向自由相机的语法:
var camera = new BABYLON.VRDeviceOrientationFreeCamera ("Camera", new BABYLON.Vector3 (-6.7, 1.2, -1.3), scene, 0);
WebVR 自由相机
WebVR 自由相机使用自由相机作为其基础,因此自由相机的属性和方法也存在于我们的 WebVR 自由相机中。
语法
以下是WebVR 自由相机的语法:
var camera = new BABYLON.WebVRFreeCamera("WVR", new BABYLON.Vector3(0, 1, -15), scene);
在大多数演示中,您将看到attachControl,其中相机连接到画布。
示例
camera.attachControl(canvas, true);
BabylonJS - 光照
在本章中,我们将学习 BabylonJS 中使用的灯光。我们将首先看看 babylonjs 提供的不同类型的灯光。
灯光旨在产生每个像素接收到的漫反射色和镜面反射色。稍后,它将用于材质以获得每个像素的最终颜色。
babylonjs 提供 4 种类型的灯光。
- 点光源
- 方向光
- 聚光灯
- 半球光
BabylonJS - 点光源
点光源的经典示例是太阳,它的光线向各个方向传播。点光源在空间中有一个独特的点,从中向各个方向传播光线。可以使用镜面反射和漫反射属性来控制光线颜色。
语法
以下是点光源的语法:
var light0 = new BABYLON.PointLight("Omni0", new BABYLON.Vector3(1, 10, 1), scene);
点光源有三个不同的参数:
第一个参数是灯光的名称。
第二个参数是放置点光源的位置。
第三个参数是需要将灯光附加到的场景。
以下属性用于在上面创建的对象上添加颜色:
light0.diffuse = new BABYLON.Color3(1, 0, 0);
light0.specular = new BABYLON.Color3(1, 1, 1);
演示
<!doctype html>
<html>
   <head>
      <meta charset = "utf-8">
      <title>BabylonJs - Basic Element-Creating Scene</title>
      <script src = "babylon.js"></script>
      <style>
         canvas {width: 100%; height: 100%;}
      </style>
   </head>

   <body>
      <canvas id = "renderCanvas"></canvas>
      <script type = "text/javascript">
         var canvas = document.getElementById("renderCanvas");
         var engine = new BABYLON.Engine(canvas, true);
         var createScene  = function() {
            var scene = new BABYLON.Scene(engine);
            scene.clearColor = new BABYLON.Color3( .5, .5, .5);

            var camera = new BABYLON.ArcRotateCamera("camera1",  0, 0, 0, new BABYLON.Vector3(0, 0, -0), scene);
            camera.setPosition(new BABYLON.Vector3(0, 0, -100));
            camera.attachControl(canvas, true);

            var pl = new BABYLON.PointLight("pl", new BABYLON.Vector3(1, 20, 1), scene);
            pl.diffuse = new BABYLON.Color3(0, 1, 0);
            pl.specular = new BABYLON.Color3(1, 0, 0);

            var ground = BABYLON.Mesh.CreateGround("ground", 150, 6, 2, scene);
            return scene;
         };
         var scene = createScene();
         engine.runRenderLoop(function() {
            scene.render();
         });
      </script>
   </body>
</html>
输出
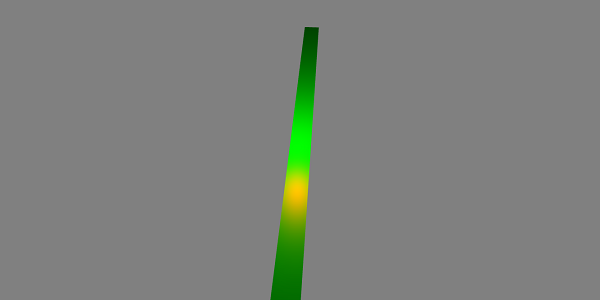
BabylonJS - 方向光
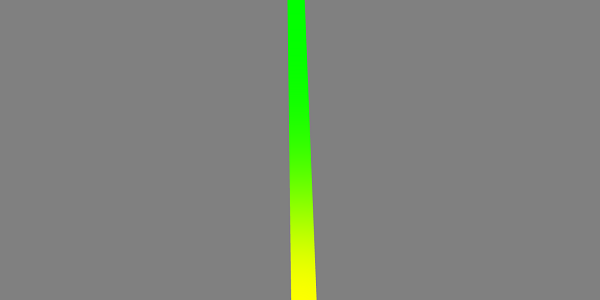
在方向光中,光线由方向定义,并根据您放置它的位置向各个方向发射。
var light0 = new BABYLON.DirectionalLight("Dir0", new BABYLON.Vector3(0, -1, 0), scene);
点光源有三个不同的参数:
第一个参数是灯光的名称。
第二个参数是位置。现在,它在 Y 轴上放置为负 -1。
第三个参数是将要附加的场景。
在这里,您可以使用镜面反射和漫反射属性添加颜色。
light0.diffuse = new BABYLON.Color3(0, 1, 0);
light0.specular = new BABYLON.Color3(1,0, 0);
演示
<!doctype html>
<html>
   <head>
      <meta charset = "utf-8">
      <title>BabylonJs - Basic Element-Creating Scene</title>
      <script src = "babylon.js"></script>
      <style>
         canvas {width: 100%; height: 100%;}
      </style>
   </head>

   <body>
      <canvas id = "renderCanvas"></canvas>
      <script type = "text/javascript">
         var canvas = document.getElementById("renderCanvas");
         var engine = new BABYLON.Engine(canvas, true);
         var createScene  = function() {
            var scene = new BABYLON.Scene(engine);
            scene.clearColor = new BABYLON.Color3( .5, .5, .5);

            var camera = new BABYLON.ArcRotateCamera("camera1",  0, 0, 0, new BABYLON.Vector3(0, 0, -0), scene);
            camera.setPosition(new BABYLON.Vector3(0, 0, -100));
            camera.attachControl(canvas, true);

            var pl = new BABYLON.DirectionalLight("Dir0", new BABYLON.Vector3(0, -10, 0), scene);
            pl.diffuse = new BABYLON.Color3(0, 1, 0);
            pl.specular = new BABYLON.Color3(1, 0, 0);

            var ground = BABYLON.Mesh.CreateGround("ground", 150, 6, 2, scene);
            return scene;
         };
         var scene = createScene();
         engine.runRenderLoop(function() {
            scene.render();
         });
      </script>
   </body>
</html>
输出
以上代码行生成以下输出:
BabylonJS - 聚光灯
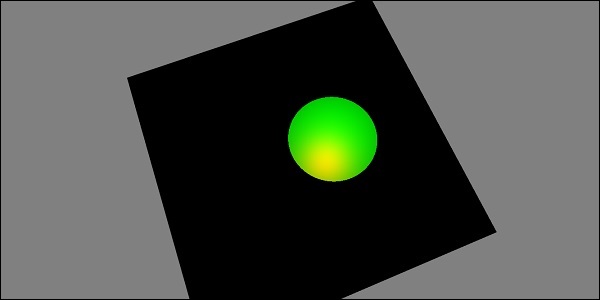
聚光灯就像光线以锥形照射一样。
语法
以下是聚光灯的语法:
var light0 = new BABYLON.SpotLight("Spot0", new BABYLON.Vector3(0, 30, -10), new BABYLON.Vector3(0, -1, 0), 0.8, 2, scene);
点光源有五个不同的参数:
- 第一个参数是灯光的名称。
- 第二个参数是位置。
- 第三个参数是方向。
- 第四个参数是角度。
- 第五个参数是指数。
这些值定义了一个从位置开始,朝向方向发射的光锥。镜面反射和漫反射用于控制光线的颜色。
light0.diffuse = new BABYLON.Color3(1, 0, 0);
light0.specular = new BABYLON.Color3(1, 1, 1);
演示
<!doctype html>
<html>
   <head>
      <meta charset = "utf-8">
      <title>BabylonJs - Basic Element-Creating Scene</title>
      <script src = "babylon.js"></script>
      <style>
         canvas {width: 100%; height: 100%;}
      </style>
   </head>

   <body>
      <canvas id = "renderCanvas"></canvas>
      <script type = "text/javascript">
         var canvas = document.getElementById("renderCanvas");
         var engine = new BABYLON.Engine(canvas, true);
         var createScene  = function() {
            var scene = new BABYLON.Scene(engine);
            scene.clearColor = new BABYLON.Color3( .5, .5, .5);

            var camera = new BABYLON.ArcRotateCamera("camera1",  0, 0, 0, new BABYLON.Vector3(0, 0, -0), scene);
            camera.setPosition(new BABYLON.Vector3(0, 0, -100));
            camera.attachControl(canvas, true);

            var light0 = new BABYLON.SpotLight("Spot0", new BABYLON.Vector3(0, 30, -10), new BABYLON.Vector3(0, -1, 0), 0.8, 2, scene);
            light0.diffuse = new BABYLON.Color3(0, 1, 0);
            light0.specular = new BABYLON.Color3(1, 0, 0);

            var ground = BABYLON.Mesh.CreateGround("ground", 80,80, 2, scene);
            return scene;
         };
         var scene = createScene();
         engine.runRenderLoop(function() {
            scene.render();
         });
      </script>
   </body>
</html>
输出
以上代码行生成以下输出:
BabylonJS - 半球光
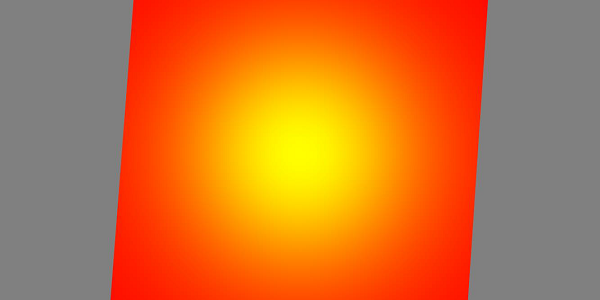
半球光更像是获取环境光。光线的方向朝向天空。灯光赋予 3 种颜色;一种用于天空,一种用于地面,最后一种用于镜面反射。
语法
以下是半球光的语法:
var light0 = new BABYLON.HemisphericLight("Hemi0", new BABYLON.Vector3(0, 1, 0), scene);
对于颜色
light0.diffuse = new BABYLON.Color3(1, 0, 0);
light0.specular = new BABYLON.Color3(0, 1, 0);
light0.groundColor = new BABYLON.Color3(0, 0, 0);
演示
<!doctype html>
<html>
   <head>
      <meta charset = "utf-8">
      <title>BabylonJs - Basic Element-Creating Scene</title>
      <script src = "babylon.js"></script>
      <style>
         canvas {width: 100%; height: 100%;}
      </style>
   </head>

   <body>
      <canvas id = "renderCanvas"></canvas>
      <script type = "text/javascript">
         var canvas = document.getElementById("renderCanvas");
         var engine = new BABYLON.Engine(canvas, true);
         var createScene  = function() {
            var scene = new BABYLON.Scene(engine);
            scene.clearColor = new BABYLON.Color3( .5, .5, .5);

            var camera = new BABYLON.ArcRotateCamera("camera1",  0, 0, 0, new BABYLON.Vector3(0, 0, -0), scene);
            camera.setPosition(new BABYLON.Vector3(0, 0, -100));
            camera.attachControl(canvas, true);

            var light0 = new BABYLON.HemisphericLight("Hemi0", new BABYLON.Vector3(0, 1, 0), scene);
            light0.diffuse = new BABYLON.Color3(1, 0, 0);
            light0.specular = new BABYLON.Color3(0, 1, 0);
            light0.groundColor = new BABYLON.Color3(0, 0, 0);

            var ground = BABYLON.Mesh.CreateGround("ground", 100,100, 2, scene);
            return scene;
         };
         var scene = createScene();
         engine.runRenderLoop(function() {
            scene.render();
         });
      </script>
   </body>
</html>
输出
以上代码行生成以下输出:
BabylonJS - 参数化形状
参数化形状是指可以使用带有弯曲、扭曲等的线条实现的不同形状。它是由数学方程(如抛物线、正弦曲线、余弦曲线、贝塞尔曲线等)生成的二维形式。使用该方程,我们可以找到坐标 (x, y) 并绘制相同的线条。在本章中,我们将看到诸如飘带、线条、虚线、管状、挤压之类的形状。可以使用下面描述的参数化形状在板上实现手绘线条。
| 序号。 | 参数化形状和描述 |
|---|---|
| 1 | 飘带
Ribbon 接收一系列路径作为输入,并沿着这些路径绘制线条。它使用复杂的逻辑来获取坐标。在下面给出的示例中,我们使用了贝塞尔曲线方程来绘制 Ribbon。贝塞尔曲线主要用于 3D 游戏中模拟平滑曲线。曲线需要控制点,曲线沿着控制点绘制。 |
| 2 | 线条
线条是 3D 游戏中的基本元素。要绘制一条线,您需要两点,您可以在这两点之间绘制一条线。 |
| 3 | 管
管状体是一种弯曲的圆柱体形状。它可以根据应用于它的方程(数学函数)来获得坐标,从而产生不同的参数化形状。 |
| 4 | 挤压
挤压有助于将二维形状转换为体积形状。假设您想创建一个二维星形,您将拥有 x、y 坐标,而 z 将为 0。通过二维坐标,挤压会将其转换为三维形状。因此,二维星形通过挤压将变成三维的。您可以尝试不同的二维形状并将它们转换为三维形状。 |
BabylonJS - 网格
在本章中,我们将学习如何使用网格构建器创建不同的形状。我们已经在之前的章节中学习了如何创建形状。
不同之处在于,使用网格构建器可以让您灵活地为形状添加颜色和图像。
使用 MeshBuilder 创建立方体
现在让我们看看如何使用 MeshBuilder 创建立方体。
演示
<!doctype html>
<html>
   <head>
      <meta charset = "utf-8">
      <title>BabylonJs - Basic Element-Creating Scene</title>
      <script src = "babylon.js"></script>
      <style>
         canvas {width: 100%; height: 100%;}
      </style>
   </head>

   <body>
      <canvas id = "renderCanvas"></canvas>
      <script type = "text/javascript">
         var canvas = document.getElementById("renderCanvas");
         var engine = new BABYLON.Engine(canvas, true);

         var createScene  = function() {
            var scene = new BABYLON.Scene(engine);
            scene.clearColor = new BABYLON.Color3(0, 0, 1);

            var camera = new BABYLON.ArcRotateCamera("Camera", 1, 0.8, 10, new BABYLON.Vector3(0, 0, 0), scene);
            camera.attachControl(canvas, true);

            var light = new BABYLON.HemisphericLight("light1", new BABYLON.Vector3(0, 1, 0), scene);
            light.intensity = 0.7;

            var pl = new BABYLON.PointLight("pl", BABYLON.Vector3.Zero(), scene);
            pl.diffuse = new BABYLON.Color3(1, 1, 1);
            pl.specular = new BABYLON.Color3(1, 1, 1);
            pl.intensity = 0.8;

            var mat = new BABYLON.StandardMaterial("mat1", scene);
            mat.alpha = 1.0;
            mat.diffuseColor = new BABYLON.Color3(0, 1, 0);

            var texture = new BABYLON.Texture("images/cube.png", scene);
            mat.diffuseTexture = texture;

            var hSpriteNb =  3;  // 3 sprites per raw
            var vSpriteNb =  2;  // 2 sprite raws

            var faceUV = new Array(6);
            for (var i = 0; i < 6; i++) {
               faceUV[i] = new BABYLON.Vector4(i/hSpriteNb, i/vSpriteNb, (i+1)/hSpriteNb, (i+1)/vSpriteNb);
            }

            var options = {
               width: 1.5,
               height: 1.5,
               depth: 1.5,
               faceUV: faceUV
            };

            var box = BABYLON.MeshBuilder.CreateBox("box", options, scene);
            box.material = mat;

            scene.registerBeforeRender(function() {
               pl.position = camera.position;
            });
            return scene;
         };
         var scene = createScene();
         engine.runRenderLoop(function() {
            scene.render();
         });
      </script>
   </body>
</html>
输出
以上代码行生成以下输出:
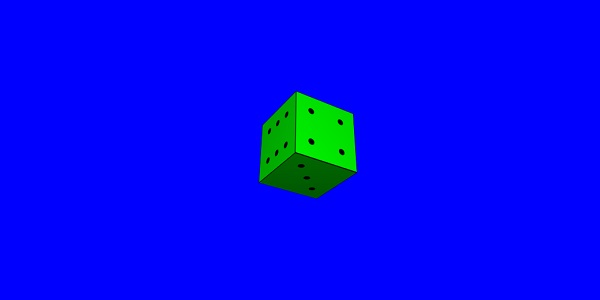
对于上面的示例,我们使用了如下所示的精灵图像。它水平方向有 3 列,垂直方向有 2 行。

在这个演示中,我们使用了一个名为 cube.png 的图像。这些图像存储在本地 images/ 文件夹中,并在下面粘贴以供参考。请注意,cube.png 是一个精灵图像,精灵图像是图像的集合。我们想在立方体上显示图像,所以需要将立方体的所有侧面放在一起。您也可以下载您选择的类似精灵图像,并在演示链接中使用。
createBox 构建器为您提供了尺寸选项。
例如:
var box = BABYLON.MeshBuilder.CreateBox("box", options, scene);
演示
var hSpriteNb =  3;  // 3 sprites per raw ie colums horizontally as shown in the image

var vSpriteNb =  2;  // 2 sprite raws as shown in the image above.

var faceUV = new Array(6); // the cube has 6 sides so creating array for same.
for (var i = 0; i < 6; i++) {
   faceUV[i] = new BABYLON.Vector4(i/hSpriteNb, i/vSpriteNb, (i+1)/hSpriteNb, (i+1)/vSpriteNb);
}

var options = {
   width: 1.5,
   height: 1.5,
   depth: 1.5,
   faceUV: faceUV
};
这称为使用 createBox 方法将纹理应用于网格构建器。我们使用了图像 **cube.png**,它水平方向有 3 列,垂直方向有 2 行。立方体或盒子有 6 个面。
要应用纹理,我们使用 options 参数。例如:
Var box = BABYLON.MeshBuilder.CreateBox ('box', options, scene);
我们定义了一个名为 faceUV 的数组,大小为 6,这是立方体的各个面。此数组将始终包含 Vector4 元素。每个 Vector4(x, y, z, w) 将定义如下:
- x = Ubottom
- y = Vbottom
- z = Utop
- w = Vtop
这些向量在 [0, 1] 范围内。Ubottom 和 Vbottom 是纹理裁剪开始处的左下角点的二维坐标。Utop、Vtop 是纹理裁剪结束处的右上角点。
var hSpriteNb =  3;  // 3 sprites per raw
var vSpriteNb =  2;  // 2 sprite raws

var faceUV = new Array(6);
for (var i = 0; i < 6; i++) {
   faceUV[i] = new BABYLON.Vector4(i/hSpriteNb, i/vSpriteNb, (i+1)/hSpriteNb, (i+1)/vSpriteNb);
}
假设默认纹理(即给定的图像)应用于盒子的所有面。如果您只想更改盒子的一个面或一个侧面,您可以直接分配如下所示的值:
var hSpriteNb =  3;  // 3 sprites per raw
var vSpriteNb =  2;  // 2 sprite raws

var faceUV = new Array(6);
faceUV[4] = new BABYLON.Vector4(0, 0, 1/hSpriteNb, 1/vSpriteNb);
示例
<!doctype html>
<html>
   <head>
      <meta charset = "utf-8">
      <title>BabylonJs - Basic Element-Creating Scene</title>
      <script src = "babylon.js"></script>
      <style>
         canvas {width: 100%; height: 100%;}
      </style>
   </head>

   <body>
      <canvas id = "renderCanvas"></canvas>
      <script type = "text/javascript">
         var canvas = document.getElementById("renderCanvas");
         var engine = new BABYLON.Engine(canvas, true);

         var createScene  = function() {
            var scene = new BABYLON.Scene(engine);
            scene.clearColor = new BABYLON.Color3(0, 0, 1);

            var camera = new BABYLON.ArcRotateCamera("Camera", 1, 0.8, 10, new BABYLON.Vector3(0, 0, 0), scene);
            camera.attachControl(canvas, true);

            var light = new BABYLON.HemisphericLight("light1", new BABYLON.Vector3(0, 1, 0), scene);
            light.intensity = 0.7;

            var pl = new BABYLON.PointLight("pl", BABYLON.Vector3.Zero(), scene);
            pl.diffuse = new BABYLON.Color3(1, 1, 1);
            pl.specular = new BABYLON.Color3(1, 1, 1);
            pl.intensity = 0.8;

            var mat = new BABYLON.StandardMaterial("mat1", scene);
            mat.alpha = 1.0;
            mat.diffuseColor = new BABYLON.Color3(0.8, 0.8, 0.8);

            var texture = new BABYLON.Texture("images/3d.png", scene);
            mat.diffuseTexture = texture;

            var hSpriteNb =  3;  // 3 sprites per raw
            var vSpriteNb =  2;  // 2 sprite raws

            var faceUV = new Array(6);
            faceUV[4] = new BABYLON.Vector4(0, 0, 1/hSpriteNb, 1/vSpriteNb);

            var options = {
               width:3,
               height:3,
               depth: 3,
               faceUV:faceUV
            };

            var box = BABYLON.MeshBuilder.CreateBox("box", options, scene);
            box.material = mat;

            scene.registerBeforeRender(function() {
               pl.position = camera.position;
            });
            return scene;
         };
         var scene = createScene();
         engine.runRenderLoop(function() {
            scene.render();
         });
      </script>
   </body>
</html>
输出
以上代码行生成以下输出:
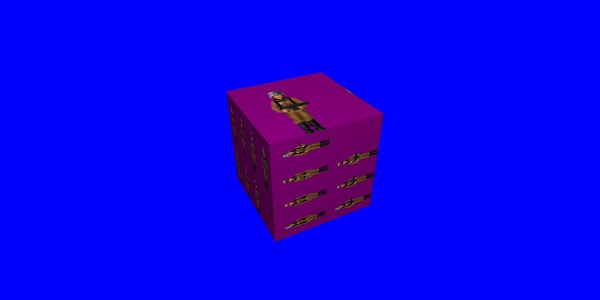
在这个演示中,我们使用了一个名为 3d.png 的图像。这些图像存储在本地 images/ 文件夹中,并在下面粘贴以供参考。请注意,3d.png 是一个精灵图像;精灵图像是图像的集合。我们想在立方体上显示图像,将立方体的所有侧面放在一起。您也可以下载您选择的类似精灵图像,并在演示链接中使用。
用于盒子的纹理 - **images/3d.png**

MeshCylinder
在本节中,我们将了解如何创建 MeshCylinder。
要创建 MeshCylinder,您需要使用 BABYLON.MeshBuilder.CreateCylinder 类。
该类的参数如下:
var meshcylinder = BABYLON.MeshBuilder.CreateCylinder("meshcylinder", {
   height: 3,
   diameter: 35,
   tessellation: 52
}, scene);
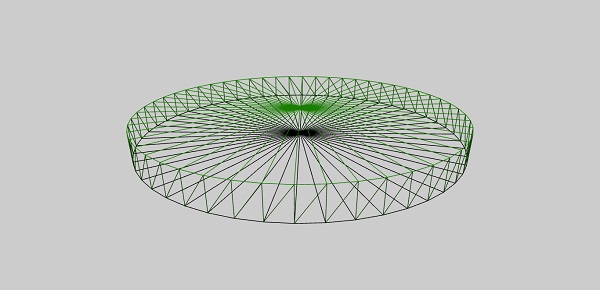
使用网格和网格构建器创建 Cylinder 之间的区别在于 - 您可以在网格构建器中使用 options。现在我们使用高度、直径和细分作为传递给圆柱体的选项。我们使用带有线框的标准材质作为此网格的材质。检查浏览器中的输出并查看圆柱体。您可以在游戏中使用类似的结构作为场景中旋转的车轮。
演示
<!doctype html>
<html>
   <head>
      <meta charset = "utf-8">
      <title>Babylon.js demo - Mesh Builder</title>
      <script src = "babylon.js"></script>
      <style>
         html,body,canvas { margin: 0; padding: 0; width: 100%; height: 100%; font-size: 0; }
      </style>
   </head>

   <body>
      <canvas id = "renderCanvas"></canvas>
      <script type = "text/javascript">
         var canvas = document.getElementById("renderCanvas");
         var engine = new BABYLON.Engine(canvas, true);
         var createScene  = function() {
            var scene = new BABYLON.Scene(engine);
            scene.clearColor = new BABYLON.Color3(0.8, 0.8, 0.8);

            var camera = new BABYLON.ArcRotateCamera("Camera", -Math.PI / 6, 1.3, 40, new BABYLON.Vector3(0, -3, 0), scene);

            var light = new BABYLON.HemisphericLight("hemi", new BABYLON.Vector3(0, 1, 0), scene);

            var mat = new BABYLON.StandardMaterial("mat", scene);
            mat.diffuseColor = new BABYLON.Color3(0.1, .5, 0);
            mat.specularColor = new BABYLON.Color3(0, 0, 0);
            mat.wireframe = true;

            var meshcylinder = BABYLON.MeshBuilder.CreateCylinder("meshcylinder", {
               height: 3,
               diameter: 35,
               tessellation: 52
            }, scene);

            meshcylinder.material = mat;
            meshcylinder.position = new BABYLON.Vector3(0, 0, 0);

            scene.activeCamera.attachControl(canvas);
            return scene;
         };

         var scene = createScene();
         engine.runRenderLoop(function() {
            scene.render();
         });
      </script>
   </body>
</html>
输出
以上代码行生成以下输出:
现在,许多使用网格构建器创建的形状将一起在一个演示中使用。下面演示链接中介绍的形状将在后续章节中列出。
BabylonJS – 网格相交和点
游戏中的网格相交很重要,因为您知道当游戏中的两个物体相交时需要做什么。下面的演示解释了当网格相交时需要捕获的事件。
在下面的演示中,我们介绍了以下两个概念:
- 相交网格
- 相交点
<!doctype html>
<html>
   <head>
   <meta charset = "utf-8">
   <title>BabylonJs - Basic Element-Creating Scene</title>
   <script src = "babylon.js"></script>
   <style>
      canvas {width: 100%; height: 100%;}
   </style>
   </head>

   <body>
      <canvas id = "renderCanvas"></canvas>
      <script type = "text/javascript">
         var canvas = document.getElementById("renderCanvas");
         var engine = new BABYLON.Engine(canvas, true);

         var createScene  = function() {
            var scene = new BABYLON.Scene(engine);
            scene.clearColor = new BABYLON.Color3(1, 1, 1);

            var camera = new BABYLON.ArcRotateCamera("ArcRotateCamera", 1, 0.8, 20, new BABYLON.Vector3(0, 0, 0), scene);
            camera.attachControl(canvas, true);

            var matcone = new BABYLON.StandardMaterial("mat1", scene);
            matcone.alpha = 1.0;
            matcone.diffuseColor = new BABYLON.Color3(0, 0, 0);
            matcone.wireframe = true;

            var cone = BABYLON.MeshBuilder.CreateCylinder("cone", {height : 10, diameterTop: 10,diameterBottom:10, tessellation: 5}, scene);
            cone.position= new BABYLON.Vector3(12,1,0);
            cone.material = matcone;

            var balloon1 = BABYLON.Mesh.CreateSphere("balloon1",5, 1.0, scene);
            var balloon2 = BABYLON.Mesh.CreateSphere("balloon2", 5, 1.0, scene);
            var balloon3 = BABYLON.Mesh.CreateSphere("balloon3", 5, 1.0, scene);

            balloon1.material = new BABYLON.StandardMaterial("matBallon", scene);
            balloon2.material = new BABYLON.StandardMaterial("matBallon", scene);
            balloon3.material = new BABYLON.StandardMaterial("matBallon", scene);

            balloon1.position = new BABYLON.Vector3(4, 2, 0);
            balloon2.position = new BABYLON.Vector3(5, 1, 0);
            balloon3.position = new BABYLON.Vector3(7, 0, 0);

            var pointToIntersect = new BABYLON.Vector3(10, 0, 0);
            var a = 0.01;

            scene.registerBeforeRender(function () {
               if (balloon1.intersectsMesh(cone, false)) {
                  balloon1.material.emissiveColor = new BABYLON.Color3(1, 0, 0);
               }
               else {
                  balloon1.material.emissiveColor = new BABYLON.Color3(0, 1, 0);
               }

               if (balloon2.intersectsMesh(cone, false)) {
                  balloon2.material.emissiveColor = new BABYLON.Color3(1, 0, 0);
               }
               else {
                  balloon2.material.emissiveColor = new BABYLON.Color3(0, 1, 0);
               }

               if (balloon3.intersectsMesh(cone, false)) {
                  balloon3.material.emissiveColor = new BABYLON.Color3(1, 0, 0);
               }
               else {
                  balloon3.material.emissiveColor = new BABYLON.Color3(0, 1, 0);
               }

               if (balloon3.intersectsPoint(pointToIntersect)) {
                  balloon3.material.emissiveColor = new BABYLON.Color3(0, 0, 0);
               }

               a += 0.01;
               balloon1.position.x += Math.cos(a) / 10;
               balloon2.position.x += Math.cos(a) / 10;
               balloon3.position.x += Math.cos(a) / 10;
            });
            return scene;
         };
         var scene = createScene();
         engine.runRenderLoop(function() {
            scene.render();
         });
      </script>
   </body>
</html>
输出
以上代码生成以下输出:
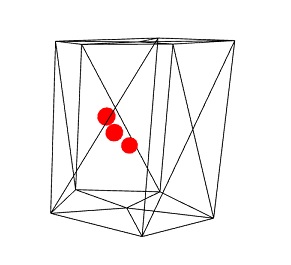
解释
使用上面的代码,我们创建了一个线框为 true 的圆柱体。我们创建了 3 个球体。球体的原始颜色为绿色。
在 **scene.registerBeforeRender** 函数中,我们将根据与网格(此处为圆柱体)的相交来更改球体的颜色。
考虑 **registerBeforeRender** 中的以下代码:
if (balloon1.intersectsMesh(cone, false)) {
   balloon1.material.emissiveColor = new BABYLON.Color3(1, 0, 0);
} else {
   balloon1.material.emissiveColor = new BABYLON.Color3(0, 1, 0);
}
**intersectsMesh** 如果与传递给它的参数中给出的网格相交,则返回 true 或 false。
例如:
balloon1.intersectsMesh(cone, false); //cone refers to the cylinder mesh here.
如果球体与圆柱体相交,则球体的颜色将变为红色;否则为绿色。
以下代码用于点相交:
var pointToIntersect = new BABYLON.Vector3(10, 0, 0);
if (balloon3.intersectsPoint(pointToIntersect)) {
   balloon3.material.emissiveColor = new BABYLON.Color3(0, 0, 0);
}
这里,**pointtoIntersect** 变量是位置向量,在 x 轴上为 10。如果球体穿过相交点,则球体的颜色将变为黑色。
BabylonJS – 网格拾取碰撞
拾取碰撞实际上会为您提供坐标,您可以将网格放置在该位置。物体由鼠标拾取,您可以将其放置在鼠标单击的位置。假设您需要将网格(物体)放置在用户单击鼠标的位置;因此,借助拾取碰撞,它可以帮助您获得单击位置的坐标。
演示
<!doctype html>
<html>
   <head>
      <meta charset = "utf-8">
      <title>BabylonJs - Basic Element-Creating Scene</title>
      <script src = "babylon.js"></script>
      <style>
      canvas {width: 100%; height: 100%;}
      </style>
   </head>

   <body>
      <canvas id = "renderCanvas"></canvas>
      <script type = "text/javascript">
         var canvas = document.getElementById("renderCanvas");
         var engine = new BABYLON.Engine(canvas, true);
         var createScene  = function() {
            var scene = new BABYLON.Scene(engine);
            scene.clearColor = new BABYLON.Color3(1, 1, 1);

            // setup environment
            var light0 = new BABYLON.PointLight("Omni", new BABYLON.Vector3(0, 10, 20), scene);
            var freeCamera = new BABYLON.FreeCamera("FreeCamera", new BABYLON.Vector3(0, 0, -30), scene);

            var balloon1 = BABYLON.Mesh.CreateSphere("balloon1",5, 1.0, scene);
            var balloon2 = BABYLON.Mesh.CreateSphere("balloon2", 5, 1.0, scene);
            balloon1.material = new BABYLON.StandardMaterial("matBallon", scene);
            balloon2.material = new BABYLON.StandardMaterial("matBallon", scene);

            balloon1.position = new BABYLON.Vector3(0, 0, -0.1);
            balloon2.position = new BABYLON.Vector3(0, 0, -0.1);
            balloon1.material.emissiveColor = new BABYLON.Color3(1, 0, 0);
            balloon2.material.emissiveColor = new BABYLON.Color3(0, 0, 1);

            //Wall
            var wall = BABYLON.Mesh.CreatePlane("wall", 30.0, scene);
            wall.material = new BABYLON.StandardMaterial("wallMat", scene);
            wall.material.emissiveColor = new BABYLON.Color3(0.5, 1, 0.5);

            //When pointer down event is raised

            scene.onPointerDown = function (evt, pickResult) {
               // if the click hits the ground object, we change the impact position
               if (pickResult.hit) {
                  var dateValue = new Date();
                  var secondNumber = dateValue.getSeconds();
                  if (secondNumber % 2 == 0) {
                  balloon1.position.x = pickResult.pickedPoint.x;
                  balloon1.position.y = pickResult.pickedPoint.y;
                  } else {
                     balloon2.position.x = pickResult.pickedPoint.x;
                     balloon2.position.y = pickResult.pickedPoint.y;
                  }
               }
            };
            return scene;
         };
         var scene = createScene();
         engine.runRenderLoop(function() {
            scene.render();
         });
      </script>
   </body>
</html>
输出
解释
在上面的示例中,我们使用了一个平面和 2 个球体。要生成此输出,请使用以下代码:
scene.onPointerDown = function (evt, pickResult) {

   // if the click hits the ground object, we change the impact position
   if (pickResult.hit) {
      var dateValue = new Date();
      var secondNumber = dateValue.getSeconds();
      if (secondNumber % 2 == 0) {
      balloon1.position.x = pickResult.pickedPoint.x;
      balloon1.position.y = pickResult.pickedPoint.y;
      }
      else {
         balloon2.position.x = pickResult.pickedPoint.x;
         balloon2.position.y = pickResult.pickedPoint.y;
      }
   }
};
事件 **scene.onPointerDown** 为您提供坐标 -x、y 和 z,在我们的示例中为 **pickResult**。
如果您单击地面网格,它会将 pickResult.hit 设置为 true。我们考虑奇数/偶数秒,并将球体的 z 和 y 坐标位置更改为 pickResult,如上所示。位置更改后,球体将放置在您单击并定位鼠标的位置。您可以尝试上面的演示。
BabylonJS – 光线投射
光线投射就像太阳的光线,用于检查场景中的碰撞和相交。
语法
var ray = new BABYLON.Ray(origin, direction, length);
参数
考虑光线投射的以下参数:
**起点** - 光线开始的位置。
**方向** - 光线的方向计算如下:
var forward = new BABYLON.Vector3(0,0,1);
forward = vecToLocal(forward, box);
var direction = forward.subtract(origin);
然后,要获得方向,我们从起点(盒子的位置)中减去它:
**长度** - 光线的长度。
演示
<!doctype html>
<html>
   <head>
      <meta charset = "utf-8">
      <title>BabylonJs - Basic Element-Creating Scene</title>
      <script src = "babylon.js"></script>
      <style>
         canvas {width: 100%; height: 100%;}
      </style>
   </head>

   <body>
      <canvas id = "renderCanvas"></canvas>
      <script type = "text/javascript">
         var canvas = document.getElementById("renderCanvas");
         var engine = new BABYLON.Engine(canvas, true);

         var createScene  = function() {
            var scene = new BABYLON.Scene(engine);

            var light = new BABYLON.PointLight("Omni", new BABYLON.Vector3(0, 100, 100), scene);

            var camera = new BABYLON.ArcRotateCamera("Camera", 0, 0.8, 100, new BABYLON.Vector3.Zero(), scene);
            camera.attachControl(canvas, true);

            var ground = BABYLON.Mesh.CreateGround("ground", 500, 500, 10, scene);

            var box = BABYLON.Mesh.CreateBox("box", 4.0, scene);
            box.position.y = 2;
            box.scaling.z = 2;

            var matBox = new BABYLON.StandardMaterial("matBox", scene);
            matBox.diffuseColor = new BABYLON.Color3(0.8, 0.1, 0.5);
            box.material = matBox;
            box.isPickable = false;

            var box2 = BABYLON.Mesh.CreateBox("box2", 8.0, scene);
            box2.position = new BABYLON.Vector3(-20, 4, 0);

            var matBox2 = new BABYLON.StandardMaterial("matBox2", scene);
            matBox2.diffuseColor = new BABYLON.Color3(1, 0, 0);
            box2.material = matBox2;

            var box3 = BABYLON.Mesh.CreateBox("box3", 8.0, scene);
            box3.position = new BABYLON.Vector3(20, 4, 0);

            var matBox3 = new BABYLON.StandardMaterial("matBox3", scene);
            matBox3.diffuseColor = new BABYLON.Color3(1, 0, 0);
            box3.material = matBox3;

            var box4 = BABYLON.Mesh.CreateBox("box4", 8.0, scene);
            box4.position = new BABYLON.Vector3(0, 0, 20);

            var matBox4 = new BABYLON.StandardMaterial("matBox4", scene);
            matBox4.diffuseColor = new BABYLON.Color3(0, 1, 0);
            box4.material = matBox4;

            var box5 = BABYLON.Mesh.CreateBox("box5", 8.0, scene);
            box5.position = new BABYLON.Vector3(0, 0, -20);

            var matBox5 = new BABYLON.StandardMaterial("matBox5", scene);
            matBox5.diffuseColor = new BABYLON.Color3(0, 1, 0);
            box5.material = matBox5;

            function mousemovef() {
               var pickResult = scene.pick(scene.pointerX, scene.pointerY);

               if (pickResult.hit) {
                  var diffX = pickResult.pickedPoint.x - box.position.x;
                  var diffY = pickResult.pickedPoint.z - box.position.z;
                  box.rotation.y = Math.atan2(diffX,diffY);
               }
            }

            scene.onPointerMove = function () {
               mousemovef();
            };

            function vecToLocal(vector, mesh) {
               var m = mesh.getWorldMatrix();
               var v = BABYLON.Vector3.TransformCoordinates(vector, m);
               return v;
            }

            scene.registerBeforeRender(function () {
               var origin = box.position;

               var forward = new BABYLON.Vector3(0,0,1);
               forward = vecToLocal(forward, box);

               var direction = forward.subtract(origin);
               direction = BABYLON.Vector3.Normalize(direction);

               var length = 100;

               var ray = new BABYLON.Ray(origin, direction, length);
               // ray.show(scene, new BABYLON.Color3(1, 1, 0.1));

               var hit = scene.pickWithRay(ray);

               if (hit.pickedMesh) {
                  hit.pickedMesh.scaling.y  += 0.01;
               }
            });
            return scene;
         };
         var scene = createScene();
         engine.runRenderLoop(function() {
            scene.render();
         });
      </script>
   </body>
</html>
输出
以上代码行生成以下输出:
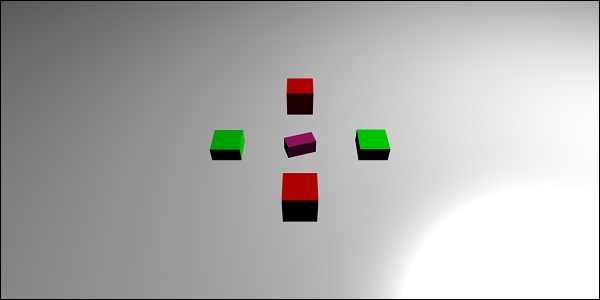
解释
中心有一个主盒子作为光线投射。一旦它指向任何盒子,盒子的尺寸就会增加。此概念在玩游戏时非常有用,可以知道哪些其他物体正在接触,并可以采取必要的措施。
添加 **box.isPickable = false;**,以便不考虑中心的主盒子。如果您不想将任何物体包含在接触的光线中,请向其添加 **box.isPickable = false;**。
以下代码添加了被光线拾取的盒子的缩放。
scene.registerBeforeRender(function () {
   var origin = box.position;
   var forward = new BABYLON.Vector3(0,0,1);
   forward = vecToLocal(forward, box);

   var direction = forward.subtract(origin);
   direction = BABYLON.Vector3.Normalize(direction);

   var length = 100;

   var ray = new BABYLON.Ray(origin, direction, length);

   var hit = scene.pickWithRay(ray);

   if (hit.pickedMesh) {
      hit.pickedMesh.scaling.y  += 0.01;
   }
});
**var ray = new BABYLON.Ray(origin, direction, length);** 创建一条光线,它将主盒子的位置作为起点。
光线的方向计算如下:
var forward = new BABYLON.Vector3(0,0,1);
forward = vecToLocal(forward, box);
var direction = forward.subtract(origin);
然后,要获得方向,我们从起点(盒子的位置)中减去它。函数 **vecToLocal** 旨在通过将向量乘以网格矩阵来转换从网格角度来看的位置。
我们使用 **var hit = scene.pickWithRay(ray);** 获取光线中的命中点。
它给出光线与网格重合的位置。
通过执行以下代码行,缩放应用于被拾取的网格:
if (hit.pickedMesh) {
   hit.pickedMesh.scaling.y  += 0.01;
}
在浏览器中尝试上面的示例以查看输出。
带有谓词函数的光线投射
现在让我们看看带有谓词函数的光线投射是如何工作的以及用 rayhelper 显示的方向。
演示
<!doctype html>
<html>
   <head>
      <meta charset = "utf-8">
      <title>BabylonJs - Basic Element-Creating Scene</title>
      <script src = "babylon.js"></script>
      <style>
         canvas {width: 100%; height: 100%;}
      </style>
   </head>

   <body>
      <canvas id = "renderCanvas"></canvas>
      <script type = "text/javascript">
         var canvas = document.getElementById("renderCanvas");
         var engine = new BABYLON.Engine(canvas, true);
         var createScene  = function() {
            var scene = new BABYLON.Scene(engine);

            var light = new BABYLON.PointLight("Omni", new BABYLON.Vector3(0, 100, 100), scene);
            var camera = new BABYLON.ArcRotateCamera("Camera", 0, 0.8, 100, new BABYLON.Vector3.Zero(), scene);
            camera.attachControl(canvas, true);

            var ground = BABYLON.Mesh.CreateGround("ground", 500, 500, 10, scene);

            var box = BABYLON.Mesh.CreateBox("box", 4.0, scene);
            box.position.y = 2;
            box.scaling.z = 2;
            var matBox = new BABYLON.StandardMaterial("matBox", scene);
            matBox.diffuseColor = new BABYLON.Color3(0.8, 0.1, 0.5);
            box.material = matBox;
            box.isPickable = false;

            var box2 = BABYLON.Mesh.CreateBox("box2", 8.0, scene);
            box2.position = new BABYLON.Vector3(-20, 4, 0);
            var matBox2 = new BABYLON.StandardMaterial("matBox2", scene);
            matBox2.diffuseColor = new BABYLON.Color3(1, 0, 0);
            box2.material = matBox2;

            var box3 = BABYLON.Mesh.CreateBox("box3", 8.0, scene);
            box3.position = new BABYLON.Vector3(20, 4, 0);
            var matBox3 = new BABYLON.StandardMaterial("matBox3", scene);
            matBox3.diffuseColor = new BABYLON.Color3(1, 0, 0);
            box3.material = matBox3;

            var box4 = BABYLON.Mesh.CreateBox("box4", 8.0, scene);
            box4.position = new BABYLON.Vector3(0, 0, 20);
            var matBox4 = new BABYLON.StandardMaterial("matBox4", scene);
            matBox4.diffuseColor = new BABYLON.Color3(0, 1, 0);
            box4.material = matBox4;

            var box5 = BABYLON.Mesh.CreateBox("box5", 8.0, scene);
            box5.position = new BABYLON.Vector3(0, 0, -20);
            var matBox5 = new BABYLON.StandardMaterial("matBox5", scene);
            matBox5.diffuseColor = new BABYLON.Color3(0, 1, 0);
            box5.material = matBox5;

            //ray showing the direction
            var ray = new BABYLON.Ray();
            var rayHelper = new BABYLON.RayHelper(ray);

            var localMeshDirection = new BABYLON.Vector3(0, 0, -1);
            var localMeshOrigin = new BABYLON.Vector3(0, 0, -.4);
            var length = 10;

            rayHelper.attachToMesh(box, localMeshDirection, localMeshOrigin, length);
            rayHelper.show(scene);

            function mousemovef() {
               var pickResult = scene.pick(scene.pointerX, scene.pointerY);

               if (pickResult.hit) {
                  var diffX = pickResult.pickedPoint.x - box.position.x;
                  var diffY = pickResult.pickedPoint.z - box.position.z;
                  box.rotation.y = Math.atan2(diffX,diffY);
               }
            }

            scene.onPointerMove = function () {
               mousemovef();
            };

            function vecToLocal(vector, mesh) {
               var m = mesh.getWorldMatrix();
               var v = BABYLON.Vector3.TransformCoordinates(vector, m);
               return v;
            }

            scene.registerBeforeRender(function () {
               var origin = box.position;
               function predicate(mesh) {
                  if (mesh == box2 || mesh == box || mesh == box5) {
                     return false;
                  }
                  return true;
               }

               var forward = new BABYLON.Vector3(0,0,1);
               forward = vecToLocal(forward, box);

               var direction = forward.subtract(origin);
               direction = BABYLON.Vector3.Normalize(direction);

               var length = 100;

               var ray = new BABYLON.Ray(origin, direction, length);
               // ray.show(scene, new BABYLON.Color3(1, 1, 0.1));

               var hit = scene.pickWithRay(ray, predicate);
               if (hit.pickedMesh) {
                  hit.pickedMesh.scaling.y  += 0.01;
               }
            });
            return scene;
         };
         var scene = createScene();
         engine.runRenderLoop(function() {
            scene.render();
         });
      </script>
   </body>
</html>
输出
以上代码行生成以下输出:
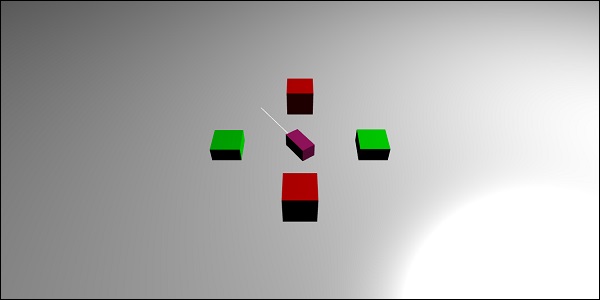
解释
带有谓词函数的光线投射有助于选择我们想要的网格。如果我们不想拾取网格,我们可以忽略它。
function predicate(mesh) {
   if (mesh == box2 || mesh == box || mesh == box5) {
      return false;
   }
   return true;
}
上述函数给出被光线选择的网格。如果选择的网格是 box2、box 或 box5,它将返回 false;否则返回 true。
您可以尝试上面的示例。
BabylonJS – 网格阴影
阴影根据光线照射到创建的网格的方式进行渲染。它们在使 3D 世界中的输出看起来更逼真方面发挥着重要作用。
现在让我们学习如何使用 babylonjs 创建阴影。
语法
var shadowGenerator00 = new BABYLON.ShadowGenerator(shadowsize, light);
参数
考虑以下与网格阴影相关的参数:
**阴影大小** - 阴影的大小。
**光线** - 场景中使用的光线。
演示
<!doctype html>
<html>
   <head>
      <meta charset = "utf-8">
      <title>BabylonJs - Basic Element-Creating Scene</title>
      <script src = "babylon.js"></script>
      <style>
         canvas {width: 100%; height: 100%;}
      </style>
   </head>

   <body>
      <canvas id = "renderCanvas"></canvas>
      <script type = "text/javascript">
         var canvas = document.getElementById("renderCanvas");
         var engine = new BABYLON.Engine(canvas, true);

         var createScene  = function() {
            var scene = new BABYLON.Scene(engine);
            scene.clearColor = new BABYLON.Color3(1, 1, 1);
            var camera = new BABYLON.ArcRotateCamera("ArcRotateCamera", 1, 0.8, 20, new BABYLON.Vector3(0, 0, 0), scene);
            camera.attachControl(canvas, true);
            // light1
            var light = new BABYLON.DirectionalLight("dir01", new BABYLON.Vector3(-1, -2, -1), scene);
            light.position = new BABYLON.Vector3(20, 40, 20);

            var ground01 = BABYLON.Mesh.CreateGround("Spotlight Hard Shadows", 24, 60, 1, scene, false);
            var groundMaterial = new BABYLON.StandardMaterial("ground", scene);
            groundMaterial.diffuseTexture = new BABYLON.Texture("images/gr1.jpg", scene);
            groundMaterial.specularColor = new BABYLON.Color3(0, 0, 0);
            groundMaterial.emissiveColor = new BABYLON.Color3(0.2, 0.2, 0.2);

            ground01.material = groundMaterial;
            ground01.receiveShadows = true;
            ground01.position.x = -5;

            var box = BABYLON.Mesh.CreateBox("box", 3.0, scene);
            box.position.x = -5;
            box.position.y = 5;
            var shadowGenerator00 = new BABYLON.ShadowGenerator(512, light);
            shadowGenerator00.getShadowMap().renderList.push(box);
            //shadowGenerator00.usePoissonSampling = true;
            //shadowGenerator00.useExponentialShadowMap = true;
            shadowGenerator00.useBlurExponentialShadowMap = true;
            shadowGenerator00.bias = 0.01;
            scene.registerBeforeRender(function() {
               box.rotation.x += 0.01;
               box.rotation.x += 0.01;
            });
            return scene;
         };
         var scene = createScene();
         engine.runRenderLoop(function() {
            scene.render();
         });
      </script>
   </body>
</html>
输出
以上代码行生成以下输出:

解释
要创建阴影,您需要创建 shadowgenerator。考虑以下示例:
var shadowGenerator00 = new BABYLON.ShadowGenerator(512, light);
要定义需要阴影的网格,您需要将其添加到上面的生成器中。
shadowGenerator00.getShadowMap().renderList.push(box);
现在,我们创建了一个地面和一个位于其顶部的盒子。我们希望盒子的阴影落在地面上。为此,我们需要确保地面被标记为接收阴影,方法如下:
ground01.receiveShadows = true;
有一些可用于阴影的滤镜,如下所示:
shadowGenerator.usePoissonSampling = true; - Called Poisson sampling
shadowGenerator.useExponentialShadowMap = true; - Exponential Shadow Map
shadowGenerator.useBlurExponentialShadowMap= true;  - Blur Exponential Shadow Map
在我们的演示中,我们使用了 shadowGenerator00.useBlurExponentialShadowMap = true; 您可以尝试其他方法,看看输出是什么样的。
这里,我们使用了名为 gr1.jpg 的图像。这些图像存储在本地 images/ 文件夹中。您可以下载任何您选择的图像,并在演示链接中使用。
BabylonJS – 网格上的高级纹理
在本节中,我们将学习有关网格上高级纹理的知识。不同的纹理如下所示:
让我们将一些复杂的纹理应用于网格 - 镜像、凹凸、视频和折射。
| 序号。 | 网格和描述 |
|---|---|
| 1 | MeshHightlight 层
高亮层用于突出显示场景中的网格。您可以为其着色,颜色将应用于网格的边界。如果您想在游戏中突出显示,可以使用网格高亮层。 |
| 2 | 变形网格
变形通过某种转换方式将物体的形状更改为另一种形状。我们已经看到了形状的可更新参数;否则该参数设置为 false。对于变形,它设置为 true,并且网格会更新以更改形状。 |
| 3 | 网格操作
操作用于向网格添加交互。当您单击网格或网格相交或碰撞时,事件会被激活。 |
| 4 | Mesh AssetsManager
使用 assestsmanager 类,您可以在场景中加载网格、图像和二进制文件。 |
| 5 | 导入网格
我们将学习如何使用导入网格。 |
| 6 | 网格变形目标
我们已经看到了线条、条带、多边形等的变形。在本演示中,我们将看到球体和盒子的变形。通过变形目标,球体的形状会发生变化,如下面的演示所示。 |
| 7 | 网格实例
如果要在场景中绘制相同的网格,请使用实例。 |
| 8 | 网格LOD与实例
LOD代表距离等级(Level Of Detail)。此功能允许您根据查看者的距离指定网格。随着查看者到对象的距离增加,网格的细节级别将使用LOD清晰地显示。 |
| 9 | 网格体积光散射后处理
此过程会散射光线,如下面的输出所示。在浏览器中测试一下,您将看到光线如何穿过网格散射。 |
| 10 | 网格边缘渲染器
边缘渲染用于绘制网格周围的边缘,如上图输出所示。 |
| 11 | 网格混合模式
可以通过修改材质的alphamode来创建混合模式。 |
| 12 | 网格实体粒子
实体粒子系统在网格上更新。我们在网格上看到的全部属性都可以在实体粒子中使用。 |
| 13 | 网格面数据
面数据占用大量内存,此功能默认情况下未启用。要启用它,我们需要根据需要创建一个网格并向其更新面数据。 |
BabylonJS - 向量位置和旋转
在您的浏览器中运行下面给出的演示链接。在下面的演示中,我们绘制了x、y和z轴。在正负方向上,x、y和z轴上都标有数字。在浏览器中运行相同的代码,根据需要更改值,绘制形状、网格,定位它们,并查看它们如何在x、y和z轴上渲染。使用x、y和z轴上提到的数字,将有助于查看网格的位置是如何完成的。
演示
<!doctype html>
<html>
   <head>
      <meta charset = "utf-8">
      <title>BabylonJs - Basic Element-Creating Scene</title>
      <script src = "babylon.js"></script>
      <style>
         canvas {width: 100%; height: 100%;}
      </style>
   </head>

   <body>
      <canvas id = "renderCanvas"></canvas>
      <script type = "text/javascript">
         var canvas = document.getElementById("renderCanvas");
         var engine = new BABYLON.Engine(canvas, true);
         var createScene  = function() {
            var scene = new BABYLON.Scene(engine);
            scene.clearColor = new BABYLON.Color3( .5, .5, .5);

            // camera
            var camera = new BABYLON.ArcRotateCamera("camera1",  0, 0, 0, new BABYLON.Vector3(5, 3, 0), scene);
            camera.setPosition(new BABYLON.Vector3(5, 10, -10));
            camera.attachControl(canvas, true);

            // lights
            var light = new BABYLON.HemisphericLight("light1", new BABYLON.Vector3(1, 0.5, 0), scene);
            light.intensity = 0.8;
            var spot = new BABYLON.SpotLight(
               "spot",
               new BABYLON.Vector3(25, 15, -10),
               new BABYLON.Vector3(-1, -0.8, 1), 15, 1, scene);
            spot.diffuse = new BABYLON.Color3(1, 1, 1);
            spot.specular = new BABYLON.Color3(0, 0, 0);
            spot.intensity = 0.2;

            // material
            var mat = new BABYLON.StandardMaterial("mat1", scene);
            mat.alpha = 1.0;
            mat.diffuseColor = new BABYLON.Color3(0.5, 0.5, 1.0);
            mat.backFaceCulling = false;
            //mat.wireframe = true;

            // show axis
            var showAxis = function(size) {
               var makeTextPlane = function(text, color, size) {
                  var dynamicTexture = new BABYLON.DynamicTexture("DynamicTexture", 50, scene, true);
                  dynamicTexture.hasAlpha = true;
                  dynamicTexture.drawText(text, 5, 40, "bold 36px Arial", color , "transparent", true);

                  var plane = new BABYLON.Mesh.CreatePlane("TextPlane", size, scene, true);
                  plane.material = new BABYLON.StandardMaterial("TextPlaneMaterial", scene);
                  plane.material.backFaceCulling = false;

                  plane.material.specularColor = new BABYLON.Color3(0, 0, 0);
                  plane.material.diffuseTexture = dynamicTexture;
                  return plane;
               };

               var axisX = BABYLON.Mesh.CreateLines("axisX", [
                  new BABYLON.Vector3(-size * 0.95, 0.05 * size, 0),
                  new BABYLON.Vector3(-size, 0, 0),
                  new BABYLON.Vector3(-size * 0.95, -0.05 * size, 0),
                  new BABYLON.Vector3(-size, 0, 0),
                  new BABYLON.Vector3.Zero(),
                  new BABYLON.Vector3(size, 0, 0),
                  new BABYLON.Vector3(size * 0.95, 0.05 * size, 0),
                  new BABYLON.Vector3(size, 0, 0),
                  new BABYLON.Vector3(size * 0.95, -0.05 * size, 0)
               ], scene);

               axisX.color = new BABYLON.Color3(1, 0, 0);
               var xChar = makeTextPlane("X", "red", size / 10);
               xChar.position = new BABYLON.Vector3(0.9 * size, -0.05 * size, 0);

               var xChar1 = makeTextPlane("-X", "red", size / 10);
               xChar1.position = new BABYLON.Vector3(-0.9 * size, 0.05 * size, 0);

               var axisY = BABYLON.Mesh.CreateLines("axisY", [
                  new BABYLON.Vector3( -0.05 * size, -size * 0.95, 0),
                  new BABYLON.Vector3(0, -size, 0),
                  new BABYLON.Vector3(0.05 * size, -size * 0.95, 0),
                  new BABYLON.Vector3(0, -size, 0),
                  new BABYLON.Vector3.Zero(),
                  new BABYLON.Vector3(0, size, 0),
                  new BABYLON.Vector3( -0.05 * size, size * 0.95, 0),
                  new BABYLON.Vector3(0, size, 0),
                  new BABYLON.Vector3( 0.05 * size, size * 0.95, 0)
               ], scene);

               axisY.color = new BABYLON.Color3(0, 1, 0);
               var yChar = makeTextPlane("Y", "green", size / 10);
               yChar.position = new BABYLON.Vector3(0, 0.9 * size, -0.05 * size);
               var yChar1 = makeTextPlane("-Y", "green", size / 10);
               yChar1.position = new BABYLON.Vector3(0, -0.9 * size, 0.05 * size);

               var axisZ = BABYLON.Mesh.CreateLines("axisZ", [
                  new BABYLON.Vector3( 0 , -0.05 * size, -size * 0.95),
                  new BABYLON.Vector3(0, 0, -size),
                  new BABYLON.Vector3( 0 , 0.05 * size, -size * 0.95),
                  new BABYLON.Vector3(0, 0, -size),
                  new BABYLON.Vector3.Zero(),
                  new BABYLON.Vector3(0, 0, size),
                  new BABYLON.Vector3( 0 , -0.05 * size, size * 0.95),
                  new BABYLON.Vector3(0, 0, size),
                  new BABYLON.Vector3( 0, 0.05 * size, size * 0.95)
               ], scene);

               axisZ.color = new BABYLON.Color3(0, 0, 1);
               var zChar = makeTextPlane("Z", "blue", size / 10);
               zChar.position = new BABYLON.Vector3(0, 0.05 * size, 0.9 * size);
               var zChar1 = makeTextPlane("-Z", "blue", size / 10);
               zChar1.position = new BABYLON.Vector3(0, 0.05 * size, -0.9 * size);
            };
            showAxis(10);
            return scene;
         };
         var scene = createScene();
         engine.runRenderLoop(function() {
            scene.render();
         });
      </script>
   </body>
</html>
输出
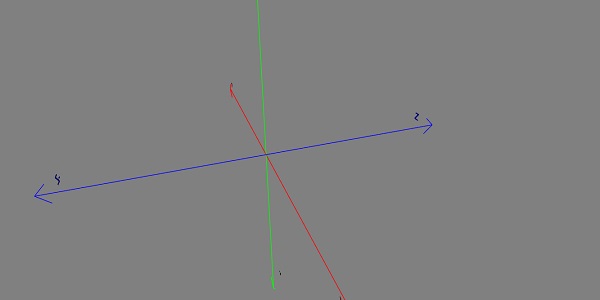
让我们定义沿x、y和z轴的坐标。
演示
<!doctype html>
<html>
   <head>
      <meta charset = "utf-8">
      <title>BabylonJs - Basic Element-Creating Scene</title>
      <script src = "babylon.js"></script>
      <style>
         canvas {width: 100%; height: 100%;}
      </style>
   </head>

   <body>
      <canvas id = "renderCanvas"></canvas>
      <script type = "text/javascript">
         var canvas = document.getElementById("renderCanvas");
         var engine = new BABYLON.Engine(canvas, true);
         var createScene  = function() {
            var scene = new BABYLON.Scene(engine);
            scene.clearColor = new BABYLON.Color3( .5, .5, .5);

            // camera
            var camera = new BABYLON.ArcRotateCamera("camera1",  0, 0, 0, new BABYLON.Vector3(5, 3, 0), scene);
            camera.setPosition(new BABYLON.Vector3(5, 10, -10));
            camera.attachControl(canvas, true);

            // lights
            var light = new BABYLON.HemisphericLight("light1", new BABYLON.Vector3(1, 0.5, 0), scene);
            light.intensity = 0.8;
            var spot = new BABYLON.SpotLight(
               "spot", new BABYLON.Vector3(25, 15, -10),
               new BABYLON.Vector3(-1, -0.8, 1), 15, 1, scene);
            spot.diffuse = new BABYLON.Color3(1, 1, 1);
            spot.specular = new BABYLON.Color3(0, 0, 0);
            spot.intensity = 0.2;

            // material
            var mat = new BABYLON.StandardMaterial("mat1", scene);
            mat.alpha = 1.0;
            mat.diffuseColor = new BABYLON.Color3(0.5, 0.5, 1.0);
            mat.backFaceCulling = false;

            //mat.wireframe = true;
            var makeTextPlane = function(text, color, size) {
               var dynamicTexture = new BABYLON.DynamicTexture("DynamicTexture", 50, scene, true);
               dynamicTexture.hasAlpha = true;
               dynamicTexture.drawText(text, 5, 40, "bold 36px Arial", color , "transparent", true);

               var plane = new BABYLON.Mesh.CreatePlane("TextPlane", size, scene, true);
               plane.material = new BABYLON.StandardMaterial("TextPlaneMaterial", scene);
               plane.material.backFaceCulling = false;
               plane.material.specularColor = new BABYLON.Color3(0, 0, 0);
               plane.material.diffuseTexture = dynamicTexture;
               return plane;
            };

            // show axis
            var showAxis = function(size) {
               var axisX = BABYLON.Mesh.CreateLines("axisX", [
                  new BABYLON.Vector3(-size * 0.95, 0.05 * size, 0),
                  new BABYLON.Vector3(-size, 0, 0),
                  new BABYLON.Vector3(-size * 0.95, -0.05 * size, 0),
                  new BABYLON.Vector3(-size, 0, 0),
                  new BABYLON.Vector3.Zero(),
                  new BABYLON.Vector3(size, 0, 0),
                  new BABYLON.Vector3(size * 0.95, 0.05 * size, 0),
                  new BABYLON.Vector3(size, 0, 0),
                  new BABYLON.Vector3(size * 0.95, -0.05 * size, 0)
               ], scene);
               axisX.color = new BABYLON.Color3(1, 0, 0);
               var xChar = makeTextPlane("X", "red", size / 10);
               xChar.position = new BABYLON.Vector3(0.9 * size, -0.05 * size, 0);

               var xChar1 = makeTextPlane("-X", "red", size / 10);
               xChar1.position = new BABYLON.Vector3(-0.9 * size, 0.05 * size, 0);
               var xcor = [];
               for (i =- 10; i <= 10; i++) {
                  xcor[i] = makeTextPlane(i, "red", size / 10);
                  xcor[i].position = new BABYLON.Vector3(i, 0, 0);
               }

               var axisY = BABYLON.Mesh.CreateLines("axisY", [
                  new BABYLON.Vector3( -0.05 * size, -size * 0.95, 0),
                  new BABYLON.Vector3(0, -size, 0),
                  new BABYLON.Vector3(0.05 * size, -size * 0.95, 0),
                  new BABYLON.Vector3(0, -size, 0),
                  new BABYLON.Vector3.Zero(),
                  new BABYLON.Vector3(0, size, 0),
                  new BABYLON.Vector3( -0.05 * size, size * 0.95, 0),
                  new BABYLON.Vector3(0, size, 0),
                  new BABYLON.Vector3( 0.05 * size, size * 0.95, 0)
               ], scene);

               axisY.color = new BABYLON.Color3(0, 1, 0);
               var yChar = makeTextPlane("Y", "green", size / 10);
               yChar.position = new BABYLON.Vector3(0, 0.9 * size, -0.05 * size);
               var yChar1 = makeTextPlane("-Y", "green", size / 10);
               yChar1.position = new BABYLON.Vector3(0, -0.9 * size, 0.05 * size);

               var ycor = [];
               for (y=-10;y<=10;y++) {
                  xcor[y] = makeTextPlane(y, "green", size / 10);
                  xcor[y].position = new BABYLON.Vector3(0, y, 0);
               }

               var axisZ = BABYLON.Mesh.CreateLines("axisZ", [
                  new BABYLON.Vector3( 0 , -0.05 * size, -size * 0.95),
                  new BABYLON.Vector3(0, 0, -size),
                  new BABYLON.Vector3( 0 , 0.05 * size, -size * 0.95),
                  new BABYLON.Vector3(0, 0, -size),
                  new BABYLON.Vector3.Zero(),
                  new BABYLON.Vector3(0, 0, size),
                  new BABYLON.Vector3( 0 , -0.05 * size, size * 0.95),
                  new BABYLON.Vector3(0, 0, size),
                  new BABYLON.Vector3( 0, 0.05 * size, size * 0.95)
               ], scene);

               axisZ.color = new BABYLON.Color3(0, 0, 1);
               var zChar = makeTextPlane("Z", "blue", size / 10);
               zChar.position = new BABYLON.Vector3(0, 0.05 * size, 0.9 * size);
               var zChar1 = makeTextPlane("-Z", "blue", size / 10);
               zChar1.position = new BABYLON.Vector3(0, 0.05 * size, -0.9 * size);

               var zcor = [];
               for (z =- 10; z <= 10; z++) {
                  xcor[z] = makeTextPlane(z, "green", size / 10);
                  xcor[z].position = new BABYLON.Vector3(0, 0, z);
               }
            };

            //Lets draw a mesh along the axis.

            var spriteManagerPlayer = new BABYLON.SpriteManager("playerManager", "images/bird.png", 1, 200, scene);
            var player = new BABYLON.Sprite("player", spriteManagerPlayer);
            player.position.x = 2;
            player.position.y = 2;
            player.position.z = 0;

            var zChardot = makeTextPlane(".", "red", 1);
            zChardot.position = new BABYLON.Vector3(1.8, 1.8,0);

            var box = BABYLON.Mesh.CreateBox("box", '2', scene);
            box.position = new BABYLON.Vector3(-5,3,0); // center point of box x-axis is -5 and y axis is 3.

            var box = BABYLON.Mesh.CreateBox("box", '2', scene);
            box.position = new BABYLON.Vector3(0,3,-3); // center point of box x-axis is -5 and y axis is 3.

            var redSphere = BABYLON.Mesh.CreateSphere("red", 32, 1, scene); //no position for sphere so by default it takes 0,0,0
            showAxis(10);
            returnscene;
         };
         var scene = createScene();
         engine.runRenderLoop(function() {
            scene.render();
         });
      </script>
   </body>
</html>
输出
以上代码行生成以下输出:
在本演示中,我们使用了图像bird.png。这些图像存储在本地images/文件夹中,并在下面提供参考。您可以下载任何您选择的图像,并在演示链接中使用。
Images/bird.png

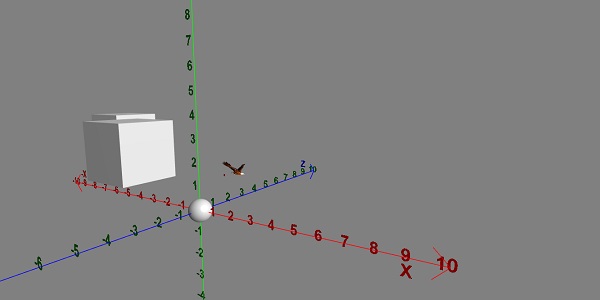
演示
<!doctype html>
<html>
   <head>
   <meta charset = "utf-8">
   <title>BabylonJs - Basic Element-Creating Scene</title>
   <script src = "babylon.js"></script>
   <style>
   canvas {width: 100%; height: 100%;}
   </style>
   </head>

   <body>
      <canvas id = "renderCanvas"></canvas>
      <script type = "text/javascript">
         var canvas = document.getElementById("renderCanvas");
         var engine = new BABYLON.Engine(canvas, true);
         var createScene  = function() {
            var scene = new BABYLON.Scene(engine);
            scene.clearColor = new BABYLON.Color3( .5, .5, .5);

            // camera
            var camera = new BABYLON.ArcRotateCamera("camera1",  0, 0, 0, new BABYLON.Vector3(5, 3, 0), scene);
            camera.setPosition(new BABYLON.Vector3(5, 10, -10));
            camera.attachControl(canvas, true);

            // lights
            var light = new BABYLON.HemisphericLight("light1", new BABYLON.Vector3(1, 0.5, 0), scene);
            light.intensity = 0.8;

            var spot = new BABYLON.SpotLight(
               "spot",
               new BABYLON.Vector3(25, 15, -10),
               new BABYLON.Vector3(-1, -0.8, 1), 15, 1, scene);
            spot.diffuse = new BABYLON.Color3(1, 1, 1);
            spot.specular = new BABYLON.Color3(0, 0, 0);
            spot.intensity = 0.2;

            // material
            var mat = new BABYLON.StandardMaterial("mat1", scene);
            mat.alpha = 1.0;
            mat.diffuseColor = new BABYLON.Color3(0.5, 0.5, 1.0);
            mat.backFaceCulling = false;

            //mat.wireframe = true;
            var makeTextPlane = function(text, color, size) {
               var dynamicTexture = new BABYLON.DynamicTexture("DynamicTexture", 50, scene, true);
               dynamicTexture.hasAlpha = true;
               dynamicTexture.drawText(text, 5, 40, "bold 36px Arial", color , "transparent", true);
               var plane = new BABYLON.Mesh.CreatePlane("TextPlane", size, scene, true);
               plane.material = new BABYLON.StandardMaterial("TextPlaneMaterial", scene);
               plane.material.backFaceCulling = false;
               plane.material.specularColor = new BABYLON.Color3(0, 0, 0);
               plane.material.diffuseTexture = dynamicTexture;
               return plane;
            };

            // show axis
            var showAxis = function(size) {
               var axisX = BABYLON.Mesh.CreateLines("axisX", [
                  new BABYLON.Vector3(-size * 0.95, 0.05 * size, 0),
                  new BABYLON.Vector3(-size, 0, 0),
                  new BABYLON.Vector3(-size * 0.95, -0.05 * size, 0),
                  new BABYLON.Vector3(-size, 0, 0),
                  new BABYLON.Vector3.Zero(),
                  new BABYLON.Vector3(size, 0, 0),
                  new BABYLON.Vector3(size * 0.95, 0.05 * size, 0),
                  new BABYLON.Vector3(size, 0, 0),
                  new BABYLON.Vector3(size * 0.95, -0.05 * size, 0)], scene);
               axisX.color = new BABYLON.Color3(1, 0, 0);
               var xChar = makeTextPlane("X", "red", size / 10);
               xChar.position = new BABYLON.Vector3(0.9 * size, -0.05 * size, 0);

               var xChar1 = makeTextPlane("-X", "red", size / 10);
               xChar1.position = new BABYLON.Vector3(-0.9 * size, 0.05 * size, 0);
               var xcor = [];
               for (i =- 10; i <= 10; i++) {
                  xcor[i] = makeTextPlane(i, "red", size / 10);
                  xcor[i].position = new BABYLON.Vector3(i, 0, 0);
               }

               var axisY = BABYLON.Mesh.CreateLines("axisY", [
                  new BABYLON.Vector3( -0.05 * size, -size * 0.95, 0),
                  new BABYLON.Vector3(0, -size, 0),
                  new BABYLON.Vector3(0.05 * size, -size * 0.95, 0),
                  new BABYLON.Vector3(0, -size, 0),
                  new BABYLON.Vector3.Zero(),
                  new BABYLON.Vector3(0, size, 0),
                  new BABYLON.Vector3( -0.05 * size, size * 0.95, 0),
                  new BABYLON.Vector3(0, size, 0),
                  new BABYLON.Vector3( 0.05 * size, size * 0.95, 0)
               ], scene);

               axisY.color = new BABYLON.Color3(0, 1, 0);
               var yChar = makeTextPlane("Y", "green", size / 10);
               yChar.position = new BABYLON.Vector3(0, 0.9 * size, -0.05 * size);
               var yChar1 = makeTextPlane("-Y", "green", size / 10);
               yChar1.position = new BABYLON.Vector3(0, -0.9 * size, 0.05 * size);

               var ycor = [];
               for (y =- 10; y <= 10; y++) {
                  xcor[y] = makeTextPlane(y, "green", size / 10);
                  xcor[y].position = new BABYLON.Vector3(0, y, 0);
               }

               var axisZ = BABYLON.Mesh.CreateLines("axisZ", [
                  new BABYLON.Vector3( 0 , -0.05 * size, -size * 0.95),
                  new BABYLON.Vector3(0, 0, -size),
                  new BABYLON.Vector3( 0 , 0.05 * size, -size * 0.95),
                  new BABYLON.Vector3(0, 0, -size),
                  new BABYLON.Vector3.Zero(),
                  new BABYLON.Vector3(0, 0, size),
                  new BABYLON.Vector3( 0 , -0.05 * size, size * 0.95),
                  new BABYLON.Vector3(0, 0, size),
                  new BABYLON.Vector3( 0, 0.05 * size, size * 0.95)
               ], scene);
               axisZ.color = new BABYLON.Color3(0, 0, 1);
               var zChar = makeTextPlane("Z", "blue", size / 10);
               zChar.position = new BABYLON.Vector3(0, 0.05 * size, 0.9 * size);
               var zChar1 = makeTextPlane("-Z", "blue", size / 10);
               zChar1.position = new BABYLON.Vector3(0, 0.05 * size, -0.9 * size);

               var zcor = [];
               for (z =- 10; z <= 10; z++) {
                  xcor[z] = makeTextPlane(z, "green", size / 10);
                  xcor[z].position = new BABYLON.Vector3(0, 0, z);
               }
            };

            var kite = BABYLON.Mesh.CreateLines("kite", [
               new BABYLON.Vector3(-4,0,0),
               new BABYLON.Vector3(0,4,0),
               new BABYLON.Vector3(4,0,0),
               new BABYLON.Vector3(0,-4,0),
               new BABYLON.Vector3(-4,0,0)
            ], scene);
            kite.color = new BABYLON.Color3(1, 1, 1);

            var path = [];
            path.push(new BABYLON.Vector3(-4, 0, 0));
            path.push(new BABYLON.Vector3(0, 0, 0));
            path.push(new BABYLON.Vector3(4, 0, 0));

            var lines1 = BABYLON.Mesh.CreateLines("lines",path, scene, true);
            lines1.color = new BABYLON.Color3(1, 1, 1);
            showAxis(10);
            return scene;
         };
         var scene = createScene();
         engine.runRenderLoop(function() {
            scene.render();
         });
      </script>
   </body>
</html>
输出
以上代码行将生成以下输出
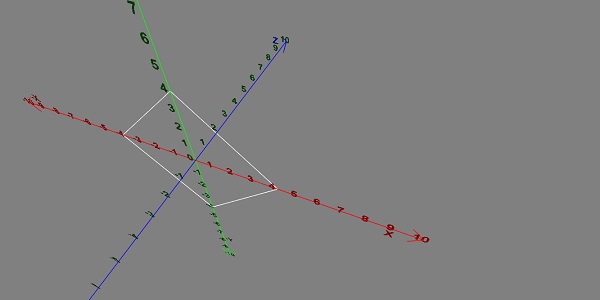
向量旋转
现在让我们看看向量旋转是如何工作的。
演示
<!doctype html>
<html>
   <head>
      <meta charset = "utf-8">
      <title>BabylonJs - Basic Element-Creating Scene</title>
      <script src = "babylon.js"></script>
      <style>
         canvas {width: 100%; height: 100%;}
      </style>
   </head>

   <body>
      <canvas id = "renderCanvas"></canvas>
      <script type = "text/javascript">
         var canvas = document.getElementById("renderCanvas");
         var engine = new BABYLON.Engine(canvas, true);
         var createScene  = function() {
            var scene = new BABYLON.Scene(engine);
            scene.clearColor = new BABYLON.Color3( .5, .5, .5);

            // camera
            var camera = new BABYLON.ArcRotateCamera("camera1",  0, 0, 0, new BABYLON.Vector3(5, 3, 0), scene);
            camera.setPosition(new BABYLON.Vector3(0, 0, 0));
            camera.attachControl(canvas, true);

            // lights
            var light = new BABYLON.HemisphericLight("light1", new BABYLON.Vector3(1, 0.5, 0), scene);
            light.intensity = 0.8;
            var spot = new BABYLON.SpotLight(
               "spot",
               new BABYLON.Vector3(25, 15, -10),
               new BABYLON.Vector3(-1, -0.8, 1), 15, 1, scene);
            spot.diffuse = new BABYLON.Color3(1, 1, 1);
            spot.specular = new BABYLON.Color3(0, 0, 0);
            spot.intensity = 0.2;

            // material
            var mat = new BABYLON.StandardMaterial("mat1", scene);
            mat.alpha = 1.0;
            mat.diffuseColor = new BABYLON.Color3(0.5, 0.5, 1.0);
            mat.backFaceCulling = false;

            //mat.wireframe = true;
            var makeTextPlane = function(text, color, size) {
               var dynamicTexture = new BABYLON.DynamicTexture("DynamicTexture", 50, scene, true);
               dynamicTexture.hasAlpha = true;
               dynamicTexture.drawText(text, 5, 40, "bold 36px Arial", color , "transparent", true);
               var plane = new BABYLON.Mesh.CreatePlane("TextPlane", size, scene, true);
               plane.material = new BABYLON.StandardMaterial("TextPlaneMaterial", scene);
               plane.material.backFaceCulling = false;
               plane.material.specularColor = new BABYLON.Color3(0, 0, 0);
               plane.material.diffuseTexture = dynamicTexture;
               return plane;
            };
            // show axis
            var showAxis = function(size) {
               var axisX = BABYLON.Mesh.CreateLines("axisX", [
                  new BABYLON.Vector3(-size * 0.95, 0.05 * size, 0),
                  new BABYLON.Vector3(-size, 0, 0),
                  new BABYLON.Vector3(-size * 0.95, -0.05 * size, 0),
                  new BABYLON.Vector3(-size, 0, 0),
                  new BABYLON.Vector3.Zero(),
                  new BABYLON.Vector3(size, 0, 0),
                  new BABYLON.Vector3(size * 0.95, 0.05 * size, 0),
                  new BABYLON.Vector3(size, 0, 0),
                  new BABYLON.Vector3(size * 0.95, -0.05 * size, 0)
               ], scene);

               axisX.color = new BABYLON.Color3(1, 0, 0);
               var xChar = makeTextPlane("X", "red", size / 10);
               xChar.position = new BABYLON.Vector3(0.9 * size, -0.05 * size, 0);

               var xChar1 = makeTextPlane("-X", "red", size / 10);
               xChar1.position = new BABYLON.Vector3(-0.9 * size, 0.05 * size, 0);
               var xcor = [];
               for (i =- 10; i <= 10; i++) {
                  xcor[i] = makeTextPlane(i, "red", size / 10);
                  xcor[i].position = new BABYLON.Vector3(i, 0, 0);
               }

               var axisY = BABYLON.Mesh.CreateLines("axisY", [
                  new BABYLON.Vector3( -0.05 * size, -size * 0.95, 0),
                  new BABYLON.Vector3(0, -size, 0),
                  new BABYLON.Vector3(0.05 * size, -size * 0.95, 0),
                  new BABYLON.Vector3(0, -size, 0),
                  new BABYLON.Vector3.Zero(),
                  new BABYLON.Vector3(0, size, 0),
                  new BABYLON.Vector3( -0.05 * size, size * 0.95, 0),
                  new BABYLON.Vector3(0, size, 0),
                  new BABYLON.Vector3( 0.05 * size, size * 0.95, 0)
               ], scene);

               axisY.color = new BABYLON.Color3(0, 1, 0);
               var yChar = makeTextPlane("Y", "green", size / 10);
               yChar.position = new BABYLON.Vector3(0, 0.9 * size, -0.05 * size);
               var yChar1 = makeTextPlane("-Y", "green", size / 10);
               yChar1.position = new BABYLON.Vector3(0, -0.9 * size, 0.05 * size);

               var ycor = [];
               for (y =- 10; y <= 10; y++) {
                  xcor[y] = makeTextPlane(y, "green", size / 10);
                  xcor[y].position = new BABYLON.Vector3(0, y, 0);
               }

               var axisZ = BABYLON.Mesh.CreateLines("axisZ", [
                  new BABYLON.Vector3( 0 , -0.05 * size, -size * 0.95),
                  new BABYLON.Vector3(0, 0, -size),
                  new BABYLON.Vector3( 0 , 0.05 * size, -size * 0.95),
                  new BABYLON.Vector3(0, 0, -size),
                  new BABYLON.Vector3.Zero(),
                  new BABYLON.Vector3(0, 0, size),
                  new BABYLON.Vector3( 0 , -0.05 * size, size * 0.95),
                  new BABYLON.Vector3(0, 0, size),
                  new BABYLON.Vector3( 0, 0.05 * size, size * 0.95)
               ], scene);

               axisZ.color = new BABYLON.Color3(0, 0, 1);
               var zChar = makeTextPlane("Z", "blue", size / 10);
               zChar.position = new BABYLON.Vector3(0, 0.05 * size, 0.9 * size);
               var zChar1 = makeTextPlane("-Z", "blue", size / 10);
               zChar1.position = new BABYLON.Vector3(0, 0.05 * size, -0.9 * size);

               var zcor = [];
               for (z =- 10; z <= 10; z++) {
                  xcor[z] = makeTextPlane(z, "green", size / 10);
                  xcor[z].position = new BABYLON.Vector3(0, 0, z);
               }
            };

            var yellowSphere = BABYLON.Mesh.CreateSphere("yellowSphere",32, 1, scene);
            yellowSphere.setPivotMatrix(BABYLON.Matrix.Translation(2, 0, 0));
            var yellowMaterial = new BABYLON.StandardMaterial("yellowMaterial", scene);
            yellowMaterial.diffuseColor = BABYLON.Color3.Yellow();
            yellowSphere.material = yellowMaterial;

            var wheel1 = BABYLON.MeshBuilder.CreateTorus('t1', {diameter: 2.0}, scene);
            wheel1.position.x = -2.0
            wheel1.position.z = -2.0;

            showAxis(10);
            var k = 0.0;
            var y = 0.0;
            var x = 0.0;
            scene.registerBeforeRender(function () {
               wheel1.rotation.copyFromFloats(0.0, 0.0, Math.PI / 2);
               wheel1.addRotation(0.0, y, 0.0);
               wheel1.addRotation(x, 0.0, 0.0);
               yellowSphere.rotation.y += 0.01;
               y += 0.05;
            });
            return scene;
         };
         var scene = createScene();
         engine.runRenderLoop(function() {
            scene.render();
         });
      </script>
   </body>
</html>
输出
以上代码行生成以下输出:
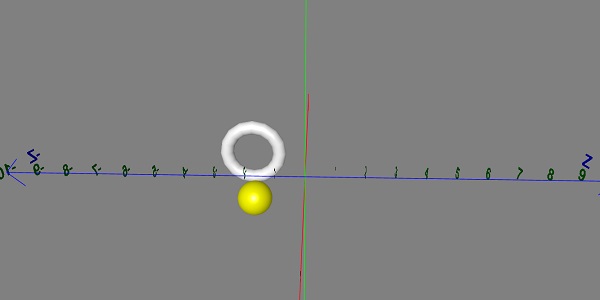
BabylonJS - 贴花
贴花就像贴在物体上的贴纸。贴纸绘制是借助绘制在网格上的二维图像完成的(例如,游戏中的物体)。在游戏中,假设有一支军队正在射击子弹,需要在物体上看到子弹的痕迹。所以在Babylon.js中,它是使用贴花完成的,当您点击任何物体时,您将在点击的位置绘制一个二维图像。
贴花用于在创建的网格上添加细节——例如子弹、孔洞等细节。在下面给出的演示链接中,我们使用图像并将其添加到导入的网格中。
要添加贴花,可以使用以下代码:
var newDecal = BABYLON.Mesh.CreateDecal("decal", mesh, decalPosition, normal, decalSize, angle);
执行以下代码以在网格上添加贴花:
BABYLON.SceneLoader.ImportMesh("Shcroendiger'scat", "scenes/", "SSAOcat.babylon", scene, function (newMeshes) {
   var cat = newMeshes[0]; / /this is mesh shown on the screen.

   // Set the target of the camera to the first imported mesh
   camera.target = cat;

   var decalMaterial = new BABYLON.StandardMaterial("decalMat", scene);
   decalMaterial.diffuseTexture = new BABYLON.Texture("images/impact1.jpg", scene);
   decalMaterial.diffuseTexture.hasAlpha = true;
   decalMaterial.zOffset = -2;

   var onPointerDown = function (evt) {
      if (evt.button !== 0) {
         return;
      }

      // check if we are under a mesh
      var pickInfo = scene.pick(scene.pointerX, scene.pointerY, function (mesh) { return mesh === cat;
      // this will give all the meshes , but it will pick the mesh whch is same as cat and return true if it is found });
      if (pickInfo.hit) { // if true
         var decalSize = new BABYLON.Vector3(5, 5, 5); //size of decal is defined

         var newDecal = BABYLON.Mesh.CreateDecal("decal", cat, pickInfo.pickedPoint, pickInfo.getNormal(true), decalSize); //decal is created
         newDecal.material = decalMaterial; //decal material is added.
      }
   }
   var canvas = engine.getRenderingCanvas();
   canvas.addEventListener("pointerdown", onPointerDown, false);

   scene.onDispose = function () {
      canvas.removeEventListener("pointerdown", onPointerDown);
   }
});
演示
<!doctype html>
<html>
   <head>
      <meta charset = "utf-8">
      <title>BabylonJs - Basic Element-Creating Scene</title>
      <script src = "babylon.js"></script>
      <style>
         canvas {width: 100%; height: 100%;}
      </style>
   </head>

   <body>
      <canvas id = "renderCanvas"></canvas>
      <script type = "text/javascript">
         var canvas = document.getElementById("renderCanvas");
         var engine = new BABYLON.Engine(canvas, true);

         var createScene  = function() {
            var scene = new BABYLON.Scene(engine);

            //Adding a light
            var light = new BABYLON.HemisphericLight("Hemi", new BABYLON.Vector3(0, 1, 0), scene);

            //Adding an Arc Rotate Camera
            var camera = new BABYLON.ArcRotateCamera("Camera", -1.85, 1.2, 200, BABYLON.Vector3.Zero(), scene);

            camera.attachControl(canvas, true);

            // The first parameter can be used to specify which mesh to import. Here we import all meshes
            BABYLON.SceneLoader.ImportMesh("Shcroendiger'scat", "scenes/", "SSAOcat.babylon", scene, function (newMeshes) {
               var cat = newMeshes[0];

               // Set the target of the camera to the first imported mesh
               camera.target = cat;

               var decalMaterial = new BABYLON.StandardMaterial("decalMat", scene);
               decalMaterial.diffuseTexture = new BABYLON.Texture("images/impact1.jpg", scene);
               decalMaterial.diffuseTexture.hasAlpha = true;
               decalMaterial.zOffset = -2;

               var onPointerDown = function (evt) {
                  if (evt.button !== 0) {
                     return;
                  }

                  // check if we are under a mesh
                  var pickInfo = scene.pick(scene.pointerX, scene.pointerY, function (mesh) { return mesh === cat; });
                  if (pickInfo.hit) {
                     var decalSize = new BABYLON.Vector3(5, 5, 5);

                     var newDecal = BABYLON.Mesh.CreateDecal("decal", cat, pickInfo.pickedPoint, pickInfo.getNormal(true), decalSize);
                     newDecal.material = decalMaterial;
                  }
               }
               var canvas = engine.getRenderingCanvas();
               canvas.addEventListener("pointerdown", onPointerDown, false);

               scene.onDispose = function () {
                  canvas.removeEventListener("pointerdown", onPointerDown);
               }
            });
            return scene;
         };
         var scene = createScene();
         engine.runRenderLoop(function() {
            scene.render();
         });
      </script>
   </body>
</html>
在上面的演示链接中,我们使用了SSAOcat.babylon网格。您可以从此处下载SSAOcat.babylon的json文件:
将文件保存在scenes/文件夹中。这将帮助您获得如下所示的输出。
输出
以上代码行生成以下输出:

在本演示中,我们使用了图像impact1.jpg。这些图像存储在本地images/文件夹中,并在下面提供参考。您可以下载任何您选择的图像,并在演示链接中使用。
images/impact1.jpg
BabylonJS - Curve3
BabylonJS具有内置API,可以创建一些复杂的数学曲线。我们之前已经看到过使用复杂方程式创建的条带、线条,用于绘制图案并计算给定网格的路径坐标。我们这里有一个内置的API来避免进行复杂的计算,就像在Curves API中一样。
解释的曲线如下:
- 二次贝塞尔曲线
- 三次贝塞尔曲线
- 埃尔米特样条曲线
- Catmull-Rom样条曲线
二次贝塞尔曲线
在本节中,我们将学习二次贝塞尔曲线。
语法
var bezier = BABYLON.Curve3.CreateQuadraticBezier(origin, control, destination, nb_of_points);
参数
考虑与二次贝塞尔曲线相关的以下参数。
起点 - 曲线的起点。
控制点 - 曲线的控制点。
终点 - 终点。
点数 - 数组中的点数。
三次贝塞尔曲线
在本节中,我们将学习三次贝塞尔曲线。
语法
var bezier3 = BABYLON.Curve3.CreateCubicBezier(origin, control1, control2, destination, nb_of_points)
参数
考虑与三次贝塞尔曲线相关的以下参数。
起点 - 起点。
控制点1 - 第一个控制点(向量形式)。
控制点2 - 第二个控制点(向量形式)。
终点 - 终点(向量形式)。
点数 - 数组形式的点数。
埃尔米特样条曲线
在本节中,我们将学习埃尔米特样条曲线。
语法
var hermite = BABYLON.Curve3.CreateHermiteSpline(p1, t1, p2, t2, nbPoints);
参数
考虑与埃尔米特样条曲线相关的以下参数:
p1 - 曲线的起点。
t1 - 起点切向量点。
p2 - 终点。
t2 - 终点切向量。
点数 - 最终曲线的点数组。
Catmull-Rom样条曲线
在本节中,我们将学习Catmull-Rom样条曲线。
语法
var nbPoints = 20;   // the number of points between each Vector3 control points
var points = [vec1, vec2, ..., vecN];  // an array of Vector3 the curve must pass through : the control points
var catmullRom = BABYLON.Curve3.CreateCatmullRomSpline(points, nbPoints);
参数
考虑与Catmull-Rom样条曲线相关的以下参数:
点 - Vector3数组,曲线必须通过控制点。
点数 - 每个Vector3控制点之间的点数。
var path = catmullRom.getPoints(); // getPoints() returns an array of successive Vector3.
var l = catmullRom.length(); // method returns the curve length.
演示
<!doctype html>
<html>
   <head>
      <meta charset = "utf-8">
      <title>BabylonJs - Basic Element-Creating Scene</title>
      <script src = "babylon.js"></script>
      <style>
         canvas {width: 100%; height: 100%;}
      </style>
   </head>

   <body>
      <canvas id = "renderCanvas"></canvas>
      <script type = "text/javascript">
         var canvas = document.getElementById("renderCanvas");
         var engine = new BABYLON.Engine(canvas, true);

         var createScene  = function() {
            var scene = new BABYLON.Scene(engine);
            scene.clearColor = new BABYLON.Color3( .5, .5, .5);

            // camera
            var camera = new BABYLON.ArcRotateCamera("camera1",  0, 0, 0, new BABYLON.Vector3(5, 3, 0), scene);
            camera.setPosition(new BABYLON.Vector3(0, 0, -100));
            camera.attachControl(canvas, true);

            // lights
            var light = new BABYLON.HemisphericLight("light1", new BABYLON.Vector3(1, 0.5, 0), scene);
            light.intensity = 0.8;
            var spot = new BABYLON.SpotLight(
            "spot",
            new BABYLON.Vector3(25, 15, -10),
            new BABYLON.Vector3(-1, -0.8, 1), 15, 1, scene);
            spot.diffuse = new BABYLON.Color3(1, 1, 1);
            spot.specular = new BABYLON.Color3(0, 0, 0);
            spot.intensity = 0.2;

            // material
            var mat = new BABYLON.StandardMaterial("mat1", scene);
            mat.alpha = 1.0;
            mat.diffuseColor = new BABYLON.Color3(0.5, 0.5, 1.0);
            mat.backFaceCulling = false;

            //mat.wireframe = true;
            var makeTextPlane = function(text, color, size) {
               var dynamicTexture = new BABYLON.DynamicTexture("DynamicTexture", 50, scene, true);
               dynamicTexture.hasAlpha = true;
               dynamicTexture.drawText(text, 5, 40, "bold 36px Arial", color , "transparent", true);

               var plane = new BABYLON.Mesh.CreatePlane("TextPlane", size, scene, true);

               plane.material = new BABYLON.StandardMaterial("TextPlaneMaterial", scene);
               plane.material.backFaceCulling = false;
               plane.material.specularColor = new BABYLON.Color3(0, 0, 0);
               plane.material.diffuseTexture = dynamicTexture;
               return plane;
            };

            // show axis
            var showAxis = function(size) {
               var axisX = BABYLON.Mesh.CreateLines("axisX", [
                  new BABYLON.Vector3(-size * 0.95, 0.05 * size, 0),
                  new BABYLON.Vector3(-size, 0, 0),
                  new BABYLON.Vector3(-size * 0.95, -0.05 * size, 0),
                  new BABYLON.Vector3(-size, 0, 0),
                  new BABYLON.Vector3.Zero(),
                  new BABYLON.Vector3(size, 0, 0),
                  new BABYLON.Vector3(size * 0.95, 0.05 * size, 0),
                  new BABYLON.Vector3(size, 0, 0),
                  new BABYLON.Vector3(size * 0.95, -0.05 * size, 0)
               ], scene);

               axisX.color = new BABYLON.Color3(1, 0, 0);
               var xChar = makeTextPlane("X", "red", size / 10);
               xChar.position = new BABYLON.Vector3(0.9 * size, -0.05 * size, 0);

               var xChar1 = makeTextPlane("-X", "red", size / 10);
               xChar1.position = new BABYLON.Vector3(-0.9 * size, 0.05 * size, 0);

               var xcor = [];
               for (i =- 20; i <= 20; i++) {
                  xcor[i] = makeTextPlane(i, "red", size / 10);
                  xcor[i].position = new BABYLON.Vector3(i, 0, 0);
               }

               var axisY = BABYLON.Mesh.CreateLines("axisY", [
                  new BABYLON.Vector3( -0.05 * size, -size * 0.95, 0),
                  new BABYLON.Vector3(0, -size, 0),
                  new BABYLON.Vector3(0.05 * size, -size * 0.95, 0),
                  new BABYLON.Vector3(0, -size, 0),
                  new BABYLON.Vector3.Zero(),
                  new BABYLON.Vector3(0, size, 0),
                  new BABYLON.Vector3( -0.05 * size, size * 0.95, 0),
                  new BABYLON.Vector3(0, size, 0),
                  new BABYLON.Vector3( 0.05 * size, size * 0.95, 0)
               ], scene);

               axisY.color = new BABYLON.Color3(0, 1, 0);
               var yChar = makeTextPlane("Y", "green", size / 10);
               yChar.position = new BABYLON.Vector3(0, 0.9 * size, -0.05 * size);
               var yChar1 = makeTextPlane("-Y", "green", size / 10);
               yChar1.position = new BABYLON.Vector3(0, -0.9 * size, 0.05 * size);
               var ycor = [];
               for (y =- 20; y <= 20; y++) {
                  xcor[y] = makeTextPlane(y, "green", size / 10);
                  xcor[y].position = new BABYLON.Vector3(0, y, 0);
               }


               var axisZ = BABYLON.Mesh.CreateLines("axisZ", [
                  new BABYLON.Vector3( 0 , -0.05 * size, -size * 0.95),
                  new BABYLON.Vector3(0, 0, -size),
                  new BABYLON.Vector3( 0 , 0.05 * size, -size * 0.95),
                  new BABYLON.Vector3(0, 0, -size),
                  new BABYLON.Vector3.Zero(),
                  new BABYLON.Vector3(0, 0, size),
                  new BABYLON.Vector3( 0 , -0.05 * size, size * 0.95),
                  new BABYLON.Vector3(0, 0, size),
                  new BABYLON.Vector3( 0, 0.05 * size, size * 0.95)
               ], scene);
               axisZ.color = new BABYLON.Color3(0, 0, 1);
               var zChar = makeTextPlane("Z", "blue", size / 10);
               zChar.position = new BABYLON.Vector3(0, 0.05 * size, 0.9 * size);
               var zChar1 = makeTextPlane("-Z", "blue", size / 10);
               zChar1.position = new BABYLON.Vector3(0, 0.05 * size, -0.9 * size);

               var zcor = [];
               for (z =- 20; z <= 20; z++) {
                  xcor[z] = makeTextPlane(z, "green", size / 10);
                  xcor[z].position = new BABYLON.Vector3(0, 0, z);
               }
            };

            var quadraticBezierVectors = BABYLON.Curve3.CreateQuadraticBezier(
            BABYLON.Vector3.Zero(),
            new BABYLON.Vector3(10, 5, 5),
            new BABYLON.Vector3(5, 10, 0), 15);
            var quadraticBezierCurve = BABYLON.Mesh.CreateLines("qbezier", quadraticBezierVectors.getPoints(), scene);
            quadraticBezierCurve.color = new BABYLON.Color3(1, 1, 0.5);

            var cubicBezierVectors = BABYLON.Curve3.CreateCubicBezier(
            BABYLON.Vector3.Zero(),
            new BABYLON.Vector3(10, 5, 20),
            new BABYLON.Vector3(-50, 5, -20),
            new BABYLON.Vector3( -10, 20, 10), 60);
            var cubicBezierCurve = BABYLON.Mesh.CreateLines("cbezier", cubicBezierVectors.getPoints(), scene);
            cubicBezierCurve.color = new BABYLON.Color3(1, 0, 0);

            var continued = cubicBezierVectors.continue(cubicBezierVectors).continue(quadraticBezierVectors);

            var points = continued.getPoints();
            var nbPoints = 60;
            var l = continued.length() / 2;
            var p1 = points[points.length - 1];
            var t1 = (p1.subtract(points[points.length - 2])).scale(l);
            var p2 = points[0];
            var t2 = (points[1].subtract(p2)).scale(l);

            var hermite = BABYLON.Curve3.CreateHermiteSpline(p1, t1, p2, t2, nbPoints);

            continued = continued.continue(hermite);

            var points = continued.getPoints();
            var continuedCurve = BABYLON.Mesh.CreateLines("continued", points, scene);
            continuedCurve.position = new BABYLON.Vector3(20, -20, 20);
            continuedCurve.color = new BABYLON.Color3(0, 0, 0);

            var nbPoints = 20;                     // the number of points between each Vector3 control points
            var points = [new BABYLON.Vector3(10, 5, 20),
            new BABYLON.Vector3(-20, 5, -20),
            new BABYLON.Vector3(-25, 5, -20),
            new BABYLON.Vector3( -30, 20, 10),];  // an array of Vector3 the curve must pass through : the control points
            var catmullRom = BABYLON.Curve3.CreateCatmullRomSpline(points, nbPoints);

            var path = catmullRom.getPoints();
            var l = catmullRom.length();

            var finalcatmullCurve = BABYLON.Mesh.CreateLines("continued", path, scene);

            var mySinus = [];
            for (var i = 0; i < 30; i++) {
               mySinus.push( new BABYLON.Vector3(i, Math.sin(i / 10), 0) );
            }

            var mySinusCurve3 = new BABYLON.Curve3(mySinus);
            var myFullCurve = mySinusCurve3.continue(cubicBezierVectors).continue(quadraticBezierVectors);
            var points1 = myFullCurve.getPoints();
            var curve3d = BABYLON.Mesh.CreateLines("continued", points1, scene);
            curve3d.color = new BABYLON.Color3(0.9, 1, 0.2);
            showAxis(20);
            return scene;
         };
         var scene = createScene();
         engine.runRenderLoop(function() {
            scene.render();
         });
      </script>
   </body>
</html>
输出
以上代码行将生成以下输出:
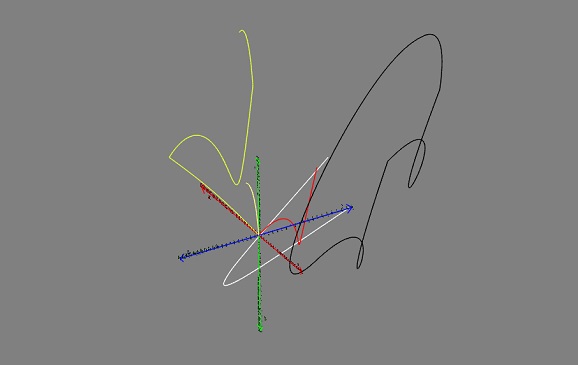
BabylonJS - 动态纹理
BabylonJS的动态纹理创建一个画布,您可以轻松地在纹理上写入文本。它还允许您使用画布并使用html5画布的所有功能与动态纹理一起使用。
我们将研究一个示例,该示例将显示如何在纹理上写入文本,还将在我们创建的网格上绘制贝塞尔曲线。
语法
以下是创建动态纹理的语法:
var myDynamicTexture = new BABYLON.DynamicTexture(name, option, scene);
参数
以下是创建动态纹理所需的参数:
名称 - 动态纹理的名称
选项 - 将具有动态纹理的宽度和高度
场景 - 创建的场景
语法
以下是如何在纹理上写入文本的语法:
myDynamicTexture.drawText(text, x, y, font, color, canvas color, invertY, update);
参数
以下是如何在纹理上写入文本所需的参数:
文本 - 要写入的文本;
x - 距左边缘的距离;
y - 距顶部或底部的距离,取决于invertY;
字体 - 以字体样式、字体大小、字体名称形式表示的字体定义;
invertY - 默认情况下为true,在这种情况下,y是距顶部的距离,当为false时,y是距底部的距离,字母反转;
更新 - 默认情况下为true,动态纹理将立即更新。
演示
<!doctype html>
<html>
   <head>
      <meta charset = "utf-8">
      <title>MDN Games: Babylon.js demo - shapes</title>
      <script src = "https://end3r.github.io/MDN-Games-3D/Babylon.js/js/babylon.js"></script>
      <style>
         html,body,canvas { margin: 0; padding: 0; width: 100%; height: 100%; font-size: 0; }
      </style>
   </head>

   <body>
      <canvas id = "renderCanvas"></canvas>
      <script type = "text/javascript">
         var canvas = document.getElementById("renderCanvas");

         var engine = new BABYLON.Engine(canvas, true);
         var createScene  = function() {
            var scene = new BABYLON.Scene(engine);

            var camera = new BABYLON.ArcRotateCamera("Camera", -Math.PI/2, Math.PI / 3, 25, BABYLON.Vector3.Zero(), scene);
            camera.attachControl(canvas, true);

            var light = new BABYLON.HemisphericLight("light1", new BABYLON.Vector3(0, 1, 0), scene);
            light.intensity = 0.7;

            var box = BABYLON.Mesh.CreateBox("box", 3.0, scene);
            box.position = new BABYLON.Vector3(0, 0, -5);

            //Create dynamic texture
            var textureGround = new BABYLON.DynamicTexture("dynamic texture", {width:512, height:256}, scene);
            var textureContext = textureGround.getContext();

            var materialGround = new BABYLON.StandardMaterial("Mat", scene);
            materialGround.diffuseTexture = textureGround;
            box.material = materialGround;

            //Add text to dynamic texture
            var font = "bold 60px Arial";
            textureGround.drawText("Box", 200, 150, font, "green", "white", true, true);
            return scene;
         };
         var scene = createScene();
         engine.runRenderLoop(function() {
            scene.render();
         });
      </script>
   </body>
</html>
输出
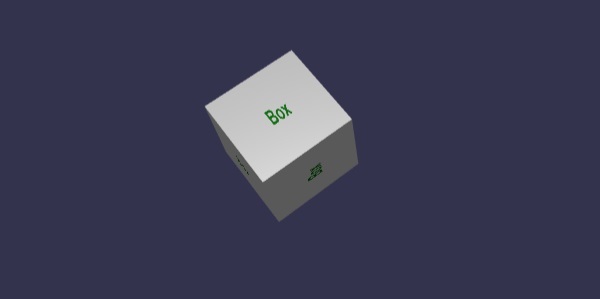
动态纹理还允许如下使用html5画布方法和属性:
语法
var ctx = myDynamicTexture.getContext();
演示
<!doctype html>
<html>
   <head>
      <meta charset = "utf-8">
      <title> Babylon.JS : Demo2</title>
      <script src = "babylon.js"></script>
      <style>
         canvas { width: 100%; height: 100%;}
      </style>
   </head>

   <body>
      <canvas id = "renderCanvas"></canvas>
      <script type = "text/javascript">
         var canvas = document.getElementById("renderCanvas");
         var engine = new BABYLON.Engine(canvas, true);
         var createScene = function () {
            var scene = new BABYLON.Scene(engine);

            var camera = new BABYLON.ArcRotateCamera("Camera", -Math.PI/2, Math.PI / 3, 25, BABYLON.Vector3.Zero(), scene);
            camera.attachControl(canvas, true);

            var light = new BABYLON.HemisphericLight("light1", new BABYLON.Vector3(0, 1, 0), scene);
            light.intensity = 0.7;

            var ground = BABYLON.MeshBuilder.CreateGround("ground1", {width: 20, height: 10, subdivisions: 25}, scene);

            //Create dynamic texture
            var textureGround = new BABYLON.DynamicTexture("dynamic texture", 512, scene);
            var textureContext = textureGround.getContext();

            var materialGround = new BABYLON.StandardMaterial("Mat", scene);
            materialGround.diffuseTexture = textureGround;
            ground.material = materialGround;

            //Draw on canvas
            textureContext.beginPath();
            textureContext.moveTo(75,40);
            textureContext.bezierCurveTo(75,37,70,25,50,25);
            textureContext.bezierCurveTo(20,25,20,62.5,20,62.5);
            textureContext.bezierCurveTo(20,80,40,102,75,120);
            textureContext.bezierCurveTo(110,102,130,80,130,62.5);
            textureContext.bezierCurveTo(130,62.5,130,25,100,25);
            textureContext.bezierCurveTo(85,25,75,37,75,40);
            textureContext.fillStyle = "red";
            textureContext.fill();
            textureGround.update();

            return scene;
         };
         var scene = createScene();
            engine.runRenderLoop(function() {
            scene.render();
         });
      </script>
   </body>
</html>
输出
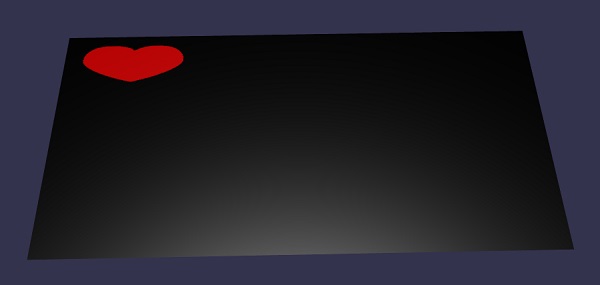
解释
我们创建了地面网格并向其添加了动态纹理。
//ground mesh
var ground = BABYLON.MeshBuilder.CreateGround("ground1", {width: 20, height: 10, subdivisions: 25}, scene);

//Create dynamic texture
var textureGround = new BABYLON.DynamicTexture("dynamic texture", 512, scene);

//adding dynamic texture to ground using standard material
var materialGround = new BABYLON.StandardMaterial("Mat", scene);
materialGround.diffuseTexture = textureGround;
ground.material = materialGround;
要在动态纹理上使用画布,我们需要先调用画布方法:
var textureContext = textureGround.getContext()
对于画布,我们将添加贝塞尔曲线,如下所示:
textureContext.beginPath();
textureContext.moveTo(75,40);

textureContext.bezierCurveTo(75,37,70,25,50,25);
textureContext.bezierCurveTo(20,25,20,62.5,20,62.5);
textureContext.bezierCurveTo(20,80,40,102,75,120);
textureContext.bezierCurveTo(110,102,130,80,130,62.5);
textureContext.bezierCurveTo(130,62.5,130,25,100,25);
textureContext.bezierCurveTo(85,25,75,37,75,40);

textureContext.fillStyle = "red";
textureContext.fill();
textureGround.update();
BabylonJS -视差贴图
视差贴图也称为偏移贴图。它使用高度图,该高度图作为材质纹理的偏移量应用,以增强几何体表面浮雕效果。在3D世界中,应用深度的石墙将具有更明显的外观,并且对最终用户来说看起来更逼真。在较陡峭的视角下,纹理坐标的位移更大,由于视差效应,随着视图的变化,会产生深度的错觉。
视差贴图与标准材质一起使用。我们在标准材质章节中学习了这一点。
视差贴图具有3个属性。
material.useParallax = true; - 这将启用视差贴图。要使用此属性,需要首先将凹凸纹理分配给材质。
material.useParallaxOcclusion = true; - 要使用此属性,必须将useParallax设置为true。它启用视差遮挡。
material.parallaxScaleBias = 0.1; - 为要分配给网格的深度应用缩放因子。对于视差,介于0.05和0.1之间的值很好。对于遮挡,您可以达到0.2。
演示
<!doctype html>
<html>
   <head>
      <meta charset = "utf-8">
      <title>BabylonJs - Basic Element-Creating Scene</title>
      <script src = "babylon.js"></script>
      <style>
         canvas {width: 100%; height: 100%;}
      </style>
   </head>

   <body>
      <canvas id = "renderCanvas"></canvas>
      <script type = "text/javascript">
         var canvas = document.getElementById("renderCanvas");
         var engine = new BABYLON.Engine(canvas, true);

         var createScene  = function() {
            // This creates a basic Babylon Scene object (non-mesh)
            var scene = new BABYLON.Scene(engine);

            // This creates and positions a free camera (non-mesh)
            var camera = new BABYLON.ArcRotateCamera("camera1", 0, Math.PI / 2, 100, new BABYLON.Vector3(0, 0, 0), scene);
            camera.attachControl(canvas, false);

            // This targets the camera to scene origin
            camera.setTarget(BABYLON.Vector3.Zero());

            // This creates a light, aiming 0,1,0 - to the sky (non-mesh)
            var light = new BABYLON.HemisphericLight("light1", new BABYLON.Vector3(0, 1, 0), scene);

            // Default intensity is 1. Let's dim the light a small amount
            light.intensity = 0.7;

            var mesh = BABYLON.Mesh.CreateBox("box01", 25, scene);
            mesh.position = new BABYLON.Vector3(0, 0, 0);

            var brickWallDiffURL = "images/a1.png";
            var brickWallNHURL = "images/a2.png";
            var stoneDiffURL = "images/pebble.jpg";
            var stoneNHURL = "images/a3.png";

            var stoneDiffuseTexture = new BABYLON.Texture(stoneDiffURL, scene);

            var stoneNormalsHeightTexture = new BABYLON.Texture(stoneNHURL, scene);

            var wallDiffuseTexture = new BABYLON.Texture(brickWallDiffURL, scene);

            var wallNormalsHeightTexture = new BABYLON.Texture(brickWallNHURL, scene);

            var normalsHeightTexture = stoneNormalsHeightTexture;

            var material = new BABYLON.StandardMaterial("mtl01", scene);
            material.diffuseTexture = stoneDiffuseTexture;
            material.bumpTexture = stoneNormalsHeightTexture;

            material.useParallax = true;
            material.useParallaxOcclusion = true;
            material.parallaxScaleBias = 0.1;
            material.specularPower = 1000.0;
            material.specularColor = new BABYLON.Color3(0.5, 0.5, 0.5);
            mesh.material = material;
            return scene;
         };
         var scene = createScene();
         engine.runRenderLoop(function() {
            scene.render();
         });
      </script>
   </body>
</html>
输出
以上代码行将生成以下输出:
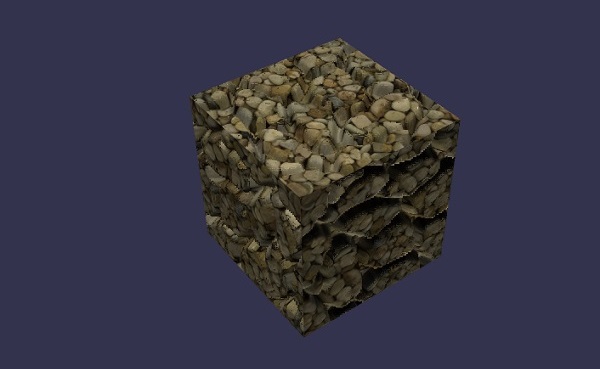
在本演示中,我们使用了图像a1.png、a2.png、pebble.jpg和a3.png。这些图像存储在本地images/文件夹中,并在下面提供参考。您可以下载任何您选择的图像,并在演示链接中使用。
Images/a1.png
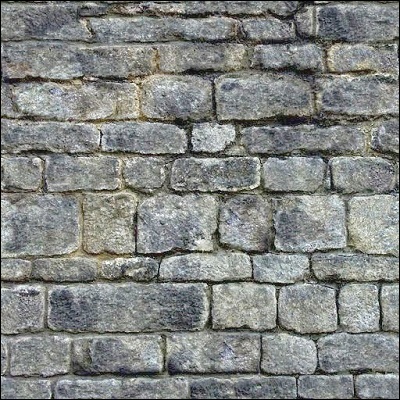
Images/a2.png
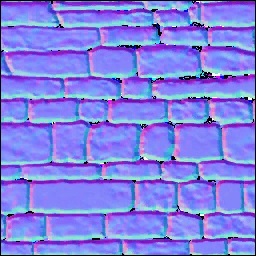
Images/pebble.jpg
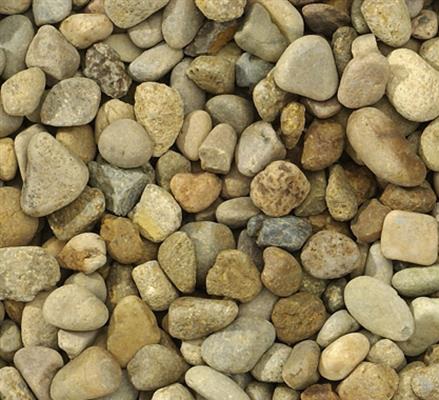
images/a3.png
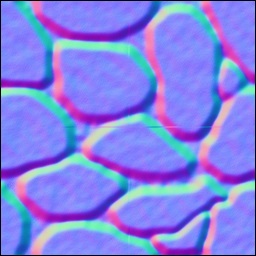
BabylonJS - 镜头光晕
当光线散射并落在图像上时,您会看到外观不同的图像,颜色也会发生变化。当您开发游戏以显示光线效果的真实发生时,会使用镜头光晕。考虑一下阳光照射在镜子上的情况,看到的效果大多被称为镜头光晕。
语法
以下是创建镜头光晕的语法:
var lensFlareSystem = new BABYLON.LensFlareSystem("lensFlareSystem", light0, scene);
参数
考虑创建镜头光晕的以下参数:
名称 - 给镜头光晕系统起的名字。
光源 - 这可以是光源或相机。
场景 - 将添加镜头光晕的场景。
要向场景添加光晕,请执行以下命令:
var flare1 = new BABYLON.LensFlare(0.5, 0.15, new BABYLON.Color3(1, 1, 1), "images/sun1.png", lensFlareSystem);
大小 - 介于0和1之间的浮点值。
位置 - 镜头光晕的源(发射器)(它可以是相机、光源或网格)。
镜头光晕系统 - 使用镜头光晕系统类创建的对象。
演示
<!doctype html>
<html>
   <head>
      <meta charset = "utf-8">
      <title>BabylonJs - Basic Element-Creating Scene</title>
      <script src = "babylon.js"></script>
      <style>
         canvas {width: 100%; height: 100%;}
      </style>
   </head>

   <body>
      <canvas id = "renderCanvas"></canvas>
      <script type = "text/javascript">
         var canvas = document.getElementById("renderCanvas");
         var engine = new BABYLON.Engine(canvas, true);

         var createScene  = function() {
            var scene = new BABYLON.Scene(engine);
            scene.clearColor = BABYLON.Color3.Gray();
            var camera = new BABYLON.ArcRotateCamera(
               "Camera", -Math.PI / 2, 1.5, 15, BABYLON.Vector3.Zero(), scene);
            camera.attachControl(canvas, false);

            var light1 = new BABYLON.HemisphericLight("light1", new BABYLON.Vector3(0, -1, 0), scene);
            light1.groundColor = new BABYLON.Color3(0.2, 0.2, 0.2);
            light1.intensity = 0.5;

            var bigdiamond = BABYLON.Mesh.CreateSphere("sphere", 32,6, scene);
            bigdiamond.visibility = 0.6;
            var dmat = new BABYLON.StandardMaterial("dmat", scene);
            dmat.diffuseColor = BABYLON.Color3.Blue();

            var texture = new BABYLON.Texture("images/earth.jpg", scene);
            dmat.diffuseTexture = texture;
            dmat.specularColor = BABYLON.Color3.White();
            bigdiamond.material = dmat;

            var lensflare1 = new BABYLON.LensFlareSystem("lensFlareSystem", camera, scene);
            var flare1 = new BABYLON.LensFlare(
               Math.random(), 0.15, new BABYLON.Color3(1, 1, 1), "images/sun1.png", lensflare1);

            var lensflare2 = new BABYLON.LensFlareSystem("lensFlareSystem", camera, scene);
            var flare2 = new BABYLON.LensFlare(
               Math.random()/2, 0.1, new BABYLON.Color3(1, 0, 0), "images/sun1.png", lensflare2);

            var lensflare3 = new BABYLON.LensFlareSystem("lensFlareSystem", camera, scene);
            var flare3 = new BABYLON.LensFlare(
               Math.random()/8, 0.1, new BABYLON.Color3(1, 0, 1), "images/sun1.png", lensflare3);

            var lensflare4 = new BABYLON.LensFlareSystem("lensFlareSystem", camera, scene);
            var flare4 = new BABYLON.LensFlare(
               Math.random()/12, 0.1, new BABYLON.Color3(0, 1, 0), "images/sun1.png", lensflare4);

            scene.registerBeforeRender(function() {
               scene.getCameraByID("Camera").alpha += 0.01;
            });
            return scene;
         };
         var scene = createScene();
         engine.runRenderLoop(function() {
            scene.render();
         });
      </script>
   </body>
</html>
输出
以上代码行生成以下输出:
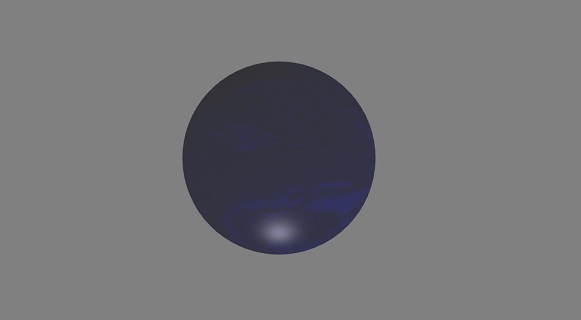
earth.jpg

images/sun1.png
BabylonJS - 创建屏幕截图
要捕获您当前正在工作的屏幕,无法使用打印屏幕按键高分辨率截屏。BabylonJS提供createscreenshot API,可以帮助您做到这一点。它将文件保存为png格式,并且图像质量不会降低。
语法
要对屏幕进行截图,我们需要提供引擎、相机和大小,如下所示。
BABYLON.Tools.CreateScreenshot(engine, camera, { width: 1024, height: 300 }, function (data) {
   var img = document.createElement("img");
   img.src = data;
   document.body.appendChild(img);
});
添加一个按钮,当用户点击它时调用截图API。
对传递给截图API的引擎进行了更改。
var engine = new BABYLON.Engine(canvas, true, {
   preserveDrawingBuffer: true, stencil: true
});
它需要将preserveDrawingBuffer和stencil设置为true的选项。
按钮添加如下:
ssButton = document.createElement("input");
document.body.appendChild (ssButton);
将点击事件添加到上面的按钮,并调用createscreenshot。它将在屏幕末尾更新屏幕截图。用于图像src的数据具有创建的屏幕截图URL。
演示
<!doctype html>
<html>
   <head>
      <meta charset = "utf-8">
      <title>BabylonJs - Basic Element-Creating Scene</title>
      <script src = "babylon.js"></script>
      <style>
         canvas {width: 100%; height: 100%;}
      </style>
   </head>

   <body>
      <canvas id = "renderCanvas"></canvas>
      <script type = "text/javascript">
         var canvas = document.getElementById("renderCanvas");
         var engine = new BABYLON.Engine(canvas, true, { preserveDrawingBuffer: true, stencil: true });
         var createScene  = function() {
            var scene = new BABYLON.Scene(engine);

            // Setup environment
            var light = new BABYLON.HemisphericLight("light1", new BABYLON.Vector3(1, 0.5, 0), scene);

            var camera = new BABYLON.ArcRotateCamera("ArcRotateCamera", 1, 0.8, 20, new BABYLON.Vector3(0, 0, 0), scene);
            camera.attachControl(canvas, true);

            var gmat = new BABYLON.StandardMaterial("mat1", scene);
            gmat.alpha = 1.0;

            //gmat.diffuseColor = new BABYLON.Color3(1, 0, 0);
            var texture = new BABYLON.Texture("images/mat.jpg", scene);
            gmat.diffuseTexture = texture;

            var ground = BABYLON.MeshBuilder.CreateGround("ground", {width: 150, height:15}, scene);
            ground.material = gmat;

            var mat = new BABYLON.StandardMaterial("mat1", scene);
            mat.alpha = 1.0;
            mat.diffuseColor = new BABYLON.Color3(1, 0, 0);

            var texture = new BABYLON.Texture("images/rugby.jpg", scene);
            mat.diffuseTexture = texture;

            var sphere = BABYLON.MeshBuilder.CreateSphere("sphere", {diameter: 2, diameterX: 3}, scene);
            sphere.position= new BABYLON.Vector3(15,1,0);
            sphere.material = mat;

            var faceColors = new Array();
            faceColors[1] = new BABYLON.Color4(0,1,0,1);   // green front

            var matcone = new BABYLON.StandardMaterial("mat1", scene);
            matcone.alpha = 1.0;
            matcone.diffuseColor = new BABYLON.Color3(0.9, 0, 2);

            var texture = new BABYLON.Texture("images/cone.jpg", scene);
            matcone.diffuseTexture = texture;

            var cone = BABYLON.MeshBuilder.CreateCylinder("cone", {diameterTop: 0, tessellation: 4}, scene);
            cone.position= new BABYLON.Vector3(12,1,0);
            cone.material = matcone;

            var matplane = new BABYLON.StandardMaterial("matplane", scene);
            matplane.alpha = 1.0;
            matplane.diffuseColor = new BABYLON.Color3(0.9, 0, 2);

            var texture = new BABYLON.Texture("images/board.jpg", scene);
            matplane.diffuseTexture = texture;
            var plane = BABYLON.MeshBuilder.CreatePlane("plane", {width: 5, height : 5}, scene);
            plane.position= new BABYLON.Vector3(9,2.5,0);
            plane.material = matplane;

            var disc = BABYLON.MeshBuilder.CreateDisc("disc", {tessellation: 3}, scene);
            disc.position= new BABYLON.Vector3(5,1,0);

            var mattorus = new BABYLON.StandardMaterial("matoct", scene);
            mattorus.alpha = 1.0;

            var texture = new BABYLON.Texture("images/ring.jpg", scene);
            mattorus.diffuseTexture = texture;

            var torus = BABYLON.MeshBuilder.CreateTorus("torus", {thickness: 0.5}, scene);
            torus.position= new BABYLON.Vector3(3,1,0);
            torus.material = mattorus;

            var matoct = new BABYLON.StandardMaterial("matoct", scene);
            matoct.alpha = 1.0;

            var texture = new BABYLON.Texture("images/d1.png", scene);
            matoct.diffuseTexture = texture;
            var octahedron = BABYLON.MeshBuilder.CreatePolyhedron("oct", {type: 1, size: 3}, scene);

            octahedron.position= new BABYLON.Vector3(-2,5,0);
            octahedron.material = matoct;

            var matico = new BABYLON.StandardMaterial("matico", scene);
            matico.alpha = 1.0;

            var texture = new BABYLON.Texture("images/diamond.jpg", scene);
            matico.diffuseTexture = texture;

            var icosphere = BABYLON.MeshBuilder.CreateIcoSphere("ico", {radius: 5, radiusY: 3, subdivisions: 2}, scene);
            icosphere.position= new BABYLON.Vector3(-13,3,0);
            icosphere.material = matico;

            //add screenshot button
            var ssButton = document.getElementById("takescreenshot");
            if (ssButton == null) {
               ssButton = document.createElement("input");
               document.body.appendChild(ssButton);
            }

            ssButton.id = "takescreenshot";
            ssButton.type = "button";
            ssButton.style.position = "fixed";
            ssButton.style.right = "0px";
            ssButton.style.top = "100px";
            ssButton.value = "create screenshot";

            ssButton.onclick = function () {
               BABYLON.Tools.CreateScreenshot(engine, camera, { width: 1024, height: 300 },
               function (data) {
                  var img = document.createElement("img");
                  img.src = data;
                  document.body.appendChild(img);
               });
            };
            return scene;
         }
         var scene = createScene();
         engine.runRenderLoop(function() {
            scene.render();
         });
      </script>
   </body>
</html>
输出
以上代码行生成以下输出:
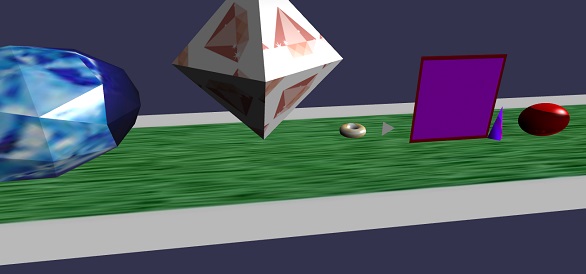
在本演示中,我们使用了图像mat.jpg、rugby.jpg、cone.jpg、board.jpg、ring.jpg、d1.png、diamond.jpg。这些图像存储在本地 images/ 文件夹中,并在此下方提供参考。您可以下载任何您选择的图像,并在演示链接中使用。
Images/mat.jpg
Images/rugby.jpg

Images/cone.jpg
Images/board.jpg
Images/ring.jpg

Images/d1.png
Images/diamond.jpg
BabylonJS - 反射探针
反射探针用于创建类似镜面的场景。这有助于查看网格在其上的反射。要创建类似镜面的场景,您需要调用类和所需的网格,您希望在其中看到反射。之后,您需要将网格添加到渲染列表中,如下所示。假设您有一个带有水面背景的场景,并且需要显示云或树木的反射或飞行的鸟,您可以使用反射探针来实现,并且创建的网格可以添加到渲染列表中,如下所示。
语法
var probe = new BABYLON.ReflectionProbe("main", 512, scene);
probe.renderList.push(yellowSphere);
probe.renderList.push(greenSphere);
probe.renderList.push(blueSphere);
probe.renderList.push(mirror);
演示
<!doctype html>
<html>
   <head>
      <meta charset = "utf-8">
      <title>BabylonJs - Basic Element-Creating Scene</title>
      <script src = "babylon.js"></script>
      <style>
         canvas {width: 100%; height: 100%;}
      </style>
   </head>

   <body>
      <canvas id = "renderCanvas"></canvas>
      <script type = "text/javascript">
         var canvas = document.getElementById("renderCanvas");
         var engine = new BABYLON.Engine(canvas, true);

         var createScene  = function() {
            var scene = new BABYLON.Scene(engine);

            var camera = new BABYLON.ArcRotateCamera("camera1", 0, 0, 10, BABYLON.Vector3.Zero(), scene);

            camera.setPosition(new BABYLON.Vector3(0, 5, -10));
            camera.attachControl(canvas, true);

            camera.upperBetaLimit = Math.PI / 2;
            camera.lowerRadiusLimit = 4;

            var light = new BABYLON.HemisphericLight("light1", new BABYLON.Vector3(0, 1, 0), scene);
            light.intensity = 0.7;

            var knot = BABYLON.Mesh.CreateTorusKnot("knot", 1, 0.4, 128, 64, 2, 3, scene);

            var yellowSphere = BABYLON.Mesh.CreateSphere("yellowSphere", 16, 1.5, scene);
            yellowSphere.setPivotMatrix(BABYLON.Matrix.Translation(3, 0, 0));

            var blueSphere = BABYLON.Mesh.CreateSphere("blueSphere", 16, 1.5, scene);
            blueSphere.setPivotMatrix(BABYLON.Matrix.Translation(-1, 3, 0));

            var greenSphere = BABYLON.Mesh.CreateSphere("greenSphere", 16, 1.5, scene);
            greenSphere.setPivotMatrix(BABYLON.Matrix.Translation(0, 0, 3));

            // Mirror
            var mirror = BABYLON.Mesh.CreateBox("Mirror", 1.0, scene);
            mirror.scaling = new BABYLON.Vector3(100.0, 0.01, 100.0);
            mirror.material = new BABYLON.StandardMaterial("mirror", scene);
            mirror.material.diffuseTexture = new BABYLON.Texture("images/square.jpg", scene);

            mirror.material.diffuseTexture.uScale = 10;
            mirror.material.diffuseTexture.vScale = 10;
            mirror.material.reflectionTexture = new BABYLON.MirrorTexture("mirror", 1024, scene, true);

            mirror.material.reflectionTexture.mirrorPlane = new BABYLON.Plane(0, -1.0, 0, -2.0);
            mirror.material.reflectionTexture.renderList = [greenSphere, yellowSphere, blueSphere, knot];
            mirror.material.reflectionTexture.level = 0.5;
            mirror.position = new BABYLON.Vector3(0, -2, 0);

            // Main material
            var mainMaterial = new BABYLON.StandardMaterial("main", scene);
            knot.material = mainMaterial;

            var probe = new BABYLON.ReflectionProbe("main", 512, scene);
            probe.renderList.push(yellowSphere);
            probe.renderList.push(greenSphere);
            probe.renderList.push(blueSphere);
            probe.renderList.push(mirror);

            mainMaterial.diffuseColor = new BABYLON.Color3(1, 0.5, 0.5);
            mainMaterial.reflectionTexture = probe.cubeTexture;
            mainMaterial.reflectionFresnel<h3>Parameters</h3> = new BABYLON.Fresnel<h3>Parameters</h3>();
            mainMaterial.reflectionFresnel<h3>Parameters</h3>.bias = 0.02;

            // Fog
            scene.fogMode = BABYLON.Scene.FOGMODE_LINEAR;
            scene.fogColor = scene.clearColor;
            scene.fogStart = 20.0;
            scene.fogEnd = 50.0;

            // Animations
            scene.registerBeforeRender(function () {
               yellowSphere.rotation.y += 0.01;
               greenSphere.rotation.y += 0.01;
               blueSphere.rotation.y += 0.01;
            });
            return scene;
         };
         var scene = createScene();
         engine.runRenderLoop(function() {
            scene.render();
         });
      </script>
   </body>
</html>
输出
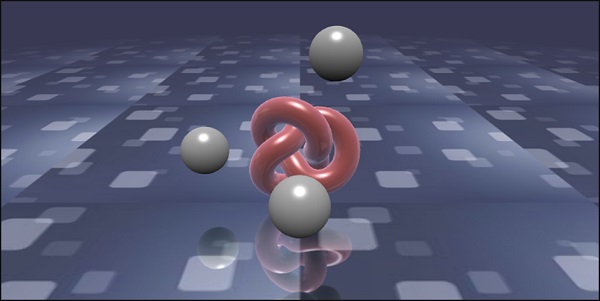
在本演示中,我们使用了图像square.jpg。这些图像存储在本地 images/ 文件夹中,并在此下方提供参考。您可以下载任何您选择的图像,并在演示链接中使用。
images/square.jpg

BabylonJS - 标准渲染管线
StandardRenderingPipeline 提供了一组与现实世界相关的后期处理效果。存在不同的后期处理效果,例如灯光效果和照明效果。
在以下示例中,您将看到各种效果,例如镜头效果、灯光的后期处理效果等。
它使用 HDR 立方体纹理,并且纹理必须是 .hdr 格式。此纹理提供全景效果,您可以在旋转相机时看到。
var hdrTexture = new BABYLON.HDRCubeTexture("images/GravelPlaza_REF.hdr", scene, 512);
调用标准渲染管线类以使用以下代码行获得效果:
// Create rendering pipeline
var pipeline = new BABYLON.StandardRenderingPipeline("standard", scene, 1.0 / devicePixelRatio, null, [camera]);
pipeline.lensTexture = new BABYLON.Texture("images/lensdirt.jpg", scene)
在下面显示的演示中,我们将创建 cubetexture 环境。我们将为此使用地面网格,并将标准渲染管线应用于整个场景。
纹理使用 lensTexture 提供,它是一个图像,您可以在移动场景时看到相同的纹理。
演示
<!doctype html>
<html>
   <head>
      <meta charset = "utf-8">
      <title>BabylonJs - Basic Element-Creating Scene</title>
      <script src = "babylon.js"></script>
      <style>
         canvas {width: 100%; height: 100%;}
      </style>
   </head>

   <body>
      <canvas id = "renderCanvas"></canvas>
      <script type = "text/javascript">
         var canvas = document.getElementById("renderCanvas");
         var engine = new BABYLON.Engine(canvas, true);

         var createScene  = function() {
            var scene = new BABYLON.Scene(engine);
            var camera = new BABYLON.ArcRotateCamera("Camera", -Math.PI / 4, Math.PI / 2.5, 200, BABYLON.Vector3.Zero(), scene);
            camera.attachControl(canvas, true);
            camera.minZ = 0.1;

            // Light
            new BABYLON.PointLight("point", new BABYLON.Vector3(0, 40, 0), scene);

            // Environment Texture
            var hdrTexture = new BABYLON.HDRCubeTexture("images/GravelPlaza_REF.hdr", scene, 512);

            // Skybox
            var hdrSkybox = BABYLON.Mesh.CreateBox("hdrSkyBox", 1000.0, scene);
            var hdrSkyboxMaterial = new BABYLON.PBRMaterial("skyBox", scene);
            hdrSkyboxMaterial.backFaceCulling = false;
            hdrSkyboxMaterial.reflectionTexture = hdrTexture.clone();
            hdrSkyboxMaterial.reflectionTexture.coordinatesMode = BABYLON.Texture.SKYBOX_MODE;
            hdrSkyboxMaterial.microSurface = 1.0;
            hdrSkyboxMaterial.cameraExposure = 0.6;
            hdrSkyboxMaterial.cameraContrast = 1.6;
            hdrSkyboxMaterial.disableLighting = true;
            hdrSkybox.material = hdrSkyboxMaterial;
            hdrSkybox.infiniteDistance = true;

            // Create mesh
            var woodbox = BABYLON.MeshBuilder.CreateBox("plane", {
               width: 40,
               height: 50,
               depth: 65
            }, scene);

            var wood = new BABYLON.PBRMaterial("wood", scene);
            wood.reflectionTexture = hdrTexture;
            wood.directIntensity = 1.5;
            wood.environmentIntensity = 0.5;
            wood.specularIntensity = 0.3;
            wood.cameraExposure = 0.9;
            wood.cameraContrast = 1.6;

            wood.reflectivityTexture = new BABYLON.Texture("images/reflectivity.png", scene);
            wood.useMicroSurfaceFromReflectivityMapAlpha = true;

            wood.albedoColor = BABYLON.Color3.White();
            wood.albedoTexture = new BABYLON.Texture("images/albedo.png", scene);
            woodbox.material = wood;

            // Create rendering pipeline
            var pipeline = new BABYLON.StandardRenderingPipeline("standard", scene, 1.0 / devicePixelRatio, null, [camera]);
            pipeline.lensTexture = new BABYLON.Texture("images/lensdirt.jpg", scene);

            // Return scene
            return scene;
         };
         var scene = createScene();
         engine.runRenderLoop(function() {
            scene.render();
         });
      </script>
   </body>
</html>
创建 images 文件夹并将 .hdr 文件存储在其中。我们使用了来自www.hdrlabs.com的 images/GravelPlaza_REF.hdr。
您可以下载您选择的 .hdr 类型文件,并在演示链接中使用。
输出
以上代码行将生成以下输出:
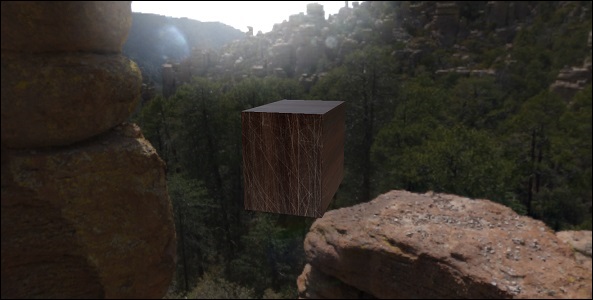
在本演示中,我们使用了图像images/GravelPlaza_REF.hdr、images/reflectivity.png、images/albedo.png、images/lensdirt.jpg。这些图像存储在本地 images/ 文件夹中,并在此下方提供参考。您可以下载任何您选择的图像,并在演示链接中使用。请注意,由于 .hdr 文件大小很大,因此很难在此处粘贴它们。
Images/reflectivity.png
Images/albedo.png
Images/lensdirt.png
BabylonJS - ShaderMaterial
着色器材质为您提供一个材质作为输出。您可以将此材质应用于任何网格。它基本上将数据从您的场景传递到顶点和片段着色器。
要获取着色器材质,需要调用以下类:
var myShaderMaterial = new BABYLON.ShaderMaterial(name, scene, route, options);
参数
考虑以下与着色器材质相关的参数:
名称 - 一个字符串,命名着色器。
场景 - 使用着色器的场景。
路径 - 通过以下三种方式之一访问着色器代码的路径:
object - {
   vertex: "custom",
   fragment: "custom"
}, used with
BABYLON.Effect.ShadersStore["customVertexShader"] and
BABYLON.Effect.ShadersStore["customFragmentShader"]
object - {
   vertexElement: "vertexShaderCode",
   fragmentElement: "fragmentShaderCode"
},
used with shader code in <script> tags
string - "./COMMON_NAME",
最后提到的语法与 index.html 文件夹中的外部文件 COMMON_NAME.vertex.fx 和 COMMON_NAME.fragment.fx 一起使用。
选项 - 包含属性和制服数组的对象,其中包含它们的名称作为字符串。
带有值的着色器语法如下所示:
var shaderMaterial = new BABYLON.ShaderMaterial("shader", scene, {
   vertex: "custom",
   fragment: "custom",
},
{
   attributes: ["position", "normal", "uv"],
   uniforms: ["world", "worldView", "worldViewProjection", "view", "projection"]
});
属性必须采用数组形式。这些包含位置、法线和 uv,它们是 vector3 三维浮点向量。
vec2 - 一个二维浮点数向量。
vec3 - 一个三维浮点数向量。
mat4 - 一个具有 4 列和 4 行浮点数的矩阵。
gl_Position - 它提供屏幕坐标的位置数据。
gl_FragColor - 它提供用于表示屏幕上面的颜色数据。
以上是 GLSL 语言中的内置变量。
由于顶点位置需要尽可能精确,因此所有浮点数都应设置为具有高精度。这是在每个着色器的代码开头使用 – precision highp float 完成的。precision highp float 确定浮点数使用的精度。
以下演示基于第一种对象方法。
演示
<!doctype html>
<html>
   <head>
      <meta charset = "utf-8">
      <title>BabylonJs - Basic Element-Creating Scene</title>
      <script src = "babylon.js"></script>
      <style>
         canvas {width: 100%; height: 100%;}
      </style>
   </head>

   <body>
      <canvas id = "renderCanvas"></canvas>
      <script type = "text/javascript">
         //downloaded HDR files from :http://www.hdrlabs.com/sibl/archive.html
         var canvas = document.getElementById("renderCanvas");
         var engine = new BABYLON.Engine(canvas, true);
         var createScene  = function() {
            var scene = new BABYLON.Scene(engine);

            var camera = new BABYLON.ArcRotateCamera(
               "Camera", Math.PI / 4, Math.PI / 4, 4, BABYLON.Vector3.Zero(), scene);

            camera.attachControl(canvas, true);

            var light = new BABYLON.HemisphericLight("light1", new BABYLON.Vector3(0, 1, 0), scene);

            BABYLON.Effect.ShadersStore["customVertexShader"] = "\r\n" +
               "precision highp float;\r\n" +
               "// Attributes\r\n" +
               "attribute vec3 position;\r\n" +
               "attribute vec2 uv;\r\n" +
               "// Uniforms\r\n" +
               "uniform mat4 worldViewProjection;\r\n" +

               "// Varying\r\n" +
               "varying vec2 vUV;\r\n" +
               "void main(void) {
                  \r\n" +
                  "gl_Position = worldViewProjection * vec4(position, 1.0);\r\n" +
                  "vUV = uv;\r\n"+"
               }
               \r\n";
               BABYLON.Effect.ShadersStore["customFragmentShader"] = "\r\n"+
                  "precision highp float;\r\n" +
                  "varying vec2 vUV;\r\n" +
                  "uniform sampler2D textureSampler;\r\n" +
               "void main(void) {
                  \r\n"+
                  "gl_FragColor = texture2D(textureSampler, vUV);\r\n"+"
               }
               \r\n";

            var shaderMaterial = new BABYLON.ShaderMaterial("shader", scene, {
               vertex: "custom",
               fragment: "custom",
            },

            {
               attributes: ["position", "normal", "uv"],
               uniforms: ["world", "worldView", "worldViewProjection", "view", "projection"]
            });

            var mainTexture = new BABYLON.Texture("images/mat.jpg", scene);

            shaderMaterial.setTexture("textureSampler", mainTexture);

            shaderMaterial.backFaceCulling = false;

            var box = BABYLON.MeshBuilder.CreateBox("box", {}, scene);
            box.material = shaderMaterial;
            return scene;
         };
         var scene = createScene();
         engine.runRenderLoop(function() {
            scene.render();
         });
      </script>
   </body>
</html>
输出
以上代码行将生成以下输出:
在本演示中,我们使用了图像mat.jpg。这些图像存储在本地 images/ 文件夹中,并在此下方提供参考。您可以下载任何您选择的图像,并在演示链接中使用。
Images/mat.jpg

BabylonJS - 骨骼和骨架
Babylonjs 提供了创建骨架和骨骼的 API。
语法
现在让我们看看不同函数的语法。
对于骨架
BABYLON.Skeleton = function (name, id, scene)
对于骨骼
BABYLON.Bone = function (name, skeleton, parentBone, matrix)
骨架和骨骼可以使用 Blender 创建,并且可以导出为 .babylonjs 格式。
演示
<!doctype html>
<html>
   <head>
      <meta charset = "utf-8">
      <title>BabylonJs - Basic Element-Creating Scene</title>
      <script src = "babylon.js"></script>
      <style>
         canvas {width: 100%; height: 100%;}
      </style>
   </head>

   <body>
      <canvas id = "renderCanvas"></canvas>
      <script type = "text/javascript">
         var canvas = document.getElementById("renderCanvas");
         var engine = new BABYLON.Engine(canvas, true);
         var createScene  = function() {
            var scene = new BABYLON.Scene(engine);

            //Adding a light
            var light = new BABYLON.PointLight("Omni", new BABYLON.Vector3(20, 20, 100), scene);

            //Adding an Arc Rotate Camera
            var camera = new BABYLON.ArcRotateCamera("Camera", 0, 0.8, 100, BABYLON.Vector3.Zero(), scene);
            camera.attachControl(canvas, false);

            BABYLON.SceneLoader.ImportMesh(
               "him", "scenes/Dude/", "Dude.babylon", scene, function (newMeshes, particleSystems, skeletons) {
               var dude = newMeshes[0];
               console.log(dude);
               dude.rotation.y = Math.PI;
               dude.position = new BABYLON.Vector3(0, 0, -80);
               scene.beginAnimation(skeletons[0], 0, 100, true, 1.0);
            })
            return scene;
         };
         var scene = createScene();
         engine.runRenderLoop(function() {
            scene.render();
         });
      </script>
   </body>
</html>
在上面的演示链接中,我们使用了 Dude.babylon 网格。您可以从此处下载 Dude.babylon 的 json 文件:
将文件保存在 scenes 文件夹中,以获得如下所示的输出。
输出
以上代码行生成以下输出:
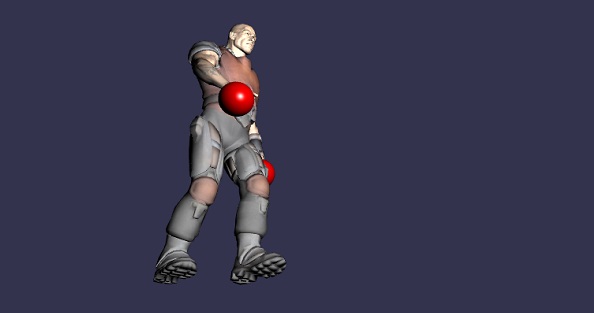
解释
对于导入网格,我们使用了 babylonjs dude 网格。
网格为我们提供骨架。例如,skeleton = skeletons[0];
要从骨架中获取骨骼,请执行以下命令:
skeleton.bones; //it gives a array.
在上面的演示中,我们创建了 2 个球体并传递给网格。为此,我们执行了以下命令:
sphere.attachToBone(skeleton.bones[30], dude);
以及:
sphere1.attachToBone(skeleton.bones[40], dude);
attachToBone 是一个函数,您可以将任何网格赋给骨骼。
Skeleton.bones[30] 和 skeleton.bones[40] 指的是骨骼的手。
BabylonJS - 物理引擎
Babylon.js 具有用于物理引擎的插件系统,有助于向场景添加交互。它显示了两个对象之间的碰撞和反弹,使其更像现实生活中的交互。演示将显示球体相互碰撞并随着碰撞四处移动,然后静止。我们在台球等游戏中注意到相同的行为,玩家用球杆击球,球体与其他球体碰撞等等。在这里,物理引擎试图提供球体碰撞和反弹时在撞击地面时的逼真视图。该引擎具有类和 API,有助于应用脉冲、力、改变速度、回调函数,以便在需要时调用,以及当我们需要执行某些操作时,如果网格与其他网格碰撞。
可以使用 3 个物理插件:
- Cannon.js
- Oimo.js
- Energy.js
演示
<!doctype html>
<html>
   <head>
      <meta charset = "utf-8">
      <title>BabylonJs - Ball/Ground Demo</title>
      <script type = "text/javascript" src="https://cdn.babylonjs.com/Oimo.js"></script>
      <script src = "babylon.js"></script>
      <style>
         canvas {width: 100%; height: 100%;}
      </style>
   </head>

   <body>
      <canvas id = "renderCanvas"></canvas>
      <script type = "text/javascript">
         var canvas = document.getElementById("renderCanvas");
         var engine = new BABYLON.Engine(canvas, true);
         var v3 = BABYLON.Vector3;

         var createScene = function () {
            // This creates a basic Babylon Scene object (non-mesh)
            var scene = new BABYLON.Scene(engine);

            var camera = new BABYLON.ArcRotateCamera("Camera", 0.86, 1.37, 250, BABYLON.Vector3.Zero(), scene);

            camera.attachControl(canvas);
            camera.maxZ = 5000;
            camera.lowerRadiusLimit = 120;
            camera.upperRadiusLimit = 430;
            camera.lowerBetaLimit =0.75;
            camera.upperBetaLimit =1.58 ;

            new BABYLON.HemisphericLight("hemi", new BABYLON.Vector3(0, 1, 0), scene);

            var randomNumber = function (min, max) {
               if (min == max) {
                  return (min);
               }
               var random = Math.random();
               return ((random * (max - min)) + min);
            };

            var mat = new BABYLON.StandardMaterial("ground", scene);
            var t = new BABYLON.Texture("images/gr1.jpg", scene);
            t.uScale = t.vScale = 10;
            mat.diffuseTexture = t;
            mat.specularColor = BABYLON.Color3.Black();

            var g = BABYLON.Mesh.CreateBox("ground", 200, scene);

            g.position.y = -20;
            g.position.x = 0
            g.scaling.y = 0.01;
            g.material = mat;

            scene.enablePhysics(new BABYLON.Vector3(0, -10, 0), new BABYLON.OimoJSPlugin());

            g.physicsImpostor = new BABYLON.PhysicsImpostor(g, BABYLON.PhysicsImpostor.BoxImpostor, {
               mass: 0,
               restitution: 0.9
            }, scene);

            var getPosition = function(y) {
               return new v3(randomNumber(-100, 100), y, randomNumber(-100, 100));
            };

            var allspheres = [];
            var y = 50;
            var max = 50;

            for (var index = 0; index < max; index++) {
               var redSphere = BABYLON.Mesh.CreateSphere("s" + index, 32, 8, scene);
               redSphere.position = getPosition(y);
               redSphere.physicsImpostor = new BABYLON.PhysicsImpostor(redSphere, BABYLON.PhysicsImpostor.SphereImpostor,{
                  mass: 1, restitution:0.9
               }, scene);

               redSphere.physicsImpostor.applyImpulse(new BABYLON.Vector3(1, 2, -1), new BABYLON.Vector3(1, 2, 0));

               var redMat = new BABYLON.StandardMaterial("ground", scene);
               redMat.diffuseColor = new BABYLON.Color3(0.4, 0.4, 0.4);
               redMat.specularColor = new BABYLON.Color3(0.4, 0.4, 0.4);
               redMat.emissiveColor = BABYLON.Color3.Red();
               redSphere.material = redMat;

               // push all spheres in the allspheres variable
               allspheres.push(redSphere);
               y += 10; // increment height
            }
            scene.registerBeforeRender(function() {
               allspheres.forEach(function(obj) {
                  // if the sphers falls down its updated again over here
                  // If object falls
                  if (obj.position.y < -100) {
                     obj.position = getPosition(200);
                  }
               });
            })
            return scene;
         };
         var scene = createScene();
         engine.runRenderLoop(function() {
            scene.render();
         });
      </script>
   </body>
</html>
输出
以上代码行生成以下输出:
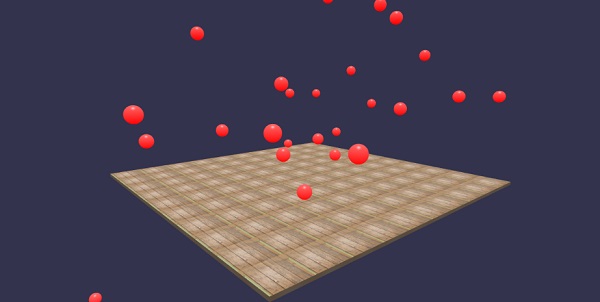
在本演示中,我们使用了图像images/gr1.jpg。这些图像存储在本地 images/ 文件夹中,并在此下方提供参考。您可以下载任何您选择的图像,并在演示链接中使用。
images/gr1.jpg

解释
scene.enablePhysics(new BABYLON.Vector3(0,-10,0), new BABYLON.OimoJSPlugin());
以上代码启用物理插件。您可以使用您选择的插件。我们使用了 OimoJsplugin()。
g.physicsImpostor = newBABYLON.PhysicsImpostor(g, BABYLON.PhysicsImpostor.BoxImpostor, {
   mass: 0,
   restitution: 0.9
}, scene);
对于交互,物理引擎使用模拟器。当应用于模拟器时,对象的形状不能更改。如果更改,则必须创建一个新的模拟器。
对于球体,我们将设置模拟器并为其添加脉冲以产生反弹效果,如下所示:
redSphere.physicsImpostor = new BABYLON.PhysicsImpostor(
   redSphere, BABYLON.PhysicsImpostor.SphereImpostor, {
      mass: 1,
      restitution:0.9
   }, scene
);

redSphere.physicsImpostor.applyImpulse(
   new BABYLON.Vector3(1, 2, -1),
   new BABYLON.Vector3(1, 2, 0)
);
物理模拟器参数
考虑以下物理效果参数:
对象
此处对象是您想要应用交互的对象。例如,球体、盒子等。
类型
类型可以是以下之一:
- BABYLON.PhysicsImpostor.SphereImpostor;
- BABYLON.PhysicsImpostor.BoxImpostor;
- BABYLON.PhysicsImpostor.PlaneImpostor;
- BABYLON.PhysicsImpostor.MeshImpostor;
- BABYLON.PhysicsImpostor.CylinderImpostor;
- BABYLON.PhysicsImpostor.ParticleImpostor;
- BABYLON.PhysicsImpostor.HeightmapImpostor;
质量
唯一必需的参数是质量,它是对象的质量(以千克为单位)。值为 0 将创建一个静态模拟器 - 适用于地面。
恢复系数
这是物体在碰撞时“回馈”的力的大小。低值将不会产生反弹,而值为 1 将产生非常有弹性的交互。
scene.registerBeforeRender(function() {
   allspheres.forEach(function(obj) {
      // if the sphers falls down its updated again over here
      // If object falls
      if (obj.position.y < -100) {
         obj.position = getPosition(200);
      }
   });
})
以上代码将落在地面上的球体带回。它会不断更新地面上任何落下的球体。在浏览器中尝试以上演示以查看物理效果。
BabylonJS - 播放声音和音乐
没有声音和音乐,游戏是不完整的。BabylonJS 声音引擎带有一个 API,有助于为游戏添加声音效果。当游戏中出现战斗场景时,您需要获得枪声,这可以使用 babylonjs 声音引擎在这里实现。您可以根据键盘/鼠标控制效果获得游戏的声音效果。声音引擎提供环境音效、专业音效和定向音效。该引擎支持 .mp3 和 .wav 声音格式。
语法
var music = new BABYLON.Sound(
   "Music", "sound.wav", scene, null, {
      loop: true,
      autoplay: true
   }
);
参数
考虑以下与声音引擎相关的参数:
名称 - 声音的名称。
URL - 要播放的声音的 url。
场景 - 要播放声音的场景。
回调函数 - 当声音准备好播放时调用的回调函数。目前为 null。我们将介绍一些示例并学习如何使用它。
Json 对象 - 此对象包含需要执行的操作的基本详细信息。
sound.autoplay - 通过此设置,文件下载后声音会自动播放。
loop:true - 这意味着声音将连续循环播放。
在您的项目目录中创建 sound 文件夹,并下载任何样本音频文件以测试输出。
现在让我们向我们已经创建的场景添加声音。
演示
<!doctype html>
<html>
   <head>
      <meta charset = "utf-8">
      <title>BabylonJs - Basic Scene- Playing sounds and music</title>
      <script src = "babylon.js"></script>
      <style>
         canvas {width: 100%; height: 100%;}
      </style>
   </head>

   <body>
      <canvas id = "renderCanvas"></canvas>
      <script type = "text/javascript">
         var canvas = document.getElementById("renderCanvas");
         var engine = new BABYLON.Engine(canvas, true);
         var createScene  = function() {
            var scene = new BABYLON.Scene(engine);
            scene.clearColor = new BABYLON.Color3(0, 1, 0);

            var camera = new BABYLON.ArcRotateCamera("Camera", 1, 0.8, 10, new BABYLON.Vector3(0, 0, 0), scene);
            camera.attachControl(canvas, true);

            var music = new BABYLON.Sound("sound", "sounds/scooby.wav", scene, null, {
               loop: true,
               autoplay: true
            });
            return scene;
         };
         var scene = createScene();
         engine.runRenderLoop(function() {
            scene.render();
         });
      </script>
   </body>
</html>
输出
以上代码行生成以下输出:
现在让我们检查回调函数是如何工作的。如果您不希望声音自动播放,或者只想在需要时播放声音,则可以使用回调函数。
例如:
Var music = new BABYLON.Sound ("Music", "music.wav", scene, function callback() {music.play();});
演示
<!doctype html>
<html>
   <head>
      <meta charset = "utf-8">
      <title>BabylonJs - Basic Scene- Playing sounds and music</title>
      <script src = "babylon.js"></script>
      <style>
         canvas {width: 100%; height: 100%;}
      </style>
   </head>

   <body>
      <canvas id = "renderCanvas"></canvas>
      <script type = "text/javascript">
         var canvas = document.getElementById("renderCanvas");
         var engine = new BABYLON.Engine(canvas, true);
         var createScene  = function() {
            var scene = new BABYLON.Scene(engine);
            scene.clearColor = new BABYLON.Color3(0, 1, 0);

            var camera = new BABYLON.ArcRotateCamera("Camera", 1, 0.8, 10, new BABYLON.Vector3(0, 0, 0), scene);
            camera.attachControl(canvas, true)

            var music = new BABYLON.Sound(
               "sound", "sounds/scooby.wav", scene, function callback() { setTimeout(function() {music.play();}, 5000)});
            return scene;
         };
         var scene = createScene();
         engine.runRenderLoop(function() {
            scene.render();
         });
      </script>
   </body>
</html>
在回调中,我们将使用 setTimeout。这意味着,我们只想在特定时间后播放声音。我们添加了 5 秒作为计时器,因此当 Scooby.wav 文件下载完毕并经过 5 秒后,声音将播放。
使用点击和键盘按键播放声音
单击场景中的任何位置,您将听到爆炸声效;如果您按下任何箭头键(左、右、上或下),它将播放爆炸声效。
对于点击,我们将事件onmousedown附加到窗口;对于按键,我们将使用 keydown 事件。根据按键码播放声音。
演示
<!doctype html>
<html>
   <head>
      <meta charset = "utf-8">
      <title>BabylonJs - Basic Scene- Playing sounds and music</title>
      <script src = "babylon.js"></script>
      <style>
         canvas {width: 100%; height: 100%;}
      </style>
   </head>

   <body>
      <canvas id = "renderCanvas"></canvas>
      <script type = "text/javascript">
         var canvas = document.getElementById("renderCanvas");
         var engine = new BABYLON.Engine(canvas, true);
         var createScene  = function() {
            var scene = new BABYLON.Scene(engine);
            scene.clearColor = new BABYLON.Color3(0, 1, 0);

            var camera = new BABYLON.ArcRotateCamera("Camera", 1, 0.8, 10, new BABYLON.Vector3(0, 0, 0), scene);
            camera.attachControl(canvas, true)

            var sound = new BABYLON.Sound("gunshot", "sounds/explosion.wav", scene);

            window.addEventListener("mousedown", function (evt) {
               if (evt.button === 0) { // onclick
                  sound.play();
               }
            });

            window.addEventListener("keydown", function (evt) { // arrow key left right up down
               if (evt.keyCode === 37 || evt.keyCode === 38 || evt.keyCode === 39 || evt.keyCode === 40) {
                  sound.play();
               }
            });
            return scene;
         };
         var scene = createScene();
         engine.runRenderLoop(function() {
            scene.render();
         });
      </script>
   </body>
</html>
输出
以上代码行将生成以下输出:

您可以控制开始时遇到的 json 对象中的声音音量。
例如:
Var music = new BABYLON.Sound("sound", "sounds/scooby.wav", scene, null, {
   loop: true,
   autoplay: true,
   volume:0.5
});
要了解声音文件何时播放完毕,可以使用以下事件:
music.onended = function () {
   console.log("sound ended");

   //you can do the required stuff here like play it again or play some other sound etc.
};
如果您除了构造函数之外还想控制声音,也可以使用 SetVolume 属性。
例如:
music.setVolume(volume);
如果您在场景中播放多个声音,可以为所有创建的声音设置一个全局声音。
例如:
BABYLON.Engine.audioEngine.setGlobalVolume(0.5);
创建三维空间声音
如果您想将声音转换为空间声音(类似于空间音效的声音),需要在声音构造函数中添加选项。
例如:
var music = new BABYLON.Sound("music", "sounds/explosion.wav", scene, null, {
   loop: false,
   autoplay: true,
   spatialSound: true
});
以下是空间声音的不同选项:
DistanceModel - 默认情况下使用“线性”方程。其他选项包括“反比”或“指数”。
MaxDistance - 设置为 100。这意味着当监听者距离声音超过 100 个单位时,音量将为 0。您将听不到声音。
PanningModel - 设置为“HRTF”。规范说明它是一种使用与人类受试者测量的冲激响应进行卷积的更高质量的空间化算法。它指的是立体声输出。
MaxDistance - 仅当 distanceModel 为线性时使用。反比或指数模式下不使用。
空间声音演示
<!doctype html>
<html>
   <head>
      <meta charset = "utf-8">
      <title>BabylonJs - Basic Scene- Playing sounds and music</title>
      <script src = "babylon.js"></script>
      <style>
         canvas {width: 100%; height: 100%;}
      </style>
   </head>

   <body>
      <canvas id = "renderCanvas"></canvas>
      <script type = "text/javascript">
         var canvas = document.getElementById("renderCanvas");
         var engine = new BABYLON.Engine(canvas, true);
         var createScene  = function() {
            var scene = new BABYLON.Scene(engine);
            scene.clearColor = new BABYLON.Color3(0, 1, 0);

            var camera = new BABYLON.ArcRotateCamera("Camera", 1, 0.8, 10, new BABYLON.Vector3(0, 0, 0), scene);
            camera.attachControl(canvas, true);

            var music = new BABYLON.Sound(
               "music", "sounds/explosion.wav", scene, null, {
                  loop: false, autoplay: true, spatialSound: true, distanceModel: "exponential"
               }
            );
            return scene;
         };
         var scene = createScene();
         engine.runRenderLoop(function() {
            scene.render();
         });
      </script>
   </body>
</html>
将声音附加到网格
使用 BABYLON.Sound,您可以将声音附加到网格。如果网格在移动,声音也会随之移动。AttachtoMesh (mesh) 是要使用的方法。
演示
<!doctype html>
<html>
   <head>
      <meta charset = "utf-8">
      <title>BabylonJs - Basic Scene- Playing sounds and music</title>
      <script src = "babylon.js"></script>
      <style>
         canvas {width: 100%; height: 100%;}
      </style>
   </head>

   <body>
      <canvas id = "renderCanvas"></canvas>
      <script type = "text/javascript">
         var canvas = document.getElementById("renderCanvas");
         var engine = new BABYLON.Engine(canvas, true);
         var createScene  = function() {
            var scene = new BABYLON.Scene(engine);
            scene.clearColor = new BABYLON.Color3(0, 1, 0);

            var camera = new BABYLON.ArcRotateCamera("Camera", 1, 0.8, 10, new BABYLON.Vector3(0, 0, 0), scene);
            camera.attachControl(canvas, true);

            var materialforbox = new BABYLON.StandardMaterial("texture1", scene);
            var box = BABYLON.Mesh.CreateBox("box", '2', scene);
            box.material  = materialforbox;
            materialforbox.ambientColor = new BABYLON.Color3(1, 0, 0.2);

            var music = new BABYLON.Sound("music", "sounds/explosion.wav", scene, null, {
               loop: false,
               autoplay: true,
               spatialSound: true,
               distanceModel: "exponential"
            });
            music.attachToMesh(box);
            return scene;
         };
         var scene = createScene();
         engine.runRenderLoop(function() {
            scene.render();
         });
      </script>
   </body>
</html>
输出
以上代码行生成以下输出:
