- MFC 教程
- MFC - 首页
- MFC - 概述
- MFC - 环境设置
- MFC - VC++ 项目
- MFC - 入门
- MFC - Windows 基础
- MFC - 对话框
- MFC - Windows 资源
- MFC - 属性表
- MFC - Windows 布局
- MFC - 控件管理
- MFC - Windows 控件
- MFC - 消息与事件
- MFC - ActiveX 控件
- MFC - 文件系统
- MFC - 标准 I/O
- MFC - 文档/视图
- MFC - 字符串
- MFC - CArray
- MFC - 链表
- MFC - 数据库类
- MFC - 序列化
- MFC - 多线程
- MFC - Internet 编程
- MFC - GDI
- MFC - 库
- MFC 有用资源
- MFC - 快速指南
- MFC - 有用资源
- MFC - 讨论
MFC - 消息与事件
一个应用程序是由各种对象组成的。大多数时候,计算机上运行着不止一个应用程序,并且操作系统不断地被要求执行一些任务。由于可能会有如此多的请求以不可预测的方式出现,因此操作系统将决定权留给对象来指定它们想要什么、何时想要以及期望什么行为或结果。
概述
Microsoft Windows 操作系统无法预测一个对象需要处理哪种请求,以及另一个对象需要哪种任务。
为了管理所有这些任务和请求,对象发送消息。
每个对象都有责任决定发送什么消息以及何时发送。
为了发送消息,控件必须创建事件。
为了区分两者,消息的名称通常以 WM_ 开头,代表窗口消息。
事件的名称通常以 On 开头,表示一个动作。
事件是发送消息的动作。
消息映射
由于 Windows 是一个面向消息的操作系统,因此 Windows 环境的大部分编程都涉及消息处理。每次发生诸如击键或鼠标点击之类的事件时,都会向应用程序发送一条消息,然后应用程序必须处理该事件。
为了让编译器管理消息,它们应该包含在类定义中。
DECLARE_MESSAGE_MAP 宏应该在类定义的末尾提供,如下面的代码所示。
class CMainFrame : public CFrameWnd {
   public:
      CMainFrame();
   protected:
      DECLARE_MESSAGE_MAP()
};
实际的消息应该列在 DECLARE_MESSAGE_MAP 行的正上方。
要实现消息,您需要创建一个程序正在使用的消息表。
此表使用两个分隔宏;
它以 BEGIN_MESSAGE_MAP 开始,以 END_MESSAGE_MAP 宏结束。
BEGIN_MESSAGE_MAP 宏接受两个参数,您的类的名称以及您从中派生类的 MFC 类,如下面的代码所示。
#include <afxwin.h>
class CMainFrame : public CFrameWnd {
   public:
      CMainFrame();
   protected:
      DECLARE_MESSAGE_MAP()
};
CMainFrame::CMainFrame() {

   // Create the window's frame
   Create(NULL, L"MFC Messages Demo", WS_OVERLAPPEDWINDOW,
                                      CRect(120, 100, 700, 480), NULL);
}
class CMessagesApp : public CWinApp {
   public:
      BOOL InitInstance();
};
BEGIN_MESSAGE_MAP(CMainFrame, CFrameWnd)
END_MESSAGE_MAP()
BOOL CMessagesApp::InitInstance(){
   m_pMainWnd = new CMainFrame;
   m_pMainWnd->ShowWindow(SW_SHOW);
   m_pMainWnd->UpdateWindow();
   return TRUE;
}
CMessagesApp theApp;
让我们通过创建一个新的 Win32 项目来了解一个简单的示例。
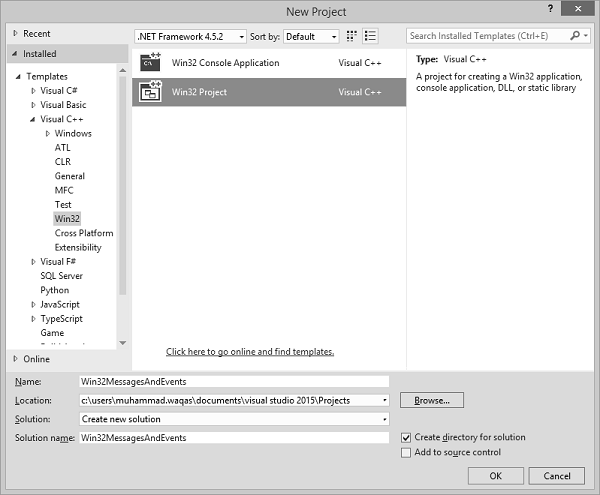
步骤 1 - 要创建 MFC 项目,请右键单击该项目并选择“属性”。
步骤 2 - 在左侧部分,单击“配置属性”→“常规”。
步骤 3 - 在“项目默认值”部分中选择“在共享 DLL 中使用 MFC”选项,然后单击“确定”。
步骤 4 - 我们需要添加一个新的源文件。
步骤 5 - 右键单击您的项目并选择“添加”→“新建项”。
步骤 6 - 在“模板”部分,单击“C++ 文件 (.cpp)”。
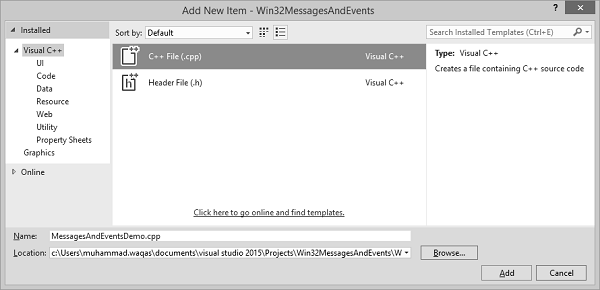
步骤 7 - 单击“添加”继续。
步骤 8 - 现在,在 *.cpp 文件中添加以下代码。
#include <afxwin.h>
class CMainFrame : public CFrameWnd {
   public:
      CMainFrame();
   protected:
      DECLARE_MESSAGE_MAP()
};

CMainFrame::CMainFrame() {
   // Create the window's frame
   Create(NULL, L"MFC Messages Demo", WS_OVERLAPPEDWINDOW,
      CRect(120, 100, 700, 480), NULL);
}

class CMessagesApp : public CWinApp {
   public:
      BOOL InitInstance();
};

BEGIN_MESSAGE_MAP(CMainFrame, CFrameWnd)
END_MESSAGE_MAP()
BOOL CMessagesApp::InitInstance() {
   m_pMainWnd = new CMainFrame;
   m_pMainWnd->ShowWindow(SW_SHOW);
   m_pMainWnd->UpdateWindow();
   return TRUE;
}
CMessagesApp theApp;
Windows 消息
有不同类型的 Windows 消息,例如创建窗口、显示窗口等。以下是一些常用的 Windows 消息。
让我们来看一个简单的窗口创建示例。
WM_CREATE - 当创建一个称为窗口的对象时,创建对象的框架会发送一个标识为 ON_WM_CREATE 的消息。
步骤 1 - 要创建 ON_WM_CREATE,请在 DECLARE_MESSAGE_MAP() 之前添加 afx_msg int OnCreate(LPCREATESTRUCT lpCreateStruct);,如下所示。
class CMainFrame : public CFrameWnd {
   public:
      CMainFrame();
   protected:
      afx_msg int OnCreate(LPCREATESTRUCT lpCreateStruct);
      DECLARE_MESSAGE_MAP()
};
步骤 2 - 在 BEGIN_MESSAGE_MAP(CMainFrame, CFrameWnd) 之后和 END_MESSAGE_MAP() 之前添加 ON_WM_CREATE()。
BEGIN_MESSAGE_MAP(CMainFrame, CFrameWnd)
   ON_WM_CREATE()
END_MESSAGE_MAP()
步骤 3 - 这是 OnCreate() 的实现。
int CMainFrame::OnCreate(LPCREATESTRUCT lpCreateStruct) {
   // Call the base class to create the window
   if (CFrameWnd::OnCreate(lpCreateStruct) == 0) {

      // If the window was successfully created, let the user know
      MessageBox(L"The window has been created!!!");
      // Since the window was successfully created, return 0
      return 0;
   }
   // Otherwise, return -1
   return -1;
}
步骤 4 - 现在您的 *.cpp 文件将如下所示。
#include <afxwin.h>
class CMainFrame : public CFrameWnd {
   public:
      CMainFrame();
   protected:
      afx_msg int OnCreate(LPCREATESTRUCT lpCreateStruct);
      DECLARE_MESSAGE_MAP()
};
CMainFrame::CMainFrame() {

   // Create the window's frame
   Create(NULL, L"MFC Messages Demo", WS_OVERLAPPEDWINDOW,
      CRect(120, 100, 700, 480), NULL);
}
class CMessagesApp : public CWinApp {
   public:
      BOOL InitInstance();
};
BEGIN_MESSAGE_MAP(CMainFrame, CFrameWnd)
   ON_WM_CREATE()
END_MESSAGE_MAP()
int CMainFrame::OnCreate(LPCREATESTRUCT lpCreateStruct) {
   // Call the base class to create the window
   if (CFrameWnd::OnCreate(lpCreateStruct) == 0) {
      // If the window was successfully created, let the user know
      MessageBox(L"The window has been created!!!");
      // Since the window was successfully created, return 0
      return 0;
   }
   // Otherwise, return -1
   return -1;
}
BOOL CMessagesApp::InitInstance() {
   m_pMainWnd = new CMainFrame;
   m_pMainWnd -> ShowWindow(SW_SHOW);
   m_pMainWnd -> UpdateWindow();
   return TRUE;
}
CMessagesApp theApp;
步骤 5 - 编译并执行上述代码后,您将看到以下输出。

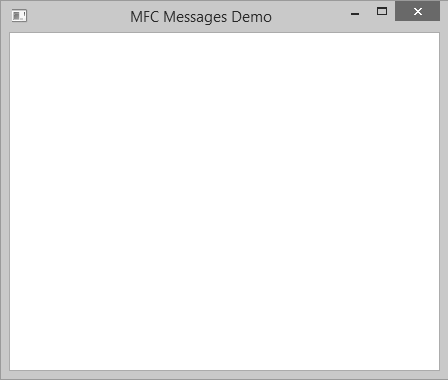
步骤 6 - 单击“确定”后,将显示主窗口。
命令消息
图形应用程序的主要功能之一是呈现 Windows 控件和资源,允许用户与机器交互。我们将学习的控件示例包括按钮、列表框、组合框等。
我们在上一课中介绍了一种资源类型,即菜单。当用户单击此类控件和资源时,它们可以启动自己的消息。源自 Windows 控件或资源的消息称为命令消息。
让我们来看一个简单的命令消息示例。
为了使您的应用程序能够创建新文档,CWinApp 类提供了 OnFileNew() 方法。
afx_msg void OnFileNew();

BEGIN_MESSAGE_MAP(CMainFrame, CFrameWnd)
   ON_COMMAND(ID_FILE_NEW, CMainFrame::OnFileNew)
END_MESSAGE_MAP()
以下是方法定义 -
void CMainFrame::OnFileNew() {
   // Create New file
}
键盘消息
键盘是连接到计算机的硬件对象。默认情况下,它用于在控件上输入可识别的符号、字母和其他字符。键盘上的每个键都显示一个符号、一个字母或它们的组合,以指示该键可用于什么。用户通常按下某个键,该键会向程序发送信号。
每个键都有一个操作系统可以识别的代码。此代码称为虚拟键码。
按下某个键会导致将WM_KEYDOWN 或WM_SYSKEYDOWN 消息放入线程消息中。这可以定义如下 -
afx_msg void OnKeyDown(UINT nChar, UINT nRepCnt, UINT nFlags);
让我们来看一个简单的示例。
步骤 1 - 以下是消息。
BEGIN_MESSAGE_MAP(CMainFrame, CFrameWnd)
   ON_WM_CREATE()
   ON_WM_KEYDOWN()
END_MESSAGE_MAP()
步骤 2 - 以下是 OnKeyDown() 的实现。
void CMainFrame::OnKeyDown(UINT nChar, UINT nRepCnt, UINT nFlags) {
   switch (nChar) {

      case VK_RETURN:
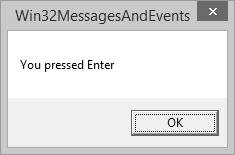
         MessageBox(L"You pressed Enter");
         break;
      case VK_F1:
         MessageBox(L"Help is not available at the moment");
         break;
      case VK_DELETE:
         MessageBox(L"Can't Delete This");
         break;
      default:
         MessageBox(L"Whatever");
   }
}
步骤 3 - 编译并执行上述代码后,您将看到以下输出。

步骤 4 - 按下 Enter 键后,将显示以下消息。
鼠标消息
鼠标是连接到计算机的另一个对象,允许用户与机器交互。
如果按下左鼠标按钮,则会发送 ON_WM_LBUTTONDOWN 消息。此消息的语法如下 -
afx_msg void OnLButtonDown(UINT nFlags, CPoint point)
如果按下右鼠标按钮,则会发送 ON_WM_RBUTTONDOWN 消息。其语法如下 -
afx_msg void OnRButtonDown(UINT nFlags, CPoint point)
类似地,如果释放左鼠标,则会发送 ON_WM_LBUTTONUP 消息。其语法如下 -
afx_msg void OnLButtonUp(UINT nFlags, CPoint point)
如果释放右鼠标,则会发送 ON_WM_TBUTTONUP 消息。其语法如下 -
afx_msg void OnRButtonUp(UINT nFlags, CPoint point)
让我们来看一个简单的示例。
步骤 1 - 在 CMainFrame 类定义中添加以下两个函数,如下面的代码所示。
class CMainFrame : public CFrameWnd {
   public:
      CMainFrame();
   protected:
      afx_msg void OnKeyDown(UINT nChar, UINT nRepCnt, UINT nFlags);
      afx_msg void OnLButtonDown(UINT nFlags, CPoint point);
      afx_msg void OnRButtonUp(UINT nFlags, CPoint point);
      DECLARE_MESSAGE_MAP()
};
步骤 2 - 添加以下两个消息映射。
BEGIN_MESSAGE_MAP(CMainFrame, CFrameWnd)
   ON_WM_KEYDOWN()
   ON_WM_LBUTTONDOWN()
   ON_WM_RBUTTONUP()
END_MESSAGE_MAP()
步骤 3 - 以下是函数定义。
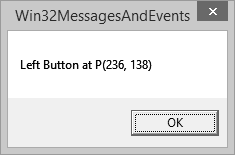
void CMainFrame::OnLButtonDown(UINT nFlags, CPoint point) {
   CString MsgCoord;
   MsgCoord.Format(L"Left Button at P(%d, %d)", point.x, point.y);
   MessageBox(MsgCoord);
}
void CMainFrame::OnRButtonUp(UINT nFlags, CPoint point) {
   MessageBox(L"Right Mouse Button Up");
}
步骤 4 - 运行此应用程序时,您将看到以下输出。

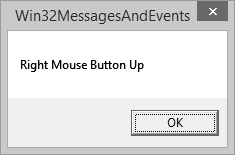
步骤 5 - 单击“确定”后,您将看到以下消息。
步骤 6 - 右键单击此窗口。现在,当您释放鼠标右键时,将显示以下消息。
