
 数据结构
数据结构 网络
网络 关系数据库管理系统
 操作系统
操作系统 Java
Java iOS
iOS HTML
HTML CSS
CSS Android
 Python
 C 编程
C 编程 C++
C++ C#
C# MongoDB
 MySQL
MySQL Javascript
 PHP
PHP如何使用 OpenCV Python 创建黑色图像和白色图像?
要创建黑色图像,我们可以使用 **np.zeros()** 方法。它创建一个给定大小的 NumPy n 维数组,所有元素都为 **0**。由于所有元素都为零,当我们使用 **cv2.imshow()** 或 **plt.imshow()** 函数显示它时,它会显示一个黑色图像。
要创建白色图像,我们可以使用 **np.ones()** 方法。它创建一个给定大小的 NumPy n 维数组,所有元素都为 **1**。我们将此数组乘以 **255** 以创建白色图像。现在所有元素都为 **255**,因此当我们使用 **cv2.imshow()** 或 **plt.imshow()** 函数显示它时,它会显示一个白色图像。
**注意** - 在使用 **np.zeros()** 或 **np.ones()** 创建 NumPy.ndarray 时,我们将 **dtype = np.uint8** 作为参数传递。
步骤
您可以按照以下步骤创建黑色和白色图像:
导入所需的库。在以下所有 Python 示例中,所需的 Python 库为 **OpenCV、NumPy** 和 **Matplotlib**。确保您已安装它们。
import cv2
import matplotlib.pyplot as plt
import numpy as np
使用 **np.zeros()** 创建 **NumPy.ndarray** 以创建黑色图像。将 **大小** 和 **dtype** 作为参数传递给这些方法。此处 dtype 为 **np.uint8**。
img = np.zeros((350, 500, 3), dtype = np.uint8)
使用 **np.ones()** 创建 **NumPy.ndarray** 以创建白色图像。将 **大小** 和 **dtype** 作为参数传递给这些方法。此处 dtype 为 **np.uint8**。现在我们将数组乘以 **255**。
img = np.ones((350, 500, 3), dtype = np.uint8)
img = 255*img
显示黑色或白色图像。
cv2.imshow('black image', img)
让我们看看不同的示例以更好地理解。
示例 1
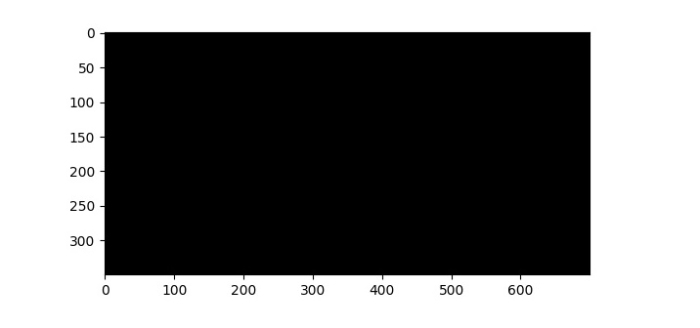
在此示例中,我们创建了一个 **700x350** 的黑色图像。此处图像 **宽度** 为 **700**,**高度** 为 **350**。
# import required libraries
import cv2
import numpy as np

# create a black image
img = np.zeros((350, 700, 3), dtype = np.uint8)

# display the image using opencv
cv2.imshow('black image', img)
cv2.waitKey(0)
输出
运行上述 Python 程序后,它将生成以下输出窗口。
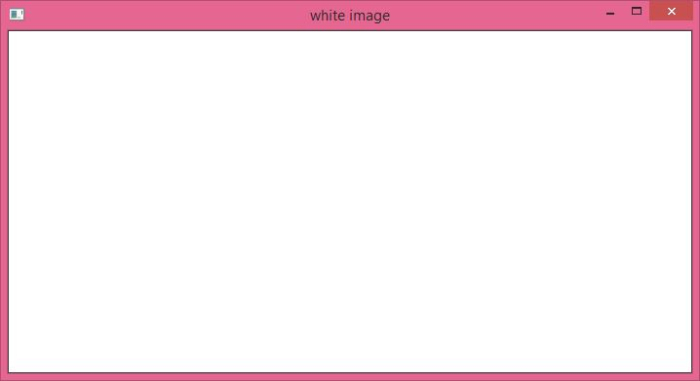
示例 2
在此示例中,我们创建了一个 **700x350** 的白色图像。请注意,此处图像 **宽度** 为 **700**,**高度** 为 **350**。
# import required libraries
import cv2
import numpy as np

# create a white image
img = np.ones((350, 700, 3), dtype = np.uint8)
img = 255* img

# display the image using opencv
cv2.imshow('white image', img)
cv2.waitKey(0)
输出
运行上述 Python 程序后,它将生成以下输出窗口。

19K+ 浏览量
