
 数据结构
数据结构 网络
网络 关系数据库管理系统 (RDBMS)
 操作系统
操作系统 Java
Java iOS
iOS HTML
HTML CSS
CSS Android
 Python
 C语言编程
C语言编程 C++
C++ C#
C# MongoDB
 MySQL
MySQL Javascript
 PHP
PHP如何在React Native中使用Flexbox?
Flexbox是一个一维布局系统,用于在React Native中排列和对齐项目,类似于它在Web上的CSS中的使用方法,但有一些默认差异。它旨在帮助我们创建在不同屏幕尺寸上看起来都很好的布局。
在React Native中使用Flexbox就像在一个架子上排列物品一样,将书籍、图片和其他物品放置在不同的位置和方向。这使我们能够创建响应式、灵活的布局,以适应不同的屏幕尺寸和方向。
在本教程中,我们将学习在React Native中使用Flexbox的基础知识。
使用Flexbox进行React Native布局
为了获得所需的布局,我们通常在React Native中结合使用flexDirection、alignItems和justifyContent。
flexDirection
flexDirection属性用于指定布局的主轴。默认情况下,该值为“column”。
以下是flexDirection的可能选项:
row − 水平排列项目,从左到右
row-reverse − 水平排列项目,从右到左
column − 垂直排列项目,从上到下
column-reverse − 垂直排列项目,从下到上
justifyContent
justifyContent属性控制项目在容器主轴上的分布方式。默认情况下,该值为“flex-start”。
以下是justifyContent的可能选项:
flex-start − 将项目对齐到容器的起始位置。
flex-end − 将项目对齐到容器的结束位置。
center − 将项目居中于容器内。
space-between − 均匀分布项目,第一个项目位于容器的起始位置,最后一个项目位于结束位置。
space-around − 均匀分布项目,项目周围留有相等的空间。
space-evenly − 均匀分布项目,项目周围以及容器的起始和结束位置留有相等的空间。
alignItems
alignItems属性用于沿布局的主轴对齐项目。当flexDirection设置为“row”时,alignItems控制项目的水平对齐方式;当flexDirection设置为“column”时,alignItems控制项目的垂直对齐方式。
alignItems的可能值为:
flex-start − 项目对齐到容器的起始位置。
flex-end − 项目对齐到容器的结束位置。
center − 项目居中于容器内。
stretch − 项目拉伸以填充容器。
baseline − 基于基线对齐项目。
其他属性
除了常用的flex属性外,还有其他属性,例如:
flex − 此属性决定组件相对于其同级组件的增长程度。值越高,它将占据更多空间。“flex: 1”将使组件扩展以填充可用空间。
flex-wrap − 此属性设置如果容器中没有足够的空间,则flex项目是否应换行。可用值为nowrap、wrap和wrap-reverse。
flex-shrink − 此属性设置当容器太小时项目收缩的能力。默认值为1。
flex-grow − 此属性设置当容器中有额外空间时项目增长的能力。默认值为0。
align-self − 此属性设置单个项目沿容器交叉轴的对齐方式。可用值为auto、flex-start、flex-end、center、stretch和baseline。
order − 此属性设置flex容器中项目的顺序。默认值为0。
示例
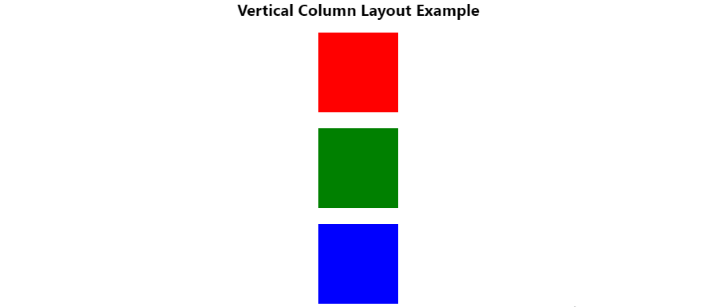
在下面的示例中,我们使用React Native中的Flexbox创建一个垂直列布局。
该应用显示三个不同颜色的盒子,这些盒子垂直排列在一个容器中。我们使用“flexDirection”属性将布局方向设置为“column”,并使用“justifyContent”属性在盒子之间均匀地分配可用空间。最后,“alignItems”属性用于将盒子居中于容器内。
总的来说,此示例演示了Flexbox在React Native中的强大功能和灵活性。
import React from "react";
import { View, Text } from "react-native";
const VerticalColumnLayoutExample = () => {
   return (
      <>
         <Text
            style={{
               fontSize: 20,
               fontWeight: "bold",
               textAlign: "center",
               marginBottom: "1rem"
            }}
         >
            Vertical Column Layout Example
         </Text>
         <View
            style={{
               flexDirection: "column",
               justifyContent: "space-between",
               alignItems: "center",
               height: 340
            }}
         >
            <View style={{ width: 100, height: 100, backgroundColor: "red" }} />
            <View style={{ width: 100, height: 100, backgroundColor: "green" }} />
            <View style={{ width: 100, height: 100, backgroundColor: "blue" }} />
         </View>
      </>
   );
};
export default VerticalColumnLayoutExample;
输出
示例
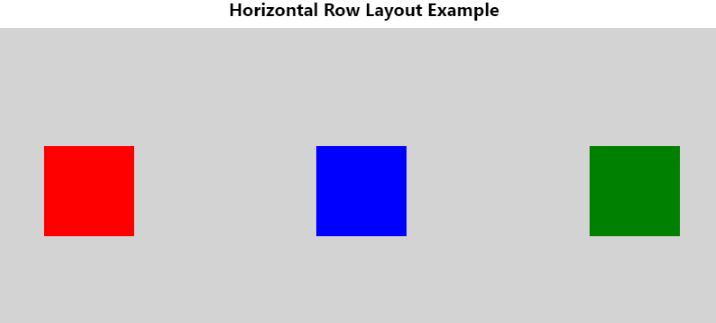
在下面的示例中,我们使用React Native中的Flexbox创建一个水平行布局。
它创建一个具有三个子视图的视图,这些子视图使用“flexDirection”、“justifyContent”和“alignItems”属性对齐。子视图也具有背景颜色,以便于视觉区分。此示例展示了如何使用这些属性在React Native中创建不同的布局。
import React from 'react';
import { View, StyleSheet ,Text} from 'react-native';

const App = () => {
   return (
      <>
         <Text style={{ fontSize: 20, fontWeight: 'bold', textAlign: "center", marginBottom: "0.5rem" }}> Horizontal Row Layout Example</Text>
         <View style={styles.container}>
            <View style={styles.box1}></View>
            <View style={styles.box2}></View>
            <View style={styles.box3}></View>
         </View>
      </>
   );
};

const styles = StyleSheet.create({
   container: {
      flex: 1,
      flexDirection: 'row',
      justifyContent: 'space-evenly',
      alignItems: 'center',
      backgroundColor: 'lightgray',
   },
   box1: {
      width: 100,
      height: 100,
      backgroundColor: 'red',
   },
   box2: {
      width: 100,
      height: 100,
      backgroundColor: 'blue',
   },
   box3: {
      width: 100,
      height: 100,
      backgroundColor: 'green',
   },
});
export default App;
输出
在本教程中,我们学习了如何在React Native中使用Flexbox创建布局。我们讨论了Flexbox的主要属性,例如flexDirection、justifyContent和alignItems,这些属性可用于控制容器中组件的布局。我们看到了如何在React Native中使用Flexbox创建垂直列布局和水平行布局。
最终,Flexbox是React Native开发人员创建现代且引人入胜的用户界面(提供良好的用户体验)的必备技能。

2K+ 浏览量
