- ASP.NET Core 教程
- ASP.NET Core - 首页
- ASP.NET Core - 概述
- ASP.NET Core - 环境设置
- ASP.NET Core - 新建项目
- ASP.NET Core - 项目结构
- ASP.NET Core - project.json
- ASP.NET Core - 配置
- ASP.NET Core - 中间件
- ASP.NET Core - 异常处理
- ASP.NET Core - 静态文件
- ASP.NET Core - 设置 MVC
- ASP.NET Core - MVC 设计模式
- ASP.NET Core - 路由
- ASP.NET Core - 属性路由
- ASP.NET Core - Action 结果
- ASP.NET Core - 视图
- 设置 Entity Framework
- ASP.NET Core - DBContext
- ASP.NET Core - Razor 布局视图
- ASP.NET Core - Razor 视图启动
- ASP.NET Core - Razor 视图导入
- ASP.NET Core - Razor 标签助手
- ASP.NET Core - Razor 编辑表单
- ASP.NET Core - Identity 概述
- ASP.NET Core - Authorize 属性
- Identity 配置
- ASP.NET Core - Identity 迁移
- ASP.NET Core - 用户注册
- ASP.NET Core - 创建用户
- ASP.NET Core - 登录和登出
- ASP.NET Core 有用资源
- ASP.NET Core - 快速指南
- ASP.NET Core - 有用资源
- ASP.NET Core - 讨论
ASP.NET Core - DBContext
Entity Framework 允许您使用称为实体的公共语言运行时 (CLR) 对象查询、插入、更新和删除数据。Entity Framework 将模型中定义的实体和关系映射到数据库。它还提供以下功能:
将从数据库返回的数据具体化为实体对象。
跟踪对对象的更改。
处理并发。
将对象更改传播回数据库。
将对象绑定到控件。
负责以对象形式与数据交互的主要类是 DbContext。使用上下文建议的方法是定义一个从 DbContext 派生的类,并公开表示上下文中指定实体集合的 DbSet 属性。
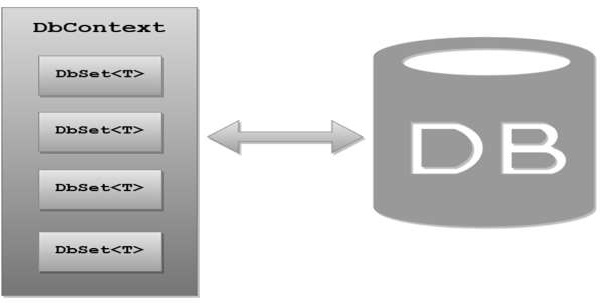
从逻辑上讲,一个 DBContext 映射到具有 DBContext 理解的架构的特定数据库。在该 DBContext 类上,您可以创建类型为 DbSet<T> 的属性。泛型类型参数 T 将是实体的类型,例如,Employee 是 FirstAppDemo 应用程序中的一个实体。
示例
让我们来看一个简单的例子,我们将创建一个 DbContext 类。在这里,我们需要在 Models 文件夹中添加一个新类,并将其命名为 **FirstAppDempDbContext**。尽管这个类本身并不是一个模型,但它确实整合了我们所有的模型,以便我们可以将它们与数据库一起使用。
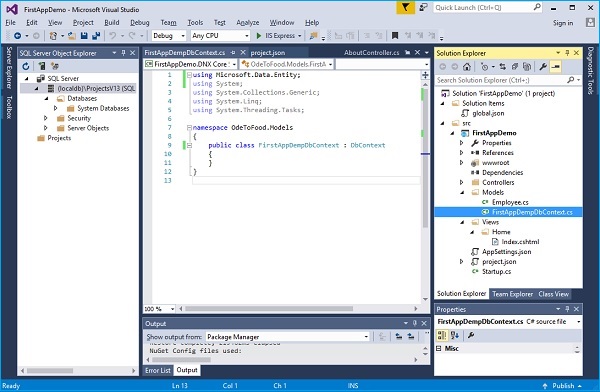
从位于 Miscrosoft.Data.Entity 命名空间中的 DbContext 类继承您的上下文类。现在在该类上实现 Employee 的 DbSet。
每个 DbSet 将映射到数据库中的一个表。如果您有一个 employee 的 DbSet 属性,并且该属性的名称是 Employees,则 Entity Framework 默认情况下会在您的数据库中查找 Employees 表。
using FirstAppDemo.Models;
using Microsoft.Data.Entity;

using System;
using System.Collections.Generic;
using System.Linq;
using System.Threading.Tasks;

namespace OdeToFood.Models {
   public class FirstAppDemoDbContext : DbContext {
      public DbSet<Employee> Employees { get; set; }
   }
}
实现非常简单,因为我们只有一个模型要处理。我们只需要一个属性,即 Employee 的 **DbSet**,我们可以将此属性命名为 **Employees**。
现在让我们直接将此类插入控制器,然后控制器可以使用 **FirstAppDemoDbContext** 来查询数据库。我们将通过向 HomeController 类添加一个新类来简化所有这些操作,在该类中,我们实现添加员工和获取员工的方法,如下面的程序所示。
using Microsoft.AspNet.Mvc;

using FirstAppDemo.ViewModels;
using FirstAppDemo.Services;
using FirstAppDemo.Entities;
using FirstAppDemo.Models;

using System.Collections.Generic;
using System.Linq;

namespace FirstAppDemo.Controllers {
   public class HomeController : Controller {
      public ViewResult Index() {
         var model = new HomePageViewModel();

         using (var context = new FirstAppDemoDbContext()) {
            SQLEmployeeData sqlData = new SQLEmployeeData(context);
               model.Employees = sqlData.GetAll();
         }
         return View(model);
      }
   }
   public class SQLEmployeeData {
      private FirstAppDemoDbContext _context { get; set; }
      public SQLEmployeeData(FirstAppDemoDbContext context) {
         _context = context;
      }
      public void Add(Employee emp) {
         _context.Add(emp);
         _context.SaveChanges();
      }
      public Employee Get(int ID) {
         return _context.Employees.FirstOrDefault(e => e.Id == ID);
      }
      public IEnumerable<Employee> GetAll() {
         return _context.Employees.ToList<Employee>();
      }
   }
   public class HomePageViewModel {
      public IEnumerable<Employee> Employees { get; set; }
   }
}
在上面的 SQLEmployeeData 类中,您可以看到我们定义了 Add 方法,该方法会将新的员工对象添加到上下文,然后保存更改。在 Get 方法中,它将根据 ID 返回员工。而在 GetAll 方法中,它将返回数据库中所有员工的列表。
配置 Entity Framework 服务
要拥有可用的 Entity Framework DBContext,我们需要更改应用程序的配置。我们需要添加一个连接字符串,以便我们的 DBContext 知道要连接到哪个服务器以及要查询哪个数据库。
我们将连接字符串放在 JSON 配置文件中。
我们还需要在 Startup 类的 ConfigureServices 方法中添加更多服务。
Entity Framework 与 ASP.NET 和 MVC 框架一样,依赖于依赖注入,为了使注入工作,运行时需要知道 Entity Framework 使用的各种服务。
有一个简单的配置 API 将添加我们需要的所有默认服务。
让我们转到 AppSettings.json 文件并添加连接字符串,如下面的程序所示。
{
   "message": "Hello, World! this message is from configuration file...",
   "database": {
      "connection": "Data Source=(localdb)\\mssqllocaldb;Initial Catalog=FirstAppDemo"
   }
}
现在让我们转到 Startup 类,我们需要为 Entity Framework 添加一些额外的服务才能使其正常工作。具体来说,我们需要做三件事与 Entity Framework 相关:
我们需要添加核心 Entity Framework 服务。
我们还需要添加与 SQL Server 相关的 Entity Framework 服务。
我们需要告诉 Entity Framework 关于我们的 DBContext。
所有这些都可以通过作为 **IServiceCollection** 的扩展方法提供的方法来完成,如下面的程序所示。
public void ConfigureServices(IServiceCollection services) {
   services.AddMvc();
   services.AddEntityFramework()
      .AddSqlServer()
      .AddDbContext<FirstAppDemoDbContext>

   (option => option.UseSqlServer(Configuration["database:connection"]));
}
第一个方法是 **AddEntityFramework**。这将添加核心 Entity Framework 服务,即默认服务。
但是,由于 Entity Framework 现在设计为可以与各种类型的数据库(包括非关系型数据库)一起工作,因此我们需要进行第二次调用以告诉 Entity Framework 添加其默认的与 SQL Server 相关的服务。
然后,我们还需要告诉 Entity Framework 关于我的 **DBContext** 类,以便它可以适当地构造该类的实例,我们可以通过第三种方法 **AddDbContext** 方法来实现。
此方法采用一个泛型类型参数,我们在此参数中指定 DBContext 派生类的类型,即 **FirstAppDemoDbContext**。
在 AddDbContext 内部,我们需要描述我们 DBContext 的选项。
这可以通过 **lambda 表达式** 来完成;这是一个操作,我们接收一个选项参数,并且 Entity Framework 可以支持不同的数据库。我们只需要告诉 Entity Framework 此特定 DBContext 将 **UseSqlServer**。
此方法需要一个参数,即要使用的 **connectionString**。
以下是 **Startup.cs** 文件的完整实现。
using Microsoft.AspNet.Mvc;

using FirstAppDemo.ViewModels;
using FirstAppDemo.Services;
using FirstAppDemo.Entities;
using FirstAppDemo.Models;

using System.Collections.Generic;
using System.Linq;

namespace FirstAppDemo.Controllers {
   public class HomeController : Controller {
      public ViewResult Index() {
         var employee = new Employee { Id = 1, Name = "Mark Upston1" };
         using (var context = new

         FirstAppDemoDbContext()) {
            SQLEmployeeData sqlData = new SQLEmployeeData(context);
            sqlData.Add(employee);
         }

         //var employee = new Employee { ID = 1, Name = "Mark Upston" };
         return View(employee);
      }
   }
   public class SQLEmployeeData {
      private FirstAppDemoDbContext _context { get; set; }
      public SQLEmployeeData(FirstAppDemoDbContext context) {
         _context = context;
      }
      public void Add(Employee emp) {
         _context.Add(emp);
         _context.SaveChanges();
      }
      public Employee Get(int ID) {
         return _context.Employees.FirstOrDefault(e => e.Id == ID);
      }
      public IEnumerable<Employee> GetAll() {
         return _context.Employees.ToList<Employee>();
      }
   }
}
现在我们需要设置数据库。设置数据库的一种方法是使用 Entity Framework 创建数据库,这是一个两步过程:
第一步
这包括以下内容:
向我们的项目添加迁移代码。
迁移代码是 **C#** 代码。这可以执行以在数据库中创建数据库模式。
Entity Framework 可以为我们生成此迁移代码。
Entity Framework 查看数据库和我们的模型,并找出使应用程序工作所需的模式更改。
因此,当我们添加其他模型或对现有模型(如 Employee 类)进行更改时,我们可以继续向项目添加迁移,并使我们的数据库模式保持同步。
第二步
这包括以下内容:
在这里,我们需要显式地应用这些迁移来更新数据库。
这两个任务都可以通过从控制台窗口使用一些简单的命令来实现。
我们已经创建了 project.json。
这就是为什么我们创建 project.json 来添加一个命令,其中“ef”映射到 EntityFramework.Commands。
让我们打开 Visual Studio 的开发者命令提示符来运行我们需要添加迁移和应用迁移的命令。最简单的方法是转到应用程序根目录。
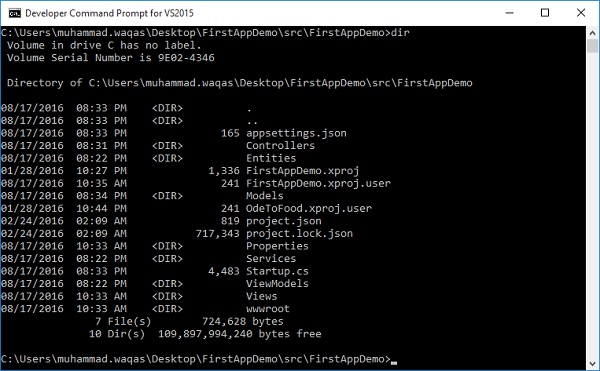
如果您在包含 project.json 文件的文件夹中,那么您就在正确的文件夹中。在这里,我们需要执行一个称为 dnvm 的命令。这是 .NET 版本管理器,它将告诉系统我们要使用哪个运行时。
现在让我们使用以下命令。
dnvm list
按 Enter 键后,您将看到以下输出。
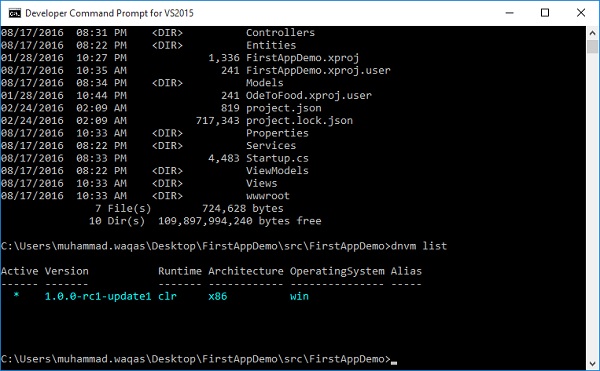
我们需要告诉 **dnvm** 我们想要使用特定的运行时。这将使我们能够访问我们要执行的 dotnet 命令或 dnx 命令。
执行以下命令。
dnvm use1.0.0-rc1-update1 -p
按 Enter 键。
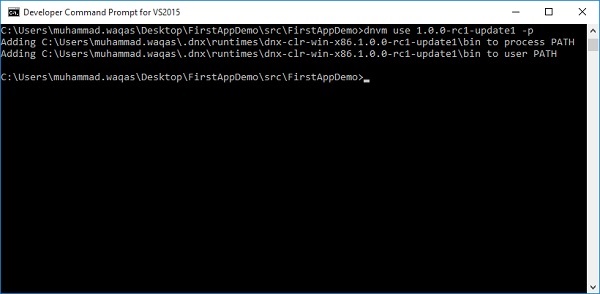
**dnvm** 将设置我们的路径和环境变量以包含一个 bin 目录,这将使我们能够访问此 dnx 实用程序。让我们执行 **dnx ef** 命令。
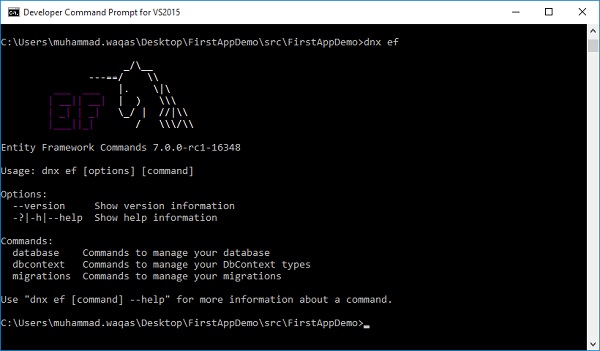
这是 .NET 执行环境,使用 dnx,我们可以调用我们在 project.json 文件中列出的命令。执行这些命令通常非常容易。当您键入 dnx ef 时,您将获得一个帮助屏幕。您不必记住所有选项。您可以从 Entity Framework 命令中查看可用的命令,其中有三个。
首先,我们需要添加迁移来执行以下命令。
dnx ef migrations add v1
按 Enter 键。
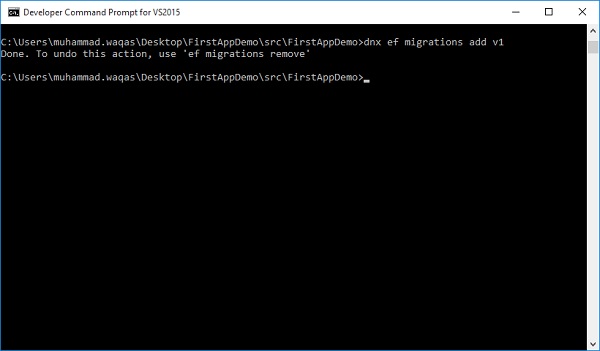
Entity Framework 将找到该上下文并查看其中的模型。它将知道没有之前的迁移,因此它将生成第一个迁移。在这里,v1 是数据库的版本 1。它将在解决方案资源管理器中创建一个新文件夹并生成代码。
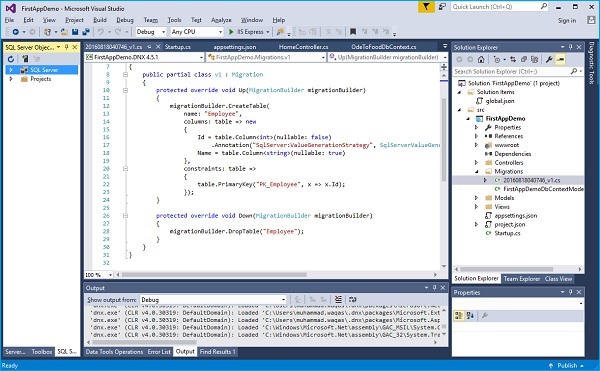
迁移本质上是用于生成 SQL 命令以修改 SQL 数据库中模式的 C# 代码。
using System;
using System.Collections.Generic;

using Microsoft.Data.Entity.Migrations;
using Microsoft.Data.Entity.Metadata;

namespace FirstAppDemo.Migrations {
   public partial class v1 : Migration {
      protected override void Up(MigrationBuilder migrationBuilder) {

         migrationBuilder.CreateTable(name: "Employee", columns: table => new {
            Id = table.Column<int>(nullable: false)
               .Annotation("SqlServer:ValueGenerationStrategy",
               SqlServerValueGenerationStrategy.IdentityColumn),
               Name = table.Column<string>(nullable: true)
         },
         constraints: table => {
            table.PrimaryKey("PK_Employee", x => x.Id);
         });
      }
      protected override void Down(MigrationBuilder migrationBuilder) {
         migrationBuilder.DropTable("Employee");
      }
   }
}
您可以看到它将创建一个名为 Employees 的表。
此表应有两个列——一个 ID 列和一个 Name 列。
按照约定,当 Entity Framework 看到您有一个名为 Id 的属性时,它将使该属性或更确切地说,使该列成为数据库中的主键。
在这里,我们将使用 SQL Server。默认情况下,Entity Framework 将使其成为 IdentityColumn,这意味着 SQL Server 将为我们生成 ID。
让我们通过键入“**dnx ef database update**”命令将这些 ID 应用到数据库。
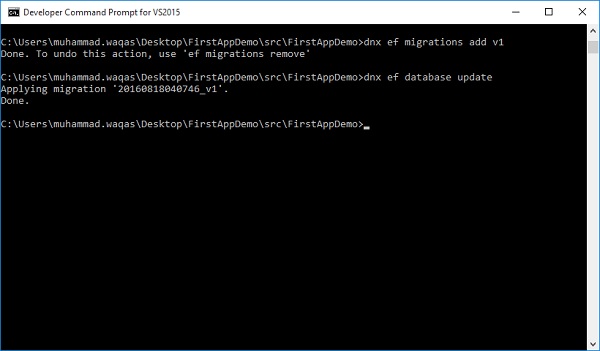
您可以看到该命令已应用迁移。
现在让我们转到 SQL Server 对象资源管理器,并刷新数据库,您现在可以看到我们有一个 FirstAppDemo 数据库。
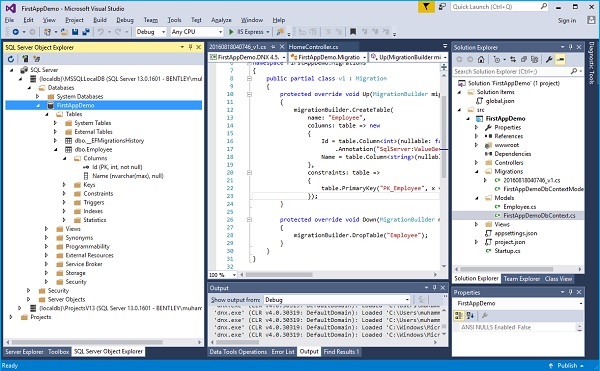
您还可以看到我们的 Employee 表,我们甚至可以查看该表的列,其中 ID 列是主键。
让我们右键单击 dbo.Employee 表并选择“查看数据”。
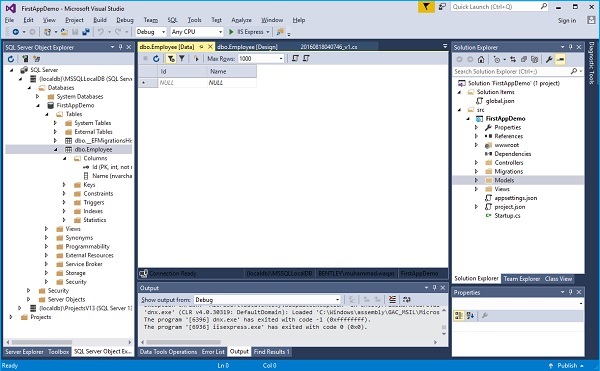
在运行应用程序之前,让我们添加一些数据。当我们启动应用程序时,我们应该看到来自数据库的一些数据。
让我们在这里添加几行数据。
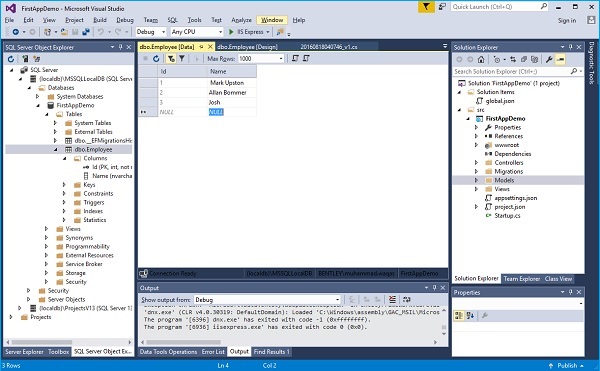
现在让我们更新 index.cshtml 文件。它以表格形式显示所有数据。
@model FirstAppDemo.Controllers.HomePageViewModel
<html xmlns="http://www.w3.org/1999/xhtml">
   <head>
       <title>Home</title>
   </head>

   <body>
      <h1>Welcome!</h1>

      <table>
         @foreach (var employee in Model.Employees) {
            <tr>
               <td>
                  @Html.ActionLink(employee.Id.ToString(), "Details", new
                     { id = employee.Id })
               </td>
               <td>@employee.Name</td>
            </tr>
         }
      </table>
   </body>
</html>
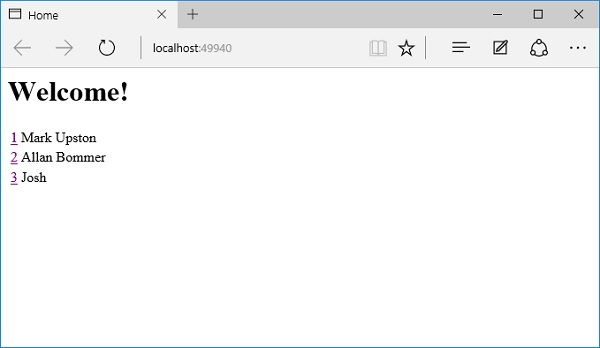
运行应用程序后,它应该产生以下输出。
