- ASP.NET Core 教程
- ASP.NET Core - 首页
- ASP.NET Core - 概述
- ASP.NET Core - 环境设置
- ASP.NET Core - 新建项目
- ASP.NET Core - 项目布局
- ASP.NET Core - Project.Json
- ASP.NET Core - 配置
- ASP.NET Core - 中间件
- ASP.NET Core - 异常处理
- ASP.NET Core - 静态文件
- ASP.NET Core - 设置 MVC
- ASP.NET Core - MVC 设计模式
- ASP.NET Core - 路由
- ASP.NET Core - 属性路由
- ASP.NET Core - 操作结果
- ASP.NET Core - 视图
- 设置 Entity Framework
- ASP.NET Core - DBContext
- ASP.NET Core - Razor 布局视图
- ASP.NET Core - Razor 视图启动
- ASP.NET Core - Razor 视图导入
- ASP.NET Core - Razor 标签助手
- ASP.NET Core - Razor 编辑表单
- ASP.NET Core - 身份概述
- ASP.NET Core - 授权属性
- 身份配置
- ASP.NET Core - 身份迁移
- ASP.NET Core - 用户注册
- ASP.NET Core - 创建用户
- ASP.NET Core - 登录和登出
- ASP.NET Core 有用资源
- ASP.NET Core - 快速指南
- ASP.NET Core - 有用资源
- ASP.NET Core - 讨论
ASP.NET Core - 设置 MVC
在本章中,我们将设置 FirstAppDemo 应用程序中的 MVC 框架。我们将通过构建一个基于 ASP.NET Core 的 Web 应用程序,更具体地说,是基于 ASP.NET Core MVC 框架的 Web 应用程序来进行。从技术上讲,我们只使用中间件就可以构建整个应用程序,但是 ASP.NET Core MVC 为我们提供了可以轻松创建 HTML 页面和基于 HTTP 的 API 的功能。
要在我们的空项目中设置 MVC 框架,请按照以下步骤操作:
安装 **Microsoft.AspNet.Mvc** 包,它使我们能够访问框架提供的程序集和类。
安装完程序包后,我们需要在运行时注册 ASP.NET MVC 所需的所有服务。我们将在 **ConfigureServices** 方法中执行此操作。
最后,我们需要添加 ASP.NET MVC 的中间件来接收请求。从本质上讲,这部分中间件接收 HTTP 请求并尝试将该请求定向到我们将编写的 C# 类。
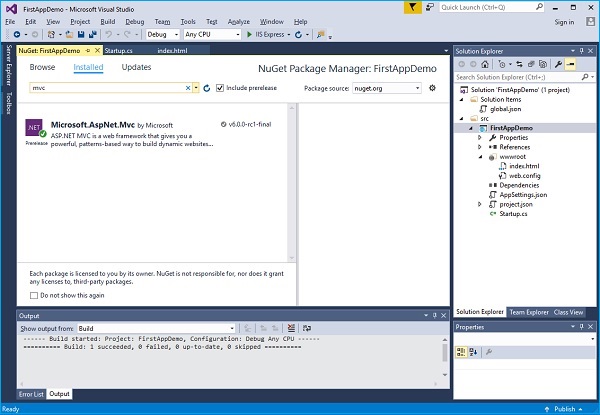
**步骤 1** - 让我们通过右键单击“管理 NuGet 程序包”来进入 NuGet 程序包管理器。安装 Microsoft.AspNet.Mvc 包,它使我们能够访问框架提供的程序集和类。
**步骤 2** - 安装 Microsoft.AspNet.Mvc 包后,我们需要在运行时注册 ASP.NET Core MVC 所需的所有服务。我们将使用 ConfigureServices 方法来执行此操作。我们还将添加一个简单的控制器,并查看该控制器的一些输出。
让我们为此项目添加一个新文件夹,并将其命名为 **Controllers**。我们可以在此文件夹中放置多个控制器,如下面的解决方案资源管理器所示。

现在右键单击 Controllers 文件夹,然后选择 **添加 → 类** 菜单选项。
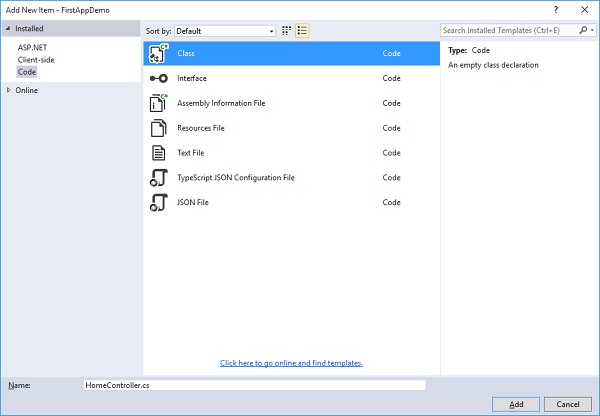
**步骤 3** - 在这里,我们想要添加一个简单的 **C#** 类,并将此类命名为 **HomeController**,然后单击“添加”按钮,如上面的屏幕截图所示。
这将是我们的默认页面。
**步骤 4** - 让我们定义一个返回字符串的公共方法,并将该方法命名为 Index,如以下程序所示。
using System;
using System.Collections.Generic;
using System.Linq;
using System.Threading.Tasks;
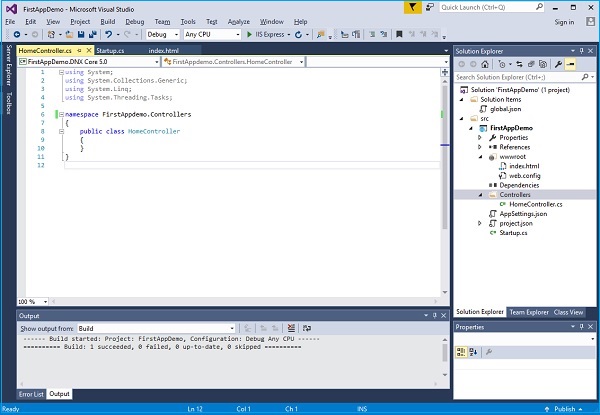
namespace FirstAppdemo.Controllers {
public class HomeController {
public string Index() {
return "Hello, World! this message is from Home Controller...";
}
}
}
**步骤 5** - 当您转到网站的根目录时,您希望看到控制器响应。目前,我们将提供 index.html 文件。
让我们进入网站的根目录并删除 index.html。我们希望控制器响应而不是 **index.html** 文件。
**步骤 6** - 现在转到 Startup 类中的 Configure 方法,并添加 **UseMvcWithDefaultRoute** 中间件。

**步骤 7** - 现在刷新网站根目录处的应用程序。
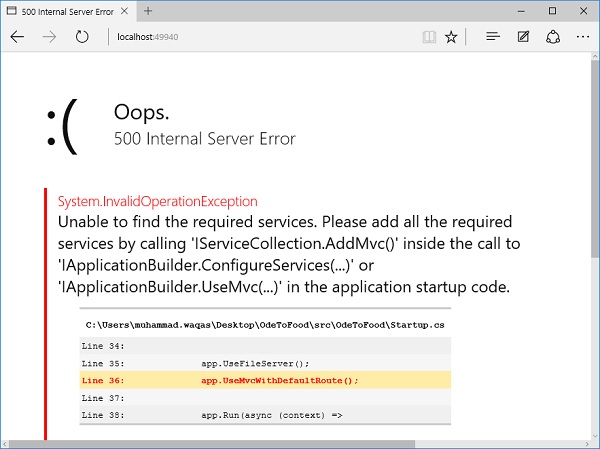
您将遇到 500 错误。错误指出框架无法找到所需的 ASP.NET Core MVC 服务。
ASP.NET Core 框架本身由具有非常集中职责的不同小型组件组成。
例如,有一个组件必须定位并实例化控制器。
该组件需要位于 ASP.NET Core MVC 正确运行的服务集合中。
**步骤 8** - 除了添加 NuGet 包和中间件外,我们还需要在 ConfigureServices 中添加 AddMvc 服务。以下是 Startup 类的完整实现。
using Microsoft.AspNet.Builder;
using Microsoft.AspNet.Hosting;
using Microsoft.AspNet.Http;

using Microsoft.Extensions.DependencyInjection;
using Microsoft.Extensions.Configuration;

namespace FirstAppDemo {
   public class Startup {
      public Startup() {
         var builder = new ConfigurationBuilder() .AddJsonFile("AppSettings.json");
         Configuration = builder.Build();
      }
      public IConfiguration Configuration { get; set; }

      // This method gets called by the runtime.
      // Use this method to add services to the container.
      // For more information on how to configure your application,
      // visit http://go.microsoft.com/fwlink/?LinkID=398940
      public void ConfigureServices(IServiceCollection services) {
         services.AddMvc();
      }

      // This method gets called by the runtime.
      // Use this method to configure the HTTP request pipeline.
      public void Configure(IApplicationBuilder app) {
         app.UseIISPlatformHandler();

         app.UseDeveloperExceptionPage();
         app.UseRuntimeInfoPage();

         app.UseFileServer();
         app.UseMvcWithDefaultRoute();

         app.Run(async (context) => {
            var msg = Configuration["message"];
            await context.Response.WriteAsync(msg);
         });
      }

      // Entry point for the application.
      public static void Main(string[] args) => WebApplication.Run<Startup>(args);
   }
}
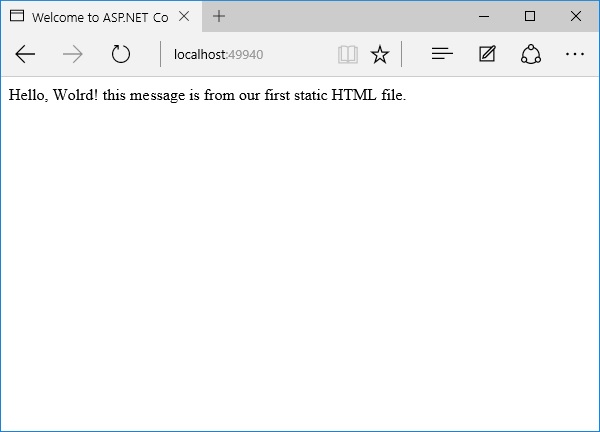
**步骤 9** - 保存 **Startup.cs** 文件,然后转到浏览器并刷新它。您现在将收到来自我们的 **home 控制器** 的响应。
