如何在 Material UI 中创建悬浮操作按钮动画?
悬浮操作按钮 (Floating action button) 是一种形状,中心带有一个图标,显示在所有屏幕内容的前面。Material UI 是一个知名的 React 组件库,提供一系列预先设计和可自定义的 UI 组件。在这些组件中,悬浮操作按钮 (FAB) 非常流行。
为了增强用户体验,我们可以为 FAB 添加动画,使其更具视觉吸引力和参与感。在本文中,我们将探讨如何在 Material UI 中为悬浮操作按钮创建动画。
什么是悬浮操作按钮?
现在让我们了解一下什么是悬浮操作按钮。这些按钮包含在应用程序的用户界面中,用于表示开发人员优先考虑的操作。只有当它确实是呈现屏幕主要操作的方式时,才应使用 FAB。
通常,建议每个屏幕只有一个 FAB 用于常用操作。FAB 有两种类型;扩展型。值得注意的是,悬浮操作按钮与按钮略有不同。
创建动画的步骤
下面,我们概述了使用 React 在 Material UI 中为悬浮操作按钮创建动画的分步过程。
步骤 1:创建一个新的 React 应用并安装 MUI
首先,让我们从创建一个 React 应用和安装 Material UI 开始。请按照以下步骤操作:
打开您的终端并运行以下命令:
npx create react app projectname
项目创建后,通过运行以下命令导航到项目目录:
cd projectname
通过运行以下命令安装 Material UI 及其依赖项:
npm install @mui/material @emotion/react @emotion/styled
步骤 2:将所需的组件导入 React
现在,创建新的 React 应用后,在 src 文件夹中有一个 main App.js 文件。打开它并导入所需的组件。
import React from "react";
import { Fab } from '@mui/material

export default function App() {
   return (

   )
}
现在我们已经完成了创建和导入所需组件的所有步骤。让我们探索一些示例,这些示例说明了使用不同方法为悬浮操作按钮创建动画。
悬浮操作按钮 API
<Fab> − 此 API 用于使用 Material UI 将悬浮操作按钮添加到项目中。
属性
children − 此属性定义 FAB 的内容。
classes − 此属性用于覆盖或向元素添加样式。
color − 此属性用于向悬浮操作按钮添加颜色。它包括 primary、secondary、success、info、error、warning 等。
component − 此属性定义 FAB 的组件。
disableFocusRipple − 如果此属性设置为 true,则键盘焦点将不会出现涟漪效果。
disabled − 此属性用于禁用 FAB。
disableRipple − 此属性用于禁用 FAB 的涟漪效果。
href − 此属性定义单击 FAB 时将跳转到的 URL。
size − 此属性用于更改 FAB 的大小。
sx − 此属性用于向 Material UI 组件添加自定义样式。
variant − 此属性用于选择要使用的 FAB,例如 circular、string 或 string。
示例
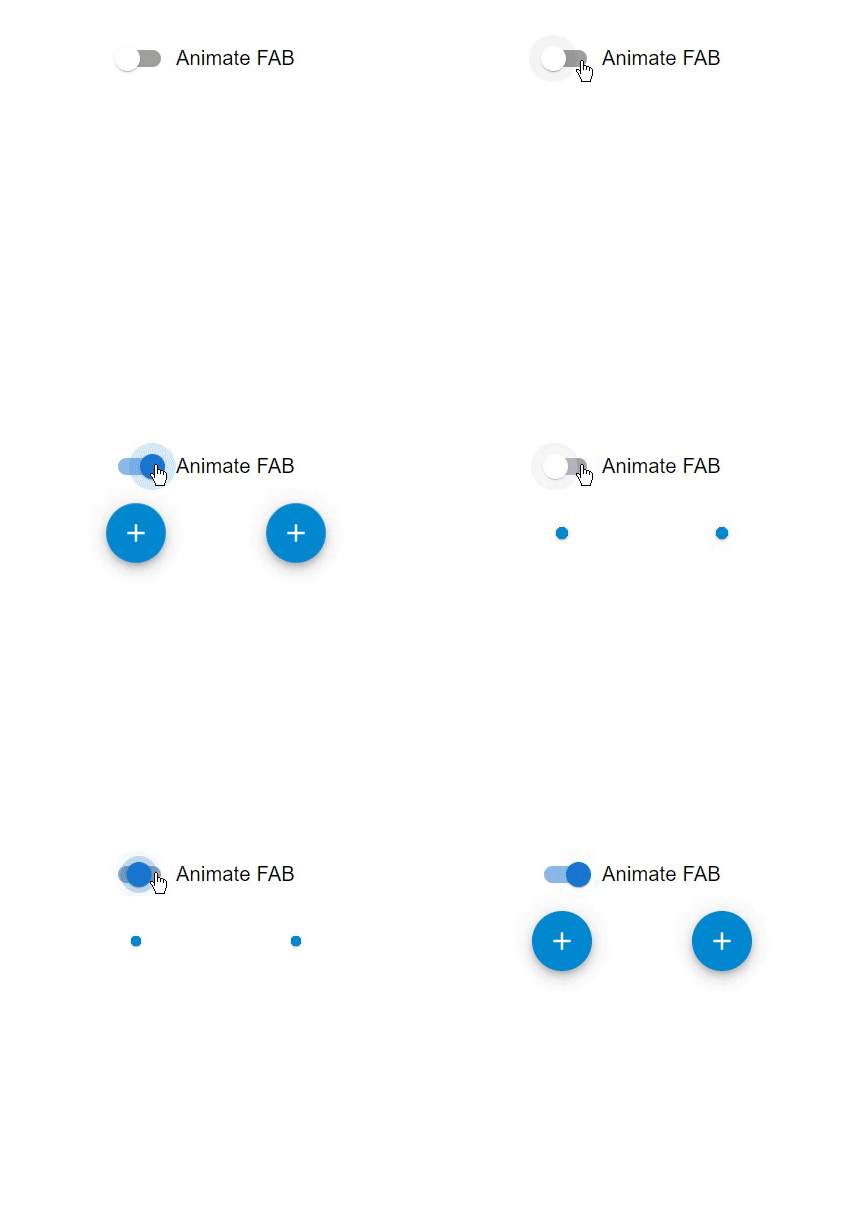
在本例中,我们将动画整合到悬浮操作按钮中。每当我们切换开关时,悬浮操作按钮都会伴随着这些动画效果优雅地出现。
import { Box, Fab, FormControlLabel, Switch } from "@mui/material";
import React, { useState } from "react";
import Zoom from "@mui/material/Zoom";
import { Add } from "@mui/icons-material";

export default function App() {
   const [checked, setChecked] = useState(false);
   const handleAnimate = () => {
      setChecked((pr) => !pr);
   };

   return (
      <div
         style={{
            display: "flex",
            marginTop: 30,
            flexDirection: "column",
            alignItems: "center",
            justifyContent: "center",
            gap: 10,
         }}>
         <FormControlLabel
            control={<Switch checked={checked} onChange={handleAnimate} />}
            label="Animate FAB"
         />
         <Box sx={{ display: "flex", gap: 10 }}>
            <Zoom in={checked}>
               <Fab color="info" size="medium">
                  <Add />
               </Fab>
            </Zoom>
            <Zoom in={checked}>
               <Fab color="info" size="medium">
                  <Add />
               </Fab>
            </Zoom>
         </Box>
      </div>
   );
}
输出

示例
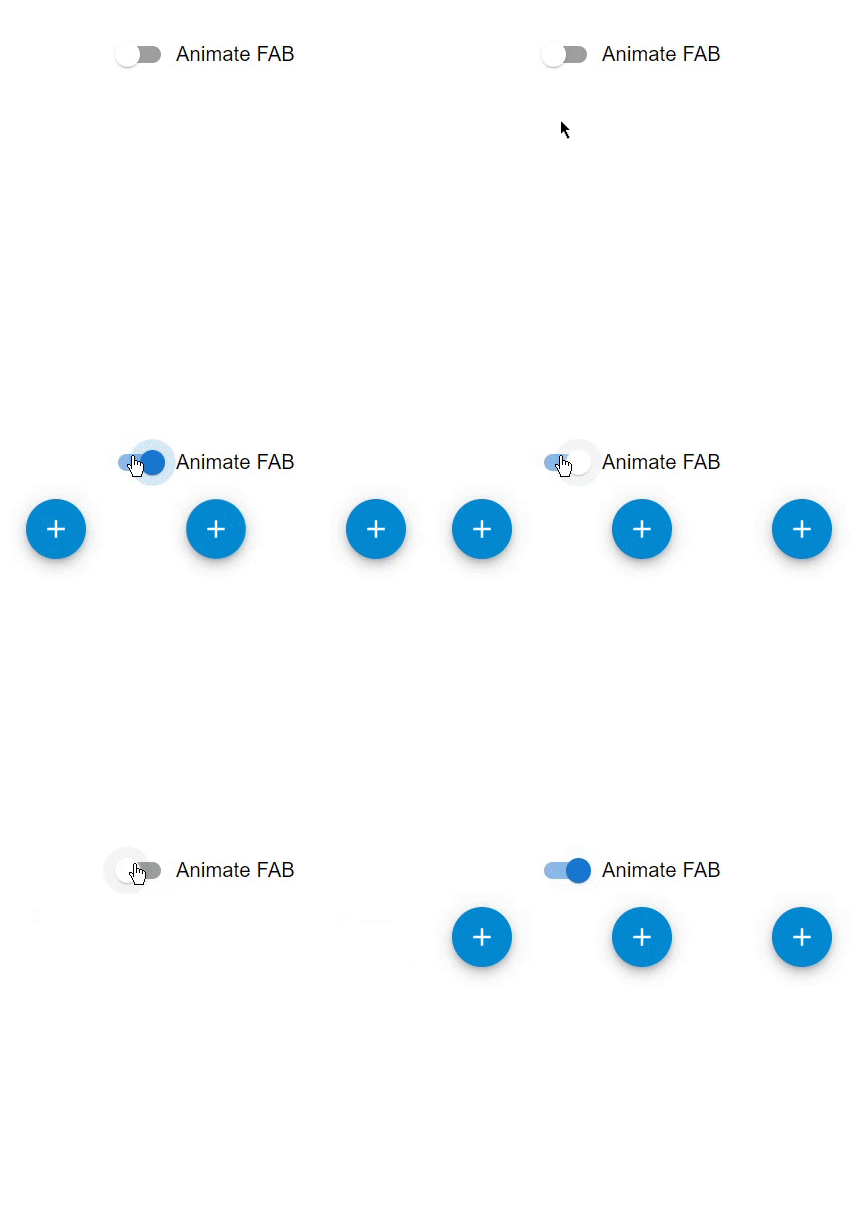
在本例中,我们向悬浮操作按钮添加了三种不同的动画。当我们单击开关时,悬浮操作按钮会分别以淡入、缩放和增长动画弹出。
import { Box, Fab, Fade, FormControlLabel, Grow, Switch, Zoom } from "@mui/material";
import React, { useState } from "react";
import { Add } from "@mui/icons-material";

export default function App() {
   const [checked, setChecked] = useState(false);
   const handleAnimate = () => {
      setChecked((pr) => !pr);
   };

   return (
      <div
         style={{
            display: "flex",
            marginTop: 30,
            flexDirection: "column",
            alignItems: "center",
            justifyContent: "center",
            gap: 10,
         }}>
         <FormControlLabel
            control={<Switch checked={checked} onChange={handleAnimate} />}
            label="Animate FAB"
         />
         <Box sx={{ display: "flex", gap: 10 }}>

            {/* Fade animation of floating action button */}
            <Fade in={checked}>
               <Fab color="info" size="medium">
                  <Add />
               </Fab>
            </Fade>

            {/* Zoom animation of floating action button */}
            <Zoom in={checked}>
               <Fab color="info" size="medium">
                  <Add />
               </Fab>
            </Zoom>

            {/* Grow animation of floating action button */}
            <Grow in={checked}>
               <Fab color="info" size="medium">
                  <Add />
               </Fab>
            </Grow>
         </Box>
      </div>
   );
}
输出

示例
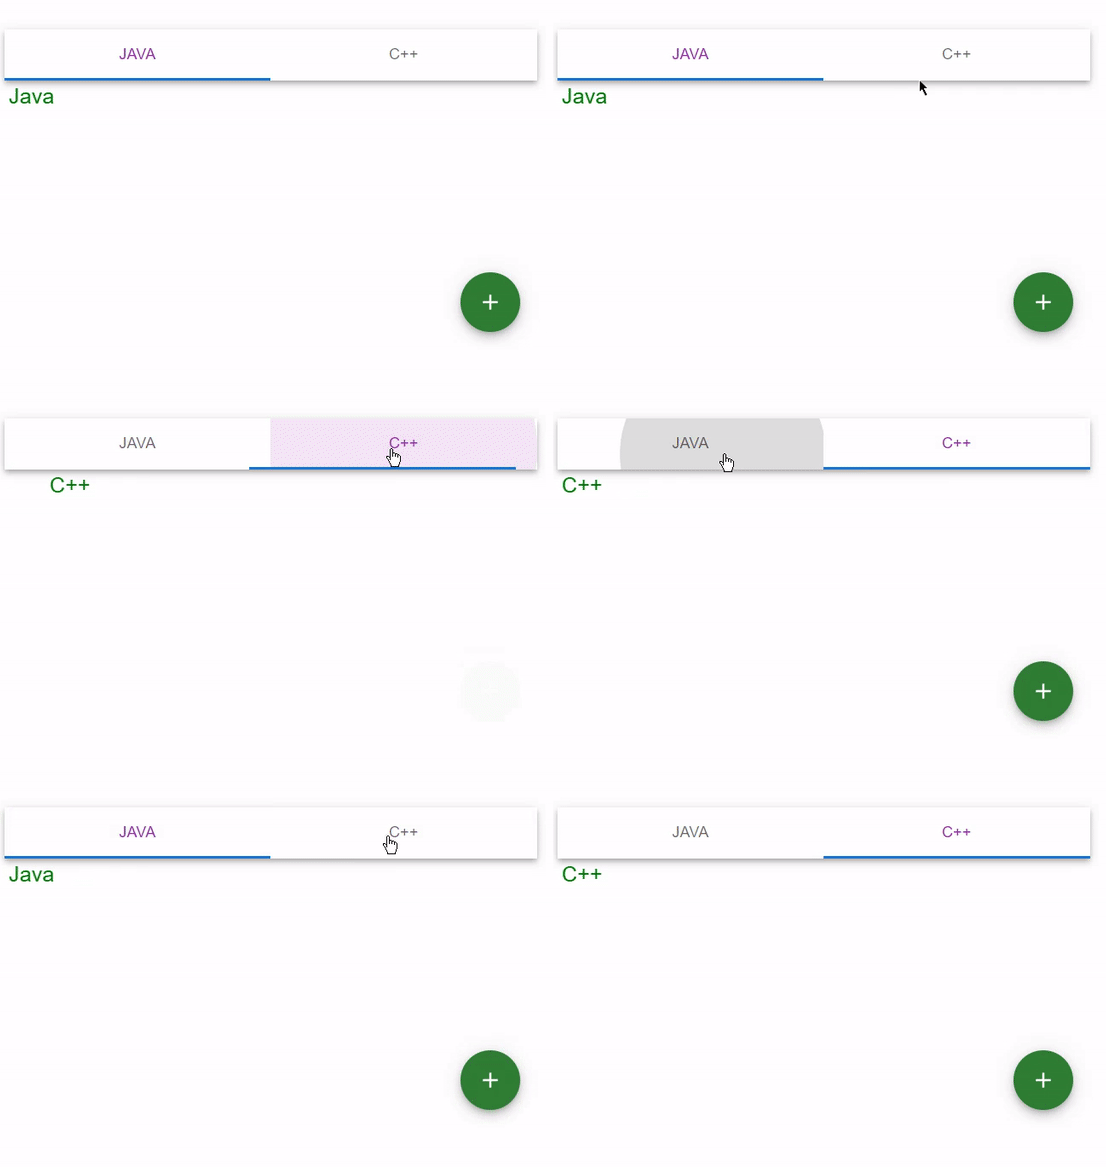
在本例中,我们将动画集成到悬浮操作按钮中。为此,我们利用 react swipeable views 库创建了两个选项卡。每当单击选项卡时,悬浮操作按钮都会以淡入动画平滑过渡。
import React from "react";
import PropTypes from "prop-types";
import SwipeableViews from "react-swipeable-views";
import { useTheme } from "@mui/material/styles";
import AppBar from "@mui/material/AppBar";
import Tabs from "@mui/material/Tabs";
import Tab from "@mui/material/Tab";
import Fab from "@mui/material/Fab";
import Typography from "@mui/material/Typography";

import { useState } from "react";
import { Add } from "@mui/icons-material";
import { Fade } from "@mui/material";

function MyCustomTab({ children: items, value, index, ...other }) {
   return (
      <Typography component="div" hidden={value !== index} {...other}>
         {value === index && (
            <span style={{ fontSize: 20, color: "green", padding: 4 }}>
               {items}
            </span>
         )}
      </Typography>
   );
}

MyCustomTab.propTypes = {
   children: PropTypes.node,
   index: PropTypes.number.isRequired,
   value: PropTypes.number.isRequired,
};

export default function App() {
   const [val, setVal] = useState(0);
   const theme = useTheme();

   const handleChange = (event, newValue) => {
      setVal(newValue);
   };

   const handleAnimateIdx = (idx) => {
      setVal(idx);
   };

   const transitionDuration = {
      enter: theme.transitions.duration.enteringScreen,
      exit: theme.transitions.duration.leavingScreen,
   };

   const fabData = [
      {
         id: 1,
      },
      {
         id: 2,
      },
   ];

   return (
      <div
         style={{
            display: "flex",
            marginTop: 30,
            flexDirection: "column",
            alignItems: "center",
            justifyContent: "center",
            gap: 10,
         }}>
         <div
            style={{
               backgroundColor: "white",
               width: 500,
               position: "relative",
               height: 300,
            }}>
            <AppBar color="inherit" position="static">
               <Tabs
                  value={val}
                  onChange={handleChange}
                  indicatorColor="primary"
                  textColor="secondary"
                  variant="fullWidth"
               >
                  <Tab label="Java" />
                  <Tab label="C++" />
               </Tabs>
            </AppBar>
            <SwipeableViews
               axis={theme.direction === "rtl" ? "x-reverse" : "x"}
               index={val}
               onChangeIndex={handleAnimateIdx}
            >
               <MyCustomTab value={val} index={0} dir={theme.direction}>
                  Java
               </MyCustomTab>
               <MyCustomTab value={val} index={1} dir={theme.direction}>
                  C++
               </MyCustomTab>
            </SwipeableViews>
            {fabData.map((fab, index) => (
               <Fade
                  key={fab.id}
                  in={val === index}
                  timeout={transitionDuration}
                  style={{
                     transitionDelay: `${
                        val === index ? transitionDuration.exit : 0
                     }ms`,
                  }}
                  unmountOnExit
               >
                  <Fab
                     sx={{ position: "absolute", bottom: 16, right: 16 }}
                     color="success"
                  >
                     <Add />
                  </Fab>
               </Fade>
            ))}
         </div>
      </div>
   );
}
输出

结论
在本文中,我们探讨了使用 React 在 Material UI 中为操作按钮制作动画的过程。我们讨论了创建这些按钮的步骤以及如何应用各种动画(如缩放、增长、淡入等)以增加吸引力。通过加入这些动画,您的应用程序将变得更具视觉吸引力,并提高用户参与度,从而提高您网站的用户参与度。


 数据结构
数据结构 网络
网络 关系数据库管理系统 (RDBMS)
 操作系统
操作系统 Java
Java iOS
iOS HTML
HTML CSS
CSS Android
 Python
 C 编程
C 编程 C++
C++ C#
C# MongoDB
 MySQL
MySQL Javascript
 PHP
PHP