- ReactJS 教程
- ReactJS - 首页
- ReactJS - 简介
- ReactJS - 路线图
- ReactJS - 安装
- ReactJS - 特性
- ReactJS - 优点与缺点
- ReactJS - 架构
- ReactJS - 创建 React 应用
- ReactJS - JSX
- ReactJS - 组件
- ReactJS - 嵌套组件
- ReactJS - 使用新创建的组件
- ReactJS - 组件集合
- ReactJS - 样式
- ReactJS - 属性 (props)
- ReactJS - 使用属性创建组件
- ReactJS - props 验证
- ReactJS - 构造函数
- ReactJS - 组件生命周期
- ReactJS - 事件管理
- ReactJS - 创建一个事件感知组件
- ReactJS - 在 Expense Manager 应用中引入事件
- ReactJS - 状态管理
- ReactJS - 状态管理 API
- ReactJS - 无状态组件
- ReactJS - 使用 React Hooks 进行状态管理
- ReactJS - 使用 React Hooks 的组件生命周期
- ReactJS - 布局组件
- ReactJS - 分页
- ReactJS - Material UI
- ReactJS - Http 客户端编程
- ReactJS - 表单编程
- ReactJS - 受控组件
- ReactJS - 非受控组件
- ReactJS - Formik
- ReactJS - 条件渲染
- ReactJS - 列表
- ReactJS - Keys
- ReactJS - 路由
- ReactJS - Redux
- ReactJS - 动画
- ReactJS - Bootstrap
- ReactJS - Map
- ReactJS - 表格
- ReactJS - 使用 Flux 管理状态
- ReactJS - 测试
- ReactJS - CLI 命令
- ReactJS - 构建和部署
- ReactJS - 例子
- Hooks
- ReactJS - Hooks 简介
- ReactJS - 使用 useState
- ReactJS - 使用 useEffect
- ReactJS - 使用 useContext
- ReactJS - 使用 useRef
- ReactJS - 使用 useReducer
- ReactJS - 使用 useCallback
- ReactJS - 使用 useMemo
- ReactJS - 自定义 Hooks
- ReactJS 高级
- ReactJS - 可访问性
- ReactJS - 代码分割
- ReactJS - Context
- ReactJS - 错误边界
- ReactJS - 转发 Refs
- ReactJS - Fragments
- ReactJS - 高阶组件
- ReactJS - 与其他库集成
- ReactJS - 性能优化
- ReactJS - Profiler API
- ReactJS - Portals
- ReactJS - 不使用 ES6 ECMAScript 的 React
- ReactJS - 不使用 JSX 的 React
- ReactJS - 调和
- ReactJS - Refs 和 DOM
- ReactJS - 渲染 Props
- ReactJS - 静态类型检查
- ReactJS - Strict Mode
- ReactJS - Web Components
- 附加概念
- ReactJS - 日期选择器
- ReactJS - Helmet
- ReactJS - 内联样式
- ReactJS - PropTypes
- ReactJS - BrowserRouter
- ReactJS - DOM
- ReactJS - 轮播图
- ReactJS - 图标
- ReactJS - 表单组件
- ReactJS - 参考 API
- ReactJS 有用资源
- ReactJS - 快速指南
- ReactJS - 有用资源
- ReactJS - 讨论
ReactJS - 使用属性创建组件
正如我们之前在本教程中学到的,React是一个非常灵活的库,规则可以弯曲,但它严格遵守一条规则:如果一个组件被定义为函数或类,它必须像一个纯函数一样对待它们的属性。在React中,纯函数定义为输入不能改变的函数,因此不会改变其结果。
简而言之,传递给组件的 Props 是只读的。但是由于应用程序 UI 是动态的,并且会随着时间的推移而改变其输入,因此我们使用“状态”概念来处理它。
状态的概念允许 React 组件响应用户操作、网络响应等更改其结果,而不会违反此规则。
如何使用属性创建组件?
在本章中,让我们看看使用属性创建组件的步骤:
我们将首先修改我们的 ExpenseEntryItem 组件并尝试使用属性。
步骤 1 - 在你喜欢的编辑器中打开我们的 expense-manager 应用程序。
在 src/components 文件夹中打开 ExpenseEntryItem 文件。
步骤 2 - 引入带有参数 props 的构造函数。
constructor(props) {
   super(props);
}
接下来,更改 render 方法并填充来自 props 的值。
render() {
return (
<div>
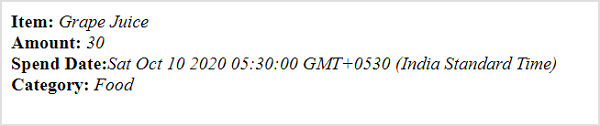
<div><b>Item:</b> <em>{this.props.name}</em></div>
<div><b>Amount:</b> <em>{this.props.amount}</em></div>
<div><b>Spend date:</b>
<em>{this.props.spenddate.tostring()}</em></div>
<div><b>Category:</b> <em>{this.props.category}</em></div>
</div>
);
}
这里:
name 代表项目名称,类型为 String
amount 代表项目的金额,类型为 number
spendDate 代表项目的支出日期,类型为 date
category 代表项目的类别,类型为 String
现在,我们已经成功地使用属性更新了组件。
import React from 'react'
import './ExpenseEntryItem.css';
import styles from './ExpenseEntryItem.module.css'

class ExpenseEntryItem extends React.Component {
   constructor(props) {
      super(props);
   }
   render() {
      return (
         <div>
            <div><b>Item:</b> <em>{this.props.name}</em></div>
            <div><b>Amount:</b> <em>{this.props.amount}</em></div>
            <div><b>Spend Date:</b>
               <em>{this.props.spendDate.toString()}</em></div>
            <div><b>Category:</b> <em>{this.props.category}</em></div>
         </div>
      );
   }
}
export default ExpenseEntryItem;
index.js
现在,我们可以通过在 index.js 中通过属性传递所有属性来使用该组件。
import React from 'react';
import ReactDOM from 'react-dom';
import ExpenseEntryItem from './components/ExpenseEntryItem'

const name = "Grape Juice"
const amount = 30.00
const spendDate = new Date("2020-10-10")
const category = "Food"

ReactDOM.render(
   <React.StrictMode>
      <ExpenseEntryItem
         name={name}
         amount={amount}
         spendDate={spendDate}
         category={category} />
   </React.StrictMode>,
   document.getElementById('root')
);
使用 npm 命令启动应用程序。
npm start
打开浏览器,在地址栏中输入 https://:3000 并按 Enter 键。
使用 CDN 在网页中执行此操作的完整代码如下:
<!DOCTYPE html>
<html>
   <head>
      <meta charset="UTF-8" />
      <title>React based application</title>
   </head>
   <body>
      <div id="react-app"></div>

      <script src="https://unpkg.com/react@17/umd/react.development.js" crossorigin></script>
      <script src="https://unpkg.com/react-dom@17/umd/react-dom.development.js" crossorigin></script>
      <script src="https://unpkg.com/@babel/standalone/babel.min.js"></script>
      <script type="text/babel">
         class ExpenseEntryItem extends React.Component {
            constructor(props) {
               super(props);
            }
            render() {
               return (
                  <div>
                     <div><b>Item:</b> <em>{this.props.name}</em></div>
                     <div><b>Amount:</b> <em>{this.props.amount}</em></div>
                     <div><b>Spend Date:</b> <em>{this.props.spendDate.toString()}</em></div>
                     <div><b>Category:</b> <em>{this.props.category}</em></div>
                  </div>
               );
            }
         }
         const name = "Grape Juice"
         const amount = 30.00
         const spendDate = new Date("2020-10-10")
         const category = "Food"

         ReactDOM.render(
            <ExpenseEntryItem
               name={name}
               amount={amount}
               spendDate={spendDate}
               category={category} />,
            document.getElementById('react-app') );
      </script>
   </body>
</html>
对象作为属性
让我们在本节学习如何在 React 中使用 JavaScript 对象作为属性。
步骤 1 - 在你喜欢的编辑器中打开我们的 expense-manager 应用程序。
打开 ExpenseEntryItem.js 文件。
步骤 2 - 接下来,更改 render() 方法并通过 this.props.item 属性访问输入对象 item。
render() {
   return (
      <div>
         <div><b>Item:</b> <em>{this.props.item.name}</em></div>
         <div><b>Amount:</b> <em>{this.props.item.amount}</em></div>
         <div><b>Spend Date:</b>
            <em>{this.props.item.spendDate.toString()}</em></div>
         <div><b>Category:</b> <em>{this.props.item.category}</em></div>
      </div>
   );
}
打开 index.js 并用 JavaScript 对象表示费用条目项目。
const item = {
   id: 1,
   name : "Grape Juice",
   amount : 30.5,
   spendDate: new Date("2020-10-10"),
   category: "Food"
}
使用花括号 ({}) 语法在组件属性中将对象传递给组件。
<ExpenseEntryItem item={item} />
index.js
index.js 的完整代码如下:
import React from 'react';
import ReactDOM from 'react-dom';
import ExpenseEntryItem from './components/ExpenseEntryItem'

const item = {
   id: 1,
   name : "Grape Juice",
   amount : 30.5,
   spendDate: new Date("2020-10-10"),
   category: "Food"
}
ReactDOM.render(
   <React.StrictMode>
   <ExpenseEntryItem item={item} />
   </React.StrictMode>,
   document.getElementById('root')
);
使用 npm 命令启动应用程序。
npm start
打开浏览器,在地址栏中输入 https://:3000 并按 Enter 键。
使用 CDN 在网页中执行此操作的完整代码如下:
<!DOCTYPE html>
<html>
   <head>
      <meta charset="UTF-8" />
      <title>React based application</title>
   </head>
   <body>
      <div id="react-app"></div>

      <script src="https://unpkg.com/react@17/umd/react.development.js" crossorigin></script>
      <script src="https://unpkg.com/react-dom@17/umd/react-dom.development.js" crossorigin></script>
      <script src="https://unpkg.com/@babel/standalone/babel.min.js"></script>
      <script type="text/babel">
         class ExpenseEntryItem extends React.Component {
            constructor(props) {
               super(props);
            }
            render() {
               return (
                  <div>
                     <div><b>Item:</b>
                        <em>{this.props.item.name}</em></div>
                     <div><b>Amount:</b>
                        <em>{this.props.item.amount}</em></div>
                     <div><b>Spend Date:</b>
                        <em>{this.props.item.spendDate.toString()}</em>
                     </div>
                     <div><b>Category:</b>
                        <em>{this.props.item.category}</em>
                     </div>
                  </div>
               );
            }
         }
         const item = {
            id: 1,
            name : "Grape Juice",
            amount : 30.5,
            spendDate: new Date("2020-10-10"),
            category: "Food"
         }
         ReactDOM.render(
            <ExpenseEntryItem item={item} />,
            document.getElementById('react-app')
         );
      </script>
   </body>
</html>