- ReactJS 教程
- ReactJS - 首页
- ReactJS - 简介
- ReactJS - 路线图
- ReactJS - 安装
- ReactJS - 特性
- ReactJS - 优点与缺点
- ReactJS - 架构
- ReactJS - 创建 React 应用
- ReactJS - JSX
- ReactJS - 组件
- ReactJS - 嵌套组件
- ReactJS - 使用新创建的组件
- ReactJS - 组件集合
- ReactJS - 样式
- ReactJS - 属性 (props)
- ReactJS - 使用属性创建组件
- ReactJS - props 验证
- ReactJS - 构造函数
- ReactJS - 组件生命周期
- ReactJS - 事件管理
- ReactJS - 创建一个事件感知组件
- ReactJS - 在 Expense Manager 应用中引入事件
- ReactJS - 状态管理
- ReactJS - 状态管理 API
- ReactJS - 无状态组件
- ReactJS - 使用 React Hooks 进行状态管理
- ReactJS - 使用 React Hooks 的组件生命周期
- ReactJS - 布局组件
- ReactJS - 分页
- ReactJS - Material UI
- ReactJS - Http 客户端编程
- ReactJS - 表单编程
- ReactJS - 受控组件
- ReactJS - 非受控组件
- ReactJS - Formik
- ReactJS - 条件渲染
- ReactJS - 列表
- ReactJS - Keys
- ReactJS - 路由
- ReactJS - Redux
- ReactJS - 动画
- ReactJS - Bootstrap
- ReactJS - Map
- ReactJS - 表格
- ReactJS - 使用 Flux 管理状态
- ReactJS - 测试
- ReactJS - 命令行接口命令
- ReactJS - 构建和部署
- ReactJS - 示例
- Hooks
- ReactJS - Hooks 简介
- ReactJS - 使用 useState
- ReactJS - 使用 useEffect
- ReactJS - 使用 useContext
- ReactJS - 使用 useRef
- ReactJS - 使用 useReducer
- ReactJS - 使用 useCallback
- ReactJS - 使用 useMemo
- ReactJS - 自定义 Hooks
- ReactJS 高级
- ReactJS - 可访问性
- ReactJS - 代码分割
- ReactJS - Context
- ReactJS - 错误边界
- ReactJS - 转发 Refs
- ReactJS - Fragments
- ReactJS - 高阶组件
- ReactJS - 集成其他库
- ReactJS - 性能优化
- ReactJS - Profiler API
- ReactJS - Portals
- ReactJS - 无 ES6 ECMAScript 的 React
- ReactJS - 无 JSX 的 React
- ReactJS - Reconciliation (协调)
- ReactJS - Refs 和 DOM
- ReactJS - Render Props
- ReactJS - 静态类型检查
- ReactJS - Strict Mode (严格模式)
- ReactJS - Web Components
- 其他概念
- ReactJS - 日期选择器
- ReactJS - Helmet
- ReactJS - 内联样式
- ReactJS - PropTypes
- ReactJS - BrowserRouter
- ReactJS - DOM
- ReactJS - 轮播图
- ReactJS - 图标
- ReactJS - 表单组件
- ReactJS - 参考 API
- ReactJS 有用资源
- ReactJS - 快速指南
- ReactJS - 有用资源
- ReactJS - 讨论
ReactJS - 使用 Create React App 工具
让我们学习如何使用 Create React App 工具创建一个费用管理应用程序。
打开终端并进入您的工作区。
> cd /go/to/your/workspace
接下来,使用 Create React App 工具创建一个新的 React 应用程序。
> create-react-app expense-manager
它将创建一个名为 expense-manager 的新文件夹,其中包含启动模板代码。
接下来,进入 expense-manager 文件夹并安装必要的库。
cd expense-manager
npm install
npm install 命令将在 node_modules 文件夹下安装必要的库。
接下来,启动应用程序。
npm start
Compiled successfully!
You can now view react-cra-web-app in the browser.

   Local:            https://:3000
   On Your Network:  http://192.168.56.1:3000

Note that the development build is not optimized.
To create a production build, use npm run build.
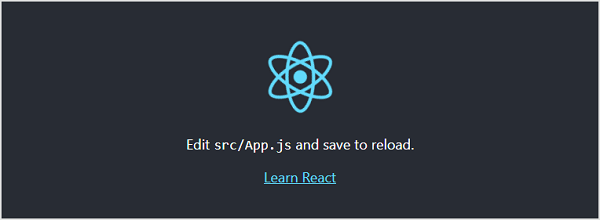
接下来,打开浏览器并在地址栏中输入 https://:3000 并按 Enter 键。开发 Web 服务器将提供我们的网页,如下所示。

让我们分析一下 React 应用程序的结构。
文件和文件夹
React 应用程序的内容如下:
|-- README.md
|-- node_modules
|-- package-lock.json
|-- package.json
|-- public
|  |-- favicon.ico
|  |-- index.html
|  |-- logo192.png
|  |-- logo512.png
|  |-- manifest.json
|  `-- robots.txt
`-- src
   |-- App.css
   |-- App.js
   |-- App.test.js
   |-- index.css
   |-- index.js
   |-- logo.svg
   |-- reportWebVitals.js
   `-- setupTests.js
这里:
package.json 是表示项目的核心文件。它配置整个项目,包括项目名称、项目依赖项以及构建和运行应用程序的命令。
{
   "name": "expense-manager",
   "version": "0.1.0",
   "private": true,
   "dependencies": {
      "@testing-library/jest-dom": "^5.11.6",
      "@testing-library/react": "^11.2.2",
      "@testing-library/user-event": "^12.6.0",
      "react": "^17.0.1",
      "react-dom": "^17.0.1",
      "react-scripts": "4.0.1",
      "web-vitals": "^0.2.4"
   },
   "scripts": {
      "start": "react-scripts start",
      "build": "react-scripts build",
      "test": "react-scripts test",
      "eject": "react-scripts eject"
   },
   "eslintConfig": {
      "extends": [
         "react-app",
         "react-app/jest"
      ]
   },
   "browserslist": {
      "production": [
         ">0.2%",
         "not dead",
         "not op_mini all"
      ],
      "development": [
         "last 1 chrome version",
         "last 1 firefox version",
         "last 1 safari version"
      ]
   }
}
package.json 在其依赖项部分引用了以下 React 库。
react 和 react-dom 是用于开发 Web 应用程序的核心 React 库。
web-vitals 是一个通用库,用于在不同的浏览器中支持应用程序。
react-scripts 是用于构建和运行应用程序的核心 React 脚本。
@testing-library/jest-dom, @testing-library/react 和 @testing-library/user-event 是用于在开发后测试应用程序的测试库。
public 文件夹 - 包含核心文件 index.html 和其他 Web 资源,例如图像、徽标、robots.txt 等。index.html 加载我们的 React 应用程序并在用户的浏览器中渲染它。
src 文件夹 - 包含应用程序的实际代码。我们将在下一节中检查它。
应用程序的源代码
在本章中,让我们检查应用程序的每个源代码文件。
index.js - 应用程序的入口点。它使用 ReactDOM.render 方法启动并启动应用程序。代码如下:
import React from 'react';
import ReactDOM from 'react-dom';
import './index.css';
import App from './App';
import reportWebVitals from './reportWebVitals';

ReactDOM.render(
   <React.StrictMode>
      <App />
   </React.StrictMode>,
   document.getElementById('root')
);

// If you want to start measuring performance in your app, pass a function
// to log results (for example: reportWebVitals(console.log))
// or send to an analytics endpoint. Learn more: https://bit.ly/CRA-vitals
reportWebVitals();
这里:
React.StrictMode 是一个内置组件,用于通过分析组件的不安全生命周期、不安全 API 使用、已弃用的 API 使用等并发出相关警告来防止意外错误。
App 是我们应用程序的第一个自定义根组件。所有其他组件都将在 App 组件内渲染。
index.css - 用于整个应用程序的样式。让我们删除所有样式并从新的代码开始。
App.js - 应用程序的根组件。让我们替换现有的 JSX 并显示简单的 hello react 消息,如下所示:
import './App.css';
function App() {
   return (
      <h1>Hello React!</h1>
   );
}
export default App;
App.css - 用于设置 App 组件的样式。让我们删除所有样式并从新的代码开始。
App.test.js - 用于为我们的组件编写单元测试函数。
setupTests.js - 用于为我们的应用程序设置测试框架。
reportWebVitals.js - 通用 Web 应用程序启动代码,用于支持所有浏览器。
logo.svg - SVG 格式的徽标,可以使用 import 关键字加载到我们的应用程序中。让我们将其从项目中删除。