如何在 Material UI 中使用 Fab 组件?
Fab 组件是浮动操作按钮的简称。您可能在许多 Android 应用程序的右下角看到过浮动操作按钮。但是,它并不固定在右下角,只是最常用的位置。
用户可以使用 Material UI 的 Fab 组件创建带有不同图标的浮动操作按钮。
要开始使用 Material UI,请在 React 项目目录的终端中执行以下命令。
npm install @mui/material @emotion/react @emotion/styled
语法
用户可以按照以下语法使用 Material UI 的 Fab 组件。
<Fab aria-label="edit icon">
   // add icon here
</Fab>
在以上语法中,我们需要在 Fab 组件的开始和结束标签之间添加图标或文本。
示例
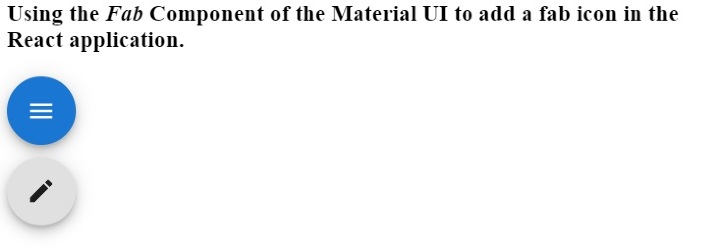
在下面的示例中,我们从 Material UI 库中导入了 Fab 组件。之后,我们在 Fab 组件内部添加了不同的图标。在输出中,用户可以观察到第一个浮动操作按钮包含菜单图标,第二个浮动操作按钮包含编辑图标。
import React from "react";
import Fab from "@mui/material/Fab";
import EditIcon from "@mui/icons-material/Edit";
import MenuIcon from "@mui/icons-material/Menu";
const App = () => {
   return (
      <div>
         <h3>
            {" "}
            Using the <i> Fab </i> Component of the Material UI to add a fab icon in the React application. {" "}
         </h3>
         <div>
            <Fab color = "primary" aria-label = "menu icon">
               <MenuIcon />
            </Fab>
         </div>
         <div style = {{marginTop: "10px"}}>
            <Fab aria-label = "edit icon">
               <EditIcon />
            </Fab>
         </div>
      </div>
   );
};
export default App;
输出

示例
在下面的示例中,我们创建了不同尺寸的浮动操作按钮。我们使用了“size” 属性来更改浮动操作按钮的尺寸。当我们传递“small”、“medium”和“default”作为 size 属性值时,用户可以在输出中看到浮动操作按钮的尺寸。
此外,我们还将颜色作为 Fab 组件的属性传递,以更改 Fab 组件的背景颜色。
import React from "react";
import Fab from "@mui/material/Fab";
import MenuIcon from "@mui/icons-material/Menu";
const App = () => {
   return (
      <div>
         <h3>
            {" "}
            Using the <i> Fab </i> Component of the Material UI to add a fab icon of different sizes in the React application. {" "}
         </h3>
         <div>
            <Fab color = "secondary" size = "small" aria-label = "add icon">
               <MenuIcon />
            </Fab>
         </div>
         <div style = {{ marginTop: "10px" }}>
            <Fab color = "secondary" size = "medium" aria-label = "menu icon">
               <MenuIcon />
            </Fab>
         </div>
         <div style = {{ marginTop: "10px" }}>
            <Fab color = "secondary" aria-label = "menu icon">
               <MenuIcon />
            </Fab>
         </div>
      </div>
   );
};
export default App;
输出

用户学习了如何使用 Material UI 的 Fab 组件。在使 App 响应式时,浮动操作按钮对于移动设备非常有用。例如,我们可以在桌面应用程序的导航栏中显示菜单,但对于移动版本,当用户点击浮动操作按钮时,我们可以显示直接菜单。
这里,我们只添加了图标作为 Fab 组件的内容,但我们也可以添加文本。此外,用户可以通过将样式作为属性传递来更改 Fab 组件的样式。

广告

 数据结构
数据结构 网络
网络 关系数据库管理系统
 操作系统
操作系统 Java
Java iOS
iOS HTML
HTML CSS
CSS Android
 Python
 C 编程
C 编程 C++
C++ C#
C# MongoDB
 MySQL
MySQL Javascript
 PHP
PHP