- Windows 10 开发教程
- Windows 10 - 首页
- Windows 10 - 简介
- Windows 10 – UWP
- Windows 10 – 第一个应用
- Windows 10 - 应用商店
- Windows 10 - XAML 控件
- Windows 10 - 数据绑定
- Windows 10 - XAML 性能
- Windows 10 - 自适应设计
- Windows 10 - 自适应 UI
- Windows 10 - 自适应代码
- Windows 10 - 文件管理
- Windows 10 - SQLite 数据库
- Windows 10 – 通信
- Windows 10 - 应用本地化
- Windows 10 - 应用生命周期
- Windows 10 - 后台执行
- Windows 10 - 应用服务
- Windows 10 - Web 平台
- Windows 10 - 连接体验
- Windows 10 - 导航
- Windows 10 - 网络
- Windows 10 - 云服务
- Windows 10 - 动态磁贴
- Windows 10 - 共享契约
- Windows 10 - 移植到 Windows
- Windows 10 有用资源
- Windows 10 - 快速指南
- Windows 10 - 有用资源
- Windows 10 - 讨论
Windows 10 开发 - 应用通信
应用间通信是指您的应用程序可以与安装在同一设备上的另一个应用程序进行通信。这并非通用 Windows 平台 (UWP) 应用程序的新功能,在 Windows 8.1 中也可用。
在 Windows 10 中,引入了一些新的改进方法,以便轻松地在同一设备上的应用程序之间进行通信。两个应用程序之间的通信可以通过以下方式进行:
- 一个应用程序启动另一个应用程序并传递一些数据。
- 应用程序简单地交换数据,无需启动任何内容。
应用间通信的主要优点是您可以将应用程序分解成更小的块,这些块可以更容易地维护、更新和使用。
准备您的应用
如果您按照以下步骤操作,其他应用程序就可以启动您的应用程序。
在应用程序包清单中添加协议声明。
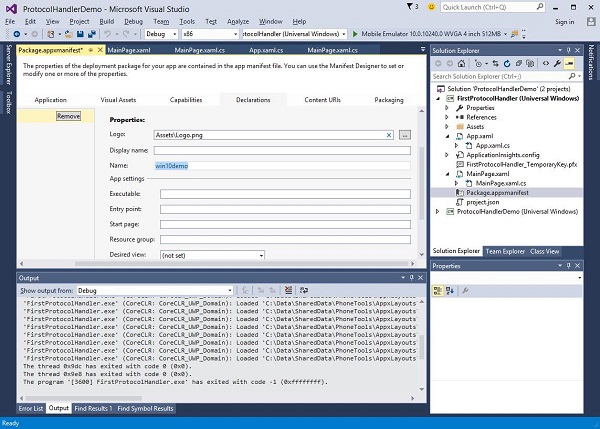
双击解决方案资源管理器中提供的Package.appxmanifest文件,如下所示。
转到声明选项卡,并写入协议名称,如下所示。
下一步是添加激活代码,以便应用程序在被其他应用程序启动时能够做出相应的响应。
要响应协议激活,我们需要重写激活类的OnActivated方法。因此,在App.xaml.cs文件中添加以下代码。
protected override void OnActivated(IActivatedEventArgs args) {

   ProtocolActivatedEventArgs protocolArgs = args as ProtocolActivatedEventArgs;

   if (args != null){

      Frame rootFrame = Window.Current.Content as Frame;

      // Do not repeat app initialization when the Window already has content,
      // just ensure that the window is active

      if (rootFrame == null){

         // Create a Frame to act as the navigation context and navigate to the first page
         rootFrame = new Frame();

         // Set the default language
         rootFrame.Language = Windows.Globalization.ApplicationLanguages.Languages[0];
         rootFrame.NavigationFailed += OnNavigationFailed;

         // Place the frame in the current Window
         Window.Current.Content = rootFrame;
      }

      if (rootFrame.Content == null){

         // When the navigation stack isn't restored, navigate to the
         // first page, configuring the new page by passing required
         // information as a navigation parameter

         rootFrame.Navigate(typeof(MainPage), null);
      }

      // Ensure the current window is active
      Window.Current.Activate();

   }
}
要启动应用程序,您可以简单地使用Launcher.LaunchUriAsync方法,该方法将使用此方法中指定的协议启动应用程序。
await Windows.System.Launcher.LaunchUriAsync(new Uri("win10demo:?SomeData=123"));
让我们通过一个简单的示例来理解这一点,在这个示例中,我们有两个 UWP 应用程序,分别是ProtocolHandlerDemo和FirstProtocolHandler。
在这个示例中,ProtocolHandlerDemo应用程序包含一个按钮,单击该按钮将打开FirstProtocolHandler应用程序。
下面是ProtocolHandlerDemo应用程序的 XAML 代码,其中包含一个按钮。
<Page
   x:Class = "ProtocolHandlerDemo.MainPage"
   xmlns = "http://schemas.microsoft.com/winfx/2006/xaml/presentation"
   xmlns:x = "http://schemas.microsoft.com/winfx/2006/xaml"
   xmlns:local = "using:ProtocolHandlerDemo"
   xmlns:d = "http://schemas.microsoft.com/expression/blend/2008"
   xmlns:mc = "http://schemas.openxmlformats.org/markup-compatibility/2006"
   mc:Ignorable = "d">

   <Grid Background = "{ThemeResource ApplicationPageBackgroundThemeBrush}">
      <Button x:Name = "LaunchButton" Content = " Launch First Protocol App"
         FontSize = "24" HorizontalAlignment = "Center"
         Click = "LaunchButton_Click"/>
   </Grid>

</Page>
下面是 C# 代码,其中实现了按钮点击事件。
using System;
using Windows.UI.Xaml;
using Windows.UI.Xaml.Controls;

// The Blank Page item template is documented at
   http://go.microsoft.com/fwlink/?LinkId=402352&clcid=0x409

namespace ProtocolHandlerDemo {

   /// <summary>
      /// An empty page that can be used on its own or navigated to within a Frame.
   /// </summary>

   public sealed partial class MainPage : Page {

      public MainPage(){
         this.InitializeComponent();
      }

      private async void LaunchButton_Click(object sender, RoutedEventArgs e) {
         await Windows.System.Launcher.LaunchUriAsync(new
            Uri("win10demo:?SomeData=123"));
      }

   }
}
现在让我们来看一下FirstProtocolHandler应用程序表格。下面是在其中创建了一个带有一些属性的文本块的 XAML 代码。
<Page
x:Class = "FirstProtocolHandler.MainPage"
xmlns = "http://schemas.microsoft.com/winfx/2006/xaml/presentation"
xmlns:x = "http://schemas.microsoft.com/winfx/2006/xaml"
xmlns:local = "using:FirstProtocolHandler"
xmlns:d = "http://schemas.microsoft.com/expression/blend/2008"
xmlns:mc = "http://schemas.openxmlformats.org/markup-compatibility/2006"
mc:Ignorable = "d">
<Grid Background = "{ThemeResource ApplicationPageBackgroundThemeBrush}">
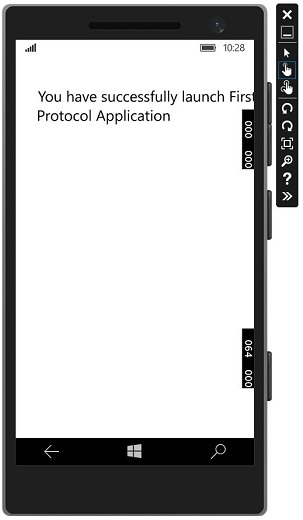
<TextBlock Text = "You have successfully launch First Protocol Application"
TextWrapping = "Wrap" Style = "{StaticResource SubtitleTextBlockStyle}"
Margin = "30,39,0,0" VerticalAlignment = "Top" HorizontalAlignment = "Left"
Height = "100" Width = "325"/>
</Grid>
</Page>
下面显示了App.xaml.cs文件的 C# 实现,其中重写了OnActivated。在App.xaml.cs文件的App类中添加以下代码。
protected override void OnActivated(IActivatedEventArgs args) {
   ProtocolActivatedEventArgs protocolArgs = args as ProtocolActivatedEventArgs;

   if (args != null) {
      Frame rootFrame = Window.Current.Content as Frame;

      // Do not repeat app initialization when the Window already has content,
      // just ensure that the window is active

      if (rootFrame == null) {

         // Create a Frame to act as the navigation context and navigate to
            the first page
         rootFrame = new Frame();

         // Set the default language
         rootFrame.Language = Windows.Globalization.ApplicationLanguages.Languages[0];
         rootFrame.NavigationFailed += OnNavigationFailed;

         // Place the frame in the current Window
         Window.Current.Content = rootFrame;
      }

      if (rootFrame.Content == null) {

         // When the navigation stack isn't restored navigate to the
         // first page, configuring the new page by passing required
         // information as a navigation parameter

         rootFrame.Navigate(typeof(MainPage), null);
      }

      // Ensure the current window is active
      Window.Current.Activate();
   }
}
当您在模拟器上编译并执行ProtocolHandlerDemo应用程序时,您将看到以下窗口。

现在,当您单击按钮时,它将打开FirstProtocolHandler应用程序,如下所示。