- Pygame 教程
- Pygame - 首页
- Pygame - 概述
- Pygame - Hello World
- Pygame - 显示模式
- Pygame - Locals 模块
- Pygame - 颜色对象
- Pygame - 事件对象
- Pygame - 键盘事件
- Pygame - 鼠标事件
- Pygame - 绘制形状
- Pygame - 加载图像
- Pygame - 在窗口中显示文本
- Pygame - 移动图像
- Pygame - 使用数字小键盘移动
- Pygame - 使用鼠标移动
- Pygame - 移动矩形对象
- Pygame - 使用文本作为按钮
- Pygame - 图像变换
- Pygame - 音效对象
- Pygame - 混音器通道
- Pygame - 播放音乐
- Pygame - 播放视频
- Pygame - 使用摄像头模块
- Pygame - 加载光标
- Pygame - 访问 CDROM
- Pygame - 精灵模块
- Pygame - PyOpenGL
- Pygame - 错误和异常
- Pygame 有用资源
- Pygame - 快速指南
- Pygame - 有用资源
- Pygame - 讨论
Pygame - 在窗口中显示文本
要在 Pygame 窗口上显示文本,我们首先需要获取一个字体对象,这可以通过 pygame.font 模块中定义的 SysFont() 函数来实现。
Fnt= SysFont(name, size, bold=False, italic=False)
可以使用 get_fonts() 函数获取当前机器上安装的字体列表。
fonts = pygame.font.get_fonts()
for f in fonts:
   print(f)
让我们定义一个表示 36 号 Arial 字体的字体对象。
font = pygame.font.SysFont("Arial", 36)
接下来,我们使用 Font 对象的 render() 方法,使用新创建的字体渲染 "Hello World" 文本,获取一个新的 Surface 对象。
txtsurf = font.render("Hello, World", True, white)
第一个参数是一个单行字符串,第二个参数表示抗锯齿。如果设置为 False,则渲染的图像是 8 位图像,如果为 True,则为 24 位图像。还可以使用可选的背景颜色参数。
现在我们需要将文本 Surface 绘制到屏幕窗口的中心。
screen.blit(txtsurf,(200 - txtsurf.get_width() // 2, 150 - txtsurf.get_height() // 2))
示例
以下是完整的代码:
import pygame

pygame.init()
screen = pygame.display.set_mode((400, 300))
done = False
white=(255,255,255)
red = (255,0,0)
green = (0,255,0)
blue = (0,0,255)

bg = (127,127,127)
while not done:
   for event in pygame.event.get():
      screen.fill(bg)
      if event.type == pygame.QUIT:
         done = True
      font = pygame.font.SysFont("Arial", 36)
   txtsurf = font.render("Hello, World", True, white)
   screen.blit(txtsurf,(200 - txtsurf.get_width() // 2, 150 - txtsurf.get_height() // 2))
pygame.display.update()
输出
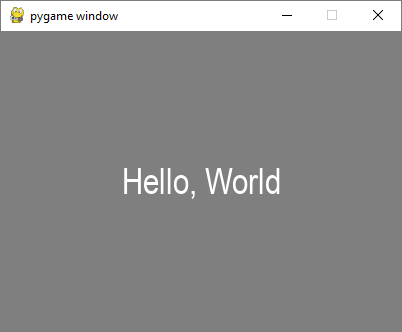
除了 SysFont() 方法外,还可以从字体文件(具有 .ttf 扩展名)或指向 ttf 文件的 Python 文件对象获取 Font 对象。也可以使用 .ttc 文件构造字体对象。font 类定义了以下方法:
| bold() | 获取或设置字体是否应以粗体渲染。 |
| italic() | 获取或设置字体是否应以斜体渲染。 |
| underline() | 获取或设置字体是否应带下划线渲染。 |
| render() | 在新的 Surface 上绘制文本 |
| size() | 计算渲染文本所需的尺寸 |
| set_underline() | 控制文本是否带下划线渲染 |
| get_underline() | 检查文本是否将带下划线渲染 |
| set_bold() | 启用粗体文本的伪渲染 |
| get_bold() | 检查文本是否将以粗体渲染 |
| set_italic() | 启用斜体文本的伪渲染 |
| metrics() | 获取每个字符的度量 |
| get_italic() | 检查文本是否将以斜体渲染 |
| get_linesize() | 获取字体的行距 |
| get_height() | 获取字体的 高度 |
| get_ascent() | 获取字体的 上升高度 |
| get_descent() | 获取字体的 下降高度 |
下面是使用 ttf 和 ttc 文件渲染文本的示例。
font1 = pygame.font.SysFont('chalkduster.ttf', 72)
img1 = font1.render('Hello World', True, BLUE)
font2 = pygame.font.SysFont('didot.ttc', 72)
img2 = font2.render('Hello Pygame', True, GREEN)

screen.blit(img1, (20, 50))
screen.blit(img2, (20, 120))
pygame.display.update()
在上面的示例中,预定义的字符串已被渲染为 Surface 对象。但是,可以读取 KEYDOWN 事件的键值以交互式地输入字符串并显示它。
首先,我们渲染一个空字符串。接下来,我们定义边界矩形,然后定义一个光标矩形,该矩形放置在与文本边界矩形重叠的位置。KEYDOWN 事件中识别的每个按键都附加到原始空字符串中并重复渲染。
示例
以下代码最初显示一个空白窗口。按下每个字母都将彼此并排显示。
import pygame

pygame.init()
screen = pygame.display.set_mode((400, 300))
done = False
white=(255,255,255)
red = (255,0,0)
green = (0,255,0)
blue = (0,0,255)

bg = (127,127,127)
text=""
while not done:
   for event in pygame.event.get():
      screen.fill(bg)
      if event.type == pygame.QUIT:
         done = True
      if event.type == pygame.KEYDOWN:
         text=text+event.unicode
      font = pygame.font.SysFont("Arial", 36)
      img = font.render(text, True, white)
      rect = img.get_rect()
      cursor = pygame.Rect(rect.topright, (3, rect.height))
      img = font.render(text, True, white)
      rect.size=img.get_size()
      cursor.topleft = rect.topright
      screen.blit(img,(200 - img.get_width() // 2, 150 - img.get_height() // 2))
   pygame.display.update()
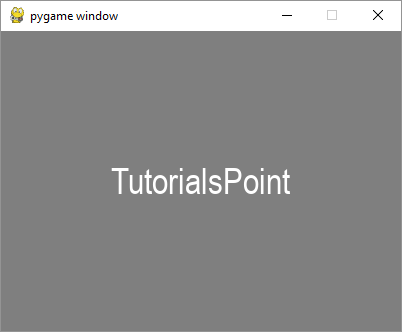
输出
运行以上代码并输入一些文本。示例输出如下:
广告