- Spring Boot 教程
- Spring Boot - 首页
- Spring Boot - 简介
- Spring Boot - 快速入门
- Spring Boot - 引导
- Spring Tool Suite
- Spring Boot - Tomcat 部署
- Spring Boot - 构建系统
- Spring Boot - 代码结构
- Spring Bean & 依赖注入
- Spring Boot - 运行器
- Spring Boot - 启动器
- Spring Boot - 应用属性
- Spring Boot - 配置
- Spring Boot - 注解
- Spring Boot - 日志
- 构建 RESTful Web 服务
- Spring Boot - 异常处理
- Spring Boot - 拦截器
- Spring Boot - Servlet 过滤器
- Spring Boot - Tomcat 端口号
- Spring Boot - Rest 模板
- Spring Boot - 文件处理
- Spring Boot - 服务组件
- Spring Boot - Thymeleaf
- 消费 RESTful Web 服务
- Spring Boot - CORS 支持
- Spring Boot - 国际化
- Spring Boot - 调度
- Spring Boot - 启用 HTTPS
- Spring Boot - Eureka 服务器
- 使用 Eureka 注册服务
- 网关代理服务器和路由
- Spring Cloud 配置服务器
- Spring Cloud 配置客户端
- Spring Boot - Actuator
- Spring Boot - Admin 服务器
- Spring Boot - Admin 客户端
- Spring Boot - 启用 Swagger2
- Spring Boot - 使用 SpringDoc OpenAPI
- Spring Boot - 创建 Docker 镜像
- 跟踪微服务日志
- Spring Boot - Flyway 数据库
- Spring Boot - 发送邮件
- Spring Boot - Hystrix
- Spring Boot - Web Socket
- Spring Boot - 批处理服务
- Spring Boot - Apache Kafka
- Spring Boot - Twilio
- Spring Boot - 单元测试用例
- Rest Controller 单元测试
- Spring Boot - 数据库处理
- Web 应用安全
- Spring Boot - 带 JWT 的 OAuth2
- Spring Boot - Google Cloud Platform
- Spring Boot - Google OAuth2 登录
- Spring Boot 资源
- Spring Boot - 快速指南
- Spring Boot - 有用资源
- Spring Boot - 讨论
Spring Boot - Web 应用安全
如果在类路径中添加了 Spring Boot Security 依赖项,则 Spring Boot 应用程序会自动为所有 HTTP 端点要求基本身份验证。端点“/”和“/home”不需要任何身份验证。所有其他端点都需要身份验证。
要将 Spring Boot Security 添加到您的 Spring Boot 应用程序中,我们需要在构建配置文件中添加 Spring Boot Starter Security 依赖项。
Maven 用户可以在 pom.xml 文件中添加以下依赖项。
<dependency>
   <groupId>org.springframework.boot</groupId>
   <artifactId>spring-boot-starter-security</artifactId>
</dependency>
Gradle 用户可以在 build.gradle 文件中添加以下依赖项。
compile("org.springframework.boot:spring-boot-starter-security")
保护 Web 应用程序
首先,使用 Thymeleaf 模板创建一个不安全的 Web 应用程序。
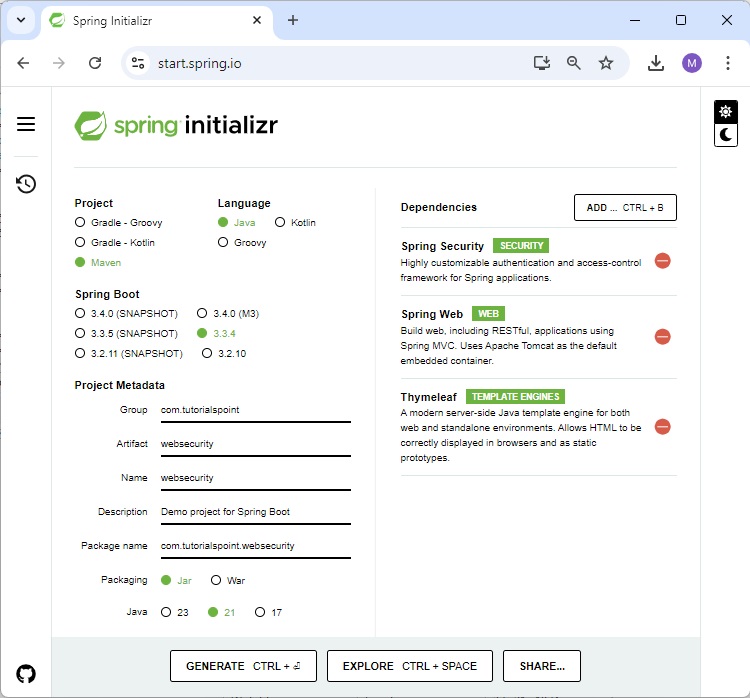
从 Spring Initializer 页面 www.start.spring.io 下载 Spring Boot 项目,并选择以下依赖项:
- Spring Web
- Spring Security
- Thymeleaf
然后,在 **src/main/resources/templates** 目录下创建一个 home.html 文件。
home.html
<!DOCTYPE html>
<html xmlns = "http://www.w3.org/1999/xhtml"
   xmlns:th = "http://www.thymeleaf.org"
   xmlns:sec = "http://www.thymeleaf.org/thymeleaf-extras-springsecurity6">

   <head>
      <title>Spring Security Example</title>
   </head>
   <body>
      <h1>Welcome!</h1>
      <p>Click <a th:href = "@{/hello}">here</a> to see a greeting.</p>
   </body>

</html>
使用 Thymeleaf 模板在 HTML 文件中定义简单的视图 ** /hello** 。
现在,在 **src/main/resources/templates** 目录下创建一个 hello.html。
hello.html
<!DOCTYPE html>
<html xmlns = "http://www.w3.org/1999/xhtml"
   xmlns:th = "http://www.thymeleaf.org"
   xmlns:sec = "http://www.thymeleaf.org/thymeleaf-extras-springsecurity6">

   <head>
      <title>Hello World!</title>
   </head>
   <body>
      <h1>Hello world!</h1>
   </body>

</html>
现在,我们需要为 home 和 hello 视图设置 Spring MVC - 视图控制器。
为此,创建一个 ViewsController 类。
ViewsController.java
package com.tutorialspoint.websecurity;

import org.springframework.stereotype.Controller;
import org.springframework.web.bind.annotation.GetMapping;

@Controller
public class ViewsController {

   @GetMapping("/hello")
   public String hello() {
      return "hello";
   }
   @GetMapping("/home")
   public String home() {
      return "home";
   }
   @GetMapping("/")
   public String index() {
      return "hello";
   }
   @GetMapping("/login")
   public String login() {
      return "login";
   }
}
现在,创建一个 Web 安全配置文件,用于通过基本身份验证保护应用程序以访问 HTTP 端点。
WebSecurityConfig.java
package com.tutorialspoint.websecurity;

import org.springframework.context.annotation.Bean;
import org.springframework.context.annotation.Configuration;
import org.springframework.security.config.annotation.web.builders.HttpSecurity;
import org.springframework.security.config.annotation.web.configuration.EnableWebSecurity;
import org.springframework.security.config.annotation.web.configurers.AbstractHttpConfigurer;
import org.springframework.security.core.userdetails.User;
import org.springframework.security.core.userdetails.UserDetails;
import org.springframework.security.core.userdetails.UserDetailsService;
import org.springframework.security.crypto.bcrypt.BCryptPasswordEncoder;
import org.springframework.security.crypto.password.PasswordEncoder;
import org.springframework.security.provisioning.InMemoryUserDetailsManager;
import org.springframework.security.web.SecurityFilterChain;

@Configuration
@EnableWebSecurity
public class WebSecurityConfig {

   @Bean
   protected UserDetailsService userDetailsService() {
      UserDetails user = User.builder()
         .username("user")
         .password(passwordEncoder().encode("password"))
         .roles("USER")
         .build();
      return new InMemoryUserDetailsManager(user);
   }
   @Bean
   protected PasswordEncoder passwordEncoder() {
      return new BCryptPasswordEncoder();
   }

   @Bean
   protected SecurityFilterChain filterChain(HttpSecurity http) throws Exception {
      return http
         .csrf(AbstractHttpConfigurer::disable)
         .authorizeHttpRequests(
            request -> request
               .requestMatchers("/").permitAll()
               .requestMatchers("/home").permitAll()
               .anyRequest().authenticated()
         )
         .formLogin(form -> form
            .loginPage("/login")
            .permitAll())
         .logout(config -> config
            .logoutSuccessUrl("/login"))
         .build();
   }
}
现在,在 **src/main/resources** 目录下创建一个 login.html 文件,以允许用户通过登录屏幕访问 HTTP 端点。
login.html
<!DOCTYPE html>
<html xmlns = "http://www.w3.org/1999/xhtml" xmlns:th = "http://www.thymeleaf.org"
   xmlns:sec = "http://www.thymeleaf.org/thymeleaf-extras-springsecurity6">

   <head>
      <title>Spring Security Example </title>
   </head>
   <body>
      <div th:if = "${param.error}">
         Invalid username and password.
      </div>
      <div th:if = "${param.logout}">
         You have been logged out.
      </div>

      <form th:action = "@{/login}" method = "post">
         <div>
            <label> User Name : <input type = "text" name = "username"/> </label>
         </div>
         <div>
            <label> Password: <input type = "password" name = "password"/> </label>
         </div>
         <div>
            <input type = "submit" value = "Sign In"/>
         </div>
      </form>

   </body>
</html>
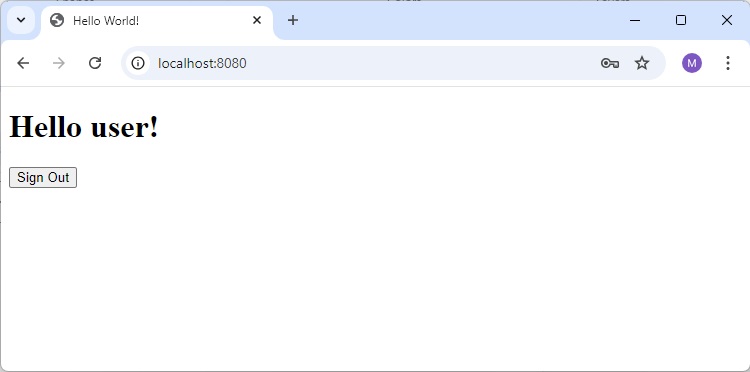
最后,更新 hello.html 文件 - 以允许用户从应用程序注销并显示当前用户名,如下所示:
hello.html
<!DOCTYPE html>
<html xmlns = "http://www.w3.org/1999/xhtml" xmlns:th = "http://www.thymeleaf.org"
   xmlns:sec = "http://www.thymeleaf.org/thymeleaf-extras-springsecurity6">

   <head>
      <title>Hello World!</title>
   </head>
   <body>
      <h1 th:inline="text">Hello <span sec:authentication="name"></span>!</h1>
      <form th:action = "@{/logout}" method = "post">
         <input type = "submit" value = "Sign Out"/>
      </form>
   </body>

</html>
下面给出主 Spring Boot 应用程序的代码:
WebsecurityApplication.java
package com.tutorialspoint.websecurity;

import org.springframework.boot.SpringApplication;
import org.springframework.boot.autoconfigure.SpringBootApplication;

@SpringBootApplication
public class WebsecurityApplication {
   public static void main(String[] args) {
      SpringApplication.run(WebsecurityDemoApplication.class, args);
   }
}
下面给出构建配置文件的完整代码。
Maven - pom.xml
<?xml version="1.0" encoding="UTF-8"?>
<project xmlns="http://maven.apache.org/POM/4.0.0" xmlns:xsi="http://www.w3.org/2001/XMLSchema-instance"
   xsi:schemaLocation="http://maven.apache.org/POM/4.0.0 https://maven.apache.org/xsd/maven-4.0.0.xsd">
   <modelVersion>4.0.0</modelVersion>
   <parent>
      <groupId>org.springframework.boot</groupId>
      <artifactId>spring-boot-starter-parent</artifactId>
      <version>3.3.4</version>
      <relativePath/> <!-- lookup parent from repository -->
   </parent>
   <groupId>com.tutorialspoint</groupId>
   <artifactId>websecurity</artifactId>
   <version>0.0.1-SNAPSHOT</version>
   <name>websecurity</name>
   <description>Demo project for Spring Boot</description>
   <url/>
   <licenses>
      <license/>
   </licenses>
   <developers>
      <developer/>
   </developers>
   <scm>
      <connection/>
      <developerConnection/>
      <tag/>
      <url/>
   </scm>
   <properties>
      <java.version>21</java.version>
   </properties>
   <dependencies>
      <dependency>
         <groupId>org.springframework.boot</groupId>
         <artifactId>spring-boot-starter-security</artifactId>
      </dependency>
      <dependency>
         <groupId>org.springframework.boot</groupId>
         <artifactId>spring-boot-starter-thymeleaf</artifactId>
      </dependency>
      <dependency>
         <groupId>org.springframework.boot</groupId>
         <artifactId>spring-boot-starter-web</artifactId>
      </dependency>
      <dependency>
         <groupId>org.thymeleaf.extras</groupId>
         <artifactId>thymeleaf-extras-springsecurity6</artifactId>
      </dependency>
      <dependency>
         <groupId>org.springframework.boot</groupId>
         <artifactId>spring-boot-starter-test</artifactId>
         <scope>test</scope>
      </dependency>
      <dependency>
         <groupId>org.springframework.security</groupId>
         <artifactId>spring-security-test</artifactId>
         <scope>test</scope>
      </dependency>
   </dependencies>
   <build>
      <plugins>
         <plugin>
            <groupId>org.springframework.boot</groupId>
            <artifactId>spring-boot-maven-plugin</artifactId>
         </plugin>
      </plugins>
   </build>
</project>
Gradle - build.gradle
buildscript {
   ext {
      springBootVersion = '3.3.4'
   }
   repositories {
      mavenCentral()
   }
   dependencies {
      classpath("org.springframework.boot:spring-boot-gradle-plugin:${springBootVersion}")
   }
}

apply plugin: 'java'
apply plugin: 'eclipse'
apply plugin: 'org.springframework.boot'

group = 'com.tutorialspoint'
version = '0.0.1-SNAPSHOT'
sourceCompatibility = 21

repositories {
   mavenCentral()
}
dependencies {
   compile('org.springframework.boot:spring-boot-starter-security')
   compile('org.springframework.boot:spring-boot-starter-thymeleaf')
   compile('org.springframework.boot:spring-boot-starter-web')

   testCompile('org.springframework.boot:spring-boot-starter-test')
   testCompile('org.springframework.security:spring-security-test')
}
编译和执行
现在,创建一个可执行的 JAR 文件,并使用以下 Maven 或 Gradle 命令运行 Spring Boot 应用程序。
Maven 用户可以使用以下命令:
mvn clean install
“BUILD SUCCESS”后,您可以在 target 目录下找到 JAR 文件。
Gradle 用户可以使用以下所示的命令:
gradle clean build
“BUILD SUCCESSFUL”后,您可以在 build/libs 目录下找到 JAR 文件。
现在,使用以下所示的命令运行 JAR 文件:
java –jar <JARFILE>
在您的 Web 浏览器中访问 URL **https://:8080/**。您可以看到如下所示的输出。
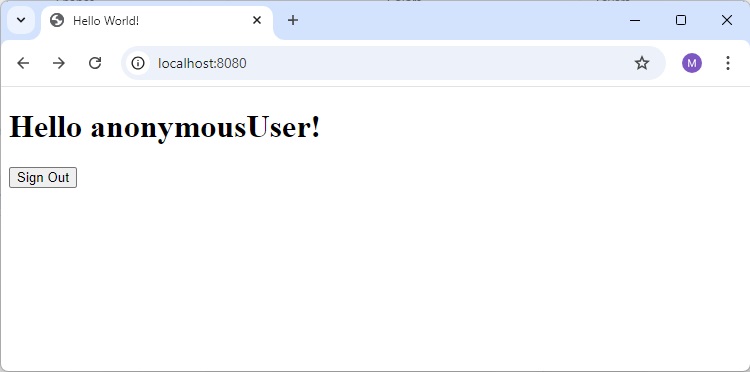
登录页面
点击注销按钮
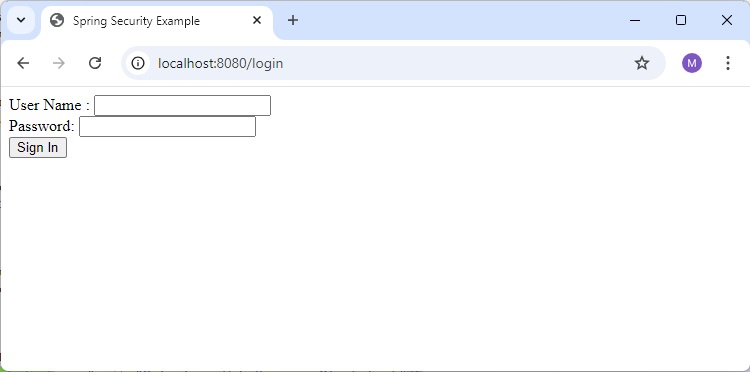
登录
使用用户名/密码登录并查看主页。
已注销
点击注销按钮。

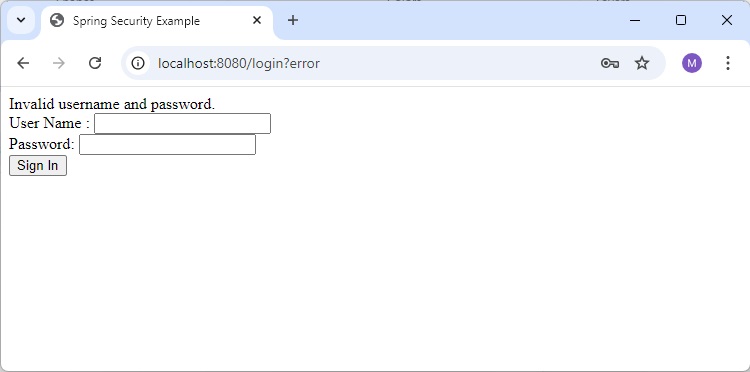
无效的用户名密码
尝试使用无效的用户名/密码登录。
