- Yii 教程
- Yii - 首页
- Yii - 概述
- Yii - 安装
- Yii - 创建页面
- Yii - 应用结构
- Yii - 入口脚本
- Yii - 控制器
- Yii - 使用控制器
- Yii - 使用操作
- Yii - 模型
- Yii - 小部件
- Yii - 模块
- Yii - 视图
- Yii - 布局
- Yii - 资源
- Yii - 资源转换
- Yii - 扩展
- Yii - 创建扩展
- Yii - HTTP 请求
- Yii - 响应
- Yii - URL 格式
- Yii - URL 路由
- Yii - URL 规则
- Yii - HTML 表单
- Yii - 验证
- Yii - 特设验证
- Yii - AJAX 验证
- Yii - 会话
- Yii - 使用闪存数据
- Yii - Cookie
- Yii - 使用 Cookie
- Yii - 文件上传
- Yii - 格式化
- Yii - 分页
- Yii - 排序
- Yii - 属性
- Yii - 数据提供者
- Yii - 数据小部件
- Yii - ListView 小部件
- Yii - GridView 小部件
- Yii - 事件
- Yii - 创建事件
- Yii - 行为
- Yii - 创建行为
- Yii - 配置
- Yii - 依赖注入
- Yii - 数据库访问
- Yii - 数据访问对象
- Yii - 查询构建器
- Yii - 活动记录
- Yii - 数据库迁移
- Yii - 主题
- Yii - RESTful API
- Yii - RESTful API 实战
- Yii - 字段
- Yii - 测试
- Yii - 缓存
- Yii - 碎片缓存
- Yii - 别名
- Yii - 日志
- Yii - 错误处理
- Yii - 身份验证
- Yii - 授权
- Yii - 本地化
- Yii - Gii
- Gii – 创建模型
- Gii – 生成控制器
- Gii – 生成模块
- Yii 有用资源
- Yii - 快速指南
- Yii - 有用资源
- Yii - 讨论
Yii - 主题
主题功能 giúp bạn thay thế một tập hợp các view bằng một tập hợp khác mà không cần phải sửa đổi các tệp view gốc. Bạn nên đặt thuộc tính theme của thành phần ứng dụng view để sử dụng chủ đề.
Bạn cũng nên định nghĩa các thuộc tính sau −
yii\base\Theme::$basePath − Định nghĩa thư mục gốc cho CSS, JS, hình ảnh, v.v.
yii\base\Theme::$baseUrl − Định nghĩa URL gốc của các tài nguyên có chủ đề.
yii\base\Theme::$pathMap − Định nghĩa các quy tắc thay thế.
Ví dụ: nếu bạn gọi $this->render('create') trong UserController, tệp view @app/views/user/create.php sẽ được hiển thị. Tuy nhiên, nếu bạn bật chủ đề như trong cấu hình ứng dụng sau, tệp view @app/themes/basic/user/create.php sẽ được hiển thị thay thế.
步骤 1 - 修改config/web.php文件。
<?php
   $params = require(__DIR__ . '/params.php');
   $config = [
      'id' => 'basic',
      'basePath' => dirname(__DIR__),
      'bootstrap' => ['log'],
      'components' => [
         'request' => [
            // !!! insert a secret key in the following (if it is empty) - this
               //is required by cookie validation
            'cookieValidationKey' => 'ymoaYrebZHa8gURuolioHGlK8fLXCKjO',
         ],
         'cache' => [
            'class' => 'yii\caching\FileCache',
         ],
         'user' => [
            'identityClass' => 'app\models\User',
            'enableAutoLogin' => true,
         ],
         'errorHandler' => [
            'errorAction' => 'site/error',
         ],
         'mailer' => [
            'class' => 'yii\swiftmailer\Mailer',
            // send all mails to a file by default. You have to set
            // 'useFileTransport' to false and configure a transport
            // for the mailer to send real emails.
            'useFileTransport' => true,
         ],
         'log' => [
            'traceLevel' => YII_DEBUG ? 3 : 0,
            'targets' => [
               [
                  'class' => 'yii\log\FileTarget',
                  'levels' => ['error', 'warning'],
               ],
            ],
         ],
         'view' => [
            'theme' => [
               'basePath' => '@app/themes/basic',
               'baseUrl' => '@web/themes/basic',
               'pathMap' => [
                  '@app/views' => '@app/themes/basic',
               ],
            ],
         ],
         'db' => require(__DIR__ . '/db.php'),
      ],
      'modules' => [
         'hello' => [
            'class' => 'app\modules\hello\Hello',
         ],
      ],
      'params' => $params,
   ];
   if (YII_ENV_DEV) {
      // configuration adjustments for 'dev' environment
      $config['bootstrap'][] = 'debug';
      $config['modules']['debug'] = [
         'class' => 'yii\debug\Module',
      ];
      $config['bootstrap'][] = 'gii';
      $config['modules']['gii'] = [
         'class' => 'yii\gii\Module',
      ];
   }
   return $config;
?>
我们添加了视图应用程序组件。
步骤 2 - 现在创建web/themes/basic目录结构和themes/basic/site。在themes/basic/site文件夹内创建一个名为about.php的文件,内容如下。
<?php
   /* @var $this yii\web\View */
   use yii\helpers\Html;
   $this->title = 'About';
   $this->params['breadcrumbs'][] = $this->title;
   $this->registerMetaTag(['name' => 'keywords', 'content' => 'yii, developing,
      views, meta, tags']);
   $this->registerMetaTag(['name' => 'description', 'content' => 'This is the
      description of this page!'], 'description');
?>

<div class = "site-about">
   <h1><?= Html::encode($this->title) ?></h1>

   <p style = "color: red;">
      This is the About page. You may modify the following file to customize its content:
   </p>
</div>
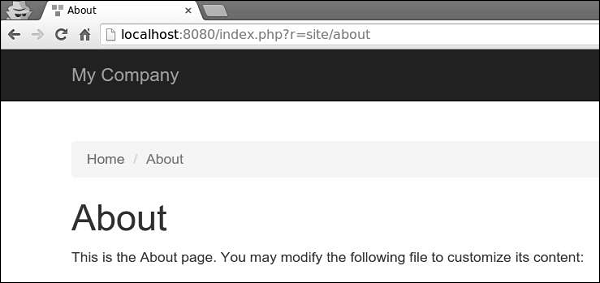
步骤 3 - 现在,访问https://:8080/index.php?r=site/about,将渲染themes/basic/site/about.php文件,而不是views/site/about.php。

步骤 4 - 要为模块设置主题,请按以下方式配置yii\base\Theme::$pathMap属性。
'pathMap' => [
   '@app/views' => '@app/themes/basic',
   '@app/modules' => '@app/themes/basic/modules',
],
步骤 5 - 要为小部件设置主题,请按以下方式配置yii\base\Theme::$pathMap属性。
'pathMap' => [
   '@app/views' => '@app/themes/basic',
   '@app/widgets' => '@app/themes/basic/widgets', // <-- !!!
],
有时您需要指定一个基本主题,其中包含应用程序的基本外观和感觉。要实现此目标,您可以使用主题继承。
步骤 6 - 按以下方式修改视图应用程序组件。
'view' => [
   'theme' => [
      'basePath' => '@app/themes/basic',
      'baseUrl' => '@web/themes/basic',
      'pathMap' => [
         '@app/views' => [
            '@app/themes/christmas',
            '@app/themes/basic',
         ],
      ]
   ],
],
在以上配置中,@app/views/site/index.php视图文件将被主题化为@app/themes/christmas/site/index.php或@app/themes/basic/site/index.php,取决于哪个文件存在。如果两个文件都存在,则使用第一个文件。
步骤 7 - 创建themes/christmas/site目录结构。
步骤 8 - 现在,在themes/christmas/site文件夹内,创建一个名为about.php的文件,内容如下。
<?php
   /* @var $this yii\web\View */
   use yii\helpers\Html;
   $this->title = 'About';
   $this->params['breadcrumbs'][] = $this->title;
   $this->registerMetaTag(['name' => 'keywords', 'content' => 'yii, developing,
      views, meta, tags']);
   $this->registerMetaTag(['name' => 'description', 'content' => 'This is the
      description of this page!'], 'description');
?>

<div class = "site-about">
   <h2>Christmas theme</h2>
   <img src = "http://pngimg.com/upload/fir_tree_PNG2514.png" alt = ""/>
   <p style = "color: red;">
      This is the About page. You may modify the following file to customize its content:
   </p>
</div>
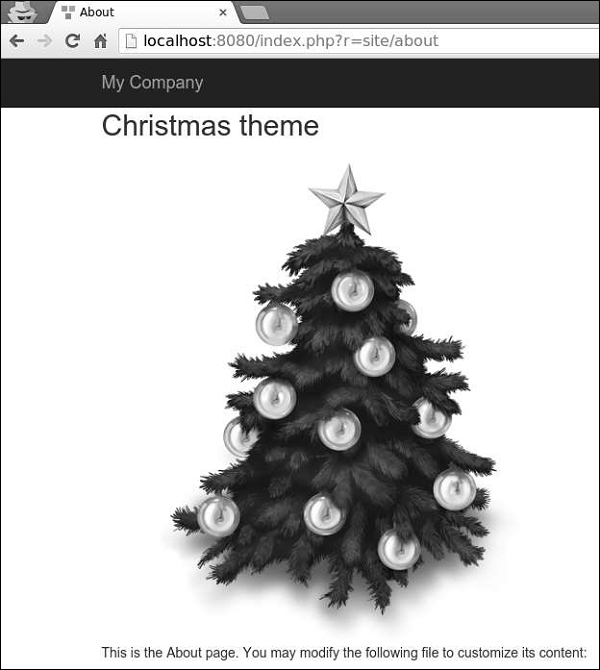
步骤 9 - 如果您访问https://:8080/index.php?r=site/about,您将看到使用圣诞节主题更新后的关于页面。
