
- Angular 教程
- Angular - 首页
- Angular - 概述
- Angular - 特性
- Angular - 优点和缺点
- Angular 基础
- Angular - 环境设置
- Angular - 第一个应用
- Angular - MVC 架构
- Angular 组件
- Angular - 组件
- Angular - 组件生命周期
- Angular - 视图封装
- Angular - 组件交互
- Angular - 组件样式
- Angular - 嵌套组件
- Angular - 内容投影
- Angular - 动态组件
- Angular - 元素
- Angular 模板
- Angular - 模板
- Angular - 文本插值
- Angular - 模板语句
- Angular - 模板中的变量
- Angular - SVG 作为模板
- Angular 绑定
- Angular - 绑定及其类型
- Angular - 数据绑定
- Angular - 事件绑定
- Angular - 属性绑定
- Angular - 属性绑定
- Angular - 类和样式绑定
- Angular 指令
- Angular - 指令
- Angular - 内置指令
- Angular 管道
- Angular - 管道
- Angular - 使用管道转换数据
- Angular 依赖注入
- Angular - 依赖注入
- Angular HTTP 客户端编程
- Angular - 服务
- Angular - HTTP 客户端
- Angular - 请求
- Angular - 响应
- Angular - 获取
- Angular - PUT
- Angular - DELETE
- Angular - JSON-P
- Angular - 使用 HTTP 进行 CRUD 操作
- Angular 路由
- Angular - 路由
- Angular - 导航
- Angular - Angular Material
- Angular 动画
- Angular - 动画
- Angular 表单
- Angular - 表单
- Angular - 表单验证
- Angular Service Workers 和 PWA
- Angular - Service Workers 和 PWA
- Angular 测试
- Angular - 测试概述
- Angular NgModules
- Angular - 模块简介
- Angular 高级
- Angular - 身份验证和授权
- Angular - 国际化
- Angular - 可访问性
- Angular - Web Workers
- Angular - 服务器端渲染
- Angular - Ivy 编译器
- Angular - 使用 Bazel 构建
- Angular - 向后兼容性
- Angular - 响应式编程
- Angular - 在指令和组件之间共享数据
- Angular 工具
- Angular - CLI
- Angular 其他
- Angular - 第三方控件
- Angular - 配置
- Angular - 显示数据
- Angular - 装饰器和元数据
- Angular - 基本示例
- Angular - 错误处理
- Angular - 测试和构建项目
- Angular - 生命周期钩子
- Angular - 用户输入
- Angular - 新功能?
- Angular 有用资源
- Angular - 快速指南
- Angular - 有用资源
- Angular - 讨论
Angular - 类和样式绑定
类绑定
动态 Web 应用程序通常具有动态样式,并在应用程序运行时设置。类绑定是一种特殊的绑定,用于将动态值绑定到 HTML 元素的 class 属性。
让我们在本节中详细了解类绑定。
类绑定的语法
Angular 在类绑定中提供了四种不同的语法。每种类型的类绑定都支持一项特殊功能。这四种语法如下所示:
- 单类绑定
- 带开/关功能的单类绑定
- 多样式绑定
- 通过带开/关功能的对象进行多样式绑定
让我们在接下来的章节中逐一学习。
单类绑定
在单类绑定中,类字符串应括在方括号中,并应将模板变量设置为其值。
<div [class]="<template variable>">
   <!-- content -->
</div>
在这里,模板变量保存特定 HTML 元素的类名。
带开/关功能的单类绑定
在带开/关功能的单类绑定中,class. style 应附加给定 HTML 元素的实际类名,并且应将具有布尔值的模板变量设置为其值。布尔值确定特定类对 HTML 元素的可用性。
<div [class.<class name>]="template variable">
   <!-- content -->
</div>
在这里,模板变量输出 true 或 false。
让我们考虑一个名为 red 的类,用于将 HTML 元素的文本设置为红色。
.red {
   color: red;
}
考虑组件中可用的成员变量 isRedEnabled。
isRedEnabled: boolean = true
然后,可以在 HTML 元素中设置类绑定,如下所示:
<div [class.red]="isRedEnabled">
   <!-- content -->
</div>
多类绑定
在多类绑定中,类字符串应括在方括号中,并且应使用一个或多个以空格分隔的现有类名设置值。例如,可以使用 [class] 设置 HTML 元素的两个类(myClass 和 myAnotherClass),如下所示:
<div [class]="<template variable>">
   <!-- content -->
</div>
在这里,模板变量将发出 myClass myAnotherClass 字符串。
通过带开/关功能的对象进行多类绑定
在通过带开/关功能的对象进行多类绑定中,类字符串应括在方括号中,并且应使用 Record<string, boolean> 类型的对象设置值,该对象分别具有类名和布尔值作为键和值。键的布尔值确定是否将相应的键设置为给定 HTML 元素的类。
<div [class]="<objects as template variable>">
   <!-- content -->
</div>
让我们考虑一个具有多个表示类名的键的对象,并具有布尔值,如下所示:
// in component
myClass: Record<string, boolean> = {
   c1: true,
   c2: false
   c3: true
}
在模板中应用类绑定,如下所示:
// in template
<div [class]="myClass">
   <!-- content -->
</div>
然后,输出将具有 c1 和 c3 类,因为这两个类在对象中都具有 true 值。
// output
<div class="c1 c3">
   <!-- content -->
</div>
应用类绑定
让我们创建一个简单的注册表单来了解类绑定。我们的注册表单将具有三个输入字段,如下所示,以及一个提交注册表单的按钮。
1. Username
2. Password
3. Confirm password
步骤 1:使用 Angular CLI 创建一个新的应用程序 my-app,如下所示:
ng new my-app
步骤 2:使用 Angular CLI 创建一个新的注册表单组件 RegisterForm,如下所示:
ng generate component RegisterForm
步骤 3:接下来,打开注册表单组件的模板,并添加一个包含用户名、密码和确认密码的表单。
<div>
   <form method="post">
      <div class="container">
         <label for="username"><b>Username</b></label>
         <input type="text" name="username" required>

         <label for="password"><b>Password</b></label>
         <input type="password" name="password" required>

         <label for="confirm_password"><b>Confirm Password</b></label>
         <input type="password" name="confirm_password" required>

         <button type="submit">Register</button>
      </div>
   </form>
</div>
步骤 4:打开注册表单组件的 CSS 样式,并使用 CSS 样式化表单,如下所示:
.container {
   padding: 15px;
}

input[type=text], input[type=password] {
   width: 100%;
   padding: 10px 20px;
   margin: 10px 0;
   display: inline-block;
   border: 1px solid #ccc;
   box-sizing: border-box;
}

button {
   background-color: blue;
   color: white;
   padding: 15px 20px;
   margin: 10px 0;
   border: none;
   cursor: pointer;
   width: 100%;
}
步骤 5:将我们的注册表单组件包含在应用程序模板文件 app.component.html 中
<app-register-form />
步骤 6:运行应用程序并测试注册表单。
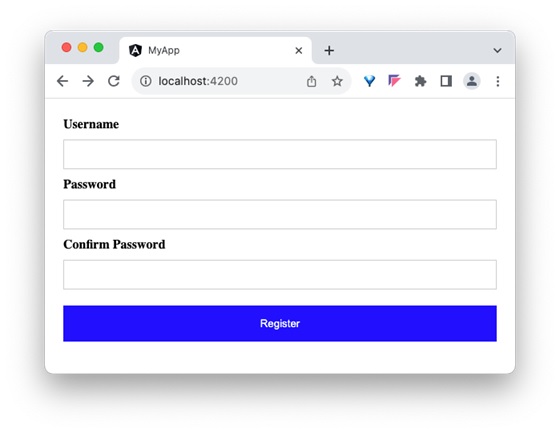
步骤 7:接下来,让我们在样式文件中创建一些类,并使用类绑定为按钮应用我们的新类。
步骤 8:接下来,在组件的样式文件中添加两个类 purple 和 small-caps。
.purple {
   background-color: purple;
}

.smallcaps {
   font-variant: small-caps;
}
步骤 9:在组件中添加一个成员变量 isPurple,如下所示:
isPurple: boolean = true
步骤 10:接下来,在组件中添加一个对象,其中 purple 和 smallcaps 类作为键,如下所示:
btnClass: Record<string, boolean> = {
   'purple': true,
   'smallcaps': true
}
步骤 11:接下来,通过类绑定将变量 isPurple 分配给按钮。
<button type="submit" [class.purple]="isPurple">Register</button>
步骤 12:运行应用程序并检查输出。输出将显示带有紫色颜色的按钮。
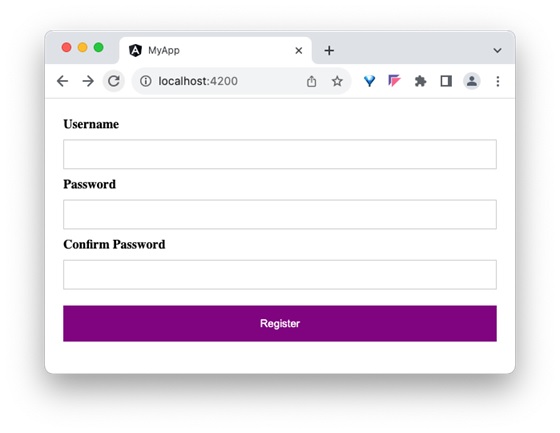
步骤 13:接下来,将对象 btnClass 重新分配给按钮的类,通过类绑定。
<button type="submit" [class]="btnClass">Register</button>
在这里,将应用 purple 和 small caps。
步骤 14:运行应用程序并检查输出。输出将显示带有紫色颜色的按钮,并且“注册”文本为小写格式。
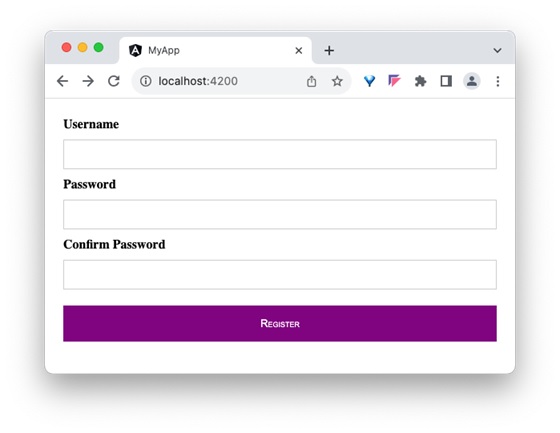
步骤 15:组件的完整列表如下:
import { Component } from '@angular/core';

@Component({
   selector: 'app-login-form',
   templateUrl: './register-form.component.html',
   styleUrls: ['./register-form.component.css']
})
export class RegisterFormComponent {
   isPurple: boolean = true

   btnClass: Record<string, boolean> = {
      'purple': true,
      'smallcaps': true
   }
}
步骤 16:组件模板的完整列表如下:
<div>
   <form method="post">
      <div class="container">
         <label for="username"><b>Username</b></label>
         <input type="text" name="username" required>

         <label for="password"><b>Password</b></label>
         <input type="password" name="password" required>

         <label for="confirm_password"><b>Confirm Password</b></label>
         <input type="password" name="confirm_password" required>

         <!-- <button type="submit" [class.purple]="isPurple">Register</button> -->
         <button type="submit" [class]="btnClass">Register</button>
      </div>
   </form>
</div>
结论
类绑定使开发人员能够轻松地通过字符串或自定义对象为任何 HTML 元素的 class 属性设置复杂的值。
样式绑定
动态 Web 应用程序通常具有动态样式,并在应用程序运行时设置。样式绑定是一种特殊的绑定,用于将动态值绑定到 HTML 元素的 style 属性。
让我们在本节中详细了解样式绑定。
样式绑定的语法
Angular 在样式绑定中提供了四种不同的语法。每种类型的样式绑定都支持一项特殊功能。这四种语法如下所示:
- 单样式绑定
- 带单位的单样式绑定
- 多样式绑定
- 通过自定义样式对象进行多样式绑定
让我们在接下来的章节中逐一学习。
单样式绑定
在单样式绑定中,CSS 样式的属性名应附加到 style. 字符串,并应括在方括号中。例如,可以使用 [style.width] 设置 HTML 元素的宽度,如下所示:
<div [style.width]="<template variable>">
   <!-- content -->
</div>
带单位的单样式绑定
在带单位的单样式绑定中,CSS 样式的属性名应附加到 style. 字符串,单位(.px)应附加到 CSS 样式的属性名,并应括在方括号中。例如,可以使用 [style.width.px] 设置 HTML 元素的宽度(以 px 为单位),如下所示:
<div [style.width.px]="<template variable>">
   <!-- content -->
</div>
多样式绑定
在多样式绑定中,style 字符串应括在方括号中,并且值应具有正确的 CSS 样式。例如,可以使用 [style] 设置 HTML 元素的宽度和高度,如下所示:
<div [style]="<template variable>">
   <!-- content -->
</div>
在这里,模板变量的一个示例输出是 width: 100px; height: 200px
带对象的多个样式绑定
在带对象的多个样式绑定中,style 字符串应括在方括号中,并且应使用 Record<string, string 类型的对象设置值,该对象分别具有正确的 CSS 属性名(或转换为驼峰式大小写)和值作为键和值。例如,可以使用 [style] 设置 HTML 元素的宽度和高度,如下所示:
<div [style]="<objects as template variable>">
   <!-- content -->
</div>
在这里,一个示例对象如下所示:
{
   width: '100px',
   height: '100px'
}
应用样式绑定
让我们创建一个简单的注册表单来了解属性绑定。我们的注册表单将具有三个输入字段,如下所示,以及一个提交注册表单的按钮。
1. Username
2. Password
3. Confirm password
步骤 1:使用 Angular CLI 创建一个新的应用程序 my-app,如下所示:
ng new my-app
步骤 2:使用 Angular CLI 创建一个新的注册表单组件 RegisterForm,如下所示:
ng generate component RegisterForm
步骤 3:接下来,打开注册表单组件的模板,并添加一个包含用户名、密码和确认密码的表单。
<div>
   <form method="post">
      <div class="container">
         <label for="username"><b>Username</b></label>
         <input type="text" name="username" required>

         <label for="password"><b>Password</b></label>
         <input type="password" name="password" required>

         <label for="confirm_password"><b>Confirm Password</b></label>
         <input type="password" name="confirm_password" required>

         <button type="submit">Register</button>
      </div>
   </form>
</div>
步骤 4:打开注册表单组件的 css 样式文件,并使用 CSS 样式化表单,如下所示:
.container {
   padding: 15px;
}

input[type=text], input[type=password] {
   width: 100%;
   padding: 10px 20px;
   margin: 10px 0;
   display: inline-block;
   border: 1px solid #ccc;
   box-sizing: border-box;
}

button {
   background-color: blue;
   color: white;
   padding: 15px 20px;
   margin: 10px 0;
   border: none;
   cursor: pointer;
   width: 100%;
}
步骤 5:将我们的注册表单组件包含在应用程序模板文件 app.component.html 中
<app-register-form />
步骤 6:运行应用程序并测试注册表单
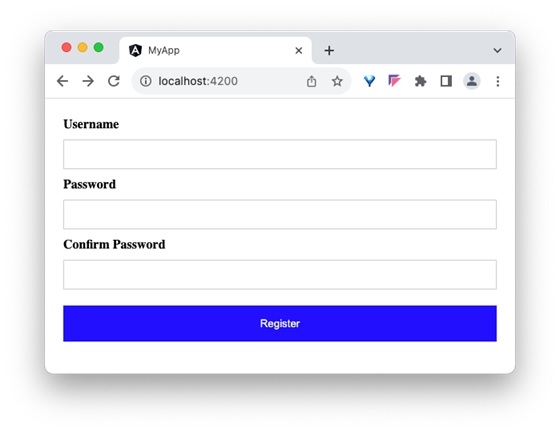
步骤 7:接下来,让我们尝试使用样式绑定为按钮应用样式。
步骤 8:在组件中添加一个包含必要值的物件,如下所示:
btnStyle: Record<string, string> = {
   'backgroundColor': 'purple',
   'color': 'white',
   'padding': '15px 20px',
   'margin': '10px 0',
   'border': 'none',
   'cursor': 'pointer',
   'width': '100%'
}
在这里,我们将按钮的背景颜色从蓝色更改为紫色。另外,请注意背景颜色样式属性 background-color 以驼峰式大小写 backgroundColor 表示。
步骤 9:接下来,删除组件样式文件中的按钮样式
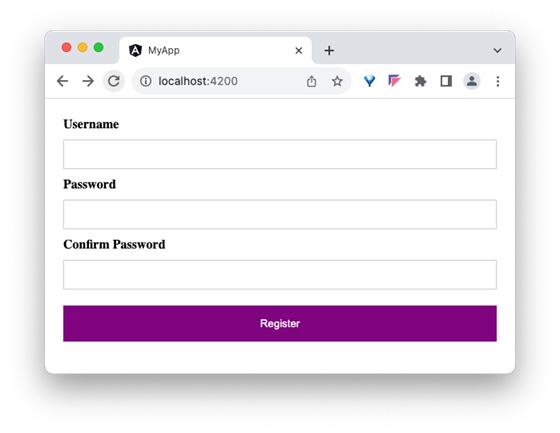
步骤 10:接下来,通过样式绑定将样式对象分配给按钮。
<button type="submit" [style]="btnStyle">Register</button>
步骤 11:组件的完整列表如下:
import { Component } from '@angular/core';

@Component({
   selector: 'app-login-form',
   templateUrl: './register-form.component.html',
   styleUrls: ['./register-form.component.css']
})
export class RegisterFormComponent {
   btnStyle: Record<string, string> = {
      'backgroundColor': 'purple',
      'color': 'white',
      'padding': '15px 20px',
      'margin': '10px 0',
      'border': 'none',
      'cursor': 'pointer',
      'width': '100%'
   }
}
步骤 12:组件模板的完整列表如下:
<div>
   <form method="post">
      <div class="container">
         <label for="username"><b>Username</b></label>
         <input type="text" name="username" required>

         <label for="password"><b>Password</b></label>
         <input type="password" name="password" required>

         <label for="confirm_password"><b>Confirm Password</b></label>
         <input type="password" name="confirm_password" required>

         <button type="submit" [style]="btnStyle" >Register</button>
      </div>
   </form>
</div>
步骤 13:运行应用程序并检查输出。
结论
样式绑定使开发人员能够轻松地通过纯样式或自定义样式对象为任何 HTML 元素的 style 属性设置复杂的值。