- Google AMP 教程
- Google AMP - 首页
- Google AMP - 概述
- Google AMP - 简介
- Google AMP - 图片
- Google AMP - 表单
- Google AMP - iframe
- Google AMP - 视频
- Google AMP - 按钮
- Google AMP - Timeago
- Google AMP - Mathml
- Google AMP - Fit Text
- Google AMP - 日期倒计时
- Google AMP - 日期选择器
- Google AMP - 故事
- Google AMP - 选择器
- Google AMP - 链接
- Google AMP - 字体
- Google AMP - 列表
- Google AMP - 用户通知
- Google AMP - 下一页
- Google AMP - 属性
- 样式和自定义 CSS
- Google AMP - 动态 CSS 类
- Google AMP - 操作和事件
- Google AMP - 动画
- Google AMP - 数据绑定
- Google AMP - 布局
- Google AMP - 广告
- Google AMP - 分析
- Google AMP - 社交小部件
- Google AMP - 媒体
- HTML 页面转换为 AMP 页面
- Google AMP - 基本语法
- Google AMP - 验证
- Google AMP - 缓存
- Google AMP - 自定义 JavaScript
- Google AMP - CORS
- Google AMP 有用资源
- Google AMP - 快速指南
- Google AMP - 有用资源
- Google AMP - 讨论
Google AMP - 按钮
按钮是 AMP 的另一个功能。请注意,AMP 中的按钮没有变化,它们的使用方式与标准 HTML 按钮标签一样。AMP 页面中按钮的唯一区别在于其事件的工作方式。
在本章中,我们将通过一些示例来展示按钮的工作原理以及如何在 AMP 组件中使用它。
灯箱示例代码
以下示例向我们展示了如何使用按钮来显示/隐藏 amp-lightbox,如下所示:
<!doctype html>
<html amp lang = "en">
   <head>
      <meta charset = "utf-8">
      <script async src = "https://cdn.ampproject.org/v0.js"></script>
      <title>Google AMP - Amp Lightbox</title>
      <link rel = "canonical" href = "http://example.ampproject.org/article-metadata.html">

      <meta name = "viewport" content ="width = device-width,minimum-scale = 1,initial-scale = 1">

      <style amp-boilerplate>
         body{
            -webkit-animation:-amp-start 8s steps(1,end) 0s 1 normal both;-moz-animation:
            -amp-start 8s steps(1,end) 0s 1 normal both;-ms-animation:
            -amp-start 8s steps(1,end) 0s 1 normal both;animation:
            -amp-start 8s steps(1,end) 0s 1 normal both
         }
         @-webkit-keyframes
         -amp-start{from{visibility:hidden}to{visibility:visible}}@-moz-keyframes
         -amp-start{from{visibility:hidden}to{visibility:visible}}@-ms-keyframes
         -amp-start{from{visibility:hidden}to{visibility:visible}}@-o-keyframes
         -amp-start{from{visibility:hidden}to{visibility:visible}}@keyframes
         -amp-start{from{visibility:hidden}to{visibility:visible}}
      </style>
      <noscript>
         <style amp-boilerplate>
            body{
               -webkit-animation:none;-moz-animation:none;-ms-an
               imation:none;animation:none
            }
         </style>
      </noscript>

      <script async custom-element = "amp-lightbox"
         src = "https://cdn.ampproject.org/v0/amp-lightbox-0.1.js">
      </script>

      <style amp-custom>
         amp-img {
            border: 1px solid #ddd;
            border-radius: 4px;
            padding: 5px;
         }
         button{
            background-color:
            #ACAD5C; color: white;
            padding: 12px 20px;
            border: none;
            border-radius: 4px;
            cursor: pointer;
            float: left;
         }

         .lightbox {
            background: rgba(211,211,211,0.8);
            width: 100%;
            height: 100%;
            position: absolute;
            display: flex;
            align-items: center;
            justify-content: center;
         }
      </style>
   </head>
   <body>
      <h3>Google AMP - Amp Lightbox</h3>
      <button on = "tap:my-lightbox">
         Show LightBox
      </button>
      <amp-lightbox id = "my-lightbox" layout = "nodisplay">
         <div class = "lightbox" on = "tap:my-lightbox.close" tabindex = "0">
            <amp-img alt = "Beautiful Flower"
               src = "images/flower.jpg"
               width = "246"
               height = "205">
            </amp-img>
         </div>
      </amp-lightbox>
   </body>
</html>
输出
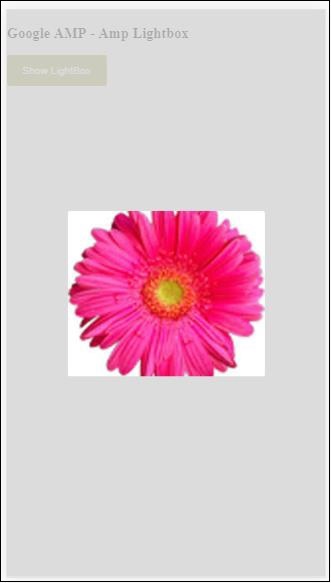
现在,您可以点击屏幕上的任意位置关闭灯箱。
在以上示例中,我们使用了如下所示的代码来使用按钮:
<button on = "tap:my-lightbox">
   Show LightBox
</button>
Next, we have added action on the button using on attribute as shown:
on = "tap:my-lightbox"
当您点击按钮时,操作将发生。请注意,灯箱的 id 已赋予它。当用户点击按钮时,灯箱将打开。类似地,您可以将按钮与任何组件上的 on 操作一起使用以与其交互。
广告