- Google AMP 教程
- Google AMP - 首页
- Google AMP - 概览
- Google AMP - 简介
- Google AMP - 图片
- Google AMP - 表单
- Google AMP - Iframes
- Google AMP - 视频
- Google AMP - 按钮
- Google AMP - Timeago
- Google AMP - Mathml
- Google AMP - Fit Text
- Google AMP - 倒计时
- Google AMP - 日期选择器
- Google AMP - 故事
- Google AMP - 选择器
- Google AMP - 链接
- Google AMP - 字体
- Google AMP - 列表
- Google AMP - 用户通知
- Google AMP - 下一页
- Google AMP - 属性
- 样式和自定义 CSS
- Google AMP - 动态 CSS 类
- Google AMP - 操作和事件
- Google AMP - 动画
- Google AMP - 数据绑定
- Google AMP - 布局
- Google AMP - 广告
- Google AMP - 分析
- Google AMP - 社交小部件
- Google AMP - 媒体
- HTML 页面到 AMP 页面
- Google AMP - 基本语法
- Google AMP - 验证
- Google AMP - 缓存
- Google AMP - 自定义 JavaScript
- Google AMP - CORS
- Google AMP 有用资源
- Google AMP 快速指南
- Google AMP - 有用资源
- Google AMP - 讨论
Google AMP 快速指南
Google AMP - 概览
Google Accelerated Mobile Pages (Google-AMP) 是 Google 的一个新的开源项目,专门用于使用 amp html 构建轻量级网页。该项目的主要目标是确保 amp 代码在所有可能的设备(如智能手机和平板电脑等)上都能正常工作并快速加载。
什么是 AMP?
加速移动页面 (AMP) 是 Google 的一个开源项目,专门设计用于使网页对移动设备友好,方法是使其渲染内容更快、更流畅并在任何浏览器中响应。
Google amp 的官方网站是 - https://www.ampproject.org/
为什么选择 AMP?
任何用户都希望网站能够非常快地加载内容。但是,当页面几乎充斥着图像、视频、动画、社交小部件时,情况可能并非如此,这使得页面非常沉重,从而增加了加载时间。这种情况可能会导致长期用户流失。
Google AMP 旨在解决此问题。AMP 有一种特殊的方式来处理图像、iframes、javascripts、广告、视频、动画、css、字体加载等。AMP 页面的内容缓存在 Google 端,因此每次用户点击搜索结果时,内容都会从缓存中提供。缓存版本也会及时更新,以便用户始终获得最新更新的页面。
为什么要选择 AMP?
本节告诉您为什么必须为您的网站选择 AMP -
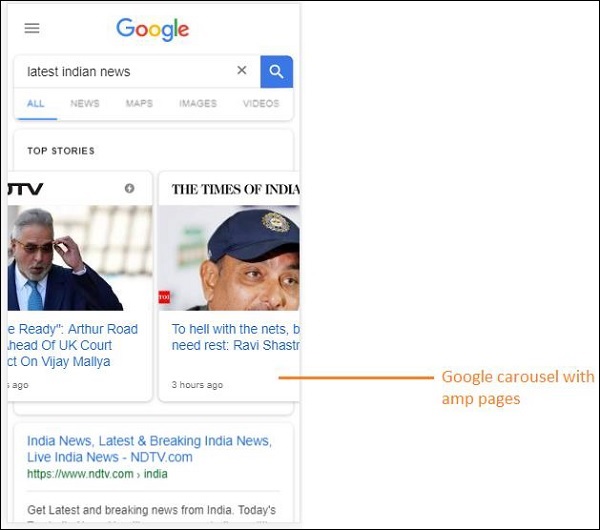
在 Google 搜索中优先显示
如今,当您在 Google 上搜索某些内容时,您会发现 Google 旋转木马显示在顶部,其中包含页面,然后是作为搜索响应的页面列表。显示的新闻旋转木马都是有效的 AMP 网站。这意味着 Google 优先考虑 amp 页面,并根据排名在新闻旋转木马中显示它们。
以下是使用关键词“最新印度新闻”在 Google 中进行搜索的示例 -

所有排名靠前的 AMP 页面都显示在 Google 旋转木马的开头,如上图所示。
当用户在 Google 搜索中搜索某些内容时,Google AMP 页面如下所示。请注意,AMP 页面上有一个 Google AMP 徽标。

更快的加载时间
当您的页面转换为 AMP 后,与非 amp 页面相比,加载时间将大大改善。更快的加载时间也是 Google 搜索中页面排名的重要因素。
无弹出窗口
使用 Google AMP 提供了愉快的网页浏览体验,因为用户不会看到使用 Google AMP 设计的页面的任何不需要的弹出窗口。
产生流量
当页面的加载速度快时,它会自动增加观看者数量,从而增加页面流量。
AMP 如何工作?
用于构建网站的最重要的组件是 javascript、图像、视频、字体、css 等。AMP 页面设计是在以独特的方式处理所有这些因素的情况下完成的。在本节中,让我们简要讨论 AMP 为使页面速度更快而做了什么。
异步 JavaScript
Javascript 在页面上起着重要作用,因为它有助于以动画、DOM 更改等形式为页面添加交互性。它还会降低页面速度,并可能阻止页面上其他内容的渲染。
AMP 如何处理 JavaScript?
AMP 异步加载 JavaScript。AMP 页面内严格不允许使用自定义 JavaScript。请注意,AMP 添加了许多组件,其中一些组件替换了现有的 html 标签;例如 amp-img、amp-iframe、amp-video、amp-lightbox、amp-animations 等。
对于每个组件,都有一个要加载的 JavaScript 文件,该文件在 script 标签中添加了 async 属性。页面上仅允许与 amp-组件相关的 JavaScript 文件,并且不允许 AMP 页面或第三方 javascript 文件中的任何其他 JavaScript。由于 AMP 使用 Google AMP 缓存,因此文件是从缓存中预加载的,从而使加载速度更快。
HTML 标签的大小
必须为图像、iframe、视频标签提供大小,以便 amp 页面可以在不加载资源的情况下找到页面上的空间。要加载的资源由 amp 页面优先考虑。内容比要加载的资源具有更高的优先级。
社交小部件/广告
Amp 提供了名为 amp-facebook、amp-twitter、amp-ad、amp-sticky 的特殊组件来处理要在页面上显示的社交小部件。AMP-ad 组件用于在页面上投放广告。AMP 在处理组件方面非常小心,并根据需要优先加载内容。
CSS
AMP 页面不允许使用外部 CSS。任何自定义 CSS 都可以利用 amp-custom 属性在 style 标签内添加。内联 CSS 也允许。AMP 以各种可能的方式减少了 http 请求。
字体
AMP 页面允许使用字体,并且字体加载的优先级由 AMP 决定。
动画
AMP 支持 amp-animation 组件并允许现代浏览器支持的过渡。
考虑到上面列出的所有要点,AMP 对为要提供的字体、图像、iframes、广告等发出的 HTTP 请求非常小心。页面折叠上方的资源首先呈现,然后优先考虑页面折叠下方的资源。
其他要点
Google AMP 缓存是另一个重要的因素,它有助于更快地呈现内容,因为内容是从缓存中获取的。
发布者必须维护两个网站 amp 和非 amp 页面。例如,假设该网站的地址为 - https://www.mypage.com。然后,内部用于在桌面上提供非 amp 页面的页面将是https://www.mypage.com/news。对于设备或 AMP,它将是https://www.mypage/com/news/amp/
Google 如何识别 AMP 和非 AMP 页面?
现在,让我们了解 Google 如何识别 AMP 和非 AMP 页面。
当 Google 搜索抓取页面时,如果它碰巧在 html 或 <html amp> 或 <html ⚡> 中获取 amp,它就知道这是一个 AMP 页面。
此外,如果 Google 遇到非 amp 页面,首先要了解 amp 页面,必须在 amp 和非 amp 页面的 html 页面的 head 部分添加以下链接标签。
非 amp 页面的页面 URL
<link rel = "amphtml" href = "https://www.mypage.com/news/amp/myfirstnews_amp.html">
这里 rel = ”amphtml” 指定用于非 amp 页面以指向 amp 版本,以便 Google 根据平台显示正确的版本。
amp 页面的页面 URL
<link rel = "canonical" href = "https://www.mypage.com/news/myfirstnews.html">
这里 rel = ”canonical” 指定在 amp 页面中指向 html 的标准版本,以便 Google 根据平台显示正确的版本。
如果您的网站只有一个 amp 页面,您仍然不应该忘记添加 rel = ”canonical”,它将指向自身 -
<link rel = "canonical" href = "https://www.mypage.com/news/amp/myfirstnews_amp.html">
下图显示了指向 amp 页面的 rel=”amphtml” 和指向标准 html 页面的 rel = ”canonical” 的引用。

Google AMP 的功能
在本节中,让我们讨论 Google AMP 提供的重要功能 -
Amp 缓存
Google Amp 缓存是添加到 amp 的核心功能之一。它提供了一个基于代理的内容交付网络来提供纯 amp 页面。Amp 缓存默认提供给所有有效的 amp 页面。它有助于与非 amp 页面相比更快地呈现页面。目前有两个 amp 缓存提供商 Google AMP Cache 和 Cloudflare AMP Cache。当用户点击并重定向到 amp 页面时,内容将从 Google 缓存中提供。
Amp 组件
Amp 有一个用于各种目的的大型组件列表。其中一些列在下面 -
amp-img - 用于在 amp 页面上显示图像。
amp-iframe - 用于显示 iframe,其中包含要在页面上显示的外部内容。请注意,使用的 iframe 是沙盒化的,这意味着它需要权限才能在 amp 页面上显示数据。因此,必须为沙盒属性指定跨源详细信息。
amp-video - 用于在页面上显示视频。
amp-audio - 用于在页面上显示音频。
amp-datepicker - 用于在页面上显示日期小部件。您无需使用任何第三方日期选择器,因为 amp 中直接提供了相同的日期选择器。
amp-story - 在页面上显示您的故事的媒介。
amp-selector − 是一个 AMP 组件,用于显示选项菜单,用户可以在选项之间进行选择。显示的选项可以是文本、图像或任何其他 AMP 组件。
amp-list − 是一个 AMP 组件,用于调用 CORS JSON 端点,并将 JSON 文件中的数据显示在模板内。
广告
广告对于发布者来说非常重要,因为他们的收入完全依赖于页面上投放的广告。AMP 不允许在页面上添加任何外部 JavaScript,但引入了一个名为 amp-ad 的特殊 AMP 组件,用于处理页面上的广告投放。
发布者希望在其页面上投放的广告网络需要支持 AMP 广告。例如,要在页面上投放双击广告,双击需要支持使用 amp-ad 组件投放广告。以下代码显示了一个双击的 amp-ad 标签。
<amp-ad width = "300"
   height = "200"
   type = "doubleclick"
   data-slot = "/4119129/ad-layout">
   <div placeholder>
      <b>Placeholder here!!!</b>
   </div>
</amp-ad>
AMP 还支持 amphtmlads,它们是由 AMP 组件和 HTML 开发的纯 AMP 广告。AMP 还支持 amp-sticky-ads,这是一种显示在页面底部的页脚广告。AMP 中广告的详细信息将在 AMP 广告章节中讨论。
社交小部件
像 Facebook、Twitter、Instagram 这样的社交小部件已变得非常重要,需要显示在发布者的页面上,以便在社交媒体上分享页面。AMP 通过开发 AMP 组件(如 amp-facebook、amp-twitter、amp-instagram、amp-pinterest 等)扩展了对所有重要社交媒体小部件的支持,以便在页面上使用。
AMP 媒体
页面上的另一个重要组件是媒体,用于显示视频,并在视频之间投放中插广告。AMP 提供了一种使用 amp-jwplayer、amp-youtube 等来实现此目的的方法。您无需加载任何额外的第三方文件即可在页面上显示 jwplayer 和 youtube。
AMP 分析
AMP 分析是一个 AMP 组件,用于跟踪给定页面上的数据。可以记录页面上所有用户交互并将其保存下来,以分析数据,以便进一步改进或用于业务目的。
AMP 动画
amp-animation 是一个 AMP 组件,用于定义要在其他 AMP 组件上使用的动画。它支持动画和过渡,可在现代浏览器中良好运行。您无需使用任何外部 CSS 库来执行动画,可以直接使用 amp-animation 组件。
AMP 布局
AMP-Layout 是 Google-AMP 中的重要功能之一。AMP 布局确保在页面加载时正确呈现 AMP 组件,而不会出现任何闪烁或滚动问题。
Google AMP 确保在执行任何其他远程资源(例如图像的 HTTP 请求、数据调用)之前完成页面上的布局渲染。可用于布局的属性包括所有 AMP 组件的宽度/高度、具有响应式、填充、固定等值的布局属性、资源加载时间过长或出现错误时显示的占位符属性以及资源出现错误时显示的回退属性。
AMP 显示布局
AMP 支持许多用于在页面上显示内容的组件,而无需任何第三方库或在页面上进行任何繁重的 CSS 样式。列表包括
手风琴 − amp-accordion 是一个 AMP 组件,用于以展开-折叠格式显示内容。用户在移动设备上查看它变得很容易,他们可以根据自己的选择从手风琴中选择部分。
轮播 − amp-carousel 是一个 AMP 组件,用于在屏幕上显示一组类似的内容,并使用箭头在内容之间切换。
灯箱 − amp-lightbox 是一个 AMP 组件,它将占据整个视口并像覆盖层一样显示。
滑块 − amp-image-slider 是一个 AMP 组件,用于通过在图像上垂直移动滑块来比较两张图像。
侧边栏 − AMP 侧边栏是一个 AMP 组件,用于显示在点击按钮时从窗口侧面滑出的内容。
AMP 的优势
AMP 页面轻量级且加载速度更快
Google 在 Google 搜索中优先考虑 AMP 页面。AMP 页面以轮播格式列在页面顶部。为了获得更高的排名,将您的页面转换为 AMP 是一个很好的优势。
AMP 页面对移动设备友好,因为内容具有响应性,并且在所有浏览器中都能很好地调整,无需任何额外的样式。
AMP 页面的用户满意度有所提高,因为与非 AMP 页面相比,页面加载速度更快,从而节省了带宽和手机电量。
AMP 的缺点
AMP 具有以下缺点:
发布者必须为其页面维护两个版本:AMP 和非 AMP。
用户必须付出额外的努力才能将非 AMP 页面转换为 AMP。由于 AMP 不支持自定义 JavaScript 或加载外部 JavaScript,因此必须使用 AMP 中可用的任何方法来实现相同的功能。
Google AMP - 简介
Google 加速移动页面(Google-AMP)是 Google 的一个新的开源项目,专门用于使用 AMP HTML 构建轻量级网页。该项目的主要目标是确保 AMP 代码在所有可能的设备(如智能手机和平板电脑)上都能正常工作并快速加载。
AMP 只是标准 HTML 的扩展。一些 HTML 标签已更改,并且 AMP 对其使用添加了限制。在本章中,我们将列出已更改的 HTML 标签以及对它们添加的限制。处理加载外部资源(例如图像、CSS、JS、表单提交、视频、音频等)的标签已更改。
此外,AMP 还添加了许多新功能,例如 amp-date-picker、amp-facebook、amp-ad、amp-analytics、amp-ad、amp-lightbox 等,可以直接在 HTML 页面中使用。其余用于显示的标签则按原样使用。
通过所有这些更改和新功能,AMP 有望在实际环境中使用时提供更快的加载速度和更好的页面性能。
当您在手机上使用 Google 搜索查找任何内容时,在 Google 轮播中顶部显示的内容大多是 AMP 页面,如下所示:
当您点击 AMP 页面时,您在地址栏中获得的 URL 如下所示:
https://www.google.co.in/amp/s/m.timesofindia.com/sports/cricket/india-in-australia/to-hell-with-the-nets-boys-need-rest-ravi-shastri/amp_articleshow/67022458.cms

URL 不是直接来自发布者,而是 Google 指向其在 Google 服务器上的自身副本,这是一个缓存版本,与非 AMP 页面相比,它有助于更快地呈现内容。这仅在设备上或 Google 模拟器模式下发生。
AMP 页面示例
AMP 页面的示例如下所示:
<!doctype html>
<html amp>
   <head>
      <meta charset = "utf-8">
      <title>Amp Sample Page</title>
      <link rel = "canonical" href = "./regular-html-version.html">
      <meta name = "viewport" content = "width = device-width,
         minimum-scale = 1,initial-scale = 1">
      <style amp-custom>
         h1 {color: red}
      </style>
      <script type = application/json>{
         "vars": {
            "uid": "23870",
            "domain": "dummyurl.com",
            "sections": "us",
            "authors": "Hello World"
         }
      }
      </script>
      <style amp-boilerplate>
         body{
            -webkit-animation:
            -amp-start 8s steps(1,end) 0s 1 normal both;-moz-animation:
            -amp-start 8s steps(1,end) 0s 1 normal both;-ms-animation:
            -amp-start 8s steps(1,end) 0s 1 normal both;animation:
            -amp-start 8s steps(1,end) 0s 1 normal both
         }
         @-webkit-keyframes
         -amp-start{from{visibility:hidden}to{visibility:visible}}@-moz-keyframes
         -amp-start{from{visibility:hidden}to{visibility:visible}}@-ms-keyframes
         -amp-start{from{visibility:hidden}to{visibility:visible}}@-o-keyframes
         -amp-start{from{visibility:hidden}to{visibility:visible}}@keyframes
         -amp-start{from{visibility:hidden}to{visibility:visible}}
      </style>
      <noscript>
         <style amp-boilerplate>
            body{
               -webkit-animation:none;
               -moz-animation:none;
               -ms-animation:none;
               animation:none}
         </style>
      </noscript>

      <script async src = "https://cdn.ampproject.org/v0.js"></script>
   </head>
   <body>
      <h1>Amp Sample Page</h1>
      <p>
         <amp-img src = "imgurl.jpg" width = "300" height = "300"
            layout = "responsive"></amp-img>
      </p>
      <amp-ad width = "300" height = "250" type = "doubleclick"
         data-slot = "/4119129/no-ad">
         <div fallback>
            <p style = "color:green;font-size:25px;">No ads to Serve!</p>
         </div>
      </amp-ad>
   </body>
</html>
AMP 页面中的注意事项
让我们了解一下程序员在 AMP 页面中需要遵循的一些注意事项。
必填标签
AMP 页面中需要包含一些必填标签,如下所示:
我们必须确保在 html 标签中添加了 amp 或 ⚡,如下所示:
<html amp>
   OR
<html ⚡>
<head> 和 <body> 标签应添加到 HTML 页面中。
以下必填元标签应添加到页面的 head 部分;否则,AMP 验证将失败
<meta charset = "utf-8">
<meta name = "viewport" content = "width=device-width, minimum-scale = 1, initial-scale = 1">
在 head 标签内添加 rel = "canonical" 的链接
<link rel = "canonical" href = "./regular-html-version.html">
带有 amp-boilerplate 的 style 标签:
<style amp-boilerplate>
   body{
      -webkit-animation:
      -amp-start 8s steps(1,end) 0s 1 normal both;-moz-animation:
      -amp-start 8s steps(1,end) 0s 1 normal both;-ms-animation:
      -amp-start 8s steps(1,end) 0s 1 normal both;animation:
      -amp-start 8s steps(1,end) 0s 1 normal both
   }
   @-webkit-keyframes
   -amp-start{from{visibility:hidden}to{visibility:visible}}@-moz-keyframes
   -amp-start{from{visibility:hidden}to{visibility:visible}}@-ms-keyframes
   -amp-start{from{visibility:hidden}to{visibility:visible}}@-o-keyframes
   -amp-start{from{visibility:hidden}to{visibility:visible}}@keyframes
   -amp-start{from{visibility:hidden}to{visibility:visible}}
</style>
带有 amp-boilerplate 的 noscript 标签:
<noscript>
   <style amp-boilerplate>
      body{
         -webkit-animation:none;
         -moz-animation:none;
         -ms-animation:none;
         animation:none
      }
   </style>
</noscript>
非常重要的是带有 async 属性的 amp 脚本标签,如下所示:
<script async src = "https://cdn.ampproject.org/v0.js"> </script>
如果您想向页面添加自定义 CSS,请注意,我们不能在 AMP 页面中调用外部样式表。要添加自定义 CSS,所有 CSS 都必须在此处添加,如下所示:
<style amp-custom>
   //all your styles here
</style>
style 标签应添加 amp-custom 属性。
AMP 组件的脚本
请注意,在 AMP 页面中严格不允许使用带有 src 和 type = ”text/javascript” 的脚本标签。仅允许在 head 部分添加带有 async 属性且与 AMP 组件相关的脚本标签。
本节列出了用于 AMP 组件的一些脚本,如下所示:
amp-ad
<script async custom-element = "amp-ad"
   src = "https://cdn.ampproject.org/v0/amp-ad-0.1.js">
</script>
amp-iframe
<script async custom-element = "amp-iframe"
   src = "https://cdn.ampproject.org/v0/amp-iframe-0.1.js">
</script>
请注意,脚本具有 async 和 custom-element 属性,以及要加载的 AMP 组件的名称。AMP 根据 async 和 custom-element 属性验证脚本标签,并且不允许加载任何其他脚本。它确实接受type=application/json,我们在示例文件中添加了该属性,如下所示
<type = application/json>
{
   "vars": {
      "uid": "23870",
      "domain": "dummyurl.com",
      "sections": "us",
      "authors": "Hello World"
   }
}
</script>
如果需要,上述脚本可以与其他 AMP 组件一起使用,例如 amp-analytics。
HTML 标签
到目前为止,我们已经了解了 AMP 页面中所需的必填标签。现在我们将讨论允许/不允许的 HTML 元素以及对它们的限制。
以下是允许/不允许的 HTML 标签列表:
| 序号 | HTML 标签和描述 |
|---|---|
| 1 | img 此标签已替换为 amp-img。在 AMP 页面中不允许使用直接的 img 标签 |
| 2 | video 替换为 amp-video |
| 3 | audio 替换为 amp-audio |
| 4 | iframe 替换为 amp-iframe |
| 5 | object 不允许 |
| 6 | embed 不允许 |
| 7 | form 可以用作 <form>。我们需要添加脚本才能在 AMP 页面中使用表单。 示例: <script async custom-element = "amp-form" src = "https://cdn.ampproject.org/v0/amp-form-0.1.js"> </script> |
| 8 | 输入元素 Allowed.<input[type = image]>, <input[type = button]>, <input[type = password]>, <input[type = file]> are not allowed |
| 9 | <fieldset> 允许 |
| 10 | <label> 允许 |
| 11 | P、div、header、footer、section 允许 |
| 12 | button 允许 |
| 13 | a <a> 标签在满足以下条件时允许使用:href 不得以 javascript 开头。如果存在,target 属性值必须为 _blank。 |
| 14 | svg 不允许 |
| 15 | meta 允许 |
| 16 | Link 允许。但不允许加载外部样式表。 |
| 17 | style 允许。它需要具有 amp-boilerplate 或 amp-custom 属性。 |
| 18 | base 不允许 |
| 19 | noscript 允许 |
注释
不允许使用条件 HTML 注释。例如:
<!--[if Chrome]> This browser is chrome (any version) <![endif]-->
HTML 事件
我们在 HTML 页面中使用的事件(如 onclick、onmouseover)在 AMP 页面中不允许使用。
我们可以按如下方式使用事件:
on = "eventName:elementId[.methodName[(arg1 = value, arg2 = value)]]"
以下是在 input 元素上使用的事件示例:
<input id = "txtname" placeholder = "Type here"
on = "inputthrottled:
AMP.setState({name: event.value})">
使用的事件是 input-throlled。
类
您不能在页面中使用以-amp- 或 i-amp-为前缀的类。此外,您可以根据需要使用类名。
ID
您不能为 HTML 元素使用以 -amp 或 i-amp- 为前缀的 ID。此外,您可以根据需要为 HTML 元素使用 ID。
链接
AMP 页面不允许在 href 中使用 JavaScript。
示例
<a href = "javascript:callfunc();">click me</a>
样式表
AMP 页面不允许使用外部样式表。可以在内部添加页面所需的样式 -
<style amp-custom> //all your styles here </style>
style 标签应添加 **amp-custom** 属性。
@规则
样式表中允许以下 @规则 -
@font-face、@keyframes、@media、@page、@supports。@import 不允许使用。未来会添加对它的支持。
@keyframes 允许在 *<style **amp-custom**>* 中使用。如果 @keyframes 太多,最好创建 *<style **amp-keyframes**>* 标签并在 AMP 文档末尾调用它。
类名、ID、标签名和属性不应以 *-amp-* 和 i-amp- 为前缀,因为它们在 AMP 代码中用于内部,如果在页面运行时也定义了它们,可能会导致冲突。
**!important** 属性在样式中不允许使用,因为 AMP 需要在必要时控制元素大小。
自定义字体
AMP 页面允许使用自定义字体的样式表。
示例
<link rel = "stylesheet" href = "https://fonts.googleapis.ac.cn/css?family=Tangerine">
AMP 页面可以使用来自以下来源的白名单字体。
Fonts.com - https://fast.fonts.net
Google Fonts - https://fonts.googleapis.ac.cn
Font Awesome - https://maxcdn.bootstrap.ac.cn
Typekit - https://use.typekit.net/kitId.css(相应替换 kitId)
**注意** - AMP 页面允许使用 @font-face 自定义字体。
示例
@font-face {
font-family: myFirstFont;
src: url(dummyfont.woff);
}
AMP 运行时
加载 AMP 核心文件后,将确定 AMP 运行时环境 -
<script async src = "https://cdn.ampproject.org/v0.js"></script>
核心文件负责加载外部资源,确定加载优先级,并在将 #development=1 添加到 AMP URL 时帮助验证 AMP 文档。
示例
https://:8080/googleamp/amppage.html#development=1
在浏览器中执行上述 URL 时,如果 AMP 验证失败,将列出错误,如果无错误,则显示 AMP 验证成功消息。
AMP 组件
AMP 添加了许多 amp-组件。它们主要用于以有效的方式处理资源加载。它还包含用于处理动画、显示数据、显示广告、社交小部件等的组件。
AMP 中有两种类型的组件。
- 内置
- 外部
**注意** - <amp-img> 是一个内置组件,如果添加了核心 AMP js 文件,则可用。外部组件,如 <amp-ad>、<amp-facebook>、<amp-video> 等,需要添加与组件相关的相应 js 文件。
常用属性
几乎所有可用的 AMP 组件都将提供诸如 width、height、layout、placeholder 和 fallback 等属性。这些属性对于任何 AMP 组件都非常重要,因为它决定了组件在 AMP 页面中的显示方式。
本教程后面章节将详细讨论所有列出的 AMP 功能。
请注意,本教程中的所有示例都针对设备进行了测试,并使用了 Google 移动模拟器模式。现在让我们详细了解一下。
Google 移动模拟器
要使用 Google 移动模拟器,请打开 Chrome 浏览器,右键单击并打开开发者控制台,如下所示 -
我们可以看到 Chrome 的开发者工具,如上所示。点击您想在浏览器中测试的链接。注意页面以桌面模式显示。
要获取上述页面以测试设备,请点击切换设备工具栏,如下所示 -
您也可以使用快捷键 Ctrl+shift+M。这会将桌面模式更改为设备模式,如下所示 -

可以查看设备列表,如下所示 -
您可以选择要测试页面的设备。请注意,本教程中的所有页面都如上所示在 Google 移动模拟器上进行了测试。Firefox 和最近的 Internet Explorer 浏览器也提供了相同的特性。
Google AMP - 图片
在 Google AMP 页面中使用的图像与在标准 html 页面中使用的图像类似,但唯一的区别是标签名称的使用方式以及一些其他属性。本章将详细讨论这些内容。
观察以下语法 -
标准 HTML
<img src = ”example.jpg” width = ”300” height = ”250” alt = ”Example” ></img>
在 AMP 页面中
<amp-img src = "example.jpg" alt = "Example" height = "300" width = "250" ><//amp-img>
请注意,标签从 **img** 更改为 **amp-img**。
为什么要使用 amp-img 而不是 img?
将 img 更改为 amp-img 的原因是为了更好地控制页面布局和加载图像的网络请求。Amp 为图像资源添加了延迟加载,并根据页面上其他可用资源的优先级进行加载。
示例
观察以下代码以更好地理解 -
<!doctype html>
<html amp lang = "en">
<head>
<meta charset = "utf-8">
<script async src = "https://cdn.ampproject.org/v0.js"></script>
<title>Google AMP - Image</title>
<link rel = "canonical" href = "http://example.ampproject.org/articlemetadata.html">
<meta name = "viewport" content = "width = device-width,
minimum-scale = 1,initialscale = 1">
<style amp-boilerplate>
body{
-webkit-animation:
-amp-start 8s steps(1,end) 0s1 normal both;-moz-animation:
-amp-start 8s steps(1,end) 0s 1 normal both;-msanimation:
- amp-start 8s steps(1,end) 0s 1 normal both;animation:
-amp-start 8s steps(1,end) 0s 1 normal both
}
@-webkit-keyframes
-ampstart{from{visibility:hidden}to{visibility:visible}}@-moz-keyframes
-ampstart{from{visibility:hidden}to{visibility:visible}}@-ms-keyframes
-ampstart{from{visibility:hidden}to{visibility:visible}}@-o-keyframes
-ampstart{from{visibility:hidden}to{visibility:visible}}@keyframes
amp-start{from{visibility:hidden}to{visibility:visible}}
</style>
<noscript>
<style amp-boilerplate>
body{
-webkit-animation:none;
-moz-animation:none;
-msanimation:none;
animation:none
}
</style>
</noscript>
</head>
<body>
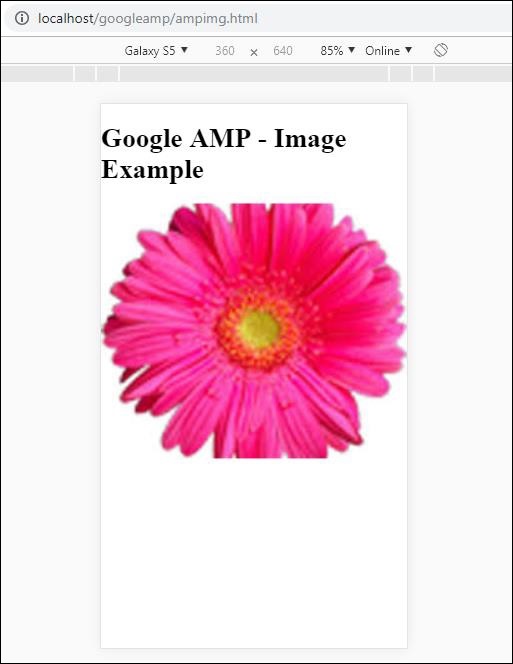
<h1>Google AMP - Image Example</h1>
<amp-img alt = "Beautiful Flower" src = "images/flower.jpg"
width = "246"
height = "205">
</amp-img>
</body>
</html>
输出
执行上述代码后,您会发现结果如下所示 -

您还可以通过向 *amp-img* 标签添加属性 layout = ”responsive” 来使图像响应,如下所示
示例
观察以下代码以更好地理解 -
<amp-img alt = "Beautiful Flower" src = "images/flower.jpg" width = "246" height = "205" layout = "responsive"> </amp-img>
输出
执行上述代码后,您会发现结果如下所示 -
Google AMP - 表单
本章介绍如何在 Google AMP 中使用表单。
请注意,表单标签与标准 HTML 中的相同。由于 AMP 对表单的使用添加了特殊的限制,因此我们需要添加 amp-form JavaScript 文件才能使用表单。
amp-form 脚本
<script async custom-element = "amp-form" src = "https://cdn.ampproject.org/v0/ampform-0.1.js"></script>
要在 AMP 页面中使用表单,我们需要在 .html 文件中包含上述脚本。amp-form JavaScript 文件支持 **http** 和 **xmlhttprequest** 进行表单提交。使用 HTTP 请求将重新加载页面,而使用 **xmlhttprequest** 则不会重新加载页面,其行为类似于 ajax 请求。
AMP 中的表单标签
For xmlhttprequest : <form method = "post" class = "p2" action-xhr = "submitform.php" target = "_top"> //Input fields here </form> For http : <form method = "post" class = "p2" action = "submitform.php" target = "_top"> //Input fields here </form>
Amp-form 提供特殊的属性,即 *submit-error* 和 *submit-success*,用于在提交表单时处理错误和成功。
示例
amp-form 的示例如下所示 -
<!doctype html>
<html amp lang = "en">
<head>
<meta charset = "utf-8">
<script async src = "https://cdn.ampproject.org/v0.js"></script>
<title>Google AMP - Form</title>
<link rel = "canonical" href = "ampform.html">
<meta name = "viewport" conten t = "width = device-width,
minimum-scale = 1,initialscale = 1">
<style amp-boilerplate>
body{
-webkit-animation:
-amp-start 8s steps(1,end) 0s1 normal both;-moz-animation:
-amp-start 8s steps(1,end) 0s 1 normal both;-msanimation:
-amp-start 8s steps(1,end) 0s 1 normal both;animation:
-amp-start 8s steps(1,end) 0s 1 normal both
}
@-webkit-keyframes
-ampstart{from{visibility:hidden}to{visibility:visible}}@-moz-keyframes
-ampstart{from{visibility:hidden}to{visibility:visible}}@-ms-keyframes
-ampstart{from{visibility:hidden}to{visibility:visible}}@-o-keyframes
-ampstart{from{visibility:hidden}to{visibility:visible}}@keyframes
-ampstart{from{visibility:hidden}to{visibility:visible}}
</style>
<noscript>
<style amp-boilerplate>
body{
-webkit-animation:none;
-moz-animation:none;
-msanimation:none;
animation:none
}
</style>
</noscript>
<script async custom-element = "amp-form"
   src = "https://cdn.ampproject.org/v0/amp-form-0.1.js">
</script>
<script async custom-template = "amp-mustache"
src = "https://cdn.ampproject.org/v0/amp-mustache-0.2.js">
</script>
<style amp-custom>
form.amp-form-submit-success [submit-success],
form.amp-form-submit-error [submit-error]{
margin-top: 16px;
}
form.amp-form-submit-success [submit-success] {
color: white;
background-color:gray;
}
form.amp-form-submit-error [submit-error] {
color: red;
}
form.amp-form-submit-success.hide-inputs > input {
display: none;
}
</style>
</head>
<body>
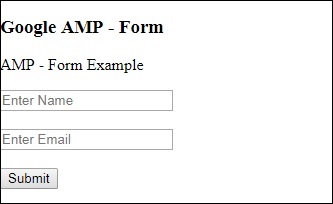
<h3>Google AMP - Form</h3>
<form method = "post"
class = "p2"
action-xhr = "submitform.php"
target = "_top">
<p>AMP - Form Example</p>
<div>
<input type = "text" name = "name" placeholder = "Enter
Name" required><br/><br/>
<input type = "email" name = "email"
placeholder = "Enter Email" required>
<br/>
<br/>
</div>
<input type = "submit" value = "Submit">
<div submit-success>
<template type = "amp-mustache">
Form Submitted! Thanks {{name}}.
</template>
</div>
<div submit-error>
<template type = "amp-mustache">
Error! {{name}}, please try again.
</template>
</div>
</form>
</body>
</html>
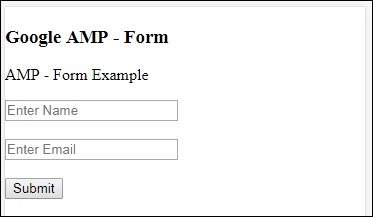
输出
执行上述代码后,您会发现结果如下所示 -
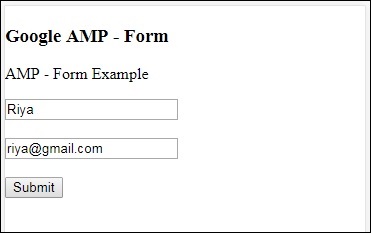
现在,输入详细信息并点击提交按钮。显示的输出屏幕如下所示 -
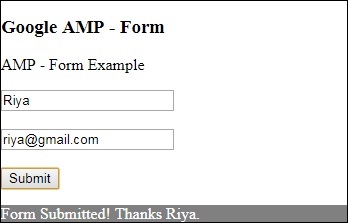
注意,我们使用了 amp-mustache 进行数据绑定。该表单使用 action-xhr 即 xmlhttprequest 提交表单。我们使用了 **submitform.php** 文件,该文件以 json 格式返回数据。
<form method = "post" class = "p2" action-xhr = "submitform.php" target = "_top"> </form>
submitform.php
<?php
if(!empty($_POST)){
$domain_url = (isset($_SERVER['HTTPS']) ? "https" : "http") . "://$_SERVER[HTTP_HOST]";
header("Content-type: application/json");
header("AMP-Access-Control-Allow-Source-Origin: " . $domain_url);
header("Access-Control-Expose-Headers: AMP-Access-Control-Allow-Source-Origin");
$myJSON = json_encode($_POST);
echo $myJSON;
}
?>
为了使表单使用 xmlhttprequest 工作,我们需要根据 CORS 规范添加标头。添加到 submitform.php 的响应标头的详细信息如下所示 -
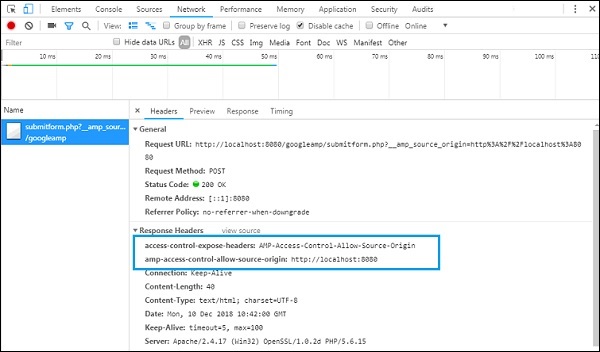
为了使表单工作,我们需要添加诸如 **access-control-expose-headers**(值为 **AMP-Access-Control-Allow-Source-Origin**)和 **amp-access-controlallow-source-origin** - **https://:8080** 等标头。
请注意,我们正在使用 php 文件和 apache 服务器。在 php 文件中,我们添加了如下所示的必需标头 -
<?php
if(!empty($_POST)){
$domain_url = (isset($_SERVER['HTTPS']) ? "https" : "http") . "://$_SERVER[HTTP_HOST]";
header("Content-type: application/json");
header("AMP-Access-Control-Allow-Source-Origin: " . $domain_url);
header("Access-Control-Expose-Headers: AMP-Access-Control-Allow-Source-Origin");
$myJSON = json_encode($_POST);
echo $myJSON;
}
?
?>
如果我们使用普通 HTTP 请求,页面将重新加载,如下所示 -
对于 HTTP 请求,我们使用了如下表单 -
<form method = "GET" class = "p2" action = "submitform.php" target = "_top"> </form>
示例
观察以下代码以更好地理解 -
<!doctype html>
<html amp lang = "en">
<head>
<meta charset = "utf-8">
<script async src = "https://cdn.ampproject.org/v0.js"></script>
<title>Google AMP - Form</title>
<link rel = "canonical" href = "ampform.html">
<meta name = "viewport" content = "width = device-width,minimum-scale = 1,initialscale = 1">
<style amp-boilerplate>
body{
-webkit-animation:
-amp-start 8s steps(1,end) 0s1 normal both;-moz-animation:
-amp-start 8s steps(1,end) 0s 1 normal both;-msanimation:
-amp-start 8s steps(1,end) 0s 1 normal both;animation:
-amp-start 8s steps(1,end) 0s 1 normal both
}
@-webkit-keyframes
-ampstart{from{visibility:hidden}to{visibility:visible}}@-moz-keyframes
-ampstart{from{visibility:hidden}to{visibility:visible}}@-ms-keyframes
-ampstart{from{visibility:hidden}to{visibility:visible}}@-o-keyframes
-ampstart{from{visibility:hidden}to{visibility:visible}}@keyframes
-ampstart{from{visibility:hidden}to{visibility:visible}}
</style>
<noscript>
<style amp-boilerplate>
body {
-webkit-animation:none;
-moz-animation:none;
-msanimation:none;
animation:none}
>/style>
</noscript>
<script async custom-element = "amp-form"
src = "https://cdn.ampproject.org/v0/amp-form-0.1.js">
</script>
<script async custom-template = "amp-mustache"
src = "https://cdn.ampproject.org/v0/amp-mustache-0.2.js">
</script>
<style amp-custom>
form.amp-form-submit-success [submit-success],
form.amp-form-submit-error [submit-error]{
margin-top: 16px;
}
form.amp-form-submit-success [submit-success] {
color: white;
background-color:gray;
}
form.amp-form-submit-error [submit-error] {
color: red;
}
form.amp-form-submit-success.hide-inputs >
input {
display: none;
}
</style>
</head>
<body>
<h3>Google AMP - Form</h3>
<form method = "GET" class = "p2" action = "submitform.php" target = "_top">
<p>AMP - Form Example</p>
<div>
<input type = "text" name = "name" placeholder = "Enter Name" required>
<br/>
<br/>
<input type = "email" name = "email" placeholder = "Enter Email" required>
<br/>
<br/>
<div>
<input type = "submit" value = "Submit">
<div submit-success>
<template type = "amp-mustache">
Form Submitted! Thanks {{name}}.
</template>
</div>
<div submit-error>
<template type = "amp-mustache">
Error! {{name}}, please try again.
</template>
</div>
</form>
</body>
</html>
输出
执行上述代码后,您会发现结果如下所示 -

Google AMP - Iframes
Google **amp-iframe** 用于在页面上显示 iframe。amp-iframe 需要添加一些条件,因此我们不能在页面上使用普通 iframe。本章将进一步讨论此内容。
iframe 的条件
在 AMP 页面中使用 iframe 时需要注意以下条件 -
iframe 上使用的 url 必须是 *https* 请求或 *data-URI* 或使用 *srcdoc* 属性。
amp-iframe 默认会添加 sandbox 属性。sandbox 属性将设置为为空。sandbox 的空值表示 iframe 处于 **最大沙盒化** 状态(对 iframe 的额外限制)。我们可以向 sandbox 添加值,我们将在下面的示例中进行讨论。
amp-iframe 不能显示在页面顶部,它应该距离顶部至少 600px 或在滚动到顶部时位于视口前 75% 以内。如果您必须在开头显示 iframe,则需要向 iframe 添加占位符,我们将在本教程后面的示例中进行讨论。
amp-iframe 必须与容器具有不同的来源。例如,如果您的主站点位于 www.xyz.com,则 iframe src 不能为 **www.xyz.com/urlname**。它可以采用其他形式,例如 .xyz.com、example.xyz.com 等。
要使用 iframe,我们需要添加以下脚本 -
<script async custom-element = "amp-iframe" src = "https://cdn.ampproject.org/v0/amp-iframe-0.1.js"></script>
Amp-iframe 格式如下 -
<amp-iframe width = "600" title = "Google map" height = "400" layout = "responsive" sandbox = "allow-scripts allow-same-origin allow-popups" frameborder = "0" src = "https://maps.google.com/maps?q=telangana&t=&z=13&ie=UTF8&iwloc=&output=embed"> </amp-iframe>
让我们借助一个工作示例来理解这一点,在该示例中,我们将使用 iframe 显示 Google 地图,如下所示。
示例
<!doctype html>
<html amp lang = "en">
<head>
<meta charset = "utf-8">
<script async src = "https://cdn.ampproject.org/v0.js"></script>
<title>Google AMP - Amp Iframe</title>
<link rel = "canonical" href = "http://example.ampproject.org/article-metadata.html">
<meta name = "viewport" content = "width = device-width,minimum-scale = 1,initial-scale = 1">
<style amp-boilerplate>
body{
-webkit-animation:-amp-start 8s steps(1,end) 0s
1 normal both;-moz-animation:
-amp-start 8s steps(1,end) 0s 1 normal both;-ms-animation:
-amp-start 8s steps(1,end) 0s 1 normal both;animation:
-amp-start 8s steps(1,end) 0s 1 normal both}
@-webkit-keyframes
-amp-start{from{visibility:hidden}to{visibility:visible}}@-moz-keyframes
-amp-start{from{visibility:hidden}to{visibility:visible}}@-ms-keyframes
-amp-start{from{visibility:hidden}to{visibility:visible}}@-o-keyframes
-amp-start{from{visibility:hidden}to{visibility:visible}}@keyframes
-amp-start{from{visibility:hidden}to{visibility:visible}}
</style><noscript>
<style amp-boilerplate>
body{-webkit-animation:none;-moz-animation:
none;-ms-animation:none;animation:none}
</style></noscript>
<script async custom-element = "amp-iframe"
src = "https://cdn.ampproject.org/v0/amp-iframe-0.1.js"
></script>
<style>
div {
height:850px;
text-align:center;
}
</style>
</head>
<body>
<h3>Google AMP - Amp Iframe</h3>
<div>
Google Maps in Iframe
</div>
<h3>Google AMP - Amp Iframe</h3>
<amp-iframe width = "600"
title = "Google map"
height = "400"
layout = "responsive"
sandbox = "allow-scripts allow-same-origin allow-popups"
frameborder = "0" src = "https://maps.google.com/maps?q=telangana&t=&z=13&ie=UTF8&iwloc=&output=embed">
</amp-iframe>
</body>
</html>
输出
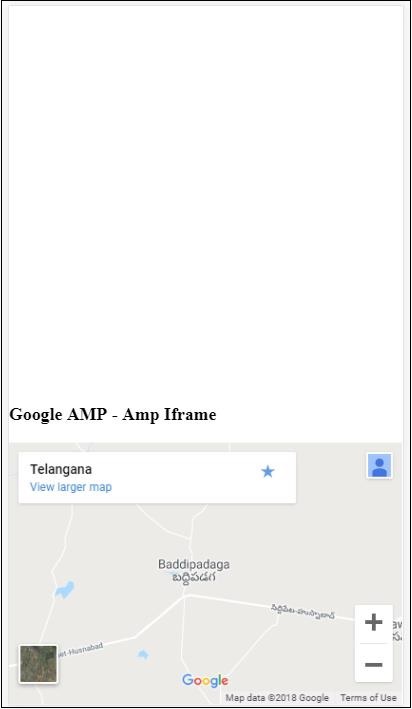
注意,我们将 iframe 放置在距离顶部 600px 以上的位置。它会显示如下错误 -
在上面的示例中,我们使用了如下所示的值的 sandbox -
sandbox = "allow-scripts allow-same-origin allow-popups"
Sandbox 属性充当对要加载到 iframe 中的内容的权限。在这里,我们允许加载来自 Google 地图链接的所有脚本。如果我们不提供 sandbox 属性,则会显示此错误,阻止内容加载到 iframe 中 -

请注意,我们必须为 sandbox 提供正确的权限。您可以在此处找到要赋予 sandbox 的所有权限的详细信息 - https://mdn.org.cn/en-US/docs/Web/HTML/Element/iframe#attr-sandbox。
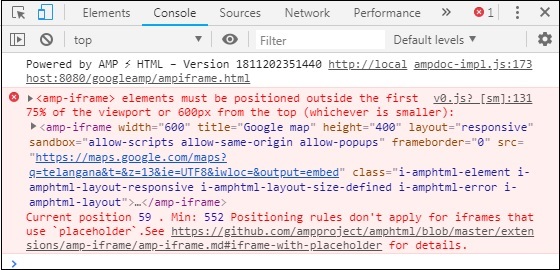
我们可以使用 amp-iframe 内部的 placeholder 属性来消除 600px 以上的限制。
下面给出了一个工作示例 -
<!doctype html>
<html amp lang = "en">
<head>
<meta charset = "utf-8">
<script async src = "https://cdn.ampproject.org/v0.js"></script>
<title>Google AMP - Amp Iframe</title>
<link rel = "canonical" href = "http://example.ampproject.org/article-metadata.html">
<meta name = "viewport" content = "width = device-width, minimum-scale=1,initial-scale=1">
<style amp-boilerplate>
body{
-webkit-animation:-amp-start 8s steps(1,end) 0s
1 normal both;-moz-animation:
-amp-start 8s steps(1,end) 0s 1 normal both;-ms-animation:
-amp-start 8s steps(1,end) 0s 1 normal both;animation:
-amp-start 8s steps(1,end) 0s 1 normal both
}
@-webkit-keyframes
-amp-start{from{visibility:hidden}to{visibility:visible}}@-moz-keyframes
-amp-start{from{visibility:hidden}to{visibility:visible}}@-ms-keyframes
-amp-start{from{visibility:hidden}to{visibility:visible}}@-o-keyframes
-amp-start{from{visibility:hidden}to{visibility:visible}}@keyframes
-amp-start{from{visibility:hidden}to{visibility:visible}}
</style>
<noscript>
<style amp-boilerplate>
body{
-webkit-animation:none;
-moz-animation:none;
-ms-animation:none;
animation:none
}
</style>
</noscript>
<script async custom-element = "amp-iframe"
src = "https://cdn.ampproject.org/v0/amp-iframe-0.1.js">
</script>
<style>
div {
height:850px;
text-align:center;
}
</style>
</head>
<body>
<h3>Google AMP - Amp Iframe</h3>
<amp-iframe width = "600"
title = "Google map"
height = "400"
layout = "responsive"
sandbox = "allow-scripts allow-same-origin allow-popups"
frameborder = "0"
src = "https://maps.google.com/maps?q=telangana&t=&z=13&ie=UTF8&iwloc=&output=embed">
<amp-img layout = "fill" src = "images/loading.jpg" placeholder></amp-img>
</amp-iframe>
</body>
</html>
我们使用了 amp-img 作为占位符,如下所示 -
<amp-iframe width = "600" title = "Google map" height = "400" layout = "responsive" sandbox = "allow-scripts allow-same-origin allow-popups" frameborder = "0" src = "https://maps.google.com/maps?q=telangana&t=&z=13&ie = UTF8&iwloc = &output = embed"> <amp-img layout = "fill" src = "images/loading.jpg" placeholder></amp-img> </amp-iframe>
在这种情况下,不考虑 600px 和 amp-iframe 在视口 75% 内的限制。在图像上显示加载指示器(三个点),用作占位符,这实际上是针对 amp-iframe src 的。一旦 iframe 内容加载完毕,图像将被删除,并显示 iframe 内容,如以下输出所示 -
输出

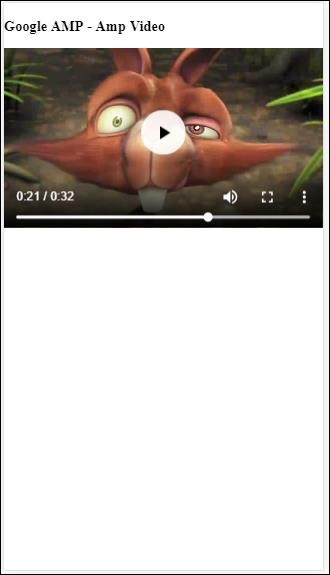
Google AMP - 视频
Amp-video 在 amp 中是一个标准的 html5 视频,用于播放直接视频嵌入。在本章中,让我们了解如何使用 amp-video。
要使用 amp-video,我们需要添加以下脚本 -
<script async custom-element = "amp-video" src = "https://cdn.ampproject.org/v0/amp-video-0.1.js"> </script>
Amp-video 具有 src 属性,该属性包含要加载的视频资源,该资源由 amp 在运行时延迟加载。此外,所有功能几乎与 html5 video 标签相同。
以下是要添加到 amp 视频的节点 -
**Source** - 您可以使用此标签添加不同的媒体文件以进行播放。
**Track** - 此标签允许您为视频启用字幕。
**Placeholder** - 此占位符标签将在视频开始播放之前显示内容。
备用 − 当浏览器不支持 HTML5 视频时,将调用此标签。
amp-video 标签的格式
amp-video 标签的格式如下所示:
<amp-video controls width = "640" height = "360"
layout = "responsive" poster = "images/videoposter.png">
<source src = "video/bunny.webm" type = "video/webm" />
<source src = "video/samplevideo.mp4" type = "video/mp4" />
<div fallback>
<p>This browser does not support the video element.</p>
</div>
</amp-video>
让我们通过以下工作示例来了解 amp-video:
示例
<!doctype html>
<html amp lang = "en">
<head>
<meta charset = "utf-8">
<script async src = "https://cdn.ampproject.org/v0.js"></script>
<title>Google AMP - Amp Video</title>
<link rel = "canonical" href = "http://example.ampproject.org/article-metadata.html">
<meta name = "viewport" content = "width = device-width, minimum-scale = 1,initial-scale=1">
<style amp-boilerplate>
body {
-webkit-animation:
-amp-start 8s steps(1,end) 0s 1 normal both;-moz-animation:
-amp-start 8s steps(1,end) 0s 1 normal both;-ms-animation:
-amp-start 8s steps(1,end) 0s 1 normal both;animation:
-amp-start 8s steps(1,end) 0s 1 normal both}
@-webkit-keyframes
-amp-start{from{visibility:hidden}to{visibility:visible}}@-moz-keyframes
-amp-start{from{visibility:hidden}to{visibility:visible}}@-ms-keyframes
-amp-start{from{visibility:hidden}to{visibility:visible}}@-o-keyframes
-amp-start{from{visibility:hidden}to{visibility:visible}}@keyframes
-amp-start{from{visibility:hidden}to{visibility:visible}}
</style>
<noscript>
<style amp-boilerplate>
body {
-webkit-animation:none;
-moz-animation:none;
-ms-animation:none;
animation:none
}
</style>
</noscript>
<script async custom-element = "amp-video"
src = "https://cdn.ampproject.org/v0/amp-video-0.1.js">
</script>
</head>
<body>
<h3>Google AMP - Amp Video</h3>
<amp-video controls
width = "640"
height = "360"
layout = "responsive"
poster = "images/videoposter.png">
<source src = "video/bunny.webm" type = "video/webm" />
<source src = "video/samplevideo.mp4" type = "video/mp4" />
<div fallback>
<p>This browser does not support the video element.</p>
</div>
</amp-video>
</body>
</html>
输出
上面给出的代码的输出如下所示:
amp-video 可用的属性
amp-video 可用的属性在此表中列出:
| 序号 | 属性和描述 |
|---|---|
| 1 | src 如果不存在<source>节点,则必须指定 src,并且它必须是 https:// URL。 |
| 2 | poster poster 接受 img URL,在视频开始播放之前显示。 |
| 3 | autoplay 如果 amp-video 上存在此属性,则如果浏览器支持,则将自动播放视频。视频将在静音模式下播放,用户需要点击视频才能取消静音。 |
| 4 | controls 如果 amp-video 上存在此属性,则将显示与 html5 视频类似的视频控件。 |
| 5 | loop 如果 amp-video 上存在此属性,则视频播放完成后将再次播放。 |
| 6 | crossorigin 如果播放视频的资源位于不同的来源,则此属性将起作用。 |
| 7 | rotate-to-fullscreen 如果视频可见,则在用户将设备旋转到横向模式后,视频将全屏显示。 |
自动播放 AMP 视频
如果需要自动播放视频,可以使用 autoplay 属性。此功能将根据浏览器支持情况运行。请注意,自动播放时视频将处于静音状态。当用户点击视频时,将取消静音。
让我们借助以下工作示例来了解 autoplay 功能:
示例
<!doctype html>
<html amp lang = "en">
<head>
<meta charset = "utf-8">
<script async src = "https://cdn.ampproject.org/v0.js"></script>
<title>Google AMP - Amp Video</title>
<link rel = "canonical" href = "http://example.ampproject.org/article-metadata.html">
<meta name = "viewport" content = "width=device-width,minimum-scale = 1, initial-scale = 1">
<style amp-boilerplate>
body {
-webkit-animation:
-amp-start 8s steps(1,end) 0s 1 normal both;
-moz-animation:-amp-start 8s steps(1,end) 0s 1 normal both;-ms-animation:
-amp-start 8s steps(1,end) 0s 1 normal both;animation:
-amp-start 8s steps(1,end) 0s 1 normal both
}
@-webkit-keyframes
-amp-start{from{visibility:hidden}to{visibility:visible}}@-moz-keyframes
-amp-start{from{visibility:hidden}to{visibility:visible}}@-ms-keyframes
-amp-start{from{visibility:hidden}to{visibility:visible}}@-o-keyframes
-amp-start{from{visibility:hidden}to{visibility:visible}}@keyframes
-amp-start{from{visibility:hidden}to{visibility:visible}}
</style>
<noscript>
<style amp-boilerplate>
body{
-webkit-animation:none;
-moz-animation:none;
-ms-animation:none;
animation:none
}
</style>
</noscript>
<script async custom-element = "amp-video" src = "
https://cdn.ampproject.org/v0/amp-video-0.1.js">
</script>
</head>
<body>
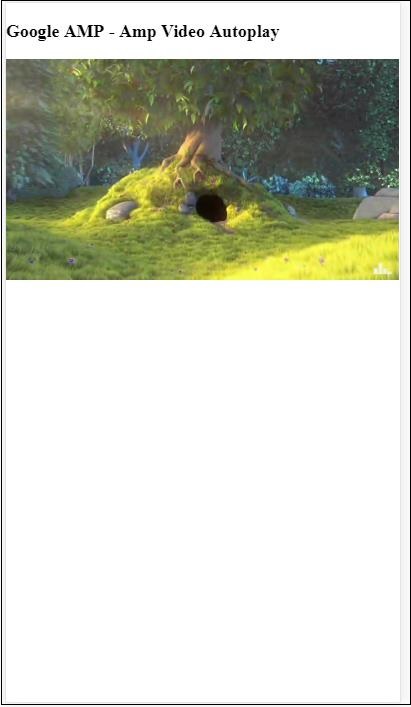
<h3>Google AMP - Amp Video Autoplay</h3>
<amp-video controls
width = "640"
height = "360"
layout = "responsive"
poster = "images/videoposter.png" autoplay>
<source src = "video/bunny.webm" type = "video/webm" />
<source src = "video/samplevideo.mp4" type = "video/mp4" />
<div fallback>
<p>This browser does not support the video element.</p>
</div>
</amp-video>
</body>
</html>
您可以通过添加 controls 属性来激活视频控件,如下面的代码所示:
<amp-video controls
width = "640"
height = "360"
layout = "responsive"
poster = "images/videoposter.png" autoplay>
<source src = "video/bunny.webm" type = "video/webm" />
<source src = "video/samplevideo.mp4" type = "video/mp4" />
<div fallback>
<p>This browser does not support the video element.</p>
</div>
</amp-video>
Google AMP - 按钮
按钮是 AMP 的另一个功能。请注意,AMP 中的按钮没有任何变化,它们的使用方式与标准的 HTML 按钮标签相同。AMP 页面中按钮的唯一区别是其事件的工作方式。
在本章中,我们将看到一些示例来展示按钮的工作方式以及如何在 AMP 组件中使用它。
Lightbox 的示例代码
以下示例向我们展示了如何使用按钮来显示/隐藏 amp-lightbox,如下所示:
<!doctype html>
<html amp lang = "en">
<head>
<meta charset = "utf-8">
<script async src = "https://cdn.ampproject.org/v0.js"></script>
<title>Google AMP - Amp Lightbox</title>
<link rel = "canonical" href = "http://example.ampproject.org/article-metadata.html">
<meta name = "viewport" content ="width = device-width,minimum-scale = 1,initial-scale = 1">
<style amp-boilerplate>
body{
-webkit-animation:-amp-start 8s steps(1,end) 0s 1 normal both;-moz-animation:
-amp-start 8s steps(1,end) 0s 1 normal both;-ms-animation:
-amp-start 8s steps(1,end) 0s 1 normal both;animation:
-amp-start 8s steps(1,end) 0s 1 normal both
}
@-webkit-keyframes
-amp-start{from{visibility:hidden}to{visibility:visible}}@-moz-keyframes
-amp-start{from{visibility:hidden}to{visibility:visible}}@-ms-keyframes
-amp-start{from{visibility:hidden}to{visibility:visible}}@-o-keyframes
-amp-start{from{visibility:hidden}to{visibility:visible}}@keyframes
-amp-start{from{visibility:hidden}to{visibility:visible}}
</style>
<noscript>
<style amp-boilerplate>
body{
-webkit-animation:none;-moz-animation:none;-ms-an
imation:none;animation:none
}
</style>
</noscript>
<script async custom-element = "amp-lightbox"
src = "https://cdn.ampproject.org/v0/amp-lightbox-0.1.js">
</script>
<style amp-custom>
amp-img {
border: 1px solid #ddd;
border-radius: 4px;
padding: 5px;
}
button{
background-color:
#ACAD5C; color: white;
padding: 12px 20px;
border: none;
border-radius: 4px;
cursor: pointer;
float: left;
}
.lightbox {
background: rgba(211,211,211,0.8);
width: 100%;
height: 100%;
position: absolute;
display: flex;
align-items: center;
justify-content: center;
}
</style>
</head>
<body>
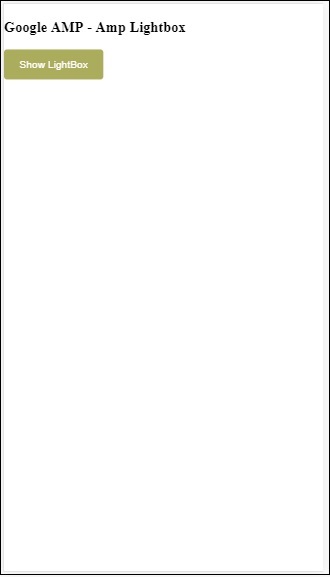
<h3>Google AMP - Amp Lightbox</h3>
<button on = "tap:my-lightbox">
Show LightBox
</button>
<amp-lightbox id = "my-lightbox" layout = "nodisplay">
<div class = "lightbox" on = "tap:my-lightbox.close" tabindex = "0">
<amp-img alt = "Beautiful Flower"
src = "images/flower.jpg"
width = "246"
height = "205">
</amp-img>
</div>
</amp-lightbox>
</body>
</html>
输出

现在,您可以点击屏幕上的任何位置关闭 lightbox。
在上面的示例中,我们使用了如下所示的代码中的按钮:
<button on = "tap:my-lightbox"> Show LightBox </button> Next, we have added action on the button using on attribute as shown: on = "tap:my-lightbox"
当您点击按钮时,将执行操作。请注意,lightbox 的 id 已赋予它。当用户点击按钮时,将打开 lightbox。同样,您可以将按钮与任何组件上的 on 操作一起使用来与其交互。
Google AMP - Timeago
Timeago 会通过将其与过去进行比较来提供时间戳详细信息,例如“x”小时前。在本章中,让我们详细讨论此功能。
要在我们的工作中插入此功能,我们需要将以下脚本添加到 .html 页面中:
<script async custom-element = "amp-timeago" src = "https://cdn.ampproject.org/v0/amp-timeago-0.1.js"> </script>
amp-timeago 标签如下所示:
<amp-timeago layout = "fixed" width = "160" height = "20" datetime = "2018-10-01T00:37:33.809Z" locale = "en">Monday 01 October 2018 00.37 </amp-timeago>
让我们通过以下工作示例来了解这一点:
示例
<!doctype html>
<html amp lang = "en">
<head>
<meta charset = "utf-8">
<script async src = "https://cdn.ampproject.org/v0.js"></script>
<title>Google AMP - TimeAgo</title>
<link rel = "canonical" href = " http://example.ampproject.org/article-metadata.html">
<meta name = "viewport" content = "width = device-width,minimum-scale = 1,initial- scale = 1">
<style amp-boilerplate>
body{
-webkit-animation:-amp-start 8s steps(1,end)
0s 1 normal both;-moz-animation:
-amp-start 8s steps(1,end) 0s 1 normal both;-ms-animation:
-amp-start 8s steps(1,end) 0s 1 normal both;animation:
-amp-start 8s steps(1,end) 0s 1 normal both
}
@-webkit-keyframes
-amp-start{from{visibility:hidden}to{visibility:visible}}@-moz-keyframes
-amp-start{from{visibility:hidden}to{visibility:visible}}@-ms-keyframes
-amp-start{from{visibility:hidden}to{visibility:visible}}@-o-keyframes
-amp-start{from{visibility:hidden}to{visibility:visible}}@keyframes
-amp-start{from{visibility:hidden}to{visibility:visible}}
</style>
<noscript>
<style amp-boilerplate>
body{
-webkit-animation:none;-moz-animation:none;-ms
-animation:none;animation:none
}
</style>
</noscript>
<script async custom-element="amp-timeago"
src = "https://cdn.ampproject.org/v0/amp-timeago-0.1.js">
</script>
</head>
<body>
<h1>Google AMP - TimeAgo Example</h1>
<amp-timeago
layout = "fixed"
width = "160"
height = "20"
datetime = "2018-10-01T00:37:33.809Z"
locale = "en">Monday 01 October 2018 00.37
</amp-timeago>
</body>
</html>
输出

默认情况下,区域设置设置为 en。我们可以更改它并根据需要以区域设置显示 timeago。可以在 timeago 标签中使用的区域设置在下表中给出。
| 序号 | 区域设置和描述 |
|---|---|
| 1 | ar 阿拉伯语 |
| 2 | be 白俄罗斯语 |
| 3 | be 白俄罗斯语 |
| 4 | bg 保加利亚语 |
| 5 | ca 加泰罗尼亚语 |
| 6 | da 丹麦语 |
| 7 | de 德语 |
| 8 | el 希腊语 |
| 9 | en 英语 |
| 10 | enShort 英语 - 简短 |
| 11 | es 西班牙语 |
| 12 | eu 巴斯克语 |
| 13 | fi 芬兰语 |
| 14 | fr 法语 |
| 15 | he 希伯来语 |
| 16 | hu 匈牙利语 |
| 17 | inBG 孟加拉语 |
| 18 | inHI 印地语 |
| 19 | inID 马来语 |
| 20 | it 意大利语 |
| 21 | ja 日语 |
| 22 | ko 韩语 |
| 23 | ml 马拉雅拉姆语 |
| 24 | nbNO 挪威书面挪威语 |
| 25 | nl 荷兰语 |
| 26 | nnNO 挪威新挪威语 |
| 27 | pl 波兰语 |
| 28 | ptBR 葡萄牙语 |
| 29 | ro 罗马尼亚语 |
| 30 | ru 俄语 |
| 31 | sv 瑞典语 |
| 32 | ta 泰米尔语 |
| 33 | th 泰语 |
| 34 | tr 土耳其语 |
| 35 | uk 乌克兰语 |
| 36 | vi 越南语 |
| 37 | zhCN 中文 |
| 38 | zhTW 繁体中文 |
让我们讨论一些使用以下工作示例的区域设置:
示例
<!doctype html>
<html amp lang = "en">
<head>
<meta charset = "utf-8">
<script async src = "https://cdn.ampproject.org/v0.js"></script>
<title>Google AMP - TimeAgo Using Locale</title>
<link rel = "canonical" href = "http://example.ampproject.org/article-metadata.html">
<meta name = "viewport" content = "width = device-width,minimum-scale = 1, initial-scale = 1">
<style amp-boilerplate>
body{
-webkit-animation:
-amp-start 8s steps(1,end) 0s 1 normal both;-moz-animation:
-amp-start 8s steps(1,end) 0s 1 normal both;-ms-animation:
-amp-start 8s steps(1,end) 0s 1 normal both;animation:
-amp-start 8s steps(1,end) 0s 1 normal both
}
@-webkit-keyframes
-amp-start{from{visibility:hidden}to{visibility:visible}}@-moz-keyframes
-amp-start{from{visibility:hidden}to{visibility:visible}}@-ms-keyframes
-amp-start{from{visibility:hidden}to{visibility:visible}}@-o-keyframes
-amp-start{from{visibility:hidden}to{visibility:visible}}@keyframes
-amp-start{from{visibility:hidden}to{visibility:visible}}
</style>
<noscript>
<style amp-boilerplate>
body{
-webkit-animation:none;
-moz-animation:none;-ms
-animation:none;
animation:none
}
</style>
</noscript>
<script async custom-element = "amp-timeago"
src = "https://cdn.ampproject.org/v0/amp-timeago-0.1.js">
</script>
</head>
<body>
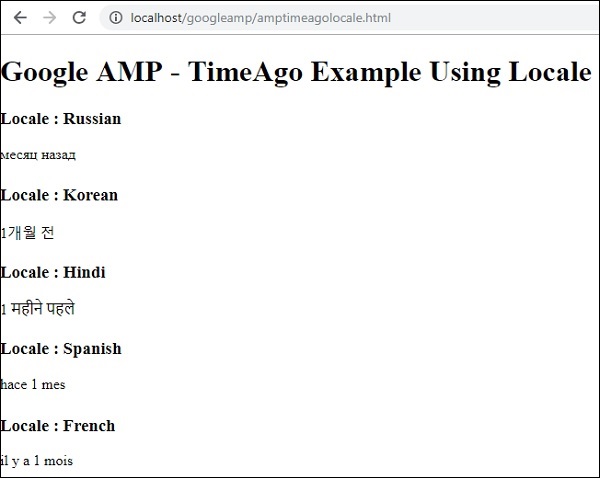
<h1>Google AMP - TimeAgo Example Using Locale</h1>
<h3>Locale : Russian</h3>
<amp-timeago layout = "fixed"
width = "160" height = "20"
datetime = "2018-10-01T00:37:33.809Z"
locale = "ru">
Monday 01 October 2018 00.37
</amp-timeago>
<h3>Locale : Korean</h3>
<amp-timeago
layout = "fixed"
width = "160"
height = "20"
datetime = "2018-10-01T00:37:33.809Z"
locale = "ko">
Monday 01 October 2018 00.37
</amp-timeago>
<h3>Locale : Hindi</h3>
<amp-timeago
layout = "fixed"
width = "160"
height = "20"
datetime = "2018-10-01T00:37:33.809Z"
locale = "inHI">
Monday 01 October 2018 00.37
</amp-timeago>
<h3>Locale : Spanish</h3>
<amp-timeago
layout = "fixed"
width = "160"
height = "20"
datetime = "2018-10-01T00:37:33.809Z"
locale = "es">
Monday 01 October 2018 00.37
</amp-timeago>
<h3>Locale : French</h3>
<amp-timeago
layout = "fixed"
width = "160"
height = "20"
datetime = "2018-10-01T00:37:33.809Z"
locale = "fr">
Monday 01 October 2018 00.3
</amp-timeago>
</body>
</html>
输出
上面代码的输出如下所示:
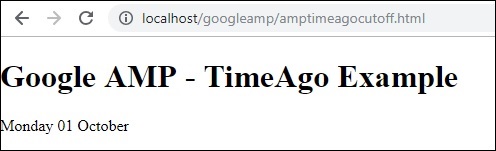
如果需要更改“X 时间前”显示,我们可以将“cutoff”属性与 timeago 一起使用。Cutoff 以秒为单位获取值以去除 ago 显示。
让我们借助以下工作示例来了解这一点:
示例
<!doctype html>
<html amp lang = "en">
<head>
<meta charset = "utf-8">
<script async src = "https://cdn.ampproject.org/v0.js"></script>
<title>Google AMP - TimeAgo</title>
<link rel = "canonical" href = "http://example.ampproject.org/article-metadata.html">
<meta name = "viewport" content = "width = device-width,minimum-scale=1, initial-scale=1">
<style amp-boilerplate>
body{
-webkit-animation:
-amp-start 8s steps(1,end) 0s 1 normal both;-moz-animation:
-amp-start 8s steps(1,end) 0s 1 normal both;-ms-animation:
-amp-start 8s steps(1,end) 0s 1 normal both;animation:
-amp-start 8s steps(1,end) 0s 1 normal both
}
@-webkit-keyframes
-amp-start{from{visibility:hidden}to{visibility:visible}}@-moz-keyframes
-amp-start{from{visibility:hidden}to{visibility:visible}}@-ms-keyframes
-amp-start{from{visibility:hidden}to{visibility:visible}}@-o-keyframes
-amp-start{from{visibility:hidden}to{visibility:visible}}@keyframes
-amp-start{from{visibility:hidden}to{visibility:visible}}
</style>
<noscript>
<style amp-boilerplate>
body{
-webkit-animation:none;
-moz-animation:none;
-ms-animation:none;
animation:none
}
</style>
</noscript>
<script async custom-element = "amp-timeago"
src = "https://cdn.ampproject.org/v0/amp-timeago-0.1.js">
</script>
</head>
<body>
<h1>Google AMP - TimeAgo Example</h1>
<amp-timeago
layout = "fixed"
width = "160"
height = "20"
datetime = "2018-10-01T00:37:33.809Z"
locale = "en"
cutoff = "300">
Monday 01 October 2018 00.37
</amp-timeago>
</body>
</html>
输出
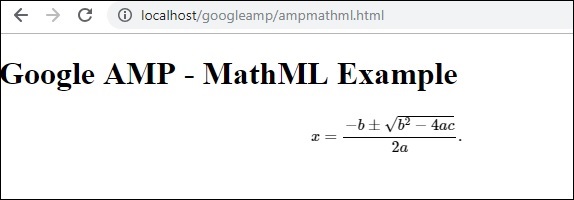
Google AMP - Mathml
使用 MathML,我们可以显示数学公式。在本章中,让我们看一个工作示例,如何使用 MathML 并使用一些数学公式来显示它。
要使用 MathML,我们需要包含以下 javascript 文件:
<script async custom-element = "amp-mathml" src = "https://cdn.ampproject.org/v0/amp-mathml-0.1.js"> </script>
MathML AMP 标签
MathML amp 标签的格式如下所示:
<amp-mathml layout = "container"
data-formula = "\[x = {-b \pm \sqrt{b^2-4ac} \over 2a}.\]">
</amp-mathml>
请注意,data-formula 是必须的属性,公式将赋予它。
示例
让我们借助一个示例更好地了解此标签。
<!doctype html>
<html amp lang = "en">
<head>
<meta charset = "utf-8">
<script async src = "https://cdn.ampproject.org/v0.js"></script>
<title>Google AMP - MathML</title>
<link rel = "canonical" href = " http://example.ampproject.org/article-metadata.html">
<meta name = "viewport" content = "width = device-width,minimum-scale = 1,initial-scale = 1">
<style amp-boilerplate>
body{
-webkit-animation:
-amp-start 8s steps(1,end) 0s 1 normal both;-moz-animation:
-amp-start 8s steps(1,end) 0s 1 normal both;-ms-animation:
-amp-start 8s steps(1,end) 0s 1 normal both;animation:
-amp-start 8s steps(1,end) 0s 1 normal both
}
@-webkit-keyframes
-amp-start{from{visibility:hidden}to{visibility:visible}}@-moz-keyframes
-amp-start{from{visibility:hidden}to{visibility:visible}}@-ms-keyframes
-amp-start{from{visibility:hidden}to{visibility:visible}}@-o-keyframes
-amp-start{from{visibility:hidden}to{visibility:visible}}@keyframes
-amp-start{from{visibility:hidden}to{visibility:visible}}
</style>
<noscript>
<style amp-boilerplate>
body{
-webkit-animation:none;
-moz-animation:none;
-ms-animation:none;
animation:none
}
</style>
</noscript>
<script async custom-element = "amp-mathml"
src = "https://cdn.ampproject.org/v0/amp-mathml-0.1.js">
</script>
</head>
<body>
<h1>Google AMP - MathML Example</h1>
<amp-mathml layout = "container"
data-formula = "\[x = {-b \pm \sqrt{b^2-4ac} \over 2a}.\]">
</amp-mathml>
</body>
</html>
输出
Amp-mathml 标签在执行时将在 iframe 中呈现显示,如下所示:
Google AMP - Fit Text
Amp 标签amp-fit-text 将减小字体大小,如果空间不足以呈现显示。本章将详细讨论此标签。
要使 amp-fit-text 正常工作,我们需要添加以下脚本:
<script async custom-element = "amp-fit-text" src = "https://cdn.ampproject.org/v0/amp-fit-text-0.1.js"> </script>
Amp Fit-Text 标签
amp-fit text 标签的格式如下所示:
<amp-fit-text width = "200" height = "200" layout = "responsive"> Text here </amp-fit-text>
示例
让我们借助一个示例更好地了解此标签。
<!doctype html>
<html amp lang = "en">
<head>
<meta charset = "utf-8">
<script async src = "https://cdn.ampproject.org/v0.js"></script>
<title>Google AMP - Amp Fit-Text</title>
<link rel = "canonical" href = "http://example.ampproject.org/article-metadata.html">
<meta name = "viewport" content = "width = device-width,minimum-scale = 1, initial-scale = 1">
<style amp-boilerplate>
body{
-webkit-animation:-amp-start 8s steps(1,end)
0s 1 normal both;-moz-animation:
-amp-start 8s steps(1,end) 0s 1 normal both;-ms-animation:
-amp-start 8s steps(1,end) 0s 1 normal both;animation:
-amp-start 8s steps(1,end) 0s 1 normal both
}
@-webkit-keyframes
-amp-start{from{visibility:hidden}to{visibility:visible}}@-moz-keyframes
-amp-start{from{visibility:hidden}to{visibility:visible}}@-ms-keyframes
-amp-start{from{visibility:hidden}to{visibility:visible}}@-o-keyframes
-amp-start{from{visibility:hidden}to{visibility:visible}}@keyframes
-amp-start{from{visibility:hidden}to{visibility:visible}}
</style>
<noscript>
<style amp-boilerplate>
body{
-webkit-animation:none;-moz-animation:none;-ms
-animation:none;animation:none}
</style>
</noscript>
<script async custom-element = "amp-fit-text"
src = "https://cdn.ampproject.org/v0/amp-fit-text-0.1.js">
</script>
</head>
<body>
<h1>Google AMP - Amp Fit-Text</h1>
<div style = "width:150px;height:150px; ">
<amp-fit-text
width = "150"
height = "150"
layout = "responsive">
<b>Welcome To TutorialsPoint - You are browsing the best resource
for Online Education</b>
</amp-fit-text>
</div>
</body>
</html>
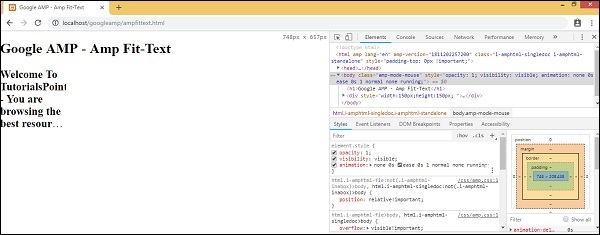
输出
上面给出的代码的输出如下所示:
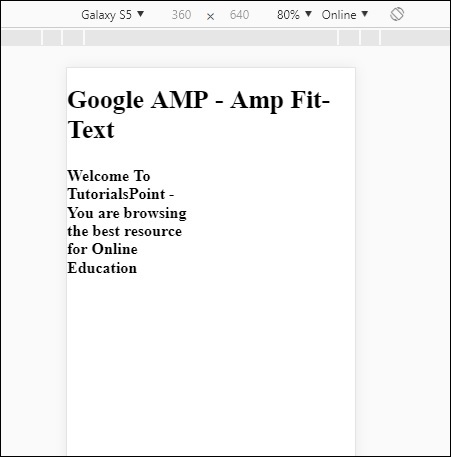
如果您使用 amp-fit-text 查看显示,则内容会尝试根据可用空间进行调整。
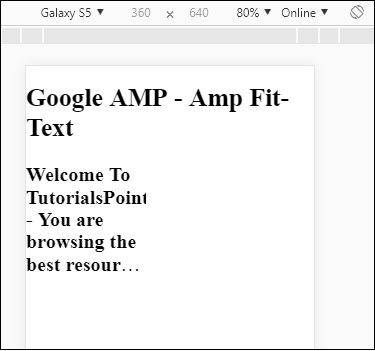
Amp-fit-text 带有两个属性max-font-size 和min-font-size。
当我们使用 max-font-size 并且没有足够的空间来呈现文本时,它将尝试减小尺寸并在可用空间内进行调整。
如果我们指定 min-font-size 并且没有足够的空间,它将截断文本并在隐藏文本的位置显示点。
示例
让我们看一个工作示例,在其中我们将为 amp-fit-text 指定 max-font-size 和 min-font-size。
<!doctype html>
<html amp lang = "en">
<head>
<meta charset = "utf-8">
<script async src = "https://cdn.ampproject.org/v0.js"></script>
<title>Google AMP - Amp Fit-Text</title>
<link rel = "canonical" href = " http://example.ampproject.org/article-metadata.html">
<meta name = "viewport" content = "width = device-width,minimum-scale = 1,initial-scale = 1">
<style amp-boilerplate>
body{
-webkit-animation:
-amp-start 8s steps(1,end) 0s 1 normal both;-moz-animation:
-amp-start 8s steps(1,end) 0s 1 normal both;-ms-animation:
-amp-start 8s steps(1,end) 0s 1 normal both;animation:
-amp-start 8s steps(1,end) 0s 1 normal both
}
@-webkit-keyframes
-amp-start{from{visibility:hidden}to{visibility:visible}}@-moz-keyframes
-amp-start{from{visibility:hidden}to{visibility:visible}}@-ms-keyframes
-amp-start{from{visibility:hidden}to{visibility:visible}}@-o-keyframes
-amp-start{from{visibility:hidden}to{visibility:visible}}@keyframes
-amp-start{from{visibility:hidden}to{visibility:visible}}
</style>
<noscript>
<style amp-boilerplate>
body{
-webkit-animation:none;
-moz-animation:none;
-ms-animation:none;
animation:none}
</style>
</noscript>
<script async custom-element = "amp-fit-text" src =
"https://cdn.ampproject.org/v0/amp-fit-text-0.1.js">
</script>
</head>
<body>
<h1>Google AMP - Amp Fit-Text</h1>
<div style = "width:150px;height:150px; ">
<amp-fit-text
width = "150"
height = "150"
layout = "responsive"
max-font-size = "30"
min-font-size = "25">
<b>Welcome To TutorialsPoint - You are
browsing the best resource for Online Education</b>
</amp-fit-text>
</div>
</body>
</html>
输出
Google AMP - 倒计时
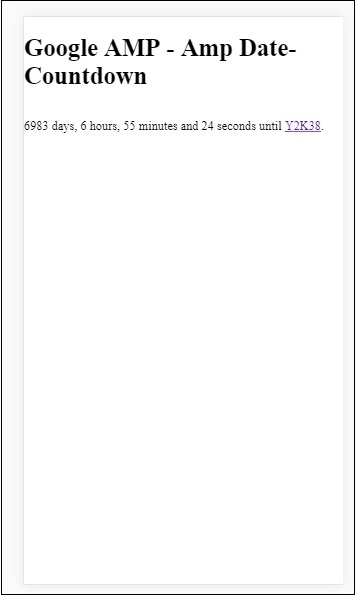
另一个名为 Amp Date countdown 的 amp 组件,用于显示到给定日期(默认为Y2K38 (2038))的天数、小时、分钟、秒。显示可以根据您选择的区域设置进行,默认情况下为 en(英语)。Amp-date-countdown 使用 amp-mustache 模板渲染数据。
在本章中,我们将看一些工作示例,以便更详细地了解 amp-date-countdown。
要使用 amp-date-countdown,我们需要添加以下脚本
用于 amp-date-countdown
<script async custom-element = "amp-date-countdown" src = "https://cdn.ampproject.org/v0/amp-date-countdown-0.1.js"> </script>
用于 amp-mustache
<script async custom-template = "amp-mustache" src = "https://cdn.ampproject.org/v0/amp-mustache-0.1.js"> </script>
Amp-date-countdown 标签
amp-date-countdown 标签如下所示:
<amp-date-countdown timestamp-seconds = "2100466648"
layout = "fixed-height"
height = "50">
<template type = "amp-mustache">
<p class = "p1">
{{d}} days, {{h}} hours, {{m}} minutes and {{s}} seconds until
<a href = "https://en.wikipedia.org/wiki/Year_2038_problem">
Y2K38
</a>.
</p>
</template>
</amp-date-countdown>
amp-date-countdown 的属性
amp-date-countdown 的属性在此表中列出:
| 序号 | 属性和描述 |
|---|---|
| 1 | end-date 要倒计时到的 ISO 格式日期。例如,2025-08-01T00:00:00+08:00 |
| 2 | timestamp-ms 以毫秒为单位的 POSIX 时间戳值;假设为 UTC 时区。例如,timestamp-ms="1521880470000" |
| 3 | timestamp-seconds 以秒为单位的 POSIX 时间戳值;假设为 UTC 时区。例如,timestamp-seconds="1521880470" |
| 4 | timeleft-ms 剩余的毫秒值,用于倒计时。例如,剩余 50 小时 timeleft-ms="180,000,000" |
| 5 | offset-seconds(可选) 一个正数或负数,表示要添加到或从给定 end-date 中减去的秒数。例如,offset-seconds="60" 将 60 秒添加到 end-date |
| 6 | when-ended(可选) 指定计时器在达到 0 秒时是否停止。该值可以设置为 stop(默认值)以指示计时器在 0 秒时停止,并且不会超过最终日期或继续以指示计时器在达到 0 秒后应继续。 |
| 7 | locale(可选) 每个计时器单元的国际化语言字符串。默认值为 en(英语)。支持的值列在下面。 |
格式
amp-date-countdown 用于显示倒计时的格式在下表中给出:
| 序号 | 格式和描述 |
|---|---|
| 1 | d 将日期显示为 0、1、2、3…无穷大 |
| 2 | dd 将日期显示为 00、01、02、03…无穷大 |
| 3 | h 将小时显示为 0、1、2、3…无穷大 |
| 4 | hh 将小时显示为 00、01、02、03…无穷大 |
| 5 | m 将分钟显示为 0、1、2、3、4…无穷大 |
| 6 | mm 将分钟显示为 00、01、02、03…无穷大 |
| 7 | s 将秒显示为 0、1、2、3…无穷大 |
| 8 | ss 将秒显示为 00、01、02、03…无穷大 |
| 9 | days 根据区域设置显示 day 或 days 字符串 |
| 10 | hours 根据区域设置显示 hour 或 hours 字符串 |
| 11 | minutes 根据区域设置显示 minute 或 minutes 字符串 |
| 12 | seconds 根据区域设置显示 second 或 seconds 字符串 |
示例
<!doctype html>
<html amp lang = "en">
<head>
<meta charset = "utf-8">
<script async src = "https://cdn.ampproject.org/v0.js"></script>
<title>Google AMP - Amp Date-Countdown</title>
<link rel = "canonical" href = " http://example.ampproject.org/article-metadata.html">
<meta name = "viewport" content = "width = device-width,minimum-scale = 1,initial-scale = 1">
<style amp-boilerplate>
body{-webkit-animation:-amp-start 8s steps(1,end)
0s 1 normal both;-moz-animation:
-amp-start 8s steps(1,end) 0s 1 normal both;-ms-animation:
-amp-start 8s steps(1,end) 0s 1 normal both;animation:
-amp-start 8s steps(1,end) 0s 1 normal both
}
@-webkit-keyframes
-amp-start{from{visibility:hidden}to{visibility:visible}}@-moz-keyframes
-amp-start{from{visibility:hidden}to{visibility:visible}}@-ms-keyframes
-amp-start{from{visibility:hidden}to{visibility:visible}}@-o-keyframes
-amp-start{from{visibility:hidden}to{visibility:visible}}@keyframes
-amp-start{from{visibility:hidden}to{visibility:visible}}
</style>
<noscript>
<style amp-boilerplate>
body{-webkit-animation:none;-moz-animation:none;-ms
-animation:none;animation:none}
</style>
</noscript>
<script async custom-element = "amp-date-countdown"
src = "https://cdn.ampproject.org/v0/amp-date-countdown-0.1.js">
</script>
<script async custom-template="amp-mustache" src=
"https://cdn.ampproject.org/v0/amp-mustache-0.1.js">
</script>
</head>
<body>
<h1>Google AMP - Amp Date-Countdown</h1>
<amp-date-countdown
timestamp-seconds = "2145683234"
layout = "fixed-height"
height = "50">
<template type = "amp-mustache">
<p class = "p1">
{{d}} days, {{h}} hours, {{m}} minutes and
{{s}} seconds until
<a href = "https://en.wikipedia.org/wiki/Year_2038_problem">
Y2K38
</a>.
</p>
</template>
</amp-date-countdown>
</body>
</html>
输出
示例
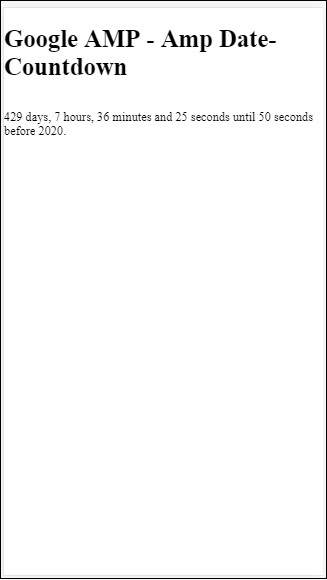
让我们通过一个工作示例来了解 amp-countdown 属性 offset-seconds:
<!doctype html>
<html amp lang = "en">
<head>
<meta charset = "utf-8">
<script async src = "https://cdn.ampproject.org/v0.js"></script>
<title>Google AMP - Amp Date-Countdown</title>
<link rel = "canonical" href = " http://example.ampproject.org/article-metadata.html">
<meta name = "viewport" content = "width = device-width,minimum-scale = 1,initial-scale = 1">
<style amp-boilerplate>
body{
-webkit-animation:-amp-start 8s steps(1,end)
0s 1 normal both;-moz-animation:
-amp-start 8s steps(1,end) 0s 1 normal both;-ms-animation:
-amp-start 8s steps(1,end) 0s 1 normal both;animation:
-amp-start 8s steps(1,end) 0s 1 normal both
}
@-webkit-keyframes
-amp-start{from{visibility:hidden}to{visibility:visible}}@-moz-keyframes
-amp-start{from{visibility:hidden}to{visibility:visible}}@-ms-keyframes
-amp-start{from{visibility:hidden}to{visibility:visible}}@-o-keyframes
-amp-start{from{visibility:hidden}to{visibility:visible}}@keyframes
-amp-start{from{visibility:hidden}to{visibility:visible}}
</style>
<noscript>
<style amp-boilerplate>
body{
-webkit-animation:none;-moz-animation:none;-ms
-animation:none;animation:none}
</style>
</noscript>
<script async custom-element = "amp-date-countdown"
src = "https://cdn.ampproject.org/v0/amp-date-countdown-0.1.js">
</script>
<script async custom-template = "amp-mustache"
src = "https://cdn.ampproject.org/v0/amp-mustache-0.1.js">
</script>
</head>
<body>
<h1>Google AMP - Amp Date-Countdown</h1>
<amp-date-countdown
end-date = "2020-01-19T08:14:08.000Z"
offset-seconds = "-50"
layout = "fixed-height"
height = "100">
<template type = "amp-mustache">
<p class = "p1">
{{d}} days, {{h}} hours, {{m}}
minutes and {{s}} seconds until 50
seconds before 2020.
</p>
</template>
</amp-date-countdown>
</body>
</html>
输出
支持的区域设置列表
以下是 amp-date-countdown 支持的区域设置列表:
| 序号 | 名称和区域设置 |
|---|---|
| 1 | en 英语 |
| 2 | es 西班牙语 |
| 3 | fr 法语 |
| 4 | de 德语 |
| 5 | id 印度尼西亚语 |
| 6 | it 意大利语 |
| 7 | ja 日语 |
| 8 | ko 韩语 |
| 9 | nl 荷兰语 |
| 10 | pt 葡萄牙语 |
| 11 | ru 俄语 |
| 12 | th 泰语 |
| 13 | tr 土耳其语 |
| 14 | vi 越南语 |
| 15 | zh-cn 简体中文 |
| 16 | zh-tw 繁体中文 |
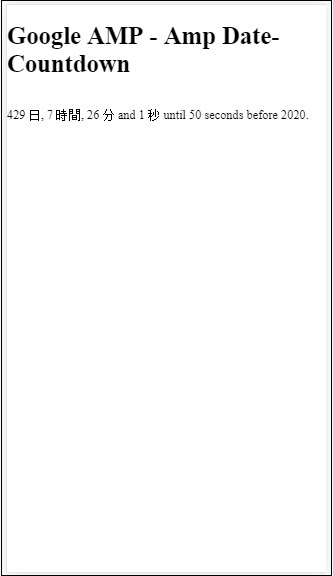
现在,我们将尝试一个示例,使用上面列出的其中一个区域设置显示倒计时。
示例
<!doctype html>
<html amp lang = "en">
<head>
<meta charset = "utf-8">
<script async src = "https://cdn.ampproject.org/v0.js"></script>
<title>Google AMP - Amp Date-Countdown</title>
<link rel = "canonical" href = "http://example.ampproject.org/article-metadata.html">
<meta name="viewport" content="width = device-width, minimum-scale = 1,initial-scale = 1">
<style amp-boilerplate>
body{
-webkit-animation:
-amp-start 8s steps(1,end)0s 1 normal both;-moz-animation:
-amp-start 8s steps(1,end) 0s 1 normal both;-ms-animation:
-amp-start 8s steps(1,end) 0s 1 normal both;animation:
-amp-start 8s steps(1,end) 0s 1 normal both
}
@-webkit-keyframes
-amp-start{from{visibility:hidden}to{visibility:visible}}@-moz-keyframes
-amp-start{from{visibility:hidden}to{visibility:visible}}@-ms-keyframes
-amp-start{from{visibility:hidden}to{visibility:visible}}@-o-keyframes
-amp-start{from{visibility:hidden}to{visibility:visible}}@keyframes
-amp-start{from{visibility:hidden}to{visibility:visible}}
</style>
<noscript>
<style amp-boilerplate>
body{
-webkit-animation:none;
-moz-animation:none;
-ms-animation:none;
animation:none}
</style>
</noscript>
<script async custom-element = "amp-date-countdown"
src = "https://cdn.ampproject.org/v0/amp-date-countdown-0.1.js">
</script>
<script async custom-template = "amp-mustache"
src = "https://cdn.ampproject.org/v0/amp-mustache-0.1.js">
</script>
</head>
<body>
<h1>Google AMP - Amp Date-Countdown</h1>
<amp-date-countdown
locale = "ja"
end-date = "2020-01-19T08:14:08.000Z"
offset-seconds = "-50"
layout = "fixed-height"
height = "100">
<template type = "amp-mustache">
<p class = "p1">
{{d}} {{days}}, {{h}} {{hours}}, {{m}}
{{minutes}} and {{s}} {{seconds}} until
50 seconds before 2020.
</p>
</template>
</amp-date-countdown>
</body>
</html>
输出
Google AMP - 日期选择器
AMP Datepicker 是一个 amp 组件,它在页面上显示日历,用户可以在其中选择日期。AMP datepicker 可以像静态日历一样显示,也可以根据输入选择显示,即点击按钮。
要使 amp-date-picker 正常工作,我们需要将以下脚本添加到页面中:
<script async custom-element = "amp-date-picker" src = "https://cdn.ampproject.org/v0/amp-date-picker-0.1.js"> </script>
Amp-date-picker 标签
amp-date-picker 的标签如下所示:
<amp-date-picker layout = "fixed-height" height = "360"></amp-date-picker>
支持的属性
以下属性受 amp-date-picker 支持:
| 序号 | 属性和描述 |
|---|---|
| 1 | mode 可用的选项是 static 和 overlay。对于 static,日历将在页面上默认打开。对于 Overlay,日历将在交互时打开。 |
| 2 | mode 可用的选项包括单选和范围。使用单选,您可以在日历上只选择一个日期。使用范围,您可以选择多个日期,但必须是连续的范围。 |
| 3 | 输入选择器 这可以是一个日期输入的查询选择器。例如,对于id来说是#nameoftheid,对于类来说是.nameoftheclass。日期将更新到分配了id的标签。 |
| 4 | 开始输入选择器 这可以是一个日期输入的查询选择器。例如,对于id来说是#nameoftheid,对于类来说是.nameoftheclass。日期将更新到分配了id的标签。 |
| 5 | 结束输入选择器 这可以是一个日期输入的查询选择器。例如,对于id来说是#nameoftheid,对于类来说是.nameoftheclass。日期将更新到分配了id的标签。 |
| 6 | 最小值 用户可以选择的最早日期。必须格式化为ISO 8601日期。如果不存在min属性,则当前日期将是最小日期。 |
| 7 | 最大值 用户可以选择的最晚日期。必须格式化为ISO 8601日期。如果不存在max属性,则日期选择器将没有最大日期。 |
| 8 | 月份格式 您需要显示所选日期的月份格式。默认值为“MMMM YYYY”。 |
| 9 | 格式 您希望日期在输入框或任何使用选择器的html元素中显示的格式。默认值为“YYYY-MM-DD”。 |
| 10 | 星期格式 显示星期的格式。 |
| 11 | 语言环境 显示日历视图的语言环境。默认值为en。 |
| 12 | 最少晚数 用户在日期范围内必须选择的晚数。默认为“1”。值为“0”允许用户为开始日期和结束日期选择相同的日期。 |
| 13 | 月份数 在日历视图中一次显示的月份数。默认为“1”。 |
| 14 | 一周的第一天 指定为一周的第一天(0-6)。默认值为“0”(星期日)。 |
| 15 | 日期大小 日历视图表格中日期单元格的px大小。默认为39。 |
主要属性为类型和模式。对于模式,我们有静态和覆盖类型的日历。对于类型,我们可以有单选和范围选项。使用type = ”single”,我们只能从日历中选择一个日期,而对于type = ”range”,我们可以在一个范围内选择多个数据。
现在,让我们通过一些工作示例来了解静态和覆盖类型日历的amp-date-picker。
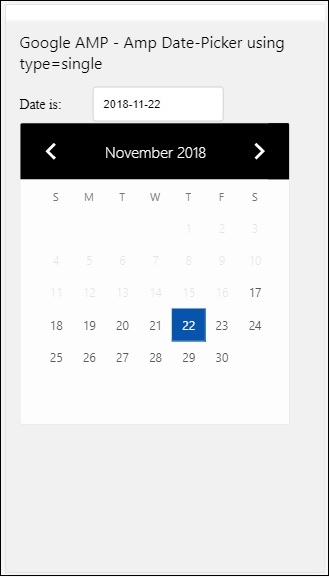
AMP静态日期选择器
对于静态类型日期选择器,我们需要指定mode=static,如下例所示。
示例
<!doctype html>
<html amp lang = "en">
<head>
<meta charset = "utf-8">
<script async src = "https://cdn.ampproject.org/v0.js"></script>
<title>Google AMP - Amp Date-Picker Static </title>
<link rel = "canonical" href = " http://example.ampproject.org/article-metadata.html">
<meta name = "viewport" content = "width = device-width, minimum-scale = 1,initial-scale = 1">
<style amp-boilerplate>
body{
-webkit-animation:
-amp-start 8s steps(1,end) 0s 1 normal both;-moz-animation:
-amp-start 8s steps(1,end) 0s 1 normal both;-ms-animation:
-amp-start 8s steps(1,end) 0s 1 normal both;animation:
-amp-start 8s steps(1,end) 0s 1 normal both
}
@-webkit-keyframes
-amp-start{from{visibility:hidden}to{visibility:visible}}@-moz-keyframes
-amp-start{from{visibility:hidden}to{visibility:visible}}@-ms-keyframes
-amp-start{from{visibility:hidden}to{visibility:visible}}@-o-keyframes
-amp-start{from{visibility:hidden}to{visibility:visible}}@keyframes
-amp-start{from{visibility:hidden}to{visibility:visible}}
</style>
<noscript>
<style amp-boilerplate>
body{-webkit-animation:
none;-moz-animation:none;-ms-animation:none;animation:none}
</style>
</noscript>
<script async custom-element = "amp-date-picker"
src = "https://cdn.ampproject.org/v0/amp-date-picker-0.1.js">
</script>
<script async custom-element = "amp-bind"
src = "https://cdn.ampproject.org/v0/amp-bind-0.1.js">
</script>
<script async custom-template = "amp-mustache"
src = "https://cdn.ampproject.org/v0/amp-mustache-0.1.js">
</script>
<style>
input[type = text]{
width: 50%;
padding: 12px;
border: 1px
solid #ccc;
border-radius: 4px;
resize: vertical;
}
label {
padding: 12px 12px 12px 0;display: inline-block;
}
.col-label {
float: left;width: 25%;margin-top: 6px;
}
.col-content {
float: left;width: 75%;margin-top: 6px;
}
.row:after {
content: "";display: table;clear: both;
}
.amp_example {
background-color: #f1f1f1;
padding: 0.01em 16px;
margin: 20px 0;
box-shadow: 0 2px 4px 0
rgba(0,0,0,0.16),0 2px 10px 0
rgba(0,0,0,0.12)!important;
}
h3{font-family: "Segoe UI",Arial,sans-serif;
font-weight: 400;margin: 10px 0;}
</style>
</head>
<body>
<div class = "amp_example">
<h3>Google AMP - Amp Date-Picker using type = single</h3>
<amp-date-picker
id = "static-date"
type = "single"
mode = "static"
layout = "fixed-height"
height = "600"
format = "YYYY-MM-DD"
input-selector = "#date">
<div class = "row">
<div class = "col-label">
<label for = "start">
Date is:
</label>
</div>
<div class = "col-content">
<input type = "text" id = "date" name = "date"
placeholder = "Date Selected Is...">
</div>
</div>
</amp-date-picker>
<div>
</body>
</html>
请注意,在这个例子中,我们默认在屏幕上显示日历,即日期选择器。
用户选择的日期将显示在文本字段中,如下面的演示屏幕所示。
输出
如何从amp-date-picker中获取所选日期?
如果您查看上面的示例,有一个名为input-selector的属性,它被赋予了文本字段的id。当用户选择日期时,它将显示在输入字段中。
<amp-date-picker
id = "static-date"
type = "single"
mode = "static"
layout = "fixed-height"
height = "600"
format = "YYYY-MM-DD"
input-selector = "#date"
<div class = "row">
<div class = "col-label">
<label for = "start">Date is:</label>
</div>
<div class = "col-content">
<input type = "text" id = "date" name = "date"
placeholder = "Date Selected Is...">
</div>
</div>
</amp-date-picker>
您还可以如下为input-selector属性提供name属性。
<amp-date-picker type = "single" mode = "static" layout = "container" input-selector = "[name = date]"> <input type = "text" id = "date" name = "date" placeholder = "Date Selected Is..."> </amp-date-picker>
如果未提供input-selector,则amp-date-picker会创建一个隐藏的输入字段,并使用amp-date-picker的id为其命名为date或${id}-date。
我们将讨论更多使用日期选择器提供的不同属性的示例。在上面,我们可以选择单个日期,因为我们提到type=”single”并将模式设置为静态。我们还可以通过将类型设置为type=”range”来选择日期范围。
示例
<!doctype html>
<html amp lang = "en">
<head>
<meta charset = "utf-8">
<script async src = "https://cdn.ampproject.org/v0.js"></script>
<title>Google AMP - Amp Date-Picker Static </title>
<link rel = "canonical" href = "http://example.ampproject.org/article-metadata.html">
<meta name = "viewport" content = "width = device-width, minimum-scale = 1,initial-scale = 1">
<style amp-boilerplate>
body{-webkit-animation:
-amp-start 8s steps(1,end) 0s 1 normal both;-moz-animation:
-amp-start 8s steps(1,end) 0s 1 normal both;-ms-animation:
-amp-start 8s steps(1,end) 0s 1 normal both;animation:
-amp-start 8s steps(1,end) 0s 1 normal both
}
@-webkit-keyframes
-amp-start{from{visibility:hidden}to{visibility:visible}}@-moz-keyframes
-amp-start{from{visibility:hidden}to{visibility:visible}}@-ms-keyframes
-amp-start{from{visibility:hidden}to{visibility:visible}}@-o-keyframes
-amp-start{from{visibility:hidden}to{visibility:visible}}@keyframes
-amp-start{from{visibility:hidden}to{visibility:visible}}
</style>
<noscript>
<style amp-boilerplate>
body{
-webkit-animation:
none;-moz-animation:none;-ms-animation:none;animation:none}
</style>
</noscript>
<script async custom-element = "amp-date-picker"
src = "https://cdn.ampproject.org/v0/amp-date-picker-0.1.js">
</script>
<script async custom-element = "amp-bind"
src = "https://cdn.ampproject.org/v0/amp-bind-0.1.js">
</script>
<script async custom-template = "amp-mustache"
src = "https://cdn.ampproject.org/v0/amp-mustache-0.1.js">
</script>
<style>
input[type = text]{
width: 50%;
padding: 12px;
border: 1px solid #ccc;
border-radius: 4px;
resize: vertical;
}
label {padding: 12px 12px 12px 0;display: inline-block;}
.col-label {float: left;width: 25%;margin-top: 6px;}
.col-content {float: left;width: 75%;margin-top: 6px;}
.row:after {content: "";display: table;clear: both;}
.amp_example {
background-color: #f1f1f1;
padding: 0.01em 16px;
margin: 20px 0;
box-shadow: 0 2px 4px 0
rgba(0,0,0,0.16),0 2px 10px 0
rgba(0,0,0,0.12)!important;
}
h3{
font-family: "Segoe UI",Arial,sans-serif;
font-weight: 400;margin: 10px 0;
}
</style>
</head>
<body>
<div class = "amp_example">
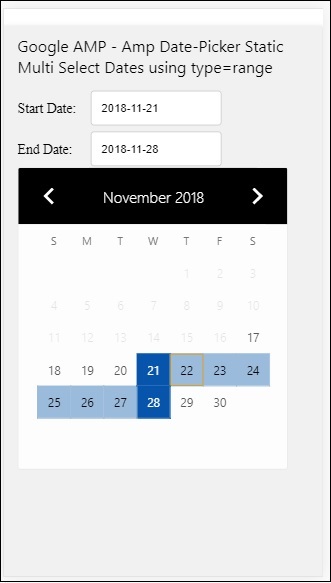
<h3>Google AMP - Amp Date-Picker Static Multi Select Dates using type = range</h3>
<amp-date-picker
id = "static-date"
type = "range"
mode = "static"
layout = "fixed-height"
height = "600"
start-input-selector = "#start"
end-input-selector = "#end"
format = "YYYY-MM-DD"
input-selector = "#static-date-input">
<div class = "row">
<div class = "col-label">
<label for = "start">Start Date:</label>
</div>
<div class = "col-content">
<input type = "text" id = "start"
name = "start" placeholder = "Start Date">
</div>
</div>
<div class = "row">
<div class = "col-label">
<label for = "end">End Date:</label>
</div>
<div class = "col-content">
<input type = "text" id = "end"
name = "end" placeholder = "End Date">
</div>
</div>
</amp-date-picker>
</div>
</body>
</html>
输出
上面代码的输出如下所示。
如何使用type= ”range”从amp-date-picker中获取开始日期和结束日期?
为了获取开始日期和结束日期,我们使用了amp-date-picker属性start-input-selector和end-input-selector。
语法细节如下所示。
<amp-date-picker id = "static-date" type = "range" mode = "static" layout = "fixed-height" height = "600" start-input-selector = "#start" end-input-selector="#end" format = "YYYY-MM-DD" input-selector = "#static-date-input"> <input type = "text" id = "start" name = "start" placeholder="Start Date"> <input type = "text" id = "end" name = "end" placeholder = "End Date"> </amp-date-picker>
两个选择器都有输入字段id,我们希望开始日期和结束日期显示在那里。您也可以像这里讨论的那样提供输入字段的名称。
AMP覆盖日期选择器
对于覆盖模式日期选择器,日历将作为对输入字段的响应显示。我们可以使用覆盖模式和type=” single”以及type=”range”,就像我们在静态日期选择器中看到的那样。
现在让我们看看一个为覆盖类型日期选择器选择日期范围的工作示例。
示例
<!doctype html>
<html amp lang = "en">
<head>
<meta charset = "utf-8">
<script async src = "https://cdn.ampproject.org/v0.js"></script>
<itle>Google AMP - Amp Date-Picker Static</title>
<link rel = "canonical" href = "http://example.ampproject.org/article-metadata.html">
<meta name = "viewport" content = "width = device-width,minimum-scale = 1,initial-scale = 1">
<style amp-boilerplate>
body{
-webkit-animation:
-amp-start 8s steps(1,end) 0s 1 normal both;-moz-animation:
-amp-start 8s steps(1,end) 0s 1 normal both;-ms-animation:
-amp-start 8s steps(1,end) 0s 1 normal both;animation:
-amp-start 8s steps(1,end) 0s 1 normal both
}
@-webkit-keyframes
-amp-start{from{visibility:hidden}to{visibility:visible}}@-moz-keyframes
-amp-start{from{visibility:hidden}to{visibility:visible}}@-ms-keyframes
-amp-start{from{visibility:hidden}to{visibility:visible}}@-o-keyframes
-amp-start{from{visibility:hidden}to{visibility:visible}}@keyframes
-amp-start{from{visibility:hidden}to{visibility:visible}}
</style>
<noscript>
<style amp-boilerplate>
body{
-webkit-animation:
none;-moz-animation:none;-ms-animation:none;animation:none}
</style>
</noscript>
<script async custom-element = "amp-date-picker"
src = "https://cdn.ampproject.org/v0/amp-date-picker-0.1.js">
</script>
<script async custom-element = "amp-bind"
src = "https://cdn.ampproject.org/v0/amp-bind-0.1.js">
</script>
<script async custom-template = "amp-mustache"
src = "https://cdn.ampproject.org/v0/amp-mustache-0.1.js">
</script>
<style>
input[type=text]{
width: 50%;
padding: 12px;border:
1px solid #ccc;
border-radius: 4px;resize: vertical;
}
label {
padding: 12px 12px 12px 0;
display: inline-block;
font-family: "Segoe UI",Arial,sans-serif;
font-weight: 400;
}
.col-label {float: left;width: 25%;margin-top: 6px;}
.col-content {float: left;width: 75%;margin-top: 6px;}
.row:after {content: "";display: table;clear: both;}
.amp_example {
background-color: #f1f1f1;
padding: 0.01em 16px;
margin: 20px 0;
box-shadow: 0 2px 4px 0
rgba(0,0,0,0.16),0 2px 10px 0
rgba(0,0,0,0.12)!important;
}
h3{font-family: "Segoe UI",Arial,sans-serif;font-weight: 400;margin: 10px 0;}
button { background-color: #ACAD5C;
color: white;
padding: 12px 20px;
border: none;
border-radius: 4px;
cursor: pointer;
float: right;
}
</style>
</head>
<body>
<div class = "amp_example">
<h3>Google AMP - Amp Date-Picker Overlay Multi Select Dates using type = rangelt;/h3>
<amp-date-picker id = "overlay-date"
type = "range"
mode = "overlay"
start-input-selector = "#start"
end-input-selector = "#end"
format = "YYYY-MM-DD"
open-after-select
input-selector = "#start">
<div class = "row">
<div class = "col-label">
<label for = "start">Start Date:lt;/label>
</div>
<div class = "col-content">
<input type = "text" id = "start"
name = "start" placeholder = "Start Date">
</div>
</div>
<div class = "row">
<div class = "col-label">
<label for = "end">End Date:lt;/label>
</div>
<div class = "col-content">
<input type = "text" id="end" name = "end"
placeholder = "End Date">
</div>
</div>
<div class = "row">
<div class = "col-label">
</div>
<div class = "col-content">
<button class = "ampstart-btn caps" on = "tap:overlay-date.clear">
Clear
</button>
</div>
</div>
</amp-date-picker>
</div>
</body>
</html>
输出
上面代码的输出如下所示。
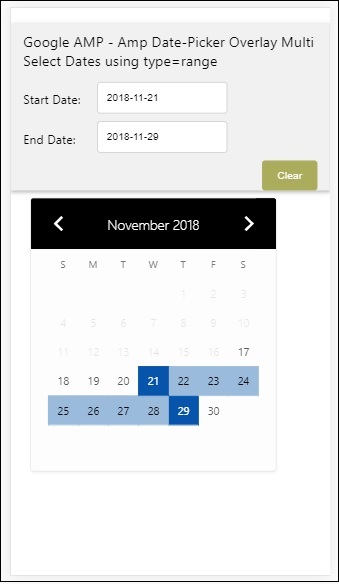
我们已经看到了如何获取开始日期和结束日期。请注意,我们在这里使用了另一个属性open-after-select。此属性将在选择后保持覆盖层打开。如果您单击日期选择器外部,它将关闭。还有一个名为clear的按钮。单击clear按钮,所选日期将被清除。执行此操作的语法如下所示。
<button class = "ampstart-btn caps" on = "tap:overlay-date.clear"> Clear </button>
要添加事件,我们必须使用on属性。本教程的事件章节将详细讨论事件。我们使用了tag行为,并为其提供了日期选择器的id和clear事件,该事件负责清除所选的日期范围。
接下来,让我们看看如何使用amp-date-picker作为灯箱。
AMP灯箱日期选择器
日期选择器可以在模态窗口内使用。我们也可以使用灯箱日期选择器来实现相同的功能。让我们通过一个工作示例来了解这一点。
要在灯箱内使用日期选择器,我们需要添加灯箱脚本,如下所示。
<script async custom-element = "amp-lightbox" src = "https://cdn.ampproject.org/v0/amp-lightbox-0.1.js"> </script>
示例
<!doctype html>
<html amp lang = "en">
<head>
<meta charset = "utf-8">
<script async src = "https://cdn.ampproject.org/v0.js"></script>
<title>Google AMP - Amp Date-Picker Static </title>
<link rel = "canonical" href = "http://example.ampproject.org/article-metadata.html">
<meta name = "viewport" content = "width=device-width,minimum-scale = 1,initial-scale = 1">
<style amp-boilerplate>
body{
-webkit-animation:
-amp-start 8s steps(1,end) 0s 1 normal both;-moz-animation:
-amp-start 8s steps(1,end) 0s 1 normal both;-ms-animation:
-amp-start 8s steps(1,end) 0s 1 normal both;animation:
-amp-start 8s steps(1,end) 0s 1 normal both
}
@-webkit-keyframes
-amp-start{from{visibility:hidden}to{visibility:visible}}@-moz-keyframes
-amp-start{from{visibility:hidden}to{visibility:visible}}@-ms-keyframes
-amp-start{from{visibility:hidden}to{visibility:visible}}@-o-keyframes
-amp-start{from{visibility:hidden}to{visibility:visible}}@keyframes
-amp-start{from{visibility:hidden}to{visibility:visible}}
</style>
<noscript>
<style amp-boilerplate>
body{
-webkit-animation:none;
-moz-animation:none;
-ms-animation:none;
animation:none}
</style>
</noscript>
<script async custom-element = "amp-date-picker"
src = "https://cdn.ampproject.org/v0/amp-date-picker-0.1.js">
</script>
<script async custom-element = "amp-bind" src = "
https://cdn.ampproject.org/v0/amp-bind-0.1.js">
<script>
<script async custom-template = "amp-mustache"
src = "https://cdn.ampproject.org/v0/amp-mustache-0.1.js">
</script>
<script async custom-element = "amp-lightbox"
src = "https://cdn.ampproject.org/v0/amp-lightbox-0.1.js">
</script>
<style>
input[type=text]{
width: 50%;
padding: 12px;
border: 1px solid #ccc;
border-radius: 4px;
resize: vertical;
}
label {
padding: 12px 12px 12px 0;
display: inline-block;
font-family: "Segoe UI",Arial,sans-serif;
font-weight: 400;
}
.col-label {
float: left;width: 25%;
margin-top: 6px;
}
.col-content {
float: left;
width: 75%;
margin-top: 6px;
}
.row:after {
content: "";
display: table;clear: both;
}
.amp_example {
background-color: #f1f1f1;
padding: 0.01em 16px;
margin: 20px 0;
box-shadow: 0 2px 4px 0 rgba(0,0,0,0.16),0 2px 10px 0rgba(0,0,0,0.12)!important;
}
h3{font-family: "Segoe UI",Arial,sans-serif;
font-weight: 400;
margin: 10px 0;
}
button {
background-color: #ACAD5C;
color: white;
padding: 12px 20px;
border: none;
border-radius: 4px;
cursor: pointer;
float: right;
}
.lightbox {background-color: rgba(100, 100, 100, 0.5);}
</style>
</head>
<body>
<div class = "amp_example">
<h3>Google AMP - Amp Date-Picker Overlay Multi Select Dates using type = range</h3>
<div class = "row">
<div class = "col-label">
<label for = "start">Start Date:</label>
<div>
<div class = "col-content">
<input type = "text" id = "start" name =
"start" placeholder = "Start Date" on = "tap:lightbox.open">
</div>
</div>
<div class = "row">
<div class = "col-label">
<label for = "end">End Date:</label>
</div>
<div class = "col-content">
<input type = "text" id = "end" name =
"end" placeholder = "End Date" on = "tap:lightbox.open">
</div>
</div>
<div class = "row">
<div class = "col-label"></div>
<div class = "col-content">
<button class = "ampstart-btn caps" on =
"tap:overlay-date.clear">Clear</button>
</div>
</div>
<amp-lightbox id = "lightbox" layout = "nodisplay" class = "lightbox">
<amp-date-picker id = "overlay-date"
type = "range"
layout = "fill"
start-input-selector = "#start"
end-input-selector = "#end"
format = "YYYY-MM-DD"
on = "activate: lightbox.open;deactivate: lightbox.close">
</amp-date-picker>
</amp-lightbox>
</div>
</body>
</html>
输出
当用户单击输入字段时,日期选择器将在灯箱内打开,如下所示。

要执行此操作,需要在输入字段上添加一个事件,如下所示。
<input type = "text" id = "start" name = "start" placeholder = "Start Date" on = "tap:lightbox.open"> <input type = "text" id = "end" name = "end" placeholder = "End Date" on = "tap:lightbox.open">
请注意,“on”是事件,它调用tap − lightbox.open以打开灯箱。
这里的lightbox是赋予amp-lightbox的id,如以下所示。amp-date-picker在amp-lightbox内调用,并在点击输入字段时激活。
<amp-lightbox id = "lightbox" layout = "nodisplay" class = "lightbox">
<amp-date-picker id = "overlay-date"
type = "range"
layout = "fill"
start-input-selector = "#start"
end-input-selector = "#end"
format = "YYYY-MM-DD"
on = "activate: lightbox.open;deactivate: lightbox.close">
</amp-date-picker>
</amp-lightbox>
Google AMP - 故事
Amp-story是一个amp组件,用于显示内容,使用户参与故事。例如,使用一系列图像讲述品牌故事。
要使用amp-story,我们需要包含如下所示的脚本。
<script async custom-element = "amp-story" src = "https://cdn.ampproject.org/v0/amp-story-1.0.js"> </script>
在本章中,让我们了解什么是amp-story以及它是如何工作的。假设我们有一个图片库,并希望在页面上显示它。在amp页面中,我们可以使用amp-story组件使它看起来更漂亮、更具互动性。
amp-story标签的格式如下所示。
<amp-story standalone> ---> Main story Tag
<amp-story-page id = "page-1"> ---> Pages inside the story e.g page1
<amp-story-grid-layer template = "fill"> -->
Layers for the page1.You can have more than one layer.
//Add html elements here or amp components
</amp-story-grid-layer>
<amp-story-grid-layer template = "fill"> -->
Layers for the page1.You can have more than one layer.
//Add html elements here or amp components
</amp-story-grid-layer>
...
</amp-story-page>
<amp-story-page id = "page-2"> ---> Pages inside the story e.g page2
<amp-story-grid-layer template = "fill"> -->
Layers for the page2.You can have more than one layer.
//Add html elements here or amp components
</amp-story-grid-layer>
...
</amp-story-page>
...
</amp-story>
为amp-story添加了一些额外的属性,如下所示。
<amp-story standalone title = "My Story" publisher = "The AMP Team" publisher-logo-src = "publisherlogo image here" poster-portrait-src = "poster portrait here" poster-square-src = "poster square image here" poster-landscape-src = "poster landscape image here">
此功能使使用amp进行故事讲述具有很强的互动性。
以下代码显示了一个amp-story的工作示例。桌面和移动模式下的输出也显示出来了。
示例
<!doctype html>
<html amp lang = "en">
<head>
<meta charset = "utf-8">
<script async src = "https://cdn.ampproject.org/v0.js"></script>
<script async custom-element = "amp-story" src = "https://cdn.ampproject.org/v0/amp-story-1.0.js"></script>
<title>Google AMP - Story</title>
<meta name = "viewport" content = "width = device-width,minimum-scale = 1,initial-scale=1">
<link rel = "canonical" href = "/stories/introduction/amp_story_hello_world/">
<style amp-boilerplate>
body{
-webkit-animation:
-amp-start 8s steps(1,end) 0s 1 normal both;-moz-animation:
-amp-start 8s steps(1,end) 0s 1 normal both;-ms-animation:
-amp-start 8s steps(1,end) 0s 1 normal both;animation:
-amp-start 8s steps(1,end) 0s 1 normal both
}
@-webkit-keyframes
-amp-start{from{visibility:hidden}to{visibility:visible}}@-moz-keyframes
-amp-start{from{visibility:hidden}to{visibility:visible}}@-ms-keyframes
-amp-start{from{visibility:hidden}to{visibility:visible}}@-o-keyframes
-amp-start{from{visibility:hidden}to{visibility:visible}}@keyframes
-amp-start{from{visibility:hidden}to{visibility:visible}}
</style>
<noscript>
<style amp-boilerplate>
body{
-webkit-animation:
none;-moz-animation:none;
-ms-animation:none;
animation:none}
</style>
</noscript>
<style amp-custom>
amp-story {
font-family: Roboto, Helvetica, Arial, sans-serif;
}
amp-story-page * {
color: white;
text-align: center;
}
</style>
</head>
<body>
<amp-story standalone title = "Stories in AMP - Hello World" publisher = "AMP Project">
<amp-story-page id = "page-1">
<amp-story-grid-layer template = "fill">
<amp-img src = "images/christmas1.jpg"
width = "300" height = "250"
layout = "responsive">
</amp-img>
</amp-story-grid-layer>
<amp-story-grid-layer template = "vertical">
<h1>Hello World</h1>
<p>This is an AMP Story.</p>
</amp-story-grid-layer>
</amp-story-page>
<amp-story-page id = "page-2">
<amp-story-grid-layer template = "fill">
<amp-img src = "images/christmas5.jpg"
width = "300" height = "250"
layout = "responsive">
</amp-img>
</amp-story-grid-layer>
<amp-story-grid-layer template = "vertical">
<h1>Hello World</h1>
<p>This is an AMP Story.</p>
</amp-story-grid-layer>
</amp-story-page>
<amp-story-page id = "page-3">
<amp-story-grid-layer template = "fill">
<amp-img src = "images/christmas3.jpg"
width = "300" height = "250"
layout = "responsive">
</amp-img>
</amp-story-grid-layer>
<amp-story-grid-layer template = "vertical">
<h1>Hello World</h1>
<p>This is an AMP Story.</p>
</amp-story-grid-layer>
</amp-story-page>
<amp-story-page id = "page-4">
<amp-story-grid-layer template = "fill">
<amp-img src = "images/christmas4.jpg"
width = "300" height="250"
layout = "responsive">
</amp-img>
</amp-story-grid-layer>
<amp-story-grid-layer template = "vertical">
<h1>Hello World</h1>
<p>This is an AMP Story.</p>
</amp-story-grid-layer>
</amp-story-page>
<amp-story-bookend src = "ampstory.json" layout = "nodisplay">
</amp-story-bookend>
</amp-story>
<body>
</html>
ampstory.json
{
"bookendVersion": "v1.0",
"shareProviders": [
"email",
"twitter",
"tumblr",
{
"provider": "facebook",
"app_id": "254325784911610"
}
],
"components": [
{
"type": "heading",
"text": "Introduction"
},
{
"type": "small",
"title": "Next Story is on Car Brands",
"url": "ampcarbrand.html",
"image": "images/audi.jpg"
}
]
}
桌面输出


这就是故事部分的显示方式。您还可以添加视频或任何其他amp组件,使故事更具互动性。
一旦到达故事的结尾,它将显示amp-bookend中提供的内容,如下所示。
<amp-story-bookend src = "ampstory.json" layout = "nodisplay"> </amp-story-bookend>
我们向amp-bookend提供了一个ampstory.json文件。json文件包含下一个故事预览的详细信息,如下所示。当用户单击右侧显示的三个点时,将显示以下屏幕。
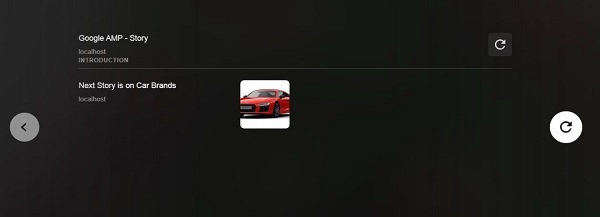
它提供了一个重播按钮,该按钮将重新加载故事。您可以单击汽车的图片,它将显示汽车品牌的 story。
移动模式下的输出如下所示。


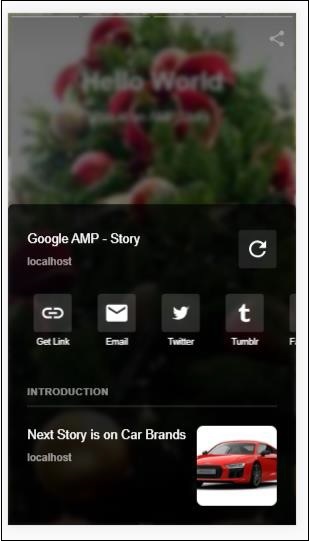
Google AMP - 选择器
Amp-selector是一个amp组件,它显示选项菜单,用户可以在选项之间进行选择。显示的选项可以是文本、图像或任何其他amp组件。在本章中,让我们详细讨论一下。
要使用amp-selector,我们需要包含以下javascript文件。
<script async custom-element = "amp-selector" src = "https://cdn.ampproject.org/v0/amp-selector-0.1.js"> </script>
amp-selector格式
以下代码显示了amp-selector格式的示例。
<amp-selector layout = "container">
<amp-img src = "images/christmas1.jpg"
width = "60"
height = "40"
option = "1">
<amp-img src = "images/christmas2.jpg"
width = "60"
height = "40"
option = "2">
</amp-img>
<amp-img src = "images/christmas3.jpg"
width = "60"
height = "40"
option = "3">
</amp-img>
<amp-img src = "images/christmas4.jpg"
width = "60"
height = "40"
option = "4">
</amp-img>
</amp-selector>
您可以在amp-selector内使用标准html标签或amp组件。内容像菜单一样显示在屏幕上,用户可以在它们之间进行选择。显示的菜单可以是单选或多选。
让我们通过以下给出的单选和多选示例来了解这一点。
Amp Selector单选
以下代码是amp-selector单选的示例。
<!doctype html>
<html amp lang = "en">
<head>
<meta charset = "utf-8">
<script async src = "https://cdn.ampproject.org/v0.js"></script>
<title>Google AMP - Amp Selector</title>
<link rel = "canonical" href = "http://example.ampproject.org/article-metadata.html">
<meta name="viewport" content="width=device-width,minimum-scale = 1,initial-scale = 1">
<style amp-boilerplate>
body{-
webkit-animation:-amp-start 8s steps(1,end) 0s 1 normal both;-moz-animation:
-amp-start 8s steps(1,end) 0s 1 normal both;-ms-animation:
-amp-start 8s steps(1,end) 0s 1 normal both;animation:
-amp-start 8s steps(1,end) 0s 1 normal both
}
@-webkit-keyframes
-amp-start{from{visibility:hidden}to{visibility:visible}}@-moz-keyframes
-amp-start{from{visibility:hidden}to{visibility:visible}}@-ms-keyframes
-amp-start{from{visibility:hidden}to{visibility:visible}}@-o-keyframes
-amp-start{from{visibility:hidden}to{visibility:visible}}@keyframes
-amp-start{from{visibility:hidden}to{visibility:visible}}
</style>
<noscript>
<style amp-boilerplate>
body{
-webkit-animation:none;-moz-animation:none;
-ms-animation:none;animation:none}
</style>
</noscript>
<script async custom-element="amp-selector"
src = "https://cdn.ampproject.org/v0/amp-selector-0.1.js">
</script>
<style amp-custom>
amp-selector:not([disabled])
amp-img[option][selected]:not([disabled]) {
outline-color: #b6A848;
outline-width: 2px;
}
</style>
</head>
<body>
<h3>Google AMP - Amp Selector</h3>
<amp-selector layout = "container">
<amp-img src = "images/christmas1.jpg"
width = "60"
height = "40"
option="1">
</amp-img>
<amp-img src="images/christmas2.jpg"
widt h = 60"
height = "40"
option = "2">
</amp-img>
<amp-img src = "images/christmas3.jpg"
width = "60"
height = "40"
option = "3">
</amp-img>
<amp-img src = "images/christmas4.jpg"
width = "60"
height = "40"
option = "4">
</amp-img>
</amp-selector>
</body>
</html>
输出
上面给定代码的输出如下所示。
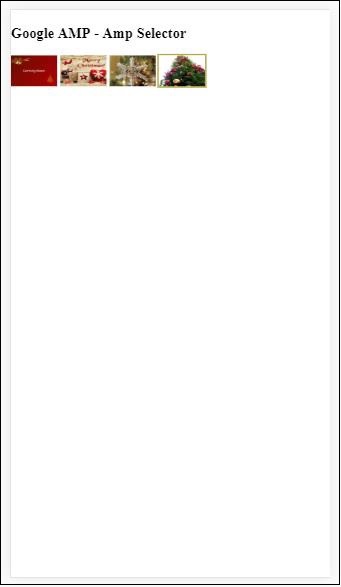
请注意,在上面的示例中,我们使用了amp-selector并在其中使用了图像来显示选项。它是一个单选选择器,因此您可以选择任何一个图像,如输出所示。
Amp Selector多选
在这个例子中,让我们使用多个属性显示带有图像的amp-selector,我们可以从选择器中选择多个选项。
示例
<!doctype html>
<html amp lang = "en">
<head>
<meta charset = "utf-8 ">
<script async src = "https://cdn.ampproject.org/v0.js"></script>
<title>Google AMP - Amp Selector</title>
<link rel = "canonical" href = "http://example.ampproject.org/article-metadata.html">
<meta name = "viewport" content = "width = device-width,minimum-scale = 1,initial-scale =1">
<style amp-boilerplate>
body{-webkit-animation:
-amp-start 8s steps(1,end) 0s 1 normal both;-moz-animation:
-amp-start 8s steps(1,end) 0s 1 normal both;-ms-animation:
-amp-start 8s steps(1,end) 0s 1 normal both;animation:
-amp-start 8s steps(1,end) 0s 1 normal both}
@-webkit-keyframes
-amp-start{from{visibility:hidden}to{visibility:visible}}@-moz-keyframes
-amp-start{from{visibility:hidden}to{visibility:visible}}@-ms-keyframes
-amp-start{from{visibility:hidden}to{visibility:visible}}@-o-keyframes
-amp-start{from{visibility:hidden}to{visibility:visible}}@keyframes
-amp-start{from{visibility:hidden}to{visibility:visible}}
</style>
<noscript>
<style amp-boilerplate>
body{
-webkit-animation:none;-moz-animation:none;
-ms-animation:none;animation:none
}
</style>
</noscript>
<script async custom-element = "amp-selector"
src = "https://cdn.ampproject.org/v0/amp-selector-0.1.js">
</script>
<style amp-custom>
amp-selector:not([disabled])
amp-img[option][selected]:not([disabled]) {
outline-color: blue;
outline-width: 2px;
}
</style>
</head>
<body>
<h3>Google AMP - Amp Selector</h3>
<amp-selector layout = "container" multiple>
<amp-img src = "images/christmas1.jpg"
width = "60"
height ="40"
option = "1">
</amp-img>
<amp-img src="images/christmas2.jpg"
width = "60"
height = "40"
option = "2">
</amp-img>
<amp-img src ="images/christmas3.jpg"
width = "60"
height = "40"
option = "3">
</amp-img>
<amp-img src = "images/christmas4.jpg"
width = "60"
height = "40"
option = "4">
</amp-img>
</amp-selector>
</body>
</html>
输出
上面代码的输出如下所示。
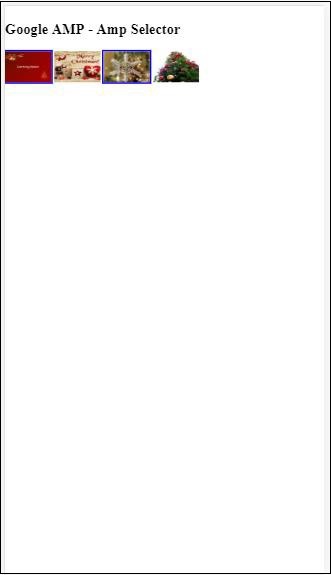
我们还可以使用amp-selector显示单选按钮,如以下给出的代码所示。
示例
<!doctype html>
<html amp lang = "en">
<head>
<meta charset = "utf-8">
<script async src = "https://cdn.ampproject.org/v0.js"></script>
<title>Google AMP - Amp Selector</title>
<link rel = "canonical" href = "http://example.ampproject.org/article-metadata.html">
<meta name = "viewport" content ="width = device-width,minimum-scale = 1,initial-scale = 1">
<style amp-boilerplate>
body{
-webkit-animation:
-amp-start 8s steps(1,end) 0s 1 normal both;-moz-animation:
-amp-start 8s steps(1,end) 0s 1 normal both;-ms-animation:
-amp-start 8s steps(1,end) 0s 1 normal both;animation:
-amp-start 8s steps(1,end) 0s 1 normal both
}
@-webkit-keyframes
-amp-start{from{visibility:hidden}to{visibility:visible}}@-moz-keyframes
-amp-start{from{visibility:hidden}to{visibility:visible}}@-ms-keyframes
-amp-start{from{visibility:hidden}to{visibility:visible}}@-o-keyframes
-amp-start{from{visibility:hidden}to{visibility:visible}}@keyframes
-amp-start{from{visibility:hidden}to{visibility:visible}}
</style>
<noscript>
<style amp-boilerplate>
body{
-webkit-animation:none;
-moz-animation:none;
-ms-animation:none;
animation:none}
</style>
</noscript>
<script async custom-element = "amp-selector"
src = "https://cdn.ampproject.org/v0/amp-selector-0.1.js">
</script>
<style amp-custom>
.radio-menu {
list-style: none;
}
.radio-menu [option][selected] {
outline: none;
}
.radio-menu [option] {
display: flex;
align-items: center;
}
.radio-menu [option]:before {
transition: background 0.25s ease-in-out;
content: "";
display: inline-block;
width: 24px;
height: 24px;
margin: 8px;
border-radius: 100%;
border: solid 1px black;
}
.radio-menu [option = red][selected]:before {
text-align: center;
content: "✓";
color: white;
background: red;
}
.radio-menu [option = green][selected]:before {
text-align: center;
content: "✓";
color: white;
background: green;
}
.radio-menu [option = blue][selected]:before {
text-align: center;
content: "✓";
color: white;
background: blue;
}
</style>
</head>
<body>
<h3>Google AMP - Amp Selector</h3>
<amp-selector class = "radio-menu" layout = "container" name = "my-selector">
<div option = "red">Red</div>
<div option = "green">Green</div>
<div option = "blue">Blue</div>
</amp-selector>
</body>
</html>
输出
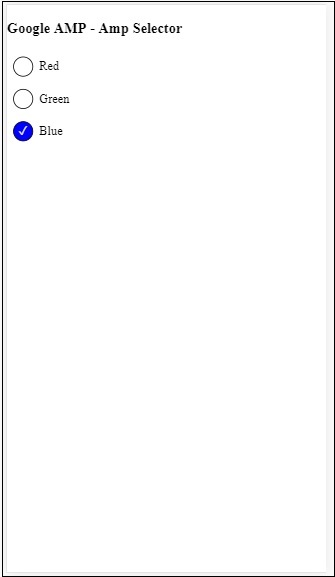
Google AMP - 链接
amp中的Link标签用于告诉Google搜索引擎可用的amp和非amp页面。在本章中,让我们详细讨论与Link标签相关的方面以及Google如何确定amp页面和非amp页面。
AMP页面发现
假设您有一个名为www.mypage.com的网站。新闻文章链接到页面:www.mypage.com/news/myfirstnews.html。
当用户在Google搜索引擎中搜索并且碰巧获得了非amp页面时,为了也获得amp页面的引用,我们需要使用link标签指定amp url,如下所示。
示例
非 amp 页面的页面 URL
<link rel = "amphtml" href = "https://www.mypage.com/news/amp/myfirstnews_amp.html">
这里rel= ”amphtml”是在非amp页面中指定的,用于指向amp版本,以便Google根据平台显示正确的版本。
amp 页面的页面 URL
<link rel = "canonical" href = "https://www.mypage.com/news/myfirstnews.html">
这里rel=”canonical”是在amp页面中指定的,用于指向html的标准版本,以便Google根据平台显示正确的版本。
如果您的网站只有一个页面,即amp页面,您仍然不应忘记添加rel=”canonical”,它将指向自身。
<link rel = "canonical" href = "https://www.mypage.com/news/amp/myfirstnews_amp.html">
下图显示了指向amp页面的rel=”amphtml”和指向标准html页面的rel=”canonical”的引用。
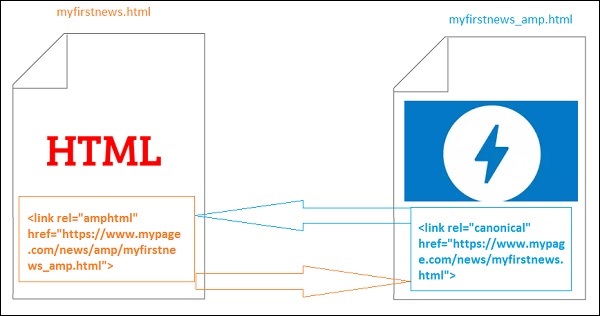
使用Link加载字体
字体可以通过link外部加载,如下所示。
<link rel = "stylesheet" href = "https://fonts.googleapis.ac.cn/css?family=Roboto">
请注意,只允许白名单来源。我们可以获取字体的白名单来源列表如下所示。
Fonts.com - https://fast.fonts.net
Google Fonts - https://fonts.googleapis.ac.cn
Font Awesome - https://maxcdn.bootstrap.ac.cn
Typekit - https://use.typekit.net/kitId.css(相应替换 kitId)
一个使用rel=”canonical”和rel=”stylesheet”的工作示例如下所示。
示例
<!doctype html>
<html amp>
<head>
<meta charset ="utf-8">
<title>Amp Sample Page</title>
<link rel = "canonical" href = "amppage.html">
<meta name = "viewport" content = "width = device-width,minimum-scale=1,initial-scale = 1">
<style amp-custom>
h1 {color: red}
</style>
<style amp-boilerplate>
body{
-webkit-animation:
-amp-start 8s steps(1,end) 0s 1 normal both;-moz-animation:
-amp-start 8s steps(1,end) 0s 1 normal both;-ms-animation:
-amp-start 8s steps(1,end) 0s 1 normal both;animation:
-amp-start 8s steps(1,end) 0s 1 normal both
}
@-webkit-keyframes
-amp-start{from{visibility:hidden}to{visibility:visible}}@-moz-keyframes
-amp-start{from{visibility:hidden}to{visibility:visible}}@-ms-keyframes
-amp-start{from{visibility:hidden}to{visibility:visible}}@-o-keyframes
-amp-start{from{visibility:hidden}to{visibility:visible}}@keyframes
-amp-start{from{visibility:hidden}to{visibility:visible}}
</style>
<noscript>
<style amp-boilerplate>
body{
-webkit-animation:none;
-moz-animation:none;
-ms-animation:none;
animation:none
}
</style>
</noscript>
<script async src = "https://cdn.ampproject.org/v0.js"></script>
<link rel = "stylesheet" href = "https://fonts.googleapis.ac.cn/css?family=Roboto">
</head>
<body>
<h1>Amp Sample Page</h1>
<p>
<amp-img src = "images/christmas1.jpg"
width = "300" height = "250"
layout = "responsive">
</amp-img>
</p>
<p style = "font-family: 'Roboto'; font-size:25px;">
Welcome to Amp Page
</p>
</body>
</html>
输出
上面代码的输出如下所示。
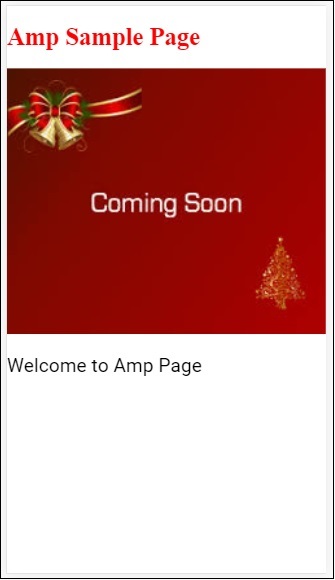
Google AMP - 字体
Amp font是amp中的一个amp组件,它主要帮助触发和监控amp页面的自定义字体。本章详细讨论了amp-font。
要使用amp-font,我们需要添加以下javascript文件。
<script async custom-element = "amp-font" src = "https://cdn.ampproject.org/v0/amp-font-0.1.js"> </script>
amp-font 组件用于控制字体加载所需的时间。它有一个 timeout 属性,用于指定超时时间(以毫秒为单位)。默认值为 3000 毫秒。该组件允许根据所需的字体是否加载或是否出现错误状态,从 document.documentElement 或 document.body 中添加/删除类。
amp-font 标签的格式如下所示:
<amp-font layout = "nodisplay" font-family = "Roboto Italic" timeout = "2000" on-error-remove-class = "robotoitalic-loading" on-error-add-class = "robotoitalic-missing" on-load-remove-class = "robotoitalic-loading" on-load-add-class = "robotoitalic-loaded"> </amp-font>
以下是一个如何在 amp 页面中使用 amp-font 的示例:
示例
<!doctype html>
<html amp lang = "en">
<head>
<meta charset = "utf-8">
<script async src = "https://cdn.ampproject.org/v0.js"></script>
<title>Google AMP - Amp Font</title>
<link rel = "canonical" href = "http://example.ampproject.org/article-metadata.html">
<meta name = "viewport" content = "width = device-width,minimum-scale = 1,initial-scale = 1">
<style amp-boilerplate>
body{
-webkit-animation:
-amp-start 8s steps(1,end) 0s 1 normal both;-moz-animation:
-amp-start 8s steps(1,end) 0s 1 normal both;-ms-animation:
-amp-start 8s steps(1,end) 0s 1 normal both;animation:
-amp-start 8s steps(1,end) 0s 1 normal both
}
@-webkit-keyframes
-amp-start{from{visibility:hidden}to{visibility:visible}}@-moz-keyframes
-amp-start{from{visibility:hidden}to{visibility:visible}}@-ms-keyframes
-amp-start{from{visibility:hidden}to{visibility:visible}}@-o-keyframes
-amp-start{from{visibility:hidden}to{visibility:visible}}@keyframes
-amp-start{from{visibility:hidden}to{visibility:visible}}
</style>
<noscript>
<style amp-boilerplate>
body{
-webkit-animation:none;
-moz-animation:none;
-ms-animation:none;
animation:none}
</style>
</noscript>
<cript async custom-element = "amp-font"
src = "https://cdn.ampproject.org/v0/amp-font-0.1.js"
></script>
<style amp-custom>
@font-face {
font-family: 'This font is not available';
font-style: normal;
font-weight: 300;
src: url(fonts/MissingFont.ttf) format('truetype');
}
.font-missing {
color:red;
font-size:25px;
}
</style>
</head>
<body>
<h1>Google AMP - Amp Font</h1>
<amp-font
layout = "nodisplay"
font-family = "Font Does Not exist"
timeout = "2000"
on-error-remove-class = "font-missing"
on-error-add-class = "font-error"
on-load-remove-class = "font-missing"
on-load-add-class = "font-loaded">
</amp-font>
<p class = "font-missing">
Example of amp-font component to show how
attributes on-error-remove-class,
on-error-add-class, on-load-remove-class
and on-load-add-class works when the font
file to be loaded does not exist.
</p>
</body>
</html>
输出
上面示例代码的输出结果如下所示:
以下是一个字体文件加载成功时 amp-font 的示例:
示例
<!doctype html>
<html amp lang = "en">
<head>
<meta charset = "utf-8">
<script async src = "https://cdn.ampproject.org/v0.js"></script>
<title>Google AMP - Amp Font</title>
<link rel = "canonical" href = "http://example.ampproject.org/article-metadata.html">
<meta name = "viewport" content = "width = device-width,minimum-scale = 1,initial-scale = 1">
<style amp-boilerplate>
body{
-webkit-animation:
-amp-start 8s steps(1,end) 0s 1 normal both;-moz-animation:
-amp-start 8s steps(1,end) 0s 1 normal both;-ms-animation:
-amp-start 8s steps(1,end) 0s 1 normal both;animation:
-amp-start 8s steps(1,end) 0s 1 normal both
}
@-webkit-keyframes
-amp-start{from{visibility:hidden}to{visibility:visible}}@-moz-keyframes
-amp-start{from{visibility:hidden}to{visibility:visible}}@-ms-keyframes
-amp-start{from{visibility:hidden}to{visibility:visible}}@-o-keyframes
-amp-start{from{visibility:hidden}to{visibility:visible}}@keyframes
-amp-start{from{visibility:hidden}to{visibility:visible}}
</style>
<noscript>
<style amp-boilerplate>
body{
-webkit-animation:none;
-moz-animation:none;
-ms-animation:none;
animation:none}
</style>
</noscript>
<script async custom-element = "amp-font"
src = "https://cdn.ampproject.org/v0/amp-font-0.1.js">
</script>
<style amp-custom>
@font-face {
font-family: 'This font is not available';
font-style: normal;
font-weight: 300;
src: url(fonts/MissingFont.ttf)
format('truetype');
}
@font-face {
font-family: 'Roboto Italic';
font-style: normal;
font-weight: 300;
src:url(fonts/Roboto-Italic.ttf) format('truetype');
}
.font-missing {
color:red;
font-size:25px;
}
.robotoitalic-loading {
color: green;
}
.robotoitalic-loaded {
font-size:25px;
color: blue;
}
.robotoitalic-missing {
color: red;
}
.robotoitalic {
font-family: 'Roboto Italic';
}
</style>
</head>
<body>
<h1>Google AMP - Amp Font</h1>
<amp-font
layout = "nodisplay"
font-family = "Font Does Not exist"
timeout = "2000"
on-error-remove-class = "font-missing"
on-error-add-class = "font-error"
on-load-remove-class = "font-missing"
on-load-add-class = "font-loaded">
</amp-font>
<p class="font-missing">
Example of amp-font component to show
how attributes on-error-remove-class,
on-error-add-class, on-load-remove-class
and on-load-add-class works when the
font file to be loaded does not exist.
</p>
<amp-font
layout = "nodisplay"
font-family = "Roboto Italic"
timeout = "2000"
on-error-remove-class = "robotoitalic-
loading"
on-error-add-class = "robotoitalic-missing"
on-load-remove-class = "robotoitalic-loading"
on-load-add-class = "robotoitalic-loaded">
</amp-font>
<p class = "robotoitalic">
Example of amp-font component to show how
attributes on-error-remove-class,
on-error-add-class, on-load-remove-class
and on-load-add-class works when the font
file exists and loads fine.
</p>
</body>
</html>
输出
上面示例代码的输出结果如下所示:
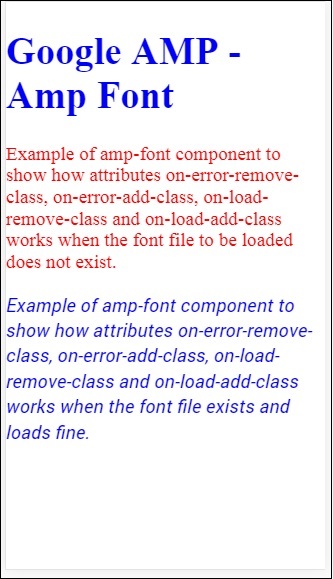
以上示例演示了如何使用字体属性,例如 **font-family、timeout、on-error-remove-class、on-error-add-class、on-load-remove-class、on-load-add-class**。这些类决定了字体加载是否成功或出现错误。
Google AMP - 列表
amp-list 是一个 amp 组件,它调用一个 CORS json 端点,并在模板内以 json 文件的形式显示数据。让我们通过一些示例来理解这一点。
要使用 amp-list,我们需要包含以下脚本:
<script async custom-element = "amp-list" src = "https://cdn.ampproject.org/v0/amp-list-0.1.js"> </script>
这是 amp-list 标签的格式:
<amp-list width = "auto" height = "100"
layout = "fixed-height" src = "amplist.json" class = "m1">
<template type = "amp-mustache">
<div class = "images_for_display">
<amp-img width = "150"
height = "100"
alt = "{{title}}"
src = "{{url}}">
</amp-img>
</div>
</template>
</amp-list>
amp-list 使用的 src 是一个 json 文件,其中包含要列出的详细信息。我们可以在 amp-list 内部使用普通的 html 标签或 amp 组件来显示来自 json 文件的数据。模板类型 amp-mustache 用于将数据绑定到要显示的内容。
让我们通过以下工作示例来了解这一点:
示例
<!doctype html>
<html amp lang = "en">
<head>
<meta charset = "utf-8">
<script async src = "https://cdn.ampproject.org/v0.js"></script>
<title>Google AMP - Amp List</title>
<link rel = "canonical" href = "http://example.ampproject.org/article-metadata.html">
<meta name = "viewport" content = "width = device-width,minimum-scale = 1,initial-scale = 1">
<style amp-boilerplate>
body{-webkit-animation:
-amp-start 8s steps(1,end) 0s 1 normal both;-moz-animation:
-amp-start 8s steps(1,end) 0s 1 normal both;-ms-animation:
-amp-start 8s steps(1,end) 0s 1 normal both;animation:
-amp-start 8s steps(1,end) 0s 1 normal both
}
@-webkit-keyframes
-amp-start{from{visibility:hidden}to{visibility:visible}}@-moz-keyframes
-amp-start{from{visibility:hidden}to{visibility:visible}}@-ms-keyframes
-amp-start{from{visibility:hidden}to{visibility:visible}}@-o-keyframes
-amp-start{from{visibility:hidden}to{visibility:visible}}@keyframes
-amp-start{from{visibility:hidden}to{visibility:visible}}
</style>
<noscript>
<style amp-boilerplate>
body{
-webkit-animation:none;-moz-animation:none;
-ms-animation:none;animation:none}
</style>
</noscript>
<script async custom-element = "amp-list"
src = "https://cdn.ampproject.org/v0/amp-list-0.1.js">
</script>
<script async custom-template = "amp-mustache"
src ="https://cdn.ampproject.org/v0/amp-mustache-0.2.js">
</script>
<style amp-custom>
amp-img {
border: 1px solid #ddd;
border-radius: 4px;
padding: 5px;
}
</style>
</head>
<body>
<h3>Google AMP - Amp List</h3>
<amp-list width = "auto" height = "100"
layout = "fixed-height" src = "amplist.json" class = "m1">
<template type = "amp-mustache">
<div class = "images_for_display">
<amp-img width = "150"
height = "100"
alt = "{{title}}"
src = "{{url}}">
</amp-img>
</div>
</template>
</amp-list>
</body>
</html>
输出
上面示例代码的输出结果如下所示:

上面示例代码中使用的 json 文件如下所示:
{
"items": [
{
"title": "Christmas Image 1",
"url": "images/christmas1.jpg"
},
{
"title": "Christmas Image 2",
"url": "images/christmas2.jpg"
},
{
"title": "Christmas Image 3",
"url": "images/christmas3.jpg"
},
{
"title": "Christmas Image 4",
"url": "images/christmas4.jpg"
}
]
}
我们可以使用 amp-list 上的事件来刷新列表,如下面的代码所示:
示例
<!doctype html>
<html amp lang = "en">
<head>
<meta charset = "utf-8">
<script async src = "https://cdn.ampproject.org/v0.js"></script>
<title>Google AMP - Amp List</title>
<link rel = "canonical" href = "http://example.ampproject.org/article-metadata.html">
<meta name = "viewport" content = "width = device-width,minimum-scale = 1,initial-scale = 1">
<style amp-boilerplate>
body{
-webkit-animation:
-amp-start 8s steps(1,end) 0s 1 normal both;-moz-animation:
-amp-start 8s steps(1,end) 0s 1 normal both;-ms-animation:
-amp-start 8s steps(1,end) 0s 1 normal both;animation:
-amp-start 8s steps(1,end) 0s 1 normal both
}
@-webkit-keyframes
-amp-start{from{visibility:hidden}to{visibility:visible}}@-moz-keyframes
-amp-start{from{visibility:hidden}to{visibility:visible}}@-ms-keyframes
-amp-start{from{visibility:hidden}to{visibility:visible}}@-o-keyframes
-amp-start{from{visibility:hidden}to{visibility:visible}}@keyframes
-amp-start{from{visibility:hidden}to{visibility:visible}}
</style>
<noscript>
<style amp-boilerplate>
body{
-webkit-animation:none;
-moz-animation:none;
-ms-animation:none;
animation:none}
</style>
</noscript>
<script async custom-element = "amp-list"
src = "https://cdn.ampproject.org/v0/amp-list-0.1.js">
</script>
<script async custom-template = "amp-mustache"
src = "https://cdn.ampproject.org/v0/amp-mustache-0.2.js">
</script>
<style amp-custom>
amp-img {
border: 1px solid #ddd;
border-radius: 4px;
padding: 5px;
}
button{
background-color: #ACAD5C;
color: white;
padding: 12px 20px;
border: none;
border-radius: 4px;
cursor: pointer;
float: right;
}
</style>
</head>
<body>
<h3>Google AMP - Amp List</h3>
<button on = "tap:amplist.refresh">Refresh Images</button>
<amp-list id = "amplist" width = "auto" height = "100"
layout = "fixed-height" src = "amplist.json" class = "m1">
<template type = "amp-mustache">
<div class = "images_for_display">
<amp-img width = "150"
height = "100"
alt = "{{title}}"
src = "{{url}}"></amp-img>
</div>
</template>
</amp-list>
</body>
</html>
输出
上面示例代码的输出结果如下所示:
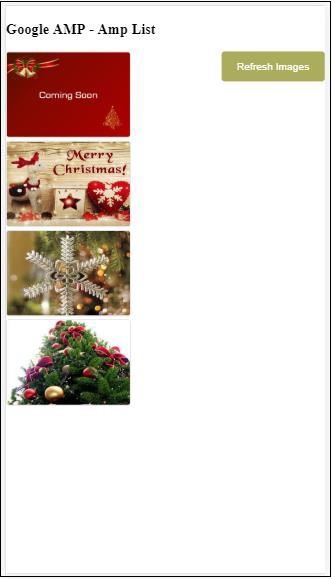
添加了一个按钮,点击该按钮时,将使用 on 事件调用刷新操作,如下所示:
<button on = "tap:amplist.refresh"> Refresh Images </button> //amplist is the id used for amp-list
点击按钮后,将再次调用 json 文件并加载其内容。如果已经加载了图像,则将被缓存。
Google AMP - 用户通知
Google amp-user-notification 用于向用户显示可关闭的对话框消息。我们可以用它来通知用户页面上的 cookie。
要使用 amp-user-notification,我们需要在页面上添加以下脚本:
<script async custom-element = "amp-user-notification" src = "https://cdn.ampproject.org/v0/amp-user-notification-0.1.js"> </script>
amp-user-notification 标签格式:
<amp-user-notification id = "my-notification" layout = "nodisplay">
<div>Example of amp-user-notification.
<button on = "tap:my-notification.dismiss">I accept
</button>
</div>
</amp-user-notification>
让我们通过一个示例来了解 amp-user-notification:
示例
<!doctype html>
<html amp lang = "en">
<head>
<meta charset = "utf-8">
<script async src = "https://cdn.ampproject.org/v0.js"></script>
<title>Google AMP - Amp Selector</title>
<link rel = "canonical" href = " http://example.ampproject.org/article-metadata.html">
<meta name = "viewport" content = "width = device-width,minimum-scale = 1,initial-scale = 1">
<style amp-boilerplate>
body{
-webkit-animation:
-amp-start 8s steps(1,end) 0s 1 normal both;-moz-animation:
-amp-start 8s steps(1,end) 0s 1 normal both;-ms-animation:
-amp-start 8s steps(1,end) 0s 1 normal both;animation:
-amp-start 8s steps(1,end) 0s 1 normal both
}
@-webkit-keyframes
-amp-start{from{visibility:hidden}to{visibility:visible}}@-moz-keyframes
-amp-start{from{visibility:hidden}to{visibility:visible}}@-ms-keyframes
-amp-start{from{visibility:hidden}to{visibility:visible}}@-o-keyframes
-amp-start{from{visibility:hidden}to{visibility:visible}}@keyframes
-amp-start{from{visibility:hidden}to{visibility:visible}}
</style>
<noscript>
<style amp-boilerplate>
body{
-webkit-animation:none;
-moz-animation:none;
-ms-animation:none
animation:none
}
</style>
</noscript>
<script async custom-element = "amp-user-notification"
src = "https://cdn.ampproject.org/v0/amp-user-notification-0.1.js">
</script>
<style amp-custom>
div {
font-size: 15px;
background-color : #ccc;
padding: 10px 10px;
border-radius: 2px;
}
button{
background-color: #ACAD5C;
color: white;
cursor: pointer;
float: right;
}
</style>
</head>
<body>
<h3>Google AMP - Amp User Notification</h3>
<amp-user-notification
id = "my-notification"
layout = "nodisplay">
<div>Example of amp-user-notification.
<button on = "tap:my-notification.dismiss">I accept
</button>
</div>
</amp-user-notification>
</body>
</html>
输出
上面示例代码的输出结果如下所示:
用户点击按钮后,通知将被关闭。关闭后,即使刷新页面,通知也不会再次显示。
用户通知的数据存储在浏览器 localStorage 中。如果清除 localStorage 并刷新页面,您将能够再次看到通知。您可以在浏览器控制台中使用 **localStorage.clear()** 来尝试此操作。
使用 **dismiss** 操作,可以通过在按钮上使用操作来关闭通知,如下所示
<button on = "tap:my-notification.dismiss"> I accept </button>
当用户点击按钮时,通知将被关闭。
Google AMP - 下一页
amp-next-page 是一个 amp 组件,当用户到达文档末尾时,可以动态加载更多页面。本章将详细介绍此概念。
要使用 amp-next-page 组件,我们需要添加以下脚本:
<script async custom-element = "amp-next-page" src = "https://cdn.ampproject.org/v0/amp-next-page-0.1.js"> </script>
此外,amp-next-page 尚未完全发布,因此要使测试页面正常工作,请添加以下 meta 标签:
<meta name = "amp-experiments-opt-in" content = "amp-next-page">
要动态加载页面,我们需要将 page-urls 提供给类型为“application/json”的 script 标签,如下所示:
<amp-next-page>
<script type = "application/json">
{
"pages": [
{
"title": "Page 2",
"image": "images/christmas1.jpg",
"ampUrl": "ampnextpage1.html"
},
{
"title": "Page 3",
"image": "images/christmas1.jpg",
"ampUrl": "ampnextpage2.html"
}
]
}
</script>
</amp-next-page>
在上面的标签中,我们尝试加载 2 个页面 **ampnextpage1.html** 和 **ampnextpage2.html**。
现在,让我们看看最终输出。所有需要加载的页面都必须添加到 pages 数组中,并包含标题、图像和 ampUrl。
示例
<!doctype html>
<html amp>
<head>
<meta charset = "utf-8">
<title>Google Amp - Next Page</title>
<link rel = "canonical" href = "ampnextpage.html">
<meta name = "amp-experiments-opt-in" content = "amp-next-page">
<meta name = "viewport" content ="width = device-width,
minimum-scale = 1,initial-scale = 1">
<style amp-boilerplate>
body {
-webkit-animation:
-amp-start 8s steps(1,end) 0s 1 normal both;-moz-animation:
-amp-start 8s steps(1,end) 0s 1 normal both;-ms-animation:
-amp-start 8s steps(1,end) 0s 1 normal both;animation:
-amp-start 8s steps(1,end) 0s 1 normal both
}
@-webkit-keyframes
-amp-start{from{visibility:hidden}to{visibility:visible}}@-moz-keyframes
-amp-start{from{visibility:hidden}to{visibility:visible}}@-ms-keyframes
-amp-start{from{visibility:hidden}to{visibility:visible}}@-o-keyframes
-amp-start{from{visibility:hidden}to{visibility:visible}}@keyframes
-amp-start{from{visibility:hidden}to{visibility:visible}}
</style>
<noscript>
<style amp-boilerplate>
body{
-webkit-animation:none;
-moz-animation:none;
-ms-animation:none;
animation:none
}
</style>
</noscript>
<script async src="https://cdn.ampproject.org/v0.js">
</script>
<script async custom-element = "amp-next-page"
src = "https://cdn.ampproject.org/v0/amp-next-page-0.1.js">
</script>
</head>
<body>
<h1>Google Amp - Next Page</h1>
<h1>Page 1</h1>
<p>Start of page 1</p>
<p>This content is loaded from page 1</p>
<p>This content is loaded from page 1</p>
<p>This content is loaded from page 1</p>
<p>This content is loaded from page 1</p>
<p>This content is loaded from page 1</p>
<p>This content is loaded from page 1</p>
<p>This content is loaded from page 1</p>
<p>This content is loaded from page 1</p>
<p>This content is loaded from page 1</p>
<p>This content is loaded from page 1</p>
<p>This content is loaded from page 1</p>
<p>This content is loaded from page 1</p>
<p>This content is loaded from page 1</p>
<p>This content is loaded from page 1</p>
<p>This content is loaded from page 1</p>
<p>This content is loaded from page 1</p>
<p>This content is loaded from page 1</p>
<p>This content is loaded from page 1</p>
<p>This content is loaded from page 1</p>
<p>This content is loaded from page 1</p>
<p>This content is loaded from page 1</p>
<p>This content is loaded from page 1</p>
<p>End of page 1</p>
<amp-next-page>
<script type = "application/json">
{
"pages": [
{
"title": "Page 2",
"image": "images/christmas1.jpg",
"ampUrl": "ampnextpage1.html"
},
{
"title": "Page 3",
"image": "images/christmas1.jpg",
"ampUrl": "ampnextpage2.html"
}
]
}
</script>
</amp-next-page>
</body>
</html>
输出
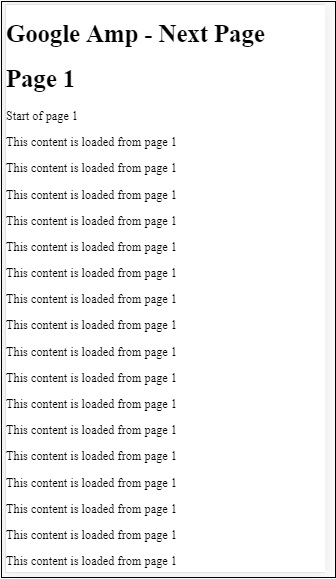


您可以注意到,当您滚动时,将显示要加载的下一页,并且地址栏中的 page-url 也已更改。
Google AMP - 属性
本章将讨论 amp 组件使用的所有常用属性。
常用属性列表如下:
- fallback
- heights
- layout
- media
- noloading
- on
- placeholder
- sizes
- width 和 height
fallback 属性
fallback 属性主要用于浏览器不支持使用的元素或文件加载出现问题或使用的文件出现错误时。
例如,您正在使用 amp-video,并且媒体文件在浏览器上出现问题,在这种情况下,我们可以指定 fallback 属性并显示一条消息,指示媒体文件无法播放或不受浏览器支持,而不是在页面上显示错误消息。
在 amp-video 上使用 Fallback
<amp-video controls
width = "640"
height = "360"
layout = "responsive"
poster = "images/videoposter.png">
<source src = "video/bunny.webm" type = "video/webm" />
<source src = "video/samplevideo.mp4" type = "video/mp4" />
<div fallback>
<p>This browser does not support the video element.</p>
</div>
</amp-video>
让我们通过一个示例来了解 fallback 的工作原理:
示例
<!doctype html>
<html amp lang = "en">
<head>
<meta charset = "utf-8">
<script async src = "https://cdn.ampproject.org/v0.js"></script>
<title>Google AMP - Amp Video</title>
<link rel = "canonical" href = " http://example.ampproject.org/article-metadata.html">
<meta name = "viewport" content = "width = device-width,minimum-scale = 1,initial-scale = 1">
<style amp-boilerplate>
body{
-webkit-animation:
-amp-start 8s steps(1,end) 0s 1 normal both;-moz-animation:
-amp-start 8s steps(1,end) 0s 1 normal both;-ms-animation:
-amp-start 8s steps(1,end) 0s 1 normal both;animation:
-amp-start 8s steps(1,end) 0s 1 normal both
}
@-webkit-keyframes
-amp-start{from{visibility:hidden}to{visibility:visible}}@-moz-keyframes
-amp-start{from{visibility:hidden}to{visibility:visible}}@-ms-keyframes
-amp-start{from{visibility:hidden}to{visibility:visible}}@-o-keyframes
-amp-start{from{visibility:hidden}to{visibility:visible}}@keyframes
-amp-start{from{visibility:hidden}to{visibility:visible}}
</style>
<noscript>
<style amp-boilerplate>
body{
-webkit-animation:none;-moz-animation:none;
-ms-animation:none;animation:none
}
</style>
</noscript>
<script async custom-element = "amp-video"
src = "https://cdn.ampproject.org/v0/amp-video-0.1.js">
</script>
</head>
<body>
<h3>Google AMP - Amp Video</h3>
<amp-video controls
width = "640"
height = "360"
layout = "responsive"
poster = "images/videoposter.png">
<source src = "video/bunny.webm"type="video/webm" />
<source src = "video/samplevideo.mp4"type = "video/mp4" />
<div fallback>
<p>This browser does not support the video element.</p>
</div>
</amp-video>
</body>
</html>
输出
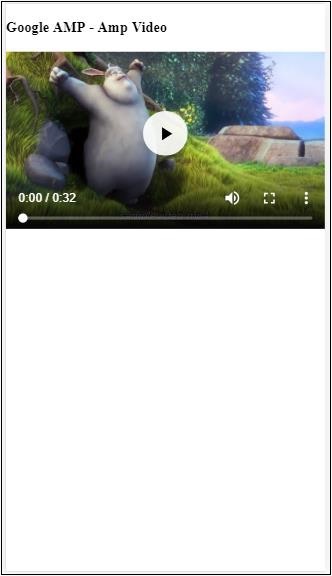
Heights 属性
此属性基本上支持响应式布局。您可以将媒体表达式用于 heights 属性,它适用于元素的高度。它还接受百分比值,因此高度是根据给定的百分比宽度计算的。
示例
<!doctype html>
<html amp lang = "en">
<head>
<meta charset = "utf-8">
<script async src = "https://cdn.ampproject.org/v0.js"></script>
<title>Google AMP - heights attribute</title>
<link rel = "canonical" href = "http://example.ampproject.org/article-metadata.html">
<meta name = "viewport" content = "width=device-width,minimum-scale = 1,initial-scale = 1">
<style amp-boilerplate>
body{
-webkit-animation:
-amp-start 8s steps(1,end) 0s 1 normal both;-moz-animation:
-amp-start 8s steps(1,end) 0s 1 normal both;-ms-animation:
-amp-start 8s steps(1,end) 0s 1 normal both;animation:
-amp-start 8s steps(1,end) 0s 1 normal both
}
@-webkit-keyframes
-amp-start{from{visibility:hidden}to{visibility:visible}}@-moz-keyframes
-amp-start{from{visibility:hidden}to{visibility:visible}}@-ms-keyframes
-amp-start{from{visibility:hidden}to{visibility:visible}}@-o-keyframes
-amp-start{from{visibility:hidden}to{visibility:visible}}@keyframes
-amp-start{from{visibility:hidden}to{visibility:visible}}
</style>
<noscript>
<style amp-boilerplate>
body{
-webkit-animation:none;-moz-animation:none;
-ms-animation:none;animation:none
}
</style>
</noscript>
<style amp-custom>
amp-img {
border: 1px solid black;
border-radius: 4px;
padding: 5px;
}
h1{font-family: "Segoe UI",Arial,sans-serif;font-weight: 400;margin: 10px 0;}
</style>
</head>
<body>
<h1>Google AMP - heights attribute</h1>
<amp-img src = "images/christmas1.jpg"
width = "320" height = "256"
heights = "(min-width:500px) 200px, 80%">
</amp-img>
</body>
</html>
输出

layout 属性
AMP-Layout 是 Google-amp 中提供的重要的功能之一。Amp Layout 确保在页面加载时正确呈现 amp 组件,而不会导致任何闪烁或滚动问题。它还在执行任何其他远程资源(如图像的 http 请求、数据调用)之前检查页面渲染。
amp 支持的布局列表如下:
- 未设置
- Container
- fill
- fixed
- fixed-height
- flex-item
- intrinsic
- nodisplay
- Responsive
您将在本教程的 **Google AMP - 布局** 章节中详细了解这一点。
让我们通过以下示例来了解 layout="responsive" 的工作原理:
示例
<!doctype html>
<html amp lang = "en">
<head>
<meta charset = "utf-8">
<script async src = "https://cdn.ampproject.org/v0.js"></script>
<title>Google AMP - Image>/title>
<link rel = "canonical" href = " http://example.ampproject.org/article-metadata.html">
<meta name = "viewport" content = "width = device-width,minimum-scale = 1,initial-scale = 1">
<style amp-boilerplate>
body {
-webkit-animation:
-amp-start 8s steps(1,end) 0s 1 normal both;-moz-animation:
-amp-start 8s steps(1,end) 0s 1 normal both;-ms-animation:
-amp-start 8s steps(1,end) 0s 1 normal both;animation:
-amp-start 8s steps(1,end) 0s 1 normal both
}
@-webkit-keyframes
-amp-start{from{visibility:hidden}to{visibility:visible}}@-moz-keyframes
-amp-start{from{visibility:hidden}to{visibility:visible}}@-ms-keyframes
-amp-start{from{visibility:hidden}to{visibility:visible}}@-o-keyframes
-amp-start{from{visibility:hidden}to{visibility:visible}}@keyframes
-amp-start{from{visibility:hidden}to{visibility:visible}}
</style>
<noscript>
<style amp-boilerplate>
body {
-webkit-animation:none;-moz-animation:none;
-ms-animation:none;animation:none
}
</style>
</noscript>
<style amp-custom>
amp-img {
border: 1px solid black;
border-radius: 4px;
padding: 5px;
}
displayitem {
display: inline-block;
width: 200px;
height:200px;
margin: 5px;
}
h1{font-family: "Segoe
UI",Arial,sans-serif;font-weight: 400;margin: 10px 0;}
</style>
</head>
<body>
<h1>Google AMP - Layout = responsive Image Example>/h1>
<div class = "displayitem">
<amp-img alt = "Beautiful Flower"
src = "images/flower.jpg"
width = "246"
height = "205"
layout = "responsive">
</amp-img>
</div>
</body>
</html>
输出
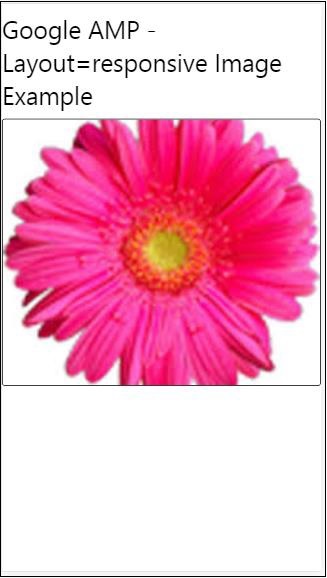
Media 属性
此属性可以在大多数 amp 组件上使用。它接受一个媒体查询,如果该值与组件不匹配,则不会呈现该组件。
让我们通过一个示例来了解 media 属性的工作原理:
示例
<!doctype html>
<html amp lang = "en">
<head>
<meta charset = "utf-8">
<script async src = "https://cdn.ampproject.org/v0.js"></script>
<title>Google AMP - Image</title>
<link rel = "canonical" href = " http://example.ampproject.org/article-metadata.html">
<meta name = "viewport" content = "width = device-width,minimum-scale = 1,initial-scale = 1">
<style amp-boilerplate>
body{
-webkit-animation:
-amp-start 8s steps(1,end) 0s 1 normal both;-moz-animation:
-amp-start 8s steps(1,end) 0s 1 normal both;-ms-animation:
-amp-start 8s steps(1,end) 0s 1 normal both;animation:
-amp-start 8s steps(1,end) 0s 1 normal both
}
@-webkit-keyframes
-amp-start{from{visibility:hidden}to{visibility:visible}}@-moz-keyframes
-amp-start{from{visibility:hidden}to{visibility:visible}}@-ms-keyframes
-amp-start{from{visibility:hidden}to{visibility:visible}}@-o-keyframes
-amp-start{from{visibility:hidden}to{visibility:visible}}@keyframes
-amp-start{from{visibility:hidden}to{visibility:visible}}
</style>
<noscript>
<style amp-boilerplate>
body {
-webkit-animation:none;-moz-animation:none;
-ms-animation:none;animation:none
}
</style>
</noscript>
<style amp-custom>
amp-img {
border: 1px solid black;
border-radius: 4px;
padding: 5px;
}
h1{font-family: "Segoe
UI",Arial,sans-serif;font-weight: 400;margin: 10px 0;}
</style>
</head>
<body>
<h1>Google AMP - Media Attribute</h1>
<div class = "displayitem">
<amp-img
media = "(min-width: 600px)"
src = "images/christmas1.jpg"
width = "466"
height = "355"
layout = "responsive">
</amp-img>
</div>
</body>
</html>
我们已在 <amp-img> 标签上使用了 media 属性,如下所示:
<amp-img media = "(min-width: 600px)" src = "images/christmas1.jpg" width = "466" height = "355" layout = "responsive"> </amp-img>
请注意,如果屏幕宽度小于 600 像素,则不会显示图像。我们将使用 Google 模拟器移动模式来测试示例。
智能手机上的输出
我们在设备上进行了检查,图像不可见,因为设备的宽度小于 600 像素。如果我们在平板电脑上进行检查,我们将获得如下所示的输出:
IPAD 上的输出

Noloading 属性
像 <amp-img>、<amp-video>、<amp-facebook> 这样的 amp 组件在实际内容加载并显示给用户之前会显示加载指示器。
要停止显示加载指示器,我们可以使用 noloading 属性,如下所示:
<amp-img src = "images/christmas1.jpg" noloading height = "300" width = "250" layout = "responsive"> </amp-img>
On 属性
on 属性用于元素的事件处理和 amp 组件上的操作。使用 on 属性的语法如下:
语法:
on = "eventName:elementId[.methodName[(arg1 = value, arg2 = value)]]"
传递给 **on** 属性的详细信息如下:
**eventName** - 它接受 amp 组件可用的事件名称。例如,对于表单,我们可以使用 submit-success、submit-error 事件名称。
**elementId** - 它接受需要在其中调用事件的元素的 ID。它可以是我们要了解其成功或错误的表单的 ID。
**methodName** - 它接受在事件发生时要调用的方法的名称。
**arg=value** - 它接受以 key=value 形式传递给方法的参数。
也可以将多个事件传递给 On 属性,如下所示:
on = "submit-success:lightbox;submit-error:lightbox1"
**注意** - 如果有多个事件,则将它们传递给 on 属性,并使用分号 (;) 分隔。
Actions 属性
Actions 主要与 on 属性一起使用,语法如下:
on = "tab:elementid.hide;"
我们可以传递多个 actions,如下所示:
on = "tab:elementid.open;tab:elementid.hide;”
**Elementid** 是要执行操作的元素的 ID。
Amp 有一些全局定义的事件和操作,可以在任何 amp 组件上使用,它们是 **tap 事件**,操作是 **hide、show** 和 **togglevisibility**。
**注意** - 如果要在任何 html 或 amp 组件上隐藏/显示或使用 togglevisibility,可以使用 **on="tap:elementid.[hide/show/togglevisibility]"**
Placeholder 属性
Placeholder 属性可以在任何 html 元素(例如 input 元素)上使用,也可以在 amp 组件上使用。Placeholder 是页面上首先显示的内容,内容加载完成后,Placeholder 将被移除并变为不可见。
input 元素上的 Placeholder
<input type = "text" id = "date" name = "date" placeholder = "Start Date">
amp 组件上的 Placeholder
<amp-anim src = "images/loreal.gif" width = "300" height = "250" layout = "responsive"> <amp-img placeholder src = "images/flower.jpg" layout = "fill"> </amp-img> </amp-anim>
Sizes 属性
这与 heights 属性的使用方式相同。该值是一个表达式,如下所示:
<amp-img src = "amp.png" width = "400" height = "300" layout = "responsive" sizes = "(min-width: 250px) 250px, 100vw"> </amp-img>
Width 和 Height 属性
它们几乎用于所有 html 元素和 amp 组件。width 和 height 用于指定 amp 元素在页面上占据的空间。
示例
<amp-img src = "amp.png" width = "400" height = "300" layout = "responsive"> </amp-img>
Google AMP - 样式和自定义 CSS
Amp 在经过仔细考虑后,才会在屏幕上呈现页面。加载的页面将包含图像、视频、iframe 等,这些都是需要执行的 http 请求。因此,http 请求会被延迟,以便显示页面上的内容,并为要加载的图像、视频、iframe 创建必要的空间。
Amp 具有占位符、回退、srcset 和布局属性等功能,可以使页面具有响应能力,并确保页面上的内容不会被打乱。在本节中,让我们详细讨论所有这些内容。
Amp 样式标签
Amp 有一个带有 **amp-custom** 属性的样式标签,如下所示:
<style amp-custom>
button{
background-color: #ACAD5C;
color: white;
padding: 12px 20px;
border: none;
border-radius: 4px;
cursor: pointer;
float: left;
}
amp-img {
border: 1px solid black;
border-radius: 4px;
padding: 5px;
}
p {
padding: 1rem;
font-size:25px;
}
largeText {
font-size:30px;
background-color:red;
}
</style>
它主要用于编写页面所需的自定义 css。请不要忘记添加 **amp-custom** 属性;否则,它将无法通过 amp 验证,如下所示:
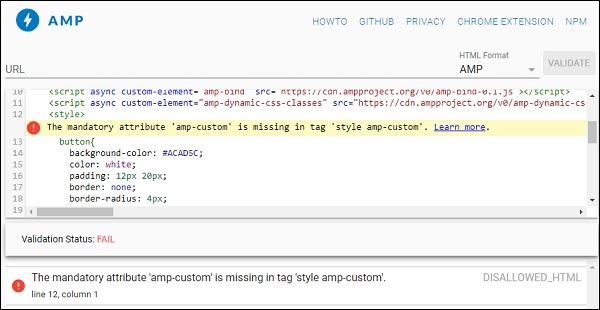
Amp 还支持 html 元素的内联 css,如下所示:
<div style = "color:green;margin-left:30px;"> Welcome to TutorialsPoint</p>
外部样式表标签
Amp 不支持外部样式表,并且在进行 amp 验证时将验证失败。
示例
<!doctype html>
<html amp lang = "en">
<head>
<meta charset = "utf-8">
<script async src = "https://cdn.ampproject.org/v0.js"></script>
<title>Google AMP - Dynamic Css Classes</title>
<link rel = "canonical" href = "
http://example.ampproject.org/article-metadata.html">
<meta name = "viewport" content = "width = device-width,minimum-scale = 1,initial-scale = 1">
<style amp-boilerplate>
body {
-webkit-animation:
-amp-start 8s steps(1,end) 0s 1 normal both;-moz-animation:
-amp-start 8s steps(1,end) 0s 1 normal both;-ms-animation:
-amp-start 8s steps(1,end) 0s 1 normal both;animation:
-amp-start 8s steps(1,end) 0s 1 normal both
}
@-webkit-keyframes
-amp-start{from{visibility:hidden}to{visibility:visible}}@-moz-keyframes
-amp-start{from{visibility:hidden}to{visibility:visible}}@-ms-keyframes
-amp-start{from{visibility:hidden}to{visibility:visible}}@-o-keyframes
-amp-start{from{visibility:hidden}to{visibility:visible}}@keyframes
-amp-start{from{visibility:hidden}to{visibility:visible}}
</style>
<noscript>
<style amp-boilerplate>
body {
-webkit-animation:none;
-moz-animation:none;
-ms-animation:none;
animation:none
}
</style>
</noscript>
<script async custom-element = "amp-bind" src = "
https://cdn.ampproject.org/v0/amp-bind-0.1.js">
</script>
<script async custom-element = "amp-dynamic-css-classes"
src = "https://cdn.ampproject.org/v0/amp-dynamic-css-classes-0.1.js">
</script>
<link rel = "stylesheet"
href = "https://cdnjs.cloudflare.com/ajax/libs/materialize/0.9 8.0/css/materialize.min.css">
<style amp-custom>
p {
padding: 1rem;
font-size:25px;
}
</style>
</head>
<body>
<h3>Google AMP - Dynamic Css Classes</h3>
<div style = "color:green;margin-left:30px;">
Welcome to TutorialsPoint</p>
</body>
</html>
当使用AMP 验证器进行验证时,我们得到以下错误。
为了使页面中的元素自适应显示,amp 元素需要指定元素在页面上占据的宽度和高度。添加 layout = “responsive” 将使元素在页面上保持纵横比自适应。
layout 属性的详细信息在章节Google AMP – 布局中详细讨论。
Google AMP - 动态 CSS 类
amp-dynamic-css-classes 会向 body 标签添加动态类。在本节中,让我们学习此标签的详细信息。
要使用 amp-dynamic-css-classes,我们需要添加以下脚本:
<script asynccustom-element="amp-dynamic-css-classes" src = "https://cdn.ampproject.org/v0/amp-dynamic-css-classes-0.1.js"> </script>
有两种重要的类由 amp-dynamic-css-classes 处理:
- amp-referrer-*
- amp-viewer
让我们详细讨论每一个。
amp-referrer-*
这些类根据用户的访问来源设置。这意味着如果用户来自 Google,则会设置与 Google 相关的 referrer 类。Twitter 和 Pinterest 也适用相同规则。
这些类根据引荐来源的类型提供。
例如,如果用户从 Google 搜索引擎点击 AMP 页面,则会添加以下类:
- amp-referrer-www-google-com
- amp-referrer-google-com
- amp-referrer-com
类似地,Twitter、Pinterest、LinkedIn 等都有相应的类。
amp-viewer
AMP Viewer 基本上会更改 AMP URL 以从 Google 缓存获取详细信息。如果您在 Google 搜索中搜索某些内容,显示的轮播图将包含所有 AMP 页面。
当您点击它们时,它们会被重定向到以 Google URL 作为前缀的 URL。当用户在 AMP Viewer 中查看页面并使用动态类时,将设置 amp-viewer 类。

当您点击 AMP 页面时,您在地址栏中获取的 URL 如下所示:
https://www.google.co.in/amp/s/m.timesofindia.com/sports/cricket/india-in-australia/to-hell-with-the-nets-boys-need-rest-ravi-shastri/amp_articleshow/67022458.cms

示例
<!doctype html>
<html amp lang = "en">
<head>
<meta charset = "utf-8">
<script async src = "https://cdn.ampproject.org/v0.js"></script>
<title>Google AMP - Dynamic Css Classes</title>
<link rel = "canonical" href = "http://example.ampproject.org/article-metadata.html">
<meta name = "viewport" content = "width = device-width,minimum-scale = 1,initial-scale = 1">
<style amp-boilerplate>
body{
-webkit-animation:
-amp-start 8s steps(1,end) 0s 1 normal both;-moz-animation:
-amp-start 8s steps(1,end) 0s 1 normal both;-ms-animation:
-amp-start 8s steps(1,end) 0s 1 normal both;animation:
-amp-start 8s steps(1,end) 0s 1 normal both
}
@-webkit-keyframes
-amp-start{from{visibility:hidden}to{visibility:visible}}@-moz-keyframes
-amp-start{from{visibility:hidden}to{visibility:visible}}@-ms-keyframes
-amp-start{from{visibility:hidden}to{visibility:visible}}@-o-keyframes
-amp-start{from{visibility:hidden}to{visibility:visible}}@keyframes
-amp-start{from{visibility:hidden}to{visibility:visible}}
</style>
<noscript>
<style amp-boilerplate>
body {
-webkit-animation:none;-moz-animation:none;
-ms-animation:none;animation:none
}
</style>
</noscript>
<script async custom-element = "amp-bind"
src = "https://cdn.ampproject.org/v0/amp-bind-0.1.js">
</script>
<script async custom-element = "amp-dynamic-css-classes"
src = "https://cdn.ampproject.org/v0/amp-dynamic-css-classes-0.1.js">
</script>
<link rel = "stylesheet" href = "https://cdnjs.cloudflare.com/ajax/libs/materialize/0.98.0/css/materialize.min.css">
<style amp-custom>
body:not(.amp-referrer-pinterest-com) .if-pinterest,
body:not(.amp-referrer-ampbyexample-com) .if-ampbyexample,
body:not(.amp-referrer-google-com) .if-google,
body:not(.amp-referrer-twitter-com) .if-twitter,
body:not(.amp-referrer-linkedin-com) .if-linkedin,
body:not(.amp-referrer-localhost) .if-localhost {
display: none;
}
body:not(.amp-viewer) .if-viewer,
body.amp-viewer .if-not-viewer {
display: none;
}
p {
padding: 1rem;
font-size:25px;
}
</style>
</head>
<body>
<h3>Google AMP - Dynamic Css Classes</h3>
<div>
<p class = "if-pinterest">You were referred here or embedded by Pinterest!</p>
<p class = "if-twitter">You were referred here or embedded by Twitter!</p>
<p class = "if-google">You were referred here or embedded by Google!</p>
<p class = "if-ampbyexample">You came here directly! Cool :)</p>
< class = "if-localhost">You came here directly! Cool :)</p>
</div>
<div>
<p class = "if-not-viewer">Hey! You are not coming from amp viewer</p>
<p class = "if-viewer">Hey! From amp viewer.</p>
<div>
</body>
</html>
输出
Google AMP - 操作和事件
要在 amp-component 上使用操作或事件,我们可以使用 on 属性。在本节中,让我们详细讨论它们。
事件
使用事件的语法如下所示:
on = "eventName:elementId[.methodName[(arg1 = value, arg2 = value)]]"
传递给on属性的详细信息如下所示:
**eventName** - 它接受 amp 组件可用的事件名称。例如,对于表单,我们可以使用 submit-success、submit-error 事件名称。
**elementId** - 它接受需要在其中调用事件的元素的 ID。它可以是我们要了解其成功或错误的表单的 ID。
**methodName** - 它接受在事件发生时要调用的方法的名称。
**arg=value** - 它接受以 key=value 形式传递给方法的参数。
也可以将多个事件传递给 on 属性,方法如下:
on = "submit-success:lightbox;submit-error:lightbox1"
如果有多个事件,则将它们传递给 on 属性,并用分号 (;) 分隔。
操作
操作基本上与 on 属性一起使用,语法如下所示:
on = "tab:elementid.hide;"
我们可以传递多个 actions,如下所示:
on = "tab:elementid.open;tab:elementid.hide;”
**Elementid** 是要执行操作的元素的 ID。
AMP 有一些全局定义的事件和操作,可以在任何 amp-component 上使用,它们是tap 事件,操作是hide、show和togglevisibility。
如果要隐藏/显示或在任何 html 或 amp 组件上使用 togglevisibility,可以使用on=”tap:elementid.[hide/show/togglevisibility]”
让我们看一些事件和操作的工作示例。
在输入元素上
让我们借助一个工作示例更好地理解这一点:
示例
<!doctype html>
<html amp lang = "en">
<head>
<meta charset = "utf-8">
<script async src = "https://cdn.ampproject.org/v0.js"></script>
<title>Google AMP - Amp Bind</title>
<link rel = "canonical" href = "http://example.ampproject.org/article-metadata.html">
<meta name = "viewport" content = "width = device-width,minimum-scale = 1,initial-scale = 1">
<style amp-boilerplate>
body{
-webkit-animation:
-amp-start 8s steps(1,end) 0s 1 normal both;-moz-animation:
-amp-start 8s steps(1,end) 0s 1 normal both;-ms-animation:
-amp-start 8s steps(1,end) 0s 1 normal both;animation:
-amp-start 8s steps(1,end) 0s 1 normal both
}
@-webkit-keyframes
-amp-start{from{visibility:hidden}to{visibility:visible}}@-moz-keyframes
-amp-start{from{visibility:hidden}to{visibility:visible}}@-ms-keyframes
-amp-start{from{visibility:hidden}to{visibility:visible}}@-o-keyframes
-amp-start{from{visibility:hidden}to{visibility:visible}}@keyframes
-amp-start{from{visibility:hidden}to{visibility:visible}}
</style>
<noscript>
<style amp-boilerplate>
body {
-webkit-animation:none;
-moz-animation:none;
-ms-animation:none;
animation:none
}
</style>
</noscript>
<script async custom-element = "amp-bind" src = "
https://cdn.ampproject.org/v0/amp-bind-0.1.js">
</script>
<script async custom-element = "amp-lightbox" src = "
https://cdn.ampproject.org/v0/amp-lightbox-0.1.js">
</script>
<style amp-custom>
button{
background-color: #ACAD5C;
color: white;
padding: 12px 20px;
border: none;
border-radius: 4px;
cursor: pointer;
float: left;}
.lightbox {
background: rgba(211,211,211,0.8);
width: 100%;
height: 100%;
position: absolute;
display: flex;
align-items: center;
justify-content: center;
}
#txtname{
width: 100%;
padding: 12px 20px;
margin: 8px 0;
display: inline-block;
border: 1px solid #ccc;
border-radius: 4px;
box-sizing: border-box;
}
div {
font-size:25px;
}
</style>
</head>
<body>
<h3>Google AMP - Amp Bind</h3>
<button on = "tap:AMP.setState({displaylightbox: true})">
Click Here
</button>
<br/>
<br/>
<h3>AMP - Input Element</h3>
<input id = "txtname" placeholder = "Type here" on =
"input-throttled:AMP.setState({name: event.value})">
<div [text] = "name"></div>
</body>
</html>
输出
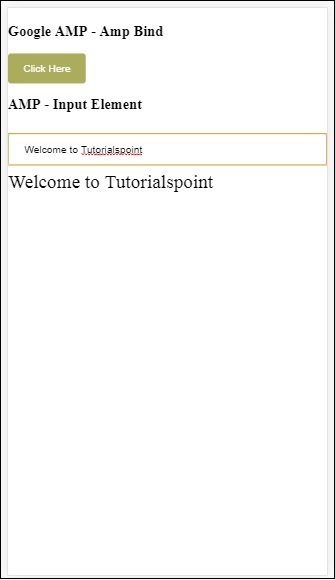
请注意,在上面的示例中,我们正在输入字段上使用事件,如下所示:
<input id = "txtname" placeholder = "Type here"
on = "input-throttled:AMP.setState({name: event.value})">
使用的事件是input-throlled。
我们也可以使用 change,如下所示:
<input id = "txtname" placeholder = "Type here" on =
"change:AMP.setState({name: event.value})">
一旦用户离开输入框,就会显示输出。我们可以在输入类型(如单选按钮、复选框等)以及 select 元素上使用 change 事件。
<input id = "txtname" placeholder = "Type here" on =
"input-debounced:AMP.setState({name: event.value})">
事件input-debounced与change事件相同,但输出在用户键入 300 毫秒后显示。
示例
<!doctype html>
<html amp lang = "en">
<head>
<meta charset = "utf-8">
<script async src = "https://cdn.ampproject.org/v0.js"></script>
<title>Google AMP - Amp Bind</title>
<link rel = "canonical" href = " http://example.ampproject.org/article-metadata.html">
<meta name = "viewport" content = "width = device-width,minimum-scale = 1,initial-scale = 1">
<style amp-boilerplate>
body{
-webkit-animation:
-amp-start 8s steps(1,end) 0s 1 normal both;-moz-animation:
-amp-start 8s steps(1,end) 0s 1 normal both;-ms-animation:
-amp-start 8s steps(1,end) 0s 1 normal both;animation:
-amp-start 8s steps(1,end) 0s 1 normal both
}
@-webkit-keyframes
-amp-start{from{visibility:hidden}to{visibility:visible}}@-moz-keyframes
-amp-start{from{visibility:hidden}to{visibility:visible}}@-ms-keyframes
-amp-start{from{visibility:hidden}to{visibility:visible}}@-o-keyframes
-amp-start{from{visibility:hidden}to{visibility:visible}}@keyframes
-amp-start{from{visibility:hidden}to{visibility:visible}}
</style>
<noscript>
<style amp-boilerplate>
body{
-webkit-animation:none;
-moz-animation:none;
-ms-animation:none;
animation:none}
</style>
</noscript>
<script async custom-element = "amp-bind"
src = "https://cdn.ampproject.org/v0/amp-bind-0.1.js">
</script>
<script async custom-element = "amp-lightbox"
src = "https://cdn.ampproject.org/v0/amp-lightbox-0.1.js">
</script>
<style amp-custom>
button{
background-color: #ACAD5C;
color: white;
padding: 12px 20px;
border: none;
border-radius: 4px;
cursor: pointer;
float: left;
}
.lightbox {
background: rgba(211,211,211,0.8);
width: 100%;
height: 100%;
position: absolute;
display: flex;
align-items: center;
justify-content: center;
}
#txtname{
width: 100%;
padding: 12px 20px;
margin: 8px 0;
display: inline-block;
border: 1px solid #ccc;
border-radius: 4px;
box-sizing: border-box;
}
div {
font-size:25px;
}
</style>
</head>
<body>
<h3>Google AMP - Amp Bind</h3>
<button on = "tap:AMP.setState({displaylightbox: true})">
Click Here
</button>
<br/>
<br/>
<h3>AMP - Input Element</h3>
<input id = "txtname" placeholder = "Type here" on =
"input-debounced:AMP.setState({name: event.value})">
<div [text] = "name"></div>
</body>
</html>
输出
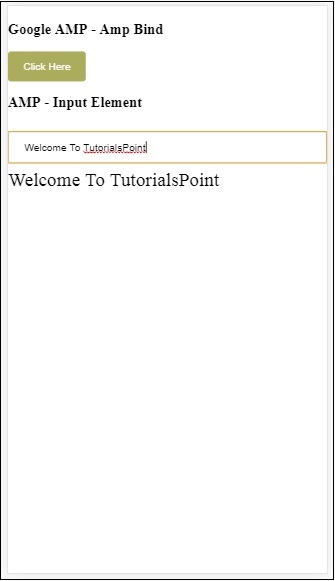
在 AMP Lightbox 上
在本节中,我们将测试 lightbox 上的以下事件:
- lightboxOpen
- lightboxClose
示例
<!doctype html>
<html amp lang = "en">
<head>
<meta charset = "utf-8">
<script async src = "https://cdn.ampproject.org/v0.js"></script>
<title>Google AMP - Amp Lightbox</title>
<link rel = "canonical" href = " http://example.ampproject.org/article-metadata.html">
<meta name = "viewport" content = "width = device-width,minimum-scale = 1,initial-scale = 1">
<style amp-boilerplate>
body{
-webkit-animation:
-amp-start 8s steps(1,end) 0s 1 normal both;-moz-animation:
-amp-start 8s steps(1,end) 0s 1 normal both;-ms-animation:
-amp-start 8s steps(1,end) 0s 1 normal both;animation:
-amp-start 8s steps(1,end) 0s 1 normal both
}
@-webkit-keyframes
-amp-start{from{visibility:hidden}to{visibility:visible}}@-moz-keyframes
-amp-start{from{visibility:hidden}to{visibility:visible}}@-ms-keyframes
-amp-start{from{visibility:hidden}to{visibility:visible}}@-o-keyframes
-amp-start{from{visibility:hidden}to{visibility:visible}}@keyframes
-amp-start{from{visibility:hidden}to{visibility:visible}}
</style>
<noscript>
<style amp-boilerplate>
body{
-webkit-animation:none;
-moz-animation:none;
-ms-animation:none;
animation:none}
</style>
</noscript>
<script async custom-element = "amp-bind"
src = "https://cdn.ampproject.org/v0/amp-bind-0.1.js">
</script>
<script async custom-element = "amp-lightbox"
src = "https://cdn.ampproject.org/v0/amp-lightbox-0.1.js">
</script>
<style amp-custom>
amp-img {
border: 1px solid #ddd;
border-radius: 4px;
padding: 5px;
}
button {
background-color: #ACAD5C;
color: white;
padding: 12px 20px;
border: none;
border-radius: 4px;
cursor: pointer;
float: left;
}
.lightbox {
background: rgba(211,211,211,0.8);
width: 100%;
height: 100%;
position: absolute;
display: flex;
align-items: center;
justify-content: center;
}
p{font-size:30px;}
</style>
</head>
<body>
<h3>Google AMP - Amp Lightbox</h3>
<p [text] = "'Lightbox is ' + lightboxstatus + '.'">
Lightbox Event Testing
</p>
<button on = "tap:my-lightbox.open">
Show LightBox
</button>
<amp-lightbox id = "my-lightbox" layout = "nodisplay"
close-button on = "lightboxOpen:AMP.setState({lightboxstatus:'opened'});
lightboxClose:AMP.setState({lightboxstatus:'closed'});">
<div class = "lightbox">
<amp-img alt = "Beautiful Flower" src = "images/loreal.gif"
width = "246"
height = "205">
</amp-img>
</div>
</amp-lightbox>
</body>
</html>
输出
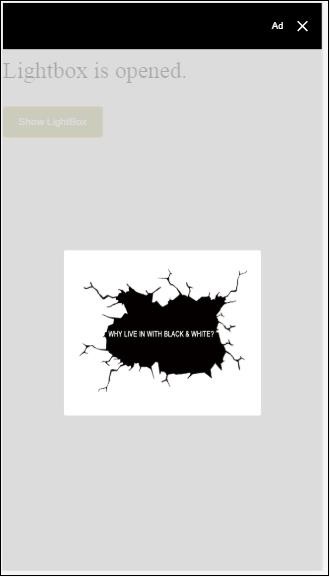
以下代码显示了如何在 lightbox 上实现 open 和 close 事件:
<p [text]="'Lightbox is ' + lightboxstatus + '.'">Lightbox Event Testing</p>
<button on = "tap:my-lightbox.open">Show LightBox</button>
<amp-lightbox id = "my-lightbox" layout = "nodisplay"
close-button on = "lightboxOpen:AMP.setState({lightboxstatus:'opened'});
lightboxClose:AMP.setState({lightboxstatus:'closed'});">
<div class = "lightbox">
<amp-img alt = "Beautiful Flower" src = "images/loreal.gif"
width = "246"
height = "205">
</amp-img>
</div>
</amp-lightbox>
AMP -Selector 上的事件
amp-selector 上可用的事件是select。
示例
<!doctype html>
<html amp lang = "en">
<head>
<meta charset = "utf-8">
<script async src = "https://cdn.ampproject.org/v0.js"></script>
<title>Google AMP - Amp Selector</title>
<link rel = "canonical" href = "http://example.ampproject.org/article-metadata.html">
<meta name = "viewport" content = "width = device-width,minimum-scale = 1,initial-scale = 1">
<style amp-boilerplate>
body{
-webkit-animation:
-amp-start 8s steps(1,end) 0s 1 normal both;-moz-animation:
-amp-start 8s steps(1,end) 0s 1 normal both;-ms-animation:
-amp-start 8s steps(1,end) 0s 1 normal both;animation:
-amp-start 8s steps(1,end) 0s 1 normal both
}
@-webkit-keyframes
-amp-start{from{visibility:hidden}to{visibility:visible}}@-moz-keyframes
-amp-start{from{visibility:hidden}to{visibility:visible}}@-ms-keyframes
-amp-start{from{visibility:hidden}to{visibility:visible}}@-o-keyframes
-amp-start{from{visibility:hidden}to{visibility:visible}}@keyframes
-amp-start{from{visibility:hidden}to{visibility:visible}}
</style>
<noscript>
<style amp-boilerplate>
body {
-webkit-animation:none;
-moz-animation:none;
-ms-animation:none;
animation:none
}
</style>
</noscript>
<script async custom-element = "amp-bind"
src = "https://cdn.ampproject.org/v0/amp-bind-0.1.js">
</script>
<script async custom-element = "amp-selector"
src = "https://cdn.ampproject.org/v0/amp-selector-0.1.js">
</script>
<style amp-custom>
.radio-menu {
list-style: none;
}
.radio-menu [option][selected] {
outline: none;
}
.radio-menu [option] {
display: flex;
align-items: center;
}
.radio-menu [option]:before {
transition: background 0.25s ease-in-out;
content: "";
display: inline-block;
width: 24px;
height: 24px;
margin: 8px;
border-radius: 100%;
border: solid 1px black;
}
.radio-menu [option = red][selected]:before {
text-align: center;
content: "✓";
color: white;
background: red;
}
.radio-menu [option = green][selected]:before {
text-align: center;
content: "✓";
color: white;
background: green;
}
.radio-menu [option = blue][selected]:before {
text-align: center;
content: "✓";
color: white;
background: blue;
}
p{font-size:30px;}
</style>
</head>
<body>
<h3>Google AMP - Amp Selector</h3>
<p [text] = "'Color selected is ' + ampselectorstatus + '.'">
Amp Selector Event Testing
<p>
<amp-selector
class = "radio-menu"
layout = "container"
name = "my-selector"
on = "select:AMP.setState({ampselectorstatus:event.selectedOptions})">
<div option = "red">
Red
</div>
<div option = "green">
Green
</div>
<div option = "blue">
Blue
</div>
</amp-selector>
</body>
</html>
输出
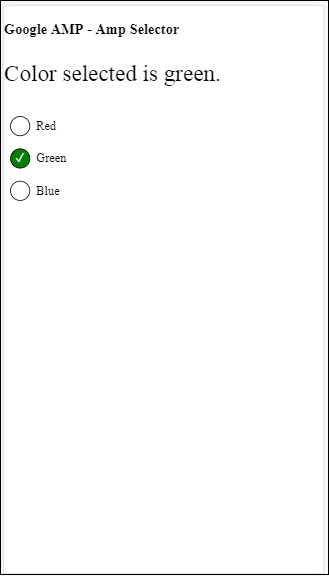
select 事件的使用方法如下所示:
<p [text]="'Color selected is ' + ampselectorstatus + '.'">
Amp Selector Event Testing
</p>
<amp-selector
class = "radio-menu"
layout ="container"
name =" my-selector"
on = "select:AMP.setState({ampselectorstatus:event.selectedOptions})">
<div option = "red">
Red
</div>
<div option = "green">
Green
</div>
<div option = "blue">
Blue
</div>
</amp-selector>
AMP-Sidebar 上的事件
可用的事件是sidebarOpen和sidebarClose。
示例
<!doctype html>
<html amp lang = "en">
<head>
<meta charset = "utf-8">
<script async src = "https://cdn.ampproject.org/v0.js"></script>
<title>Google AMP - Amp Sidebar</title>
<link rel = "canonical" href = "http://example.ampproject.org/article-metadata.html">
<meta name = "viewport" content = "width = device-width,minimum-scale = 1,initial-scale = 1">
<style amp-boilerplate>
body{
-webkit-animation:
-amp-start 8s steps(1,end) 0s 1 normal both;-moz-animation:
-amp-start 8s steps(1,end) 0s 1 normal both;-ms-animation:
-amp-start 8s steps(1,end) 0s 1 normal both;animation:
-amp-start 8s steps(1,end) 0s 1 normal both
}
@-webkit-keyframes
-amp-start{from{visibility:hidden}to{visibility:visible}}@-moz-keyframes
-amp-start{from{visibility:hidden}to{visibility:visible}}@-ms-keyframes
-amp-start{from{visibility:hidden}to{visibility:visible}}@-o-keyframes
-amp-start{from{visibility:hidden}to{visibility:visible}}@keyframes
-amp-start{from{visibility:hidden}to{visibility:visible}}
</style>
<noscript>
<style amp-boilerplate>
body{
-webkit-animation:none;
-moz-animation:none;
-ms-animation:none;
animation:none
}
</style>
</noscript>
<script async custom-element = "amp-bind"
src = "https://cdn.ampproject.org/v0/amp-bind-0.1.js">
</script>
<script async custom-element = "amp-sidebar"
src = "https://cdn.ampproject.org/v0/amp-sidebar-0.1.js">
</script>
<style amp-custom>
amp-img {
border: 1px solid #ddd;
border-radius: 4px;
padding: 5px;
}
button{
background-color: #ACAD5C;
color: white;
padding: 12px 20px;
border: none;
border-radius: 4px;
cursor: pointer;
float: left;
}
.amp-sidebar-toolbar-target-shown {
display: none;
}
p{font-size:30px;}
</style>
</head>
<body>
<h3>Google AMP - Amp Sidebar</h3>
<p [text] = "'Sidebar is ' + ampsidebarstatus + '.'">
Amp Sidebar Event Testing
</p>
<button on = "tap:sidebar1">
Show Sidebar
</button>
<amp-sidebar
id = "sidebar1"
layout = "nodisplay"
side = "right"
on = "sidebarOpen:AMP.setState({ampsidebarstatus: 'Opened'});
sidebarClose:AMP.setState({ampsidebarstatus: 'Closed'})">
<ul>
<li>Nav item 1</li>
<li>
<a href = "#idTwo" on = "tap:idTwo.scrollTo">Nav item 2</a>
</li>
<li>Nav item 3</li>
<li>
<a href = "#idFour" on="tap:idFour.scrollTo">Nav item 4</a>
</li>
<li>Nav item 5</li>
<li>Nav item 6</li>
</ul>
</amp-sidebar>
<div id = "target-element">
</div>
</body>
</html>
输出
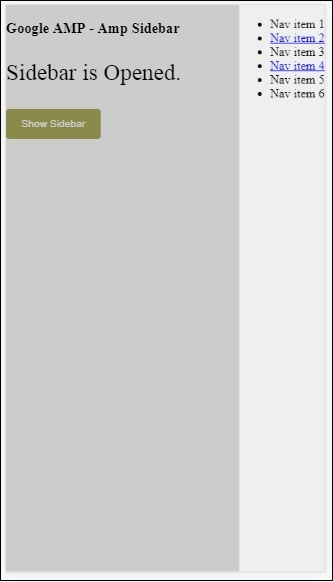
这些事件的使用方法如下所示:
<p [text] = "'Sidebar is ' + ampsidebarstatus + '.'">
Amp Sidebar Event Testing
</p>
<button on = "tap:sidebar1">
Show Sidebar
</button>
<amp-sidebar
id = "sidebar1"
layout = "nodisplay"
side = "right"
on = "sidebarOpen:AMP.setState({ampsidebarstatus: 'Opened'});
sidebarClose:AMP.setState({ampsidebarstatus: 'Closed'})">
<ul>
<li>Nav item 1</li>
<li>
<a href = "#idTwo" on = "tap:idTwo.scrollTo">Nav item 2</a>
</li>
<li>Nav item 3</li>
<li>
<a href = "#idFour" on = "tap:idFour.scrollTo">Nav item 4</a>
</li>
<li>Nav item 5</li>
<li>Nav item 6</li>
</ul>
</amp-sidebar>
Google AMP - 动画
Amp-animation 是一个 AMP 组件,它定义要用于其他 AMP 组件的动画。本章详细讨论了它们。
要使用 amp-animation,我们需要添加以下脚本:
<script async custom-element = "amp-animation" src = "https://cdn.ampproject.org/v0/amp-animation-0.1.js"> </script>
动画的详细信息定义在 JSON 结构中。
amp-animation的基本结构如下所示:
<amp-animation layout = "nodisplay">
<script type = "application/json">
{
// Timing properties
...
"animations": [
{
// animation 1
},
...
{
// animation n
}
]
}
</script>
</amp-animation>
animation组件包含以下内容:选择器、变量、时间属性、关键帧等。
{
"selector": "#target-id",
// Variables
// Timing properties
// Subtargets
...
"keyframes": []
}
选择器
在这里,我们需要提供将使用动画的元素的类或 ID。
变量
它们是在关键帧内部定义要使用的值。变量使用var()定义。
示例
{
"--delay": "0.5s",
"animations": [
{
"selector": "#target1",
"delay": "var(--delay)",
"--x": "150px",
"--y" : "200px",
"keyframes": {
"transform": "translate(var(--x), var(--y, 0px)"
}
}
]
}
这里delay、x 和y是变量,变量的值在所示示例中定义。
时间属性
在这里,您可以为动画定义持续时间和延迟。以下是支持的时间属性:
| 属性 | 值 | 描述 |
|---|---|---|
| duration | 时间属性。值必须以毫秒为单位。 | 用于动画的持续时间。 |
| delay | 时间属性。值必须以毫秒为单位。 | 动画开始执行之前的延迟 |
| endDelay | 时间属性。值必须以毫秒或秒为单位。 | 给定的延迟,在动画完成时应用。 |
| iterations | 值必须为数字。 | 动画需要重复的次数。 |
| iterationStart | 值必须为数字。 | 效果开始动画的时间偏移量。 |
| easing | 值为字符串 | 这用于为动画获取缓动效果。缓动的一些示例包括 linear、ease、ease-in、ease-out、ease-in-out 等 |
| direction | 值为字符串 | "normal"、"reverse"、"alternate" 或 "alternate-reverse" 之一。 |
| fill | 值为字符串 | 值可以是 "none"、"forwards"、"backwards"、"both"、"auto"。 |
关键帧
关键帧可以通过多种方式定义,例如对象形式或数组形式。请考虑以下示例。
示例
"keyframes": {"transform": "translate(100px,200px)"}
示例
{
"keyframes": {
"opacity": [1, 0],
"transform": ["scale(1)", "scale(2)"]
}
}
示例
{
"keyframes": [
{"opacity": 1, "transform": "scale(1)"},
{"opacity": 0, "transform": "scale(2)"}
]
}
示例
{
"keyframes": [
{"easing": "ease-out", "opacity": 1, "transform": "scale(1)"},
{"opacity": 0, "transform": "scale(2)"}
]
}
使用 CSS 的关键帧
<style amp-custom>
div {
width: 100px;
height: 100px;
background-color: red;
position: relative;
margin: 0 auto;
transform:scale(3);
}
@keyframes example { 0% {transform:scale(3)}
75% {transform:scale(2)}
100% {transform:scale(1)}
}
</style>
<amp-animation layout = "nodisplay">
<script type = "application/json">
{
"duration": "4s",
"keyframes": "example"
}
</script>
</amp-animation>
关键帧内部可以使用一些 CSS 属性。支持的属性称为白名单属性。以下是关键帧内部可以使用白名单属性:
- opacity
- transform
- visibility
- 'offsetDistance'
注意 - 使用除白名单属性之外的任何其他属性都会在控制台中抛出错误。
现在让我们通过一个简单的示例来了解,该示例将在动画应用于图像时旋转图像。在此示例中,我们使用 amp-animation 旋转图像。
示例
<!doctype html>
<html amp lang = "en">
<head>
<meta charset = "utf-8">
<script async src = "https://cdn.ampproject.org/v0.js"></script>
<title>Google AMP - Amp Video</title>
<link rel = "canonical" href = "http://example.ampproject.org/article-metadata.html">
<meta name = "viewport" content = "width = device-width, minimum-scale = 1,initial-scale = 1">
<style amp-boilerplate>
body{
-webkit-animation:
-amp-start 8s steps(1,end) 0s 1 normal both;-moz-animation:
-amp-start 8s steps(1,end) 0s 1 normal both;-ms
-amp-start 8s steps(1,end) 0s 1 normal both;animation:
-amp-start 8s steps(1,end) 0s 1 normal both
}
@-webkit-keyframes
-amp-start{from{visibility:hidden}to{visibility:visible}}@-moz-keyframes
-amp-start{from{visibility:hidden}to{visibility:visible}}@-ms-keyframes
-amp-start{from{visibility:hidden}to{visibility:visible}}@-o-keyframes
-amp-start{from{visibility:hidden}to{visibility:visible}}@keyframes
-amp-start{from{visibility:hidden}to{visibility:visible}}
</style>
<noscript>
<style amp-boilerplate>
body{
-webkit-animation:none;
-moz-animation:none;
-ms-animation:none;
animation:none
}
</style>
</noscript>
<script async custom-element = "amp-animation"
src =" https://cdn.ampproject.org/v0/amp-animation-0.1.js">
</script>
<style amp-custom>
amp-img {
border: 1px solid black;
border-radius: 4px;
padding: 5px;
}
</style>
</head>
<body>
<h3>Google AMP - Amp Animation Example</h3>
<amp-animation id = "anim1" layout = "nodisplay" trigger = "visibility">
<script type = "application/json">
{
"duration": "1s",
"fill": "both",
"direction": "alternate",
"animations": [
{
"selector": "#image1",
"easing": "cubic-bezier(0,0,.21,1)",
"keyframes": {
"transform": "rotate(20deg)"
}
}
]
}
</script>
</amp-animation>
<br/>
<br/>
<amp-img
id = "image1"
src = "images/christmas1.jpg"
width = 300
height = 250
layout = "responsive">
</amp-img>
<br/>
</body>
</html>
输出

上面使用的 amp-animation 详细信息在下面显示的代码中给出:
<amp-animation id = "anim1" layout = "nodisplay" trigger = "visibility">
<script type = "application/json">
{
"duration": "1s",
"fill": "both",
"direction": "alternate",
"animations": [
{
"selector": "#image1",
"easing": "cubic-bezier(0,0,.21,1)",
"keyframes": {
"transform": "rotate(20deg)"
}
}
]
}
</script>
</amp-animation>
这里的选择器是应用旋转动画的图像的 ID:
<amp-img id = "image1" src = "images/christmas1.jpg" width = 300 height = 250 layout = "responsive"> </amp-img>
使用 CSS 中的关键帧的示例
示例
<!doctype html>
<html amp lang = "en">
<head>
<meta charset = "utf-8">
<script async src = "https://cdn.ampproject.org/v0.js"></script>
<title>Google AMP - Amp Video</title>
<link rel = "canonical" href = "http://example.ampproject.org/article-metadata.html">
<meta name = "viewport" content = "width = device-width,minimum-scale = 1,initial-scale = 1">
<style amp-boilerplate>
body{
-webkit-animation:
-amp-start 8s steps(1,end) 0s 1 normal both;-moz-animation:
-amp-start 8s steps(1,end) 0s 1 normal both;-ms-animation:
-amp-start 8s steps(1,end) 0s 1 normal both;animation:
-amp-start 8s steps(1,end) 0s 1 normal both
}
@-webkit-keyframes
-amp-start{from{visibility:hidden}to{visibility:visible}}@-moz-keyframes
-amp-start{from{visibility:hidden}to{visibility:visible}}@-ms-keyframes
-amp-start{from{visibility:hidden}to{visibility:visible}}@-o-keyframes
-amp-start{from{visibility:hidden}to{visibility:visible}}@keyframes
-amp-start{from{visibility:hidden}to{visibility:visible}}
</style>
<noscript>
<style amp-boilerplate>
body{
-webkit-animation:none;
-moz-animation:none;
-ms-animation:none;
animation:none
}
</style>
</noscript>
<script async custom-element = "amp-animation"
src = "https://cdn.ampproject.org/v0/amp-animation-0.1.js">
</script>
<style amp-custom>
div {
width: 100px;
height: 100px;
background-color: red;
position: relative;
margin: 0 auto;
transform:scale(3);
}
@keyframes example {
0% {transform:scale(3)}
75% {transform:scale(2)}
100% {transform:scale(1)}
}
</style>
</head>
<body>
<h3>Google AMP - Amp Animation Example</h3>
<amp-animation id = "anim1" layout = "nodisplay" trigger = "visibility">
<script type = "application/json">
{
"duration": "3s",
"fill": "both",
"direction": "alternate",
"animations": [{
"selector": "#image1",
"easing": "cubic-bezier(0,0,.21,1)",
"keyframes":"example"
}]
}
</script>
</amp-animation>
<br/>
<br/>
<div id = "image1"></div>
<br/>
</body>
</html>
输出
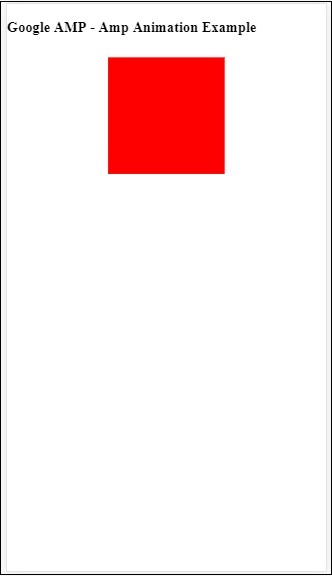
动画触发器
使用 trigger = ”visibility”,默认情况下会应用动画。为了在事件上启动动画,我们必须删除 trigger = ”visibility” 并添加事件以启动动画,如下面的示例所示:
示例
<!doctype html>
<html amp lang = "en">
<head>
<meta charset = "utf-8">
<script async src = "https://cdn.ampproject.org/v0.js"></script>
<title>Google AMP - Amp Video</title>
<link rel = "canonical" href = "http://example.ampproject.org/article-metadata.html">
<meta name = "viewport" content = "width = device-width,
minimum-scale = 1,initial-scale = 1">
<style amp-boilerplate>
body{
-webkit-animation:
-amp-start 8s steps(1,end) 0s 1 normal both;-moz-animation:
-amp-start 8s steps(1,end) 0s 1 normal both;-ms-animation:
-amp-start 8s steps(1,end) 0s 1 normal both;animation:
-amp-start 8s steps(1,end) 0s 1 normal both
}
@-webkit-keyframes
-amp-start{from{visibility:hidden}to{visibility:visible}}@-moz-keyframes
-amp-start{from{visibility:hidden}to{visibility:visible}}@-ms-keyframes
-amp-start{from{visibility:hidden}to{visibility:visible}}@-o-keyframes
-amp-start{from{visibility:hidden}to{visibility:visible}}@keyframes
-amp-start{from{visibility:hidden}to{visibility:visible}}
</style>
<noscript>
<style amp-boilerplate>
body{
-webkit-animation:none;
-moz-animation:none;
-ms-animation:none;
animation:none}
</style>
</noscript>
<script async custom-element = "amp-animation"
src = "https://cdn.ampproject.org/v0/amp-animation-0.1.js">
</script>
<style amp-custom>
div {
width: 100px;
height: 100px;
background-color: red;
position: relative;
margin: 0 auto;
transform:scale(2);
}
@keyframes example {
0% {transform:scale(2)}
75% {transform:scale(1)}
100% {transform:scale(0.5)}
}
button{
background-color: #ACAD5C;
color: white;
padding: 12px 20px;
border: none;
border-radius: 4px;
cursor: pointer;
float: left;
}
</style>
</head>
<body>
<h3>Google AMP - Amp Animation Example</h3>
<amp-animation id = "anim1" layout = "nodisplay">
<script type = "application/json">
{
"duration": "3s",
"fill": "both",
"direction": "alternate",
"animations": [{
"selector": "#image1",
"easing": "cubic-bezier(0,0,.21,1)",
"keyframes":"example"
}]
}
</script>
</amp-animation>
<button on = "tap:anim1.start">Start</button>
<br/>
<br/>
<div id = "image1"></div>
</body>
</html>
请注意,当点击开始按钮时,动画将开始。
输出
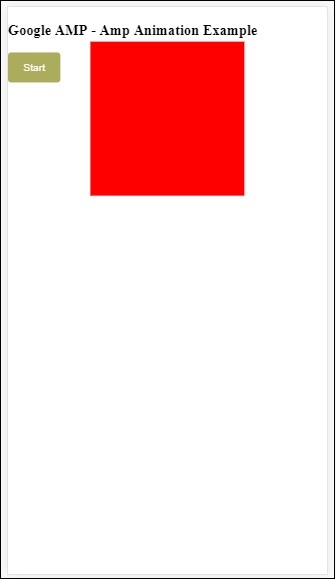
我们在 On 上使用了名为start的操作来启动动画。类似地,还支持其他操作,如下所示:
- start
- pause
- restart
- resume
- togglePause
- seekTo
- reverse
- finish
- cancel
让我们看一个可以使用该操作的工作示例。
示例
<!doctype html>
<html amp lang = "en">
<head>
<meta charset = "utf-8">
<script async src = "https://cdn.ampproject.org/v0.js"></script>
<title>Google AMP - Amp Video</title>
<link rel = "canonical" href = "http://example.ampproject.org/article-metadata.html">
<meta name = "viewport" content = "width=device-width,minimum-scale = 1,initial-scale = 1">
<style amp-boilerplate>
body{
-webkit-animation:
-amp-start 8s steps(1,end) 0s 1 normal both;-moz-animation:
-amp-start 8s steps(1,end) 0s 1 normal both;-ms-animation:
-amp-start 8s steps(1,end) 0s 1 normal both;animation:
-amp-start 8s steps(1,end) 0s 1 normal both
}
@-webkit-keyframes
-amp-start{from{visibility:hidden}to{visibility:visible}}@-moz-keyframes
-amp-start{from{visibility:hidden}to{visibility:visible}}@-ms-keyframes
-amp-start{from{visibility:hidden}to{visibility:visible}}@-o-keyframes
-amp-start{from{visibility:hidden}to{visibility:visible}}@keyframes
-amp-start{from{visibility:hidden}to{visibility:visible}}
</style>
<noscript>
<style amp-boilerplate>
body{
-webkit-animation:none;
-moz-animation:none;
-ms-animation:none;
animation:none}
</style>
</noscript>
<script async custom-element = "amp-animation"
src = "https://cdn.ampproject.org/v0/amp-animation-0.1.js">
</script>
<style amp-custom>
#image1 {
width: 100px;
height: 100px;
background-color: red;
position: relative;
margin: 0 auto;
transform:scale(2);
}
@keyframes example {
0% {transform:scale(2)}
75% {transform:scale(1)}
100% {transform:scale(0.5)}
}
button1{
background-color: #ACAD5C;
color: white;
padding: 12px 20px;
border: none;
border-radius: 4px;
cursor: pointer;
float: left;
}
</style>
</head>
<body>
<h3>Google AMP - Amp Animation Example</h3>
<amp-animation id = "anim1" layout = "nodisplay">
<script type = "application/json">
{
"duration": "3s",
"fill": "both",
"direction": "alternate",
"animations": [{
"selector": "#image1",
"easing": "cubic-bezier(0,0,.21,1)",
"keyframes":"example"
}]
}
</script>
</amp-animation>
<button on = "tap:anim1.start">Start</button>
<button on = "tap:anim1.pause">Pause</button>
<button on = "tap:anim1.resume">Resume</button>
<button on = "tap:anim1.reverse">Reverse</button>
<button on = "tap:anim1.cancel">cancel</button>
<button on = "tap:anim1.finish">finish</button>
<button on = "tap:anim1.togglePause">togglePause</button>
<button on = "tap:anim1.seekTo(percent = 1.00)">seekTo(100%)</button>
<br/>
<br/>
<br/>
<br/>
<div id="image1"></div>
</body>
</html>
输出
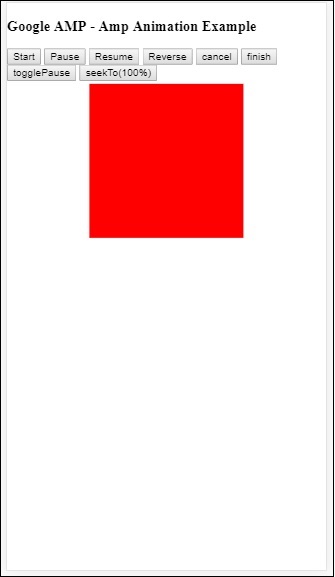
Google AMP - 数据绑定
Amp-bind 有助于通过数据绑定和类似 JS 的表达式,根据操作向 amp-components 和 html 标签添加交互性。本章详细讨论了数据绑定。
要使用 amp-bind,我们需要将以下脚本添加到我们的页面:
<script async custom-element = "amp-bind" src = "https://cdn.ampproject.org/v0/amp-bind-0.1.js"> </script>
让我们借助一个工作示例来充分理解这一点,如下所示:
示例
<!doctype html>
<html amp lang = "en">
<head>
<meta charset = "utf-8">
<script async src = "https://cdn.ampproject.org/v0.js"></script>
<title>Google AMP - Amp Bind</title>
<link rel = "canonical" href =
"http://example.ampproject.org/article-metadata.html">
<meta name = "viewport" content = "width = device-width,
minimum-scale = 1,initial-scale = 1">
<style amp-boilerplate>
body{
-webkit-animation:
-amp-start 8s steps(1,end) 0s 1 normal both;-moz-animation:
-amp-start 8s steps(1,end) 0s 1 normal both;-ms-animation:
-amp-start 8s steps(1,end) 0s 1 normal both;animation:
-amp-start 8s steps(1,end) 0s 1 normal both
}
@-webkit-keyframes
-amp-start{from{visibility:hidden}to{visibility:visible}}@-moz-keyframes
-amp-start{from{visibility:hidden}to{visibility:visible}}@-ms-keyframes
-amp-start{from{visibility:hidden}to{visibility:visible}}@-o-keyframes
-amp-start{from{visibility:hidden}to{visibility:visible}}@keyframes
-amp-start{from{visibility:hidden}to{visibility:visible}}
</style>
<noscript>
<style amp-boilerplate>
body{
-webkit-animation:none;
-moz-animation:none;
-ms-animation:none;
animation:none
}
</style>
</noscript>
<script async custom-element = "amp-bind"
src = "https://cdn.ampproject.org/v0/amp-bind-0.1.js"></script>
<style amp-custom>
button{
background-color: #ACAD5C;
color: white;
padding: 12px 20px;
border: none;
border-radius: 4px;
}
</style>
</head>
<body>
<h3>Google AMP - Amp Bind</h3>
<p [text] = "'Hello ' + world + '.'">
Click on the button to change the text
</p>
<button on = "tap:AMP.setState({world: 'This is amp-bind example'})">
Click Here
</button>
</body>
</html>
输出
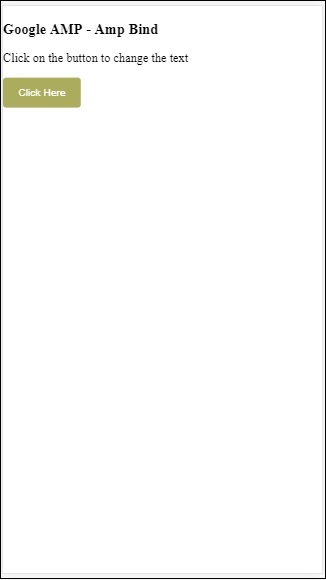
单击按钮查看文本更改,如下所示:
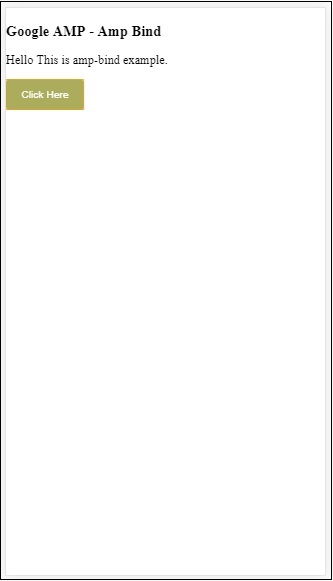
因此,在上面显示的示例中,我们使用了 amp-bind 来更改单击按钮时的文本。
Amp-bind 有三个组件:
状态 - 最初状态为空。单击按钮后,状态会发生更改。例如,
<button on = "tap:AMP.setState({world: 'This is amp-bind example'})">
Click Here
</button>
AMP.setState 方法用于更改状态。变量world被分配值This is amp-bind example。变量world在 html 标签内使用:
<p [text] = "'Hello ' + world + '.'"> Click on the button to change the text </p>
单击按钮后,world 会被分配一个新值:This is amp-bind example。
我们也可以使用 amp-state 进行绑定,如下所示:
<amp-state id = "myState">
<script type = "application/json">
{
"foo": "bar"
}
</script>
</amp-state>
表达式将在绑定期间分配bmyState.foo。
表达式 - amp-bind 工作的表达式如下所示:
'Hello ' + world
world被称为状态变量。
绑定 - 绑定应用于表单 [属性] 中的特殊属性。例如:
<p [text] = "'Hello ' + world + '.'"> Click on the button to change the text </p>
在上面的示例中,[text]具有用于绑定p标签的表达式。
我们可以使用以下属性进行绑定:
- [text]
- [class]
- [hidden]
- [width]
- [height]
绑定也可以在 amp-components 上进行,并且仅允许特定的属性。以下列表显示了此类组件和属性:
| 序号 | AMP 组件 | 属性和描述 |
|---|---|---|
| 1 | <amp-carousel type=slides> | [slide]*
使用此绑定行为更改幻灯片 |
| 2 | <amp-date-picker> | [min]
min -> 设置最早可选择日期 [max]max -> 设置最晚可选择日期 |
| 3 | <amp-iframe> | [src]
更改 iframe 的 src |
| 4 | <amp-img> | [alt] [attribution] [src] [srcset]
我们可以更改 alt、attribution、src 和 srcset。如果更改了 src,请更改 srcset,因为它用于缓存 |
| 5 | <amp-lightbox> | [open]*
您可以通过绑定到open来显示/隐藏 lightbox |
| 6 | <amp-list> | [src]
如果表达式是字符串,则从字符串 URL 获取并呈现 JSON。如果表达式是对象或数组,则呈现表达式数据。 |
| 7 | <amp-selector> | [selected]* [disabled]
更改当前选定的子元素(由其 option 属性值标识)。支持逗号分隔的值列表以进行多选 |
使用 AMP-State 进行绑定
我们可以使用 amp-state 定义所有我们希望在 html 元素或 amp-component 上使用的数据。
amp-state 内部使用的数据必须采用 JSON 格式,如下所示:
<amp-state id = "myCarsList">
<script type = "application/json">
{
"currentcar" : "bmw",
"audi": {
"imageUrl": "images/audi.jpg"
},
"bmw": {
"imageUrl": "images/bmw.jpg"
}
}
</script>
</amp-state>
因此,我们使用汽车名称和用于汽车的图像定义了键值对。
文本和 AMP-Image 上的 AMP-Bind
下面显示了一个使用 amp-state 和 amp-bind 的工作示例:
<!doctype html>
<html amp lang = "en">
<head>
<meta charset = "utf-8">
<script async src = "https://cdn.ampproject.org/v0.js"></script>
<title>Google AMP - Amp Bind</title>
<link rel = "canonical" href =
"http://example.ampproject.org/article-metadata.html">
<meta name = "viewport" content = "width = device-width,
minimum-scale = 1,initial-scale = 1">
<style amp-boilerplate>
body{
-webkit-animation:
-amp-start 8s steps(1,end) 0s 1 normal both;-moz-animation:
-amp-start 8s steps(1,end) 0s 1 normal both;-ms-animation:
-amp-start 8s steps(1,end) 0s 1 normal both;animation:
-amp-start 8s steps(1,end) 0s 1 normal both
}
@-webkit-keyframes
-amp-start{from{visibility:hidden}to{visibility:visible}}@-moz-keyframes
-amp-start{from{visibility:hidden}to{visibility:visible}}@-ms-keyframes
-amp-start{from{visibility:hidden}to{visibility:visible}}@-o-keyframes
-amp-start{from{visibility:hidden}to{visibility:visible}}@keyframes
-amp-start{from{visibility:hidden}to{visibility:visible}
}
</style>
<noscript>
<style amp-boilerplate>
body{
-webkit-animation:none;
-moz-animation:none;
-ms-animation:none;
animation:none
}
</style>
</noscript>
<script async custom-element = "amp-bind" src =
"https://cdn.ampproject.org/v0/amp-bind-0.1.js"></script>
<style amp-custom>
button{
background-color: #ACAD5C;
color: white;
padding: 12px 20px;
border: none;
border-radius: 4px;
cursor: pointer;
float: left;
}
</style>
</head>
<body>
<h3>Google AMP - Amp Bind</h3>
<amp-state id = "myCarsList">
<script type = "application/json">
{
"currentcar" : "bmw",
"audi": {
"imageUrl": "images/audi.jpg",
"style": "greenBackground"
},
"bmw": {
"imageUrl": "images/bmw.jpg",
"style": "redBackground"
}
}
</script>
</amp-state>
<amp-img
width = "300"
height = "200"
src = "images/bmw.jpg"
[src] = "myCarsList[currentcar].imageUrl">
</amp-img>
<p [text] = "'This is a ' + currentcar + '.'">
This is a BMW.
</p>
<br/>
<button on = "tap:AMP.setState({currentcar: 'audi'})">
Change Car
</button>
</body>
</html>
输出
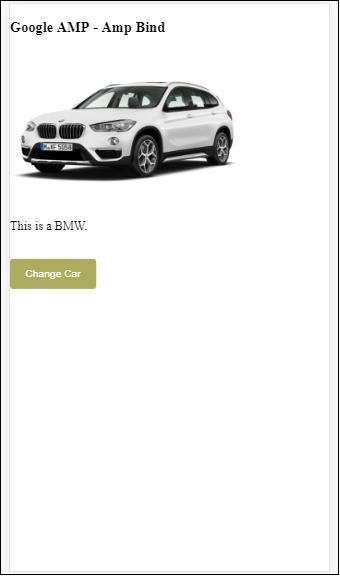
点击按钮查看汽车图像变化以及下面的文本。
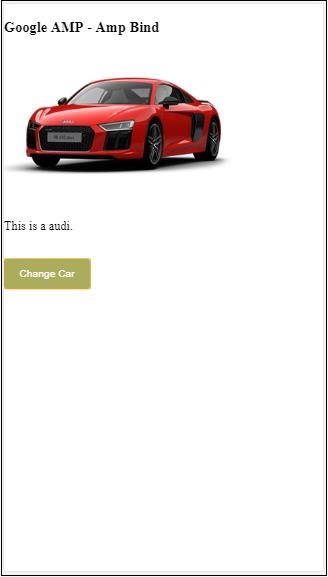
在视频和 iframe 上使用 amp-bind
现在我们将看到一个工作示例,它将更改 amp-iframe 和 amp-video 的 src。
<!doctype html>
<html amp lang = "en">
<head>
<meta charset = "utf-8">
<script async src = "https://cdn.ampproject.org/v0.js"></script>
<title>Google AMP - Amp Bind</title>
<link rel = "canonical" href =
"http://example.ampproject.org/article-metadata.html">
<meta name = "viewport" content = "width = device-width,
minimum-scale = 1,initial-scale = 1">
<style amp-boilerplate>
body{
-webkit-animation:
-amp-start 8s steps(1,end) 0s 1 normal both;-moz-animation:
-amp-start 8s steps(1,end) 0s 1 normal both;-ms-animation:
-amp-start 8s steps(1,end) 0s 1 normal both;animation:
-amp-start 8s steps(1,end) 0s 1 normal both
}
@-webkit-keyframes
-amp-start{from{visibility:hidden}to{visibility:visible}}@-moz-keyframes
-amp-start{from{visibility:hidden}to{visibility:visible}}@-ms-keyframes
-amp-start{from{visibility:hidden}to{visibility:visible}}@-o-keyframes
-amp-start{from{visibility:hidden}to{visibility:visible}}@keyframes
-amp-start{from{visibility:hidden}to{visibility:visible}}
</style>
<noscript>
<style amp-boilerplate>
body{
-webkit-animation:none;
-moz-animation:none;
-ms-animation:none;
animation:none
}
</style>
</noscript>
<script async custom-element = "amp-bind" src =
"https://cdn.ampproject.org/v0/amp-bind-0.1.js"></script>
<script async custom-element = "amp-video" src =
"https://cdn.ampproject.org/v0/amp-video-0.1.js"></script>
<script async custom-element = "amp-iframe" src =
"https://cdn.ampproject.org/v0/amp-iframe-0.1.js"></script>
<style amp-custom>
button{
background-color: #ACAD5C;
color: white;
padding: 12px 20px;
border: none;
border-radius: 4px;
cursor: pointer;
float: left;
}
</style>
</head>
<body>
<h3>Google AMP - Amp Bind</h3>
<button on = "tap:AMP.setState({currentlist: 'list1'})">
Click Here
</button>
<br/>
<br/>
<amp-state id = "myList">
<script type = "application/json">
{
"currentlist" : "",
"list1": {
"url": "video/m.mp4",
"style": "greenBackground",
"iframeurl":"https://maps.google.com/maps?q=hyderabad&t=&z=13&ie=UTF8&iwloc=&output=embed"
}
}
</script>
</amp-state>
<h3>AMP - IFRAME</h3>
<amp-iframe
width = "600"
title = "Google map"
height = "400"
layout = "responsive"
sandbox = "allow-scripts allow-same-origin allow-popups"
frameborder = "0"
src = "https://maps.google.com/maps?q=telangana&t=&z=13&ie=UTF8&iwloc=&output=embed"
[src] = "myList[currentlist].iframeurl">
<amp-img
layout = "fill"
src = "images/loading.jpg"
placeholder
>
/amp-img>
</amp-iframe>
<h3>AMP - VIDEO</h3>
<amp-video
id = "amp-video"
src = "video/samplevideo.mp4"
layout="responsive"
[src] = "myList[currentlist].url"
width = "300"
height = "170" autoplay controls>
</amp-video>
</body>
</html>
请注意,这里我们使用了 amp-state 与 iframesrc 和 video src。
<amp-state id = "myList">
<script type = "application/json">
{
"currentlist" : "",
"list1": {
"url": "video/m.mp4",
"style": "greenBackground",
"iframeurl":"
https://maps.google.com/maps?q=hyderabad&t=&z=13&ie=UTF8&iwloc=&output=embed"
}
}
</script>
</amp-state>
currentlist 设置为空,点击按钮后,将其设置为 list1。currentlist 变量用于 iframe 和视频的 src,如下所示:
<amp-iframe width="600"
title = "Google map"
height = "400"
layout = "responsive"
sandbox = "allow-scripts allow-same-origin allow-popups"
frameborder = "0" src = "https://maps.google.com/maps?q=telangana&t=&z=13&ie=UTF8&iwloc=&output=embed"
[src] = "myList[currentlist].iframeurl">
<amp-img layout = "fill" src = "images/loading.jpg" placeholder>
</amp-img>
</amp-iframe>
<amp-video id = "amp-video" src = "video/samplevideo.mp4"
layout = "responsive" [src] = "myList[currentlist].url" width = "300"
height = "170" autoplay controls>
</amp-video>
输出

点击按钮查看视频和 iframe src 的变化。
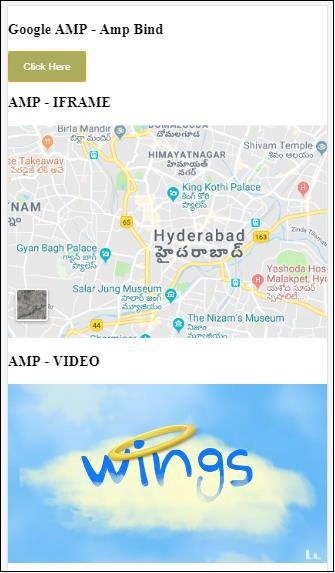
amp-bind 与 amp-lightbox 结合使用
现在,让我们看看绑定和 amp-lightbox 结合使用时的工作原理。
示例
<!doctype html>
<html amp lang = "en">
<head>
<meta charset = "utf-8">
<script async src="https://cdn.ampproject.org/v0.js"></script>
<title>Google AMP - Amp Bind</title>
<link rel = "canonical" href =
"http://example.ampproject.org/article-metadata.html">
<meta name = "viewport" content = "width = device-width,
minimum-scale = 1,initial-scale = 1">
<style amp-boilerplate>
body{
-webkit-animation:
-amp-start 8s steps(1,end) 0s 1 normal both;-moz-animation:
-amp-start 8s steps(1,end) 0s 1 normal both;-ms-animation:
-amp-start 8s steps(1,end) 0s 1 normal both;animation:
-amp-start 8s steps(1,end) 0s 1 normal both
}
@-webkit-keyframes
-amp-start{from{visibility:hidden}to{visibility:visible}}@-moz-keyframes
-amp-start{from{visibility:hidden}to{visibility:visible}}@-ms-keyframes
-amp-start{from{visibility:hidden}to{visibility:visible}}@-o-keyframes
-amp-start{from{visibility:hidden}to{visibility:visible}}@keyframes
-amp-start{from{visibility:hidden}to{visibility:visible}}
</style>
<noscript>
<style amp-boilerplate>
body{
-webkit-animation:none;
-moz-animation:none;
-ms-animation:none;
animation:none
}
</style>
</noscript>
<script async custom-element = "amp-bind" src =
"https://cdn.ampproject.org/v0/amp-bind-0.1.js"></script>
<script async custom-element = "amp-lightbox" src =
"https://cdn.ampproject.org/v0/amp-lightbox-0.1.js"></script>
<style amp-custom>
button{
background-color: #ACAD5C;
color: white;
padding: 12px 20px;
border: none;
border-radius: 4px;
cursor: pointer;
float: left;
}
.lightbox {
background: rgba(211,211,211,0.8);
width: 100%;
height: 100%;
position: absolute;
display: flex;
align-items: center;
justify-content: center;
}
</style>
</head>
<body>
<h3>Google AMP - Amp Bind</h3>
<button on = "tap:AMP.setState({displaylightbox: true})">
Click Here
</button>
<br/>
<br/>
<h3>AMP - Lightbox</h3>
<amp-lightbox
id = "my-lightbox"
[open] = "displaylightbox"
layout = "nodisplay"
close-button>
<div class = "lightbox" on = "tap:AMP.setState({displaylightbox: false})">
<amp-img alt = "Beautiful Flower"
src = "images/loreal.gif"
width = "246"
height = "205">
</amp-img>
</div>
</amp-lightbox>
</body>
</html>
要在 amp-lightbox 上使用绑定,我们已在 amp-lightbox 上使用了 [open],如下所示:
<amp-lightbox id = "my-lightbox" [open] = "displaylightbox"
layout = "nodisplay" close-button>
<div class = "lightbox" on="tap:AMP.setState({displaylightbox: false})">
<amp-img alt = "Beautiful Flower"
src = "images/loreal.gif"
width = "246"
height = "205">
</amp-img>
</div>
</amp-lightbox>
[open] = “displaylightbox” 是一个变量状态,它在点击按钮和点击 lightbox div 时会更改为 true/false。
<button on = "tap:AMP.setState({displaylightbox: true})">
Click Here
</button>
<div class = "lightbox" on = "tap:AMP.setState({displaylightbox: false})">
<amp-img alt = "Beautiful Flower"
src = "images/loreal.gif"
width = "246"
height = "205">
</amp-img>
</div>
输出
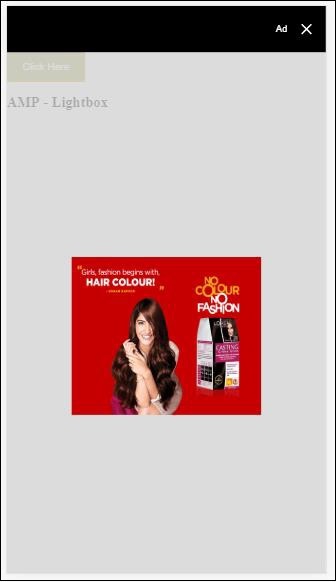
将 amp 绑定到输入元素
让我们通过一个工作示例来了解 amp 绑定到输入元素的工作原理,如下所示:
<!doctype html>
<html amp lang = "en">
<head>
<meta charset = "utf-8">
<script async src = "https://cdn.ampproject.org/v0.js"></script>
<title>Google AMP - Amp Bind</title>
<link rel = "canonical" href=
"http://example.ampproject.org/article-metadata.html">
<meta name = "viewport" content = "width = device-width,
minimum-scale = 1,initial-scale = 1">
<style amp-boilerplate>
body{
-webkit-animation:
-amp-start 8s steps(1,end) 0s 1 normal both;-moz-animation:
-amp-start 8s steps(1,end) 0s 1 normal both;-ms-animation:
-amp-start 8s steps(1,end) 0s 1 normal both;animation:
-amp-start 8s steps(1,end) 0s 1 normal both
}
@-webkit-keyframes
-amp-start{from{visibility:hidden}to{visibility:visible}}@-moz-keyframes
-amp-start{from{visibility:hidden}to{visibility:visible}}@-ms-keyframes
-amp-start{from{visibility:hidden}to{visibility:visible}}@-o-keyframes
-amp-start{from{visibility:hidden}to{visibility:visible}}@keyframes
-amp-start{from{visibility:hidden}to{visibility:visible}}
</style>
<noscript>
<style amp-boilerplate>
body{
-webkit-animation:none;
-moz-animation:none;
-ms-animation:none;
animation:none
}
</style>
<noscript>
<script async custom-element = "amp-bind"
src = "https://cdn.ampproject.org/v0/amp-bind-0.1.js">
<script>
<script async custom-element = "amp-lightbox"
src = "https://cdn.ampproject.org/v0/amp-lightbox-0.1.js">
</script>
<style amp-custom>
button{
background-color: #ACAD5C;
color: white;
padding: 12px 20px;
border: none;
border-radius: 4px;
cursor: pointer;
float: left;
}
.lightbox {
background: rgba(211,211,211,0.8);
width: 100%;
height: 100%;
position: absolute;
display: flex;
align-items: center;
justify-content: center;
}
#txtname{
width: 100%;
padding: 12px 20px;
margin: 8px 0;
display: inline-block;
border: 1px solid #ccc;
border-radius: 4px;
box-sizing: border-box;
}
div {
font-size:25px;
}
</style>
</head>
<body>
<h3>Google AMP - Amp Bind</h3>
<button on = "tap:AMP.setState({displaylightbox: true})">
Click Here
</button>
<br/>
<br/>
<h3>
AMP - Input Element
<h3>
<input id = "txtname" placeholder = "Type here"
on = "input-throttled:AMP.setState({name: event.value})">
<div [text] = "name">
</div>
</body>
</html>
输出
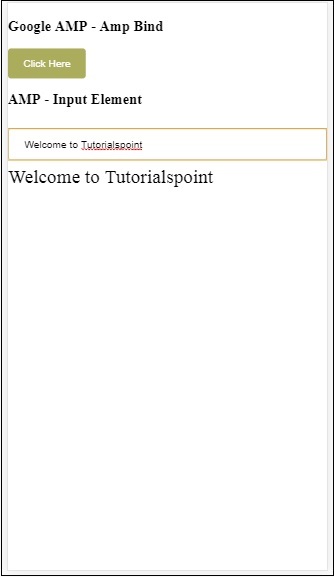
在文本框中输入的数据将在底部显示。这可以通过在输入事件上更改状态变量name来实现,如下所示:
<input id = "txtname" placeholder = "Type here" on =
"input-throttled:AMP.setState({name: event.value})">
<div [text] = "name">
</div>
Google AMP - 布局
AMP-Layout 是 Google-amp 中提供的重要的功能之一。Amp Layout 确保在页面加载时正确渲染 amp 组件,而不会导致任何闪烁或滚动问题。Google AMP 确保在执行任何其他远程资源(如图像的 http 请求、数据调用)之前完成页面上的布局渲染。
布局属性列表如下所示。
width 和 height
layout
sizes
heights
media
placeholder
fallback
noloading
我们将在本章中详细介绍layout属性。其余属性将在本教程的Google AMP – 属性章节中详细讨论。
Layout 属性
我们可以在 amp 组件上使用 layout 属性,它将决定组件如何在页面内渲染。下面列出了 amp 支持的布局列表:
未设置
Container
fill
fixed
fixed-height
flex-item
intrinsic
nodisplay
Responsive
对于每种布局,我们将看到一个工作示例,该示例将展示 layout 属性如何以不同的方式渲染 amp 组件。在我们的示例中,我们将使用amp-img组件。
未指定示例
<!doctype html>
<html amp lang = "en">
<head>
<meta charset = "utf-8">
<script async src="https://cdn.ampproject.org/v0.js"></script>
<title>Google AMP - Image</title>
<link rel = "canonical" href =
"http://example.ampproject.org/article-metadata.html">
<meta name = "viewport" content = "width = device-width,
minimum-scale = 1,initial-scale = 1">
<style amp-boilerplate>
body{
-webkit-animation:
-amp-start 8s steps(1,end) 0s 1 normal both;-moz-animation:
-amp-start 8s steps(1,end) 0s 1 normal both;-ms-animation:
-amp-start 8s steps(1,end) 0s 1 normal both;animation:
-amp-start 8s steps(1,end) 0s 1 normal both
}
@-webkit-keyframes
-amp-start{from{visibility:hidden}to{visibility:visible}}@-moz-keyframes
-amp-start{from{visibility:hidden}to{visibility:visible}}@-ms-keyframes
-amp-start{from{visibility:hidden}to{visibility:visible}}@-o-keyframes
-amp-start{from{visibility:hidden}to{visibility:visible}}@keyframes
-amp-start{from{visibility:hidden}to{visibility:visible}}
</style>
<noscript>
<style amp-boilerplate>
body{
-webkit-animation:none;
-moz-animation:none;
-ms-animation:none;
animation:none
}
</style>
</noscript>
<style amp-custom>
amp-img {
border: 1px solid black;
border-radius: 4px;
padding: 5px;
}
</style>
</head>
<body>
<h1>Google AMP - Image Example</h1>
<amp-img
alt = "Beautiful
Flower"src = "images/flower.jpg"
width = "246"
height = "205">
</amp-img>
</body>
</html>
输出
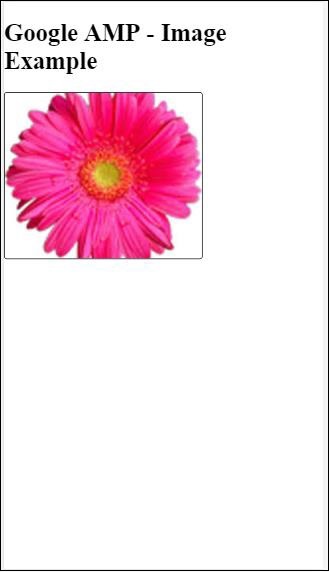
Container 示例
Layout=”container” 通常用于父元素,子元素采用定义的大小。
<!doctype html>
<html amp lang = "en">
<head>
<meta charset = "utf-8">
<script async src = "https://cdn.ampproject.org/v0.js"></script>
<title>Google AMP - Image</title>
<link rel = "canonical" href =
"http://example.ampproject.org/article-metadata.html">
<meta name = "viewport" content = "width = device-width,
minimum-scale = 1,initial-scale = 1">
<style amp-boilerplate>
body{
-webkit-animation:
-amp-start 8s steps(1,end) 0s 1 normal both;-moz-animation:
-amp-start 8s steps(1,end) 0s 1 normal both;-ms-animation:
-amp-start 8s steps(1,end) 0s 1 normal both;animation:
-amp-start 8s steps(1,end) 0s 1 normal both
}@-webkit-keyframes
-amp-start{from{visibility:hidden}to{visibility:visible}}@-moz-keyframes
-amp-start{from{visibility:hidden}to{visibility:visible}}@-ms-keyframes
-amp-start{from{visibility:hidden}to{visibility:visible}}@-o-keyframes
-amp-start{from{visibility:hidden}to{visibility:visible}}@keyframes
-amp-start{from{visibility:hidden}to{visibility:visible}}
</style>
<noscript>
<style amp-boilerplate>
body{
-webkit-animation:none;
-moz-animation:none;
-ms-animation:none;
animation:none
}
</style>
</noscript>
<style amp-custom>
amp-img {
border: 1px solid black;
border-radius: 4px;
padding: 5px;
}
h1{
font-family: "Segoe UI",Arial,sans-serif;
font-weight: 400;margin: 10px 0;
}
</style>
</head>
<body>
<h1>Google AMP - Layout = container Image Example</h1>
<amp-accordion layout = "container">
<amp-img alt = "Beautiful Flower"
src = "images/flower.jpg"
width = "246"
height = "205">
</amp-img>
</amp-accordion>
</body>
</html>
输出
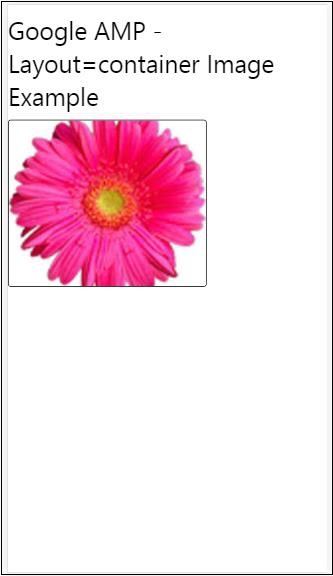
Fill 示例
Layout= ”fill” 采用父元素的宽度和高度。
<!doctype html>
<html amp lang = "en">
<head>
<meta charset = "utf-8">
<script async src = "https://cdn.ampproject.org/v0.js"></script>
<title>
Google AMP - Image
<title>
<link rel = "canonical" href =
"http://example.ampproject.org/article-metadata.html">
<meta name = "viewport" content = "width = device-width,
minimum-scale = 1,initial-scale = 1">
<style amp-boilerplate>
body{
-webkit-animation:
-amp-start 8s steps(1,end) 0s 1 normal both;-moz-animation:
-amp-start 8s steps(1,end) 0s 1 normal both;-ms-animation:
-amp-start 8s steps(1,end) 0s 1 normal both;animation:
-amp-start 8s steps(1,end) 0s 1 normal both
}
@-webkit-keyframes
-amp-start{from{visibility:hidden}to{visibility:visible}}@-moz-keyframes
-amp-start{from{visibility:hidden}to{visibility:visible}}@-ms-keyframes
-amp-start{from{visibility:hidden}to{visibility:visible}}@-o-keyframes
-amp-start{from{visibility:hidden}to{visibility:visible}}@keyframes
-amp-start{from{visibility:hidden}to{visibility:visible}}
</style>
<noscript>
<style amp-boilerplate>
body{
-webkit-animation:none;
-moz-animation:none;
-ms-animation:none;
animation:none
}
</style>
</noscript>
<style amp-custom>
amp-img {
border: 1px solid black;
border-radius: 4px;
padding: 5px;
}
h1{font-family: "Segoe UI",Arial,sans-serif;
font-weight: 400;margin: 10px 0;}
</style>
</head>
<body>
<h1>Google AMP - Layout = fill Image Example</h1>
<div style = "position:relative;width:100px;height:100px;">
<amp-img alt = "Beautiful Flower"
src = "images/flower.jpg"
width = "246"
height = "205"
layout = "fill">
</amp-img>
</div>
</body>
</html>
输出
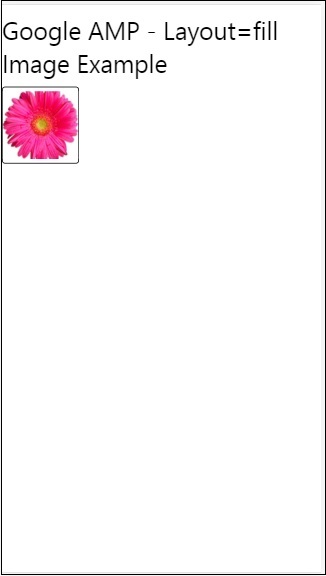
Fixed 和 fixed-height 示例
在了解 fixed 和 fixed-height 的用法之前,请注意以下两点:
layout=”fixed”需要指定宽度和高度,amp 组件将显示在其中。
layout=”fixed-height”需要为组件指定高度。它将确保高度不变。使用 fixed-height 时,不得指定宽度,或者可以设置为 auto。
<!doctype html>
<html amp lang = "en">
<head>
<meta charset = "utf-8">
<script async src = "https://cdn.ampproject.org/v0.js"></script>
<title>Google AMP - Image</title>
<link rel = "canonical" href =
"http://example.ampproject.org/article-metadata.html">
<meta name = "viewport" content = "width = device-width,
minimum-scale = 1,initial-scale = 1">
<style amp-boilerplate>
body{
-webkit-animation:
-amp-start 8s steps(1,end) 0s 1 normal both;-moz-animation:
-amp-start 8s steps(1,end) 0s 1 normal both;-ms-animation:
-amp-start 8s steps(1,end) 0s 1 normal both;animation:
-amp-start 8s steps(1,end) 0s 1 normal both
}
@-webkit-keyframes
-amp-start{from{visibility:hidden}to{visibility:visible}}@-moz-keyframes
-amp-start{from{visibility:hidden}to{visibility:visible}}@-ms-keyframes
-amp-start{from{visibility:hidden}to{visibility:visible}}@-o-keyframes
-amp-start{from{visibility:hidden}to{visibility:visible}}@keyframes
-amp-start{from{visibility:hidden}to{visibility:visible}}
</style>
<noscript>
<style amp-boilerplate>
body{
-webkit-animation:none;
-moz-animation:none;
-ms-animation:none;
animation:none
}
</style>
</noscript>
<style amp-custom>
amp-img {
border: 1px solid black;
border-radius: 4px;
padding: 5px;
}
div{
display: inline-block;
width: 200px;
height:200px;
margin: 5px;
}
h1{font-family: "Segoe UI",Arial,sans-serif;
font-weight: 400;margin: 10px 0;}
</style>
</head>
<body>
<h1>Google AMP - Layout = fixed and
Layout = fixed-height Image Example
</h1>
<div>
<amp-img alt = "Beautiful Flower"
src = "images/flower.jpg"
width = "246"
height = "205"
layout = "fixed">
</amp-img>
</div>
<div>
<amp-img alt = "Beautiful Flower"
src = "images/flower.jpg"
height = "205"
layout = "fixed-height">
</amp-img>
</div>
</body>
</html>
输出
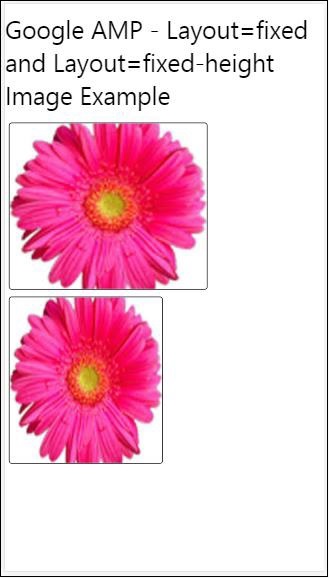
Flex-item 和 intrinsic
<!doctype html>
<html amp lang = "en">
<head>
<meta charset = "utf-8">
<script async src ="https://cdn.ampproject.org/v0.js"></script>
<title>Google AMP - Image</title>
<link rel = "canonical" href ="
http://example.ampproject.org/article-metadata.html">
<meta name = "viewport" content = "width = device-width,
minimum-scale = 1,initial-scale = 1">
<style amp-boilerplate>
body{
-webkit-animation:
-amp-start 8s steps(1,end) 0s 1 normal both;-moz-animation:
-amp-start 8s steps(1,end) 0s 1 normal both;-ms-animation:
-amp-start 8s steps(1,end) 0s 1 normal both;animation:
-amp-start 8s steps(1,end) 0s 1 normal both
}
@-webkit-keyframes
-amp-start{from{visibility:hidden}to{visibility:visible}}@-moz-keyframes
-amp-start{from{visibility:hidden}to{visibility:visible}}@-ms-keyframes
-amp-start{from{visibility:hidden}to{visibility:visible}}@-o-keyframes
-amp-start{from{visibility:hidden}to{visibility:visible}}@keyframes
-amp-start{from{visibility:hidden}to{visibility:visible
<style>
<noscript>
<style amp-boilerplate>
body{
-webkit-animation:none;
-moz-animation:none;
-ms-animation:none;
animation:none
}
</style>
</noscript>
<style amp-custom>
amp-img {
border: 1px solid black;
border-radius: 4px;
padding: 5px;
}
displayitem {
display: inline-block;
width: 200px;
height:200px;
margin: 5px;
}
h1{font-family: "Segoe UI",Arial,sans-serif;
font-weight: 400;margin: 10px 0;}
</style>
</head>
<body>
<h1>Google AMP - Layout = flex-item and
Layout = intrinsic Image Example
</h1>
<div class = "displayitem">
<amp-img alt = "Beautiful Flower"
src = "images/flower.jpg"
layout = "flex-item">
</amp-img>
</div>
<div class = "displayitem">
<amp-img alt = "Beautiful Flower"
src = "images/flower.jpg"
width = "246"
height = "205"
layout = "intrinsic">
</amp-img>
</div>
</body>
</html>
输出
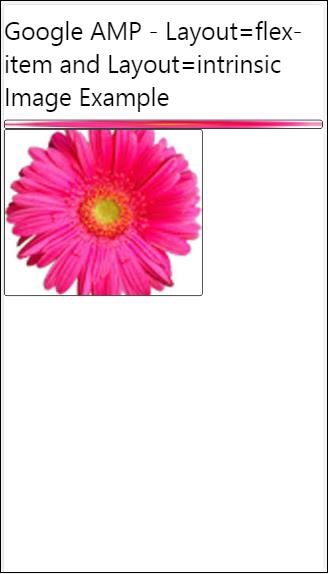
nodisplay 和 responsive
具有 layout = nodisplay 的 amp 组件不会占用页面上的任何空间,就像 display:none 一样。无需为此类布局添加任何宽度和高度属性。
具有 layout = responsive 的 amp 组件将占用可用空间或页面的宽度,并且高度会调整大小以保持元素的纵横比。
<!doctype html>
<html amp lang = "en">
<head>
<meta charset = "utf-8">
<script async src = "https://cdn.ampproject.org/v0.js">
</script>
<title>Google AMP - Image</title>
<link rel = "canonical" href =
"http://example.ampproject.org/article-metadata.html">
<meta name = "viewport" content="width=device-width,
minimum-scale = 1,initial-scale = 1">
<style amp-boilerplate>
body{
-webkit-animation:
-amp-start 8s steps(1,end) 0s 1 normal both;-moz-animation:
-amp-start 8s steps(1,end) 0s 1 normal both;-ms-animation:
-amp-start 8s steps(1,end) 0s 1 normal both;animation:
-amp-start 8s steps(1,end) 0s 1 normal both}
@-webkit-keyframes
-amp-start{from{visibility:hidden}to{visibility:visible}}@-moz-keyframes
-amp-start{from{visibility:hidden}to{visibility:visible}}@-ms-keyframes
-amp-start{from{visibility:hidden}to{visibility:visible}}@-o-keyframes
-amp-start{from{visibility:hidden}to{visibility:visible}}@keyframes
-amp-start{from{visibility:hidden}to{visibility:visible}}
</style>
<noscript>
<style amp-boilerplate>
body{
-webkit-animation:none;
-moz-animation:none;
-ms-animation:none;
animation:none}
</style>
</noscript>
<style amp-custom>
amp-img {
border: 1px solid black;
border-radius: 4px;
padding: 5px;
}
displayitem {
display: inline-block;
width: 200px;
height:200px;
margin: 5px;
}
h1{font-family: "Segoe UI",Arial,sans-serif;
font-weight: 400;margin: 10px 0;}
</style>
</head>
<body>
<h1>Google AMP - Layout=no-display and
Layout = responsive Image Example</h1>
<div class = "displayitem">
<amp-img alt = "Beautiful Flower"
src = "images/flower.jpg"
layout = "no-display">
</amp-img>
</div>
<div class = "displayitem">
<amp-img alt = "Beautiful Flower"
src = "images/flower.jpg"
width = "246"
height = "205"
layout = "responsive">
</amp-img>
</div>
</body>
</html>
输出
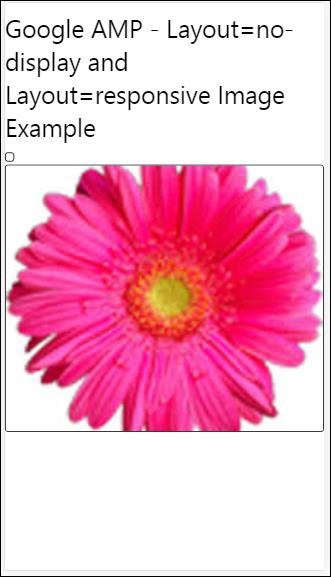
Google AMP 支持的布局列表如下
手风琴
轮播
灯箱
滑块
侧边栏
Amp- 手风琴
Amp-accordion 是一个 amp 组件,用于以展开-折叠的格式显示内容。用户在移动设备上查看它变得很容易,他们可以在其中根据自己的选择从手风琴中选择部分。
要使用 amp-accordion,您需要添加以下脚本:
<script async custom-element = "amp-accordion" src = "https://cdn.ampproject.org/v0/amp-accordion-0.1.js"> </script>
Amp-accordion 标签
<amp-accordion>
<section class = "seca">
<h3>Content 1</h3>
<div>
<p>Content 1 is opened for amp-accordion</p>
<p>Content 1 is opened for amp-accordion</p>
<p>Content 1 is opened for amp-accordion</p>
<p>Content 1 is opened for amp-accordion</p>
<p>Content 1 is opened for amp-accordion</p>
<p>Content 1 is opened for amp-accordion</p>
</div>
</section>
…
</amp-accordion>
让我们看一个 amp-accordion 的工作示例。
<!doctype html>
<html amp lang = "en">
<head>
<meta charset = "utf-8">
<script async src = "https://cdn.ampproject.org/v0.js">
</script>
<title>Google AMP - Amp Accordion </title>
<link rel = "canonical" href=
"http://example.ampproject.org/article-metadata.html">
<meta name = "viewport" content = "width = device-width,
minimum-scale = 1,initial-scale = 1">
<style amp-boilerplate>
body{
-webkit-animation:
-amp-start 8s steps(1,end) 0s 1 normal both;-moz-animation:
-amp-start 8s steps(1,end) 0s 1 normal both;-ms-animation:
-amp-start 8s steps(1,end) 0s 1 normal both;animation:
-amp-start 8s steps(1,end) 0s 1 normal both
}
@-webkit-keyframes
-amp-start{from{visibility:hidden}to{visibility:visible}}@-moz-keyframes
-amp-start{from{visibility:hidden}to{visibility:visible}}@-ms-keyframes
-amp-start{from{visibility:hidden}to{visibility:visible}}@-o-keyframes
-amp-start{from{visibility:hidden}to{visibility:visible}}@keyframes
-amp-start{from{visibility:hidden}to{visibility:visible}}
</style>
<noscript>
<style amp-boilerplate>
body{
-webkit-animation:none;
-moz-animation:none;
-ms-animation:none;
animation:none}
</style>
</noscript>
<script async custom-element = "amp-accordion" src =
"https://cdn.ampproject.org/v0/amp-accordion-0.1.js">
</script>
<style>
input[type = text]{
width: 50%;
padding: 12px;
border: 1px solid #ccc;
border-radius: 4px;
resize: vertical;
}
label {
padding: 12px 12px 12px 0;
display: inline-block;
font-family: "Segoe UI",Arial,sans-serif;
font-weight: 400;
}
.col-label {
float: left;
width: 25%;
margin-top: 6px;
}
.col-content {
float: left;
width: 75%;
margin-top: 6px;
}
.row:after {
content: "";
display: table;
clear: both;
}
.amp_example {
background-color: #f1f1f1;
padding: 0.01em 16px;
margin: 20px 0;
box-shadow: 0 2px 4px 0
rgba(0,0,0,0.16),0 2px 10px 0
rgba(0,0,0,0.12)!important;
}
h3{
font-family: "Segoe UI",Arial,sans-serif;
font-weight: 400;margin: 10px 0;
}
input[type=submit] {
background-color: #ACAD5C;
color: white;
padding: 12px 20px;
border: none;
border-radius: 4px;
cursor: pointer;
float: right;
}
.lightbox {background-color: rgba(100, 100, 100, 0.5);}
.seca {background-color:#fff;}
</style>
</head>
<body>
<div class = "amp_example">
<h3>Google AMP - Amp Accordion</h3>
<amp-accordion>
<section class = "seca">
<h3>Content 1</h3>
<div>
<p>Content 1 is opened for amp-accordion</p>
<p>Content 1 is opened for amp-accordion</p>
<p>Content 1 is opened for amp-accordion</p>
<p>Content 1 is opened for amp-accordion</p>
<p>Content 1 is opened for amp-accordion</p>
<p>Content 1 is opened for amp-accordion</p>
</div>
</section>
<section expanded class = "seca">
<h3>Content 2</h3>
<div>
<p>Content 2 is opened for amp-accordion</p>
<p>Content 2 is opened for amp-accordion</p>
<p>Content 2 is opened for amp-accordion</p>
<p>Content 2 is opened for amp-accordion</p>
<p>Content 2 is opened for amp-accordion</p>
</div>
</section>
<section class="seca">
<h3>Content 3</h3>
<div>
<p>Content 3 is opened for amp-accordion</p>
<p>Content 3 is opened for amp-accordion</p>
<p>Content 3 is opened for amp-accordion</p>
<p>Content 3 is opened for amp-accordion</p>
<p>Content 3 is opened for amp-accordion</p>
</div>
</section>
</amp-accordion>
</div>
</body>
</html>
输出
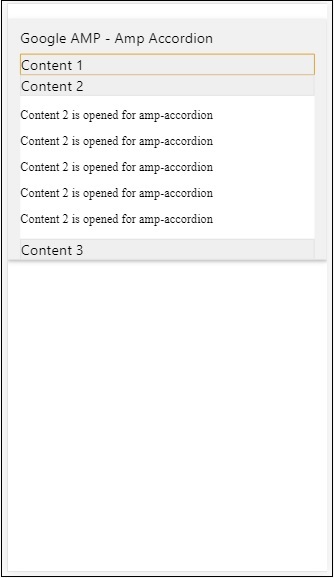
Amp-accordion 内部包含多个部分。每个部分可以有两个子元素,超过两个子元素将在浏览器控制台中显示错误。您可以在部分中添加一个容器,并在其中包含多个元素。
默认情况下,我们使用 expanded 属性将一个部分保持在展开模式。
自动折叠手风琴
对于自动折叠,我们正在 amp-accordion 上使用属性expand-single-section,如示例所示。用户打开的部分将保持展开状态,其余部分将使用expand-single-section属性关闭。
<!doctype html>
<html amp lang = "en">
<head>
<meta charset = "utf-8">
<script async src = "https://cdn.ampproject.org/v0.js">
</script>
<title>Google AMP - Amp Accordion </title>
<link rel = "canonical" href=
"http://example.ampproject.org/article-metadata.html">
<meta name = "viewport" content = "width = device-width,
minimum-scale = 1,initial-scale = 1">
<style amp-boilerplate>
body{
-webkit-animation:
-amp-start 8s steps(1,end) 0s 1 normal both;-moz-animation:
-amp-start 8s steps(1,end) 0s 1 normal both;-ms-animation:
-amp-start 8s steps(1,end) 0s 1 normal both;animation:
-amp-start 8s steps(1,end) 0s 1 normal both
}
@-webkit-keyframes
-amp-start{from{visibility:hidden}to{visibility:visible}}@-moz-keyframes
-amp-start{from{visibility:hidden}to{visibility:visible}}@-ms-keyframes
-amp-start{from{visibility:hidden}to{visibility:visible}}@-o-keyframes
-amp-start{from{visibility:hidden}to{visibility:visible}}@keyframes
-amp-start{from{visibility:hidden}to{visibility:visible}}
</style>
<noscript>
<style amp-boilerplate>
body{
-webkit-animation:none;
-moz-animation:none;
-ms-animation:none;
animation:none}
</style>
</noscript>
<script async custom-element = "amp-accordion" src =
"https://cdn.ampproject.org/v0/amp-accordion-0.1.js">
</script>
<style>
input[type = text]{
width: 50%;
padding: 12px;
border: 1px solid #ccc;
border-radius: 4px;
resize: vertical;
}
label {
padding: 12px 12px 12px 0;
display: inline-block;
font-family: "Segoe UI",Arial,sans-serif;
font-weight: 400;
}
.col-label {
float: left;
width: 25%;
margin-top: 6px;
}
.col-content {
float: left;
width: 75%;
margin-top: 6px;
}
.row:after {
content: "";
display: table;
clear: both;
}
.amp_example {
background-color: #f1f1f1;
padding: 0.01em 16px;
margin: 20px 0;
box-shadow: 0 2px 4px 0
rgba(0,0,0,0.16),0 2px 10px 0
rgba(0,0,0,0.12)!important;
}
h3{
font-family: "Segoe UI",Arial,sans-serif;
font-weight: 400;
margin: 10px 0;
}
input[type=submit] {
background-color: #ACAD5C;
color: white;
padding: 12px 20px;
border: none;
border-radius: 4px;
cursor: pointer;
float: right;}
.lightbox {background-color: rgba(100, 100, 100, 0.5);}
.seca {background-color:#fff;}
</style>
<head>
<body>
<div class = "amp_example">
<h3>Google AMP - Amp Accordion</h3>
<amp-accordion expand-single-section>
<section class = "seca">
<h3>Content 1</h3>
<div>
<p>Content 1 is opened for amp-accordion</p>
<p>Content 1 is opened for amp-accordion</p>
<p>Content 1 is opened for amp-accordion</p>
<p>Content 1 is opened for amp-accordion</p>
<p>Content 1 is opened for amp-accordion</p>
<p>Content 1 is opened for amp-accordion</p>
</div>
</section>
<section class = "seca">
<h3>Content 2</h3>
<div>
<p>Content 2 is opened for amp-accordion</p>
<p>Content 2 is opened for amp-accordion</p>
<p>Content 2 is opened for amp-accordion</p>
<p>Content 2 is opened for amp-accordion</p>
<;p>Content 2 is opened for amp-accordion</p>
</div>
</section>
<section class = "seca">
<h3>Content 3</h3>
<div>
<p>Content 3 is opened for amp-accordion</p>
<p>Content 3 is opened for amp-accordion</p>
<p>Content 3 is opened for amp-accordion</p>
<p>Content 3 is opened for amp-accordion</p>
<p>Content 3 is opened for amp-accordion</p>
</div>
</section>
</amp-accordion>
</div>
</body>
</html>
输出

手风琴动画
使用animate属性,我们可以为手风琴的展开-折叠添加动画。请查看下面的示例:
<!doctype html>
<html amp lang = "en">
<head>
<meta charset = "utf-8">
<script async src = "https://cdn.ampproject.org/v0.js">
</script>
<title>Google AMP - Amp Accordion </title>
<link rel = "canonical" href = "http://example.ampproject.org/article-metadata.html>
<meta name = "viewport" content = "width = device-width,minimum-scale = 1,initial-scale = 1">
<style amp-boilerplate>
body{
-webkit-animation:
-amp-start 8s steps(1,end) 0s 1 normal both;-moz-animation:
-amp-start 8s steps(1,end) 0s 1 normal both;-ms-animation:
-amp-start 8s steps(1,end) 0s 1 normal both;animation:
-amp-start 8s steps(1,end) 0s 1 normal both
}
@-webkit-keyframes
-amp-start{from{visibility:hidden}to{visibility:visible}}@-moz-keyframes
-amp-start{from{visibility:hidden}to{visibility:visible}}@-ms-keyframes
-amp-start{from{visibility:hidden}to{visibility:visible}}@-o-keyframes
-amp-start{from{visibility:hidden}to{visibility:visible}}@keyframes
-amp-start{from{visibility:hidden}to{visibility:visible}}
</style>
<noscript>
<style amp-boilerplate>
body{
-webkit-animation:none;
-moz-animation:none;
-ms-animation:none;animation:none
}
</style>
</noscript>
<script async custom-element = "amp-accordion" src =
"https://cdn.ampproject.org/v0/amp-accordion-0.1.js">
</script>
<style>
input[type = text]{
width: 50%;
padding: 12px;
border: 1px solid #ccc;
border-radius: 4px;
resize: vertical;
}
label {
padding: 12px 12px 12px 0;
display: inline-block;
font-family: "Segoe UI",Arial,sans-serif;
font-weight: 400;
}
.col-label {
float: left;
width: 25%;
margin-top: 6px;
}
.col-content {
float: left;
width: 75%;
margin-top: 6px;
}
.row:after {
content: "";
display: table;
clear: both;
}
.amp_example {
background-color: #f1f1f1;
padding: 0.01em 16px;
margin: 20px 0;
box-shadow: 0 2px 4px 0 rgba(0,0,0,0.16),
0 2px 10px 0 rgba(0,0,0,0.12)!important;
}
h3{
font-family: "Segoe UI",Arial,sans-serif;
font-weight: 400;margin: 10px 0;
}
input[type=submit] {
background-color: #ACAD5C;
color: white;
padding: 12px 20px;
border: none;
border-radius: 4px;
cursor: pointer;
float: right;
}
.lightbox {background-color: rgba(100, 100, 100, 0.5);}
.seca {background-color:#fff;}
</style>
</head>
<body>
<div class = "amp_example">
<h3>Google AMP - Amp Accordion</h3>
<amp-accordion animate expand-single-section>
<section class = "seca">
<h3>Content 1</h3>
<div>
<p>Content 1 is opened for amp-accordion</p>
<p>Content 1 is opened for amp-accordion</p>
<p>Content 1 is opened for amp-accordion</p>
<p>Content 1 is opened for amp-accordion</p>
<p>Content 1 is opened for amp-accordion</p>
<p>Content 1 is opened for amp-accordion</p>
</div>
</section>
<section class = "seca">
<h3>Content 2</h3>
<div>
<p>Content 2 is opened for amp-accordion</p>
<p>Content 2 is opened for amp-accordion</p>
<p>Content 2 is opened for amp-accordion</p>
<p>Content 2 is opened for amp-accordion</p>
<p>Content 2 is opened for amp-accordion</p>
</div>
</section>
<section class="seca">
<h3>Content 3</h3>
<div>
<p>Content 3 is opened for amp-accordion</p>
<p>Content 3 is opened for amp-accordion</p>
<p>Content 3 is opened for amp-accordion</p>
<p>Content 3 is opened for amp-accordion</p>
<p>Content 3 is opened for amp-accordion</p>
</div>
</section>
</amp-accordion>
</div>
</body>
</html>
输出
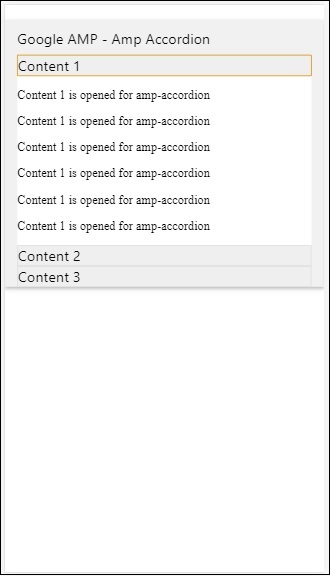
AMP 轮播
Amp-carousel 是一个 amp 组件,用于在屏幕上显示一组类似的内容,并使用箭头在内容之间切换。
要使用 amp-carousel,我们需要添加以下脚本:
<script async custom-element = "amp-carousel" src = "https://cdn.ampproject.org/v0/amp-carousel-0.1.js"></script>
Amp-carousel 标签
amp-carousel 标签如下所示:
<amp-carousel height="300" layout="fixed-height" type="carousel">
<amp-img src="images/christmas1.jpg" width="400" height="300" alt="a sample image"></amp-img>
….
</amp-carousel>
amp-carousel 可用的属性
amp-carousel 可用的属性列在下表中:
| 序号 | 属性和描述 |
|---|---|
| 1 | type
我们可以将轮播项目显示为轮播和幻灯片 |
| 2 | height
轮播的高度(以像素为单位) |
| 3 | controls(可选)
它在屏幕上显示左右箭头。在设备上几秒钟后消失。可以使用 Css 使箭头始终可见。 |
| 4 | data-next-button-aria-label(可选)
用于设置下一个轮播的标签。 |
| 5 | data-prev-button-aria-label(可选)
用于设置上一个轮播的标签。 |
| 6 | autoplay(可选)
用于在 5000 毫秒后显示下一张幻灯片。它可以使用 amp-carousel 上的 delay 属性(毫秒数)覆盖。它将向轮播添加循环属性,幻灯片到达末尾后将再次播放。仅用于 type=slides,并且 autoplay 至少需要 2 张幻灯片才能工作。 |
现在,让我们通过示例来了解如何以不同的方式显示轮播。
Amp 轮播类型为 carousel
使用 carousel 类型,项目可以水平滚动。
示例
<!doctype html>
<html amp lang = "en">
<head>
<meta charset = "utf-8">
<title>amp-carousel</title>
<script async src = "https://cdn.ampproject.org/v0.js">
</script>
<!-- ## Setup -->
<!-- Import the carousel component in the header. -->
<script async custom-element = "amp-carousel" src =
"https://cdn.ampproject.org/v0/amp-carousel-0.1.js">
</script>
<link rel = "canonical" href="
https://ampbyexample.com/components/amp-carousel/">
<meta name = "viewport" content = "width = device-width,
minimum-scale = 1,initial-scale = 1">
<style amp-boilerplate>
body{
-webkit-animation:
-amp-start 8s steps(1,end) 0s 1 normal both;-moz-animation:
-amp-start 8s steps(1,end) 0s 1 normal both;-ms-animation:
-amp-start 8s steps(1,end) 0s 1 normal both;animation:
-amp-start 8s steps(1,end) 0s 1 normal both
}
@-webkit-keyframes
-amp-start{from{visibility:hidden}to{visibility:visible}}@-moz-keyframes
-amp-start{from{visibility:hidden}to{visibility:visible}}@-ms-keyframes
-amp-start{from{visibility:hidden}to{visibility:visible}}@-o-keyframes
-amp-start{from{visibility:hidden}to{visibility:visible}}@keyframes
-amp-start{from{visibility:hidden}to{visibility:visible}}
</style>
<noscript>
<style amp-boilerplate>
body{
-webkit-animation:none;
-moz-animation:none;
-ms-animation:none;
animation:none
}
</style>
</noscript>
<style amp-custom>
h3{
font-family: "Segoe UI",Arial,sans-serif;
font-weight: 400;
margin: 10px 0;
}
</style>
</head>
<body>
<h3>Google Amp-Carousel</h3>
<amp-carousel height = "300" layout = "fixed-height" type = "carousel">
<amp-img
src = "images/christmas1.jpg"
width = "400"
height = "300"
alt = "a sample image">
</amp-img>
<amp-img src = "images/christmas2.jpg"
width = "400"
height = "300"
alt = "another sample image">
</amp-img>
<amp-img
src = "images/christmas3.jpg"
width = "400"
height = "300"
alt = "and another sample image">
</amp-img>
</amp-carousel>
</body>
</html>
输出
Amp 轮播类型为 slides
Amp 轮播type = ”slides”一次显示一个项目。您可以使用 fill、fixed、fixed-height、flex-item、nodisplay 和 responsive 作为布局。
示例
<!doctype html>
<html amp lang = "en">
<head>
<meta charset = "utf-8">
<title>amp-carousel</title>
<script async src = "https://cdn.ampproject.org/v0.js">
</script>
<!-- ## Setup -->
<!-- Import the carousel component in the header. -->
<script async custom-element = "amp-carousel" src =
"https://cdn.ampproject.org/v0/amp-carousel-0.1.js">
</script>
<link rel = "canonical" href=
"https://ampbyexample.com/components/amp-carousel/">
<meta name = "viewport" content = "width = device-width,
minimum-scale = 1,initial-scale = 1">
<style amp-boilerplate>
body{
-webkit-animation:
-amp-start 8s steps(1,end) 0s 1 normal both;-moz-animation:
-amp-start 8s steps(1,end) 0s 1 normal both;-ms-animation:
-amp-start 8s steps(1,end) 0s 1 normal both;animation:
-amp-start 8s steps(1,end) 0s 1 normal both
}
@-webkit-keyframes
-amp-start{from{visibility:hidden}to{visibility:visible}}@-moz-keyframes
-amp-start{from{visibility:hidden}to{visibility:visible}}@-ms-keyframes
-amp-start{from{visibility:hidden}to{visibility:visible}}@-o-keyframes
-amp-start{from{visibility:hidden}to{visibility:visible}}@keyframes
-amp-start{from{visibility:hidden}to{visibility:visible}}
</style>
<noscript>
<style amp-boilerplate>
body{
-webkit-animation:none;
-moz-animation:none;
-ms-animation:none;
animation:none}
</style>
</noscript>
<style amp-custom>
h3{
font-family: "Segoe UI",Arial,sans-serif;
font-weight: 400;margin: 10px 0;}
</style>
</head>
<body>
<h3>Google Amp-Carousel</h3>
<amp-carousel
width = "400"
height = "300"
layout = "responsive"
type = "slides">
<amp-img
src = "images/christmas1.jpg"
width = "400"
height = "300"
layout = "responsive"
alt = "a sample image">
</amp-img>
<amp-img
src = "images/christmas2.jpg"
width = "400"
height = "300"
layout = "responsive"
alt="another sample image">
</amp-img>
<amp-img
src = "images/christmas3.jpg"
width = "400"
height = "300"
layout = "responsive"
alt = "and another sample image">
</amp-img>
</amp-carousel>
</body>
</html>
输出
使用 autoplay 的 Amp 轮播
在下面给出的示例中,我们添加了 autoplay 属性,延迟时间为 2000 毫秒(2 秒)。这将在延迟 2 秒后更改幻灯片。默认情况下,延迟时间为 5000 毫秒(5 秒)。
示例
<!doctype html>
<html amp lang = "en">
<head>
<meta charset = "utf-8">
<title>amp-carousel</title>
<script async src = "https://cdn.ampproject.org/v0.js">
</script>
<!-- ## Setup -->
<!-- Import the carousel component in the header. -->
<script async custom-element = "amp-carousel" src =
"https://cdn.ampproject.org/v0/amp-carousel-0.1.js">
</script>
<link rel = "canonical" href =
"https://ampbyexample.com/components/amp-carousel/">
<meta name = "viewport" content = "width = device-width,
minimum-scale = 1,initial-scale = 1">
<style amp-boilerplate>
body{
-webkit-animation:
-amp-start 8s steps(1,end) 0s 1 normal both;-moz-animation:
-amp-start 8s steps(1,end) 0s 1 normal both;-ms-animation:
-amp-start 8s steps(1,end) 0s 1 normal both;animation:
-amp-start 8s steps(1,end) 0s 1 normal both
}
@-webkit-keyframes
-amp-start{from{visibility:hidden}to{visibility:visible}}@-moz-keyframes
-amp-start{from{visibility:hidden}to{visibility:visible}}@-ms-keyframes
-amp-start{from{visibility:hidden}to{visibility:visible}}@-o-keyframes
-amp-start{from{visibility:hidden}to{visibility:visible}}@keyframes
-amp-start{from{visibility:hidden}to{visibility:visible}}
</style>
<noscript>
<style amp-boilerplate>
body{
-webkit-animation:none;
-moz-animation:none;
-ms-animation:none;
animation:none}
</style>
</noscript>
<style amp-custom>
h3{
font-family: "Segoe UI",Arial,sans-serif;
font-weight: 400;
margin: 10px 0;
}
</style>
</head>
<body>
<h3>Google Amp-Carousel</h3>
<amp-carousel
width = "400"
height = "300"
layout = "responsive"
type = "slides"
autoplay delay = "2000">
<amp-img
src = "images/christmas1.jpg"
width = "400"
height = "300"
layout = "responsive"
alt = "a sample image">
</amp-img>
<amp-img
src = "images/christmas2.jpg"
width = "400"
height = "300"
layout = "responsive"
alt = "another sample image">
</amp-img>
<amp-img
src = "images/christmas3.jpg"
width = "400"
height = "300"
layout = "responsive"
alt = "and another sample image">
</amp-img>
</amp-carousel>
</body>
</html>
输出
AMP 灯箱
Amp-lightbox 是一个 amp 组件,它将占用整个视口并像叠加层一样显示。
要使用 amp-lightbox,请添加以下脚本:
<script async custom-element = "amp-lightbox" src = "https://cdn.ampproject.org/v0/amp-lightbox-0.1.js"> </script>
amp-lightbox 可用的属性
amp-lightbox 的属性列表如下所示:
| 序号 | 属性和描述 |
|---|---|
| 1 | animate-in(可选)
在这里,您可以指定打开灯箱的动画样式。默认情况下为 淡入 。支持的样式值为淡入、从底部飞入和从顶部飞入 |
| 2 | close-button(在 AMPHTML 广告中需要)
当用于 amphtmlads 时,我们可以为灯箱指定关闭按钮。 |
| 3 | id(必需)
灯箱的唯一标识符 |
| 4 | layout(必需)
layout 的值为 nodisplay |
| 5 | Scrollable(可选)
使用 amp-lightbox 上的此属性,可以滚动灯箱的内容,超出灯箱的高度。 |
灯箱示例
<!doctype html>
<html amp lang = "en">
<head>
<meta charset = "utf-8">
<script async src = "https://cdn.ampproject.org/v0.js">
</script>
<title>Google AMP - Amp Lightbox</title>
<link rel = "canonical" href =
"http://example.ampproject.org/article-metadata.html">
<meta name = "viewport" content = "width = device-width,
minimum-scale = 1,initial-scale = 1">
<style amp-boilerplate>
body{
-webkit-animation:
-amp-start 8s steps(1,end) 0s 1 normal both;-moz-animation:
-amp-start 8s steps(1,end) 0s 1 normal both;-ms-animation:
-amp-start 8s steps(1,end) 0s 1 normal both;animation:
-amp-start 8s steps(1,end) 0s 1 normal both
}
@-webkit-keyframes
-amp-start{from{visibility:hidden}to{visibility:visible}}@-moz-keyframes
-amp-start{from{visibility:hidden}to{visibility:visible}}@-ms-keyframes
-amp-start{from{visibility:hidden}to{visibility:visible}}@-o-keyframes
-amp-start{from{visibility:hidden}to{visibility:visible}}@keyframes
-amp-start{from{visibility:hidden}to{visibility:visible}}
</style>
<noscript>
<style amp-boilerplate>
body{
-webkit-animation:none;
-moz-animation:none;
-ms-animation:none;
animation:none}
</style>
</noscript>
<script async custom-element = "amp-lightbox" src =
"https://cdn.ampproject.org/v0/amp-lightbox-0.1.js">
</script>
<style amp-custom>
amp-img {
border: 1px solid #ddd;
border-radius: 4px;
padding: 5px;
}
button{
background-color: #ACAD5C;
color: white;
padding: 12px 20px;
border: none;
border-radius: 4px;
cursor: pointer;
float: left;
}
.lightbox {
background: rgba(211,211,211,0.8);
width: 100%;
height: 100%;
position: absolute;
display: flex;
align-items: center;
justify-content: center;
}
</style>
</head>
<body>
<h3>Google AMP - Amp Lightbox</h3>
<button on = "tap:my-lightbox">
Show LightBox
</button>
<amp-lightbox id = "my-lightbox" layout = "nodisplay">
<div class = "lightbox" on="tap:my-lightbox.close" tabindex = "0">
<amp-img
alt = "Beautiful Flower"
src = "images/flower.jpg"
width = "246"
height = "205">
</amp-img>
</div>
</amp-lightbox>
</body>
</html>
输出
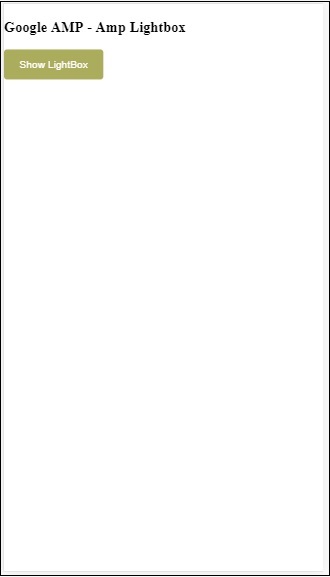
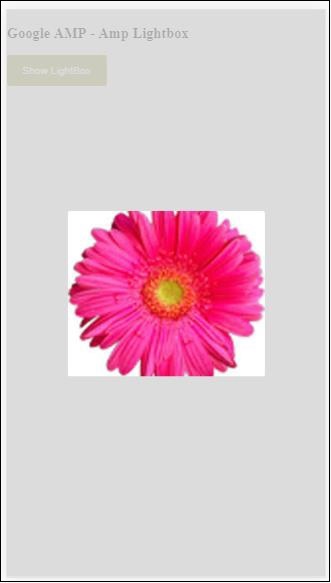
点击屏幕上的任意位置关闭灯箱。
您可以向灯箱添加关闭按钮,这在显示叠加类型广告时非常有用。请观察以下示例:
示例
<!doctype html>
<html amp lang = "en">
<head>
<meta charset = "utf-8">
<script async src = "https://cdn.ampproject.org/v0.js">
</script>
<title>Google AMP - Amp Lightbox</title>
<link rel = "canonical" href =
"http://example.ampproject.org/article-metadata.html">
<meta name = "viewport" content = "width = device-width,
minimum-scale = 1,initial-scale = 1">
<style amp-boilerplate>
body{
-webkit-animation:
-amp-start 8s steps(1,end) 0s 1 normal both;-moz-animation:
-amp-start 8s steps(1,end) 0s 1 normal both;-ms-animation:
-amp-start 8s steps(1,end) 0s 1 normal both;animation:
-amp-start 8s steps(1,end) 0s 1 normal both
}
@-webkit-keyframes
-amp-start{from{visibility:hidden}to{visibility:visible}}@-moz-keyframes
-amp-start{from{visibility:hidden}to{visibility:visible}}@-ms-keyframes
-amp-start{from{visibility:hidden}to{visibility:visible}}@-o-keyframes
-amp-start{from{visibility:hidden}to{visibility:visible}}@keyframes
-amp-start{from{visibility:hidden}to{visibility:visible}}
</style>
<noscript>
<style amp-boilerplate>
body{
-webkit-animation:none;
-moz-animation:none;
-ms-animation:none;
animation:none}
</style>
</noscript>
<script async custom-element = "amp-lightbox" src =
"https://cdn.ampproject.org/v0/amp-lightbox-0.1.js">
</script>
<style amp-custom>
amp-img {
border: 1px solid #ddd;
border-radius: 4px;
padding: 5px;
}
button{
background-color: #ACAD5C;
color: white;
padding: 12px 20px;
border: none;
border-radius: 4px;
cursor: pointer;
float: left;
}
.lightbox {
background: rgba(211,211,211,0.8);
width: 100%;
height: 100%;
position: absolute;
display: flex;
align-items: center;
justify-content: center;
}
</style>
</head>
<body>
<h3>Google AMP - Amp Lightbox</h3>
<button on = "tap:my-lightbox">
Show LightBox
</button>
<amp-lightbox id = "my-lightbox" layout = "nodisplay" close-button>
<div class = "lightbox" on = "tap:my-lightbox.close">
<amp-img
alt = "Beautiful Flower"
src = "images/flower.jpg"
width = "246"
height = "205">
</amp-img>
</div>
</amp-lightbox>
</body>
</html>
输出
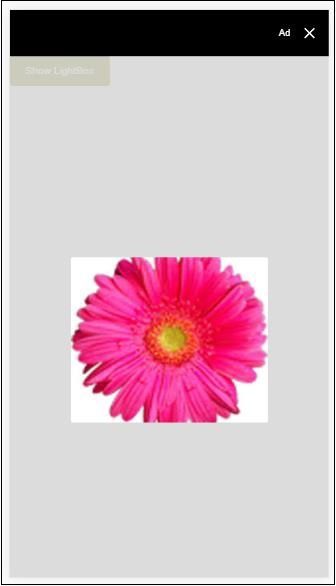
Amp 侧边栏
Amp 侧边栏是 amp 组件,用于显示内容,这些内容在点击按钮时从窗口的两侧滑出。
要使用 amp-sidebar,我们需要添加以下脚本:
<script async custom-element = "amp-sidebar" src = " https://cdn.ampproject.org/v0/amp-sidebar-0.1.js"> </script>
Amp-sidebar 标签
<amp-sidebar id = "sidebar" layout = "nodisplay" side = "right"> <span on = "tap:sidebar.close">X</span> Html content here.. </amp-sidebar>
amp-sidebar 上可用的属性列表如下所示:
| 序号 | 属性和描述 |
|---|---|
| 1 | side
此属性将在指定的方向打开侧边栏。例如 left/right |
| 2 | layout
Nodisplay 将用于侧边栏布局 |
| 3 | open
打开侧边栏时添加此属性。 |
| 4 | data-close-button-aria-label
用于设置关闭按钮的标签。 |
我们将使用上述属性与侧边栏一起工作。请观察下面显示的示例:
示例
<!doctype html>
<html amp lang = "en">
<head>
<meta charset = "utf-8">
<script async src = "https://cdn.ampproject.org/v0.js">
</script>
<title>Google AMP - Amp Sidebar</title>
<link rel = "canonical" href="
http://example.ampproject.org/article-metadata.html">
<meta name = "viewport" content = "width = device-width,
minimum-scale = 1,initial-scale = 1">
<style amp-boilerplate>
body{
-webkit-animation:
-amp-start 8s steps(1,end) 0s 1 normal both;-moz-animation:
-amp-start 8s steps(1,end) 0s 1 normal both;-ms-animation:
-amp-start 8s steps(1,end) 0s 1 normal both;animation:
-amp-start 8s steps(1,end) 0s 1 normal both
}
@-webkit-keyframes
-amp-start{from{visibility:hidden}to{visibility:visible}}@-moz-keyframes
-amp-start{from{visibility:hidden}to{visibility:visible}}@-ms-keyframes
-amp-start{from{visibility:hidden}to{visibility:visible}}@-o-keyframes
-amp-start{from{visibility:hidden}to{visibility:visible}}@keyframes
-amp-start{from{visibility:hidden}to{visibility:visible}}
</style>
<noscript>
<style amp-boilerplate>
body{
-webkit-animation:none;
-moz-animation:none;
-ms-animation:none;
animation:none}
</style>
</noscript>
<script async custom-element = "amp-sidebar" src =
"https://cdn.ampproject.org/v0/amp-sidebar-0.1.js">
</script>
<style amp-custom>
amp-img {
border: 1px solid #ddd;
border-radius: 4px;
padding: 5px;
}
button{
background-color: #ACAD5C;
color: white;
padding: 12px 20px;
border: none;
border-radius: 4px;
cursor: pointer;
float: left;
}
</style>
</head>
<body>
<h3>Google AMP - Amp Sidebar</h3>
<button on = "tap:sidebar">
Show Sidebar
</button>
<amp-sidebar id = "sidebar" layout = "nodisplay" side = "right">
<span on = "tap:sidebar.close">X</span>
<ul>
<li><a href = "/">About</a></li>
<li><a href = "/">Services</a></li>
<li><a href = "/">Contact US</a></li>
</ul>
</amp-sidebar>
</body>
</html>
输出
我们使用side属性在右侧打开侧边栏。您可以使用 left 值作为side属性在左侧打开它。layout属性必须为nodisplay。Open属性在侧边栏打开时存在。
data-close-button-aria-label
属性用于添加关闭按钮。它是可选的,不是必须使用的。Amp 图片滑块
Amp-image-slider 是一个 amp 组件,用于通过在图像上垂直移动滑块来比较两张图像。
要使用 amp-img-slider,请添加以下脚本:
<script async custom-element = "amp-image-slider" src = " https://cdn.ampproject.org/v0/amp-image-slider-0.1.js"> </script>
Amp-img-slider 标签
<amp-image-slider width = "300" height = "200" layout = "responsive"> <amp-img src = "images/christmas1.jpg" layout = "fill"> </amp-img> <amp-img src = "images/christmas2.jpg" layout = "fill"> </amp-img> </amp-image-slider>
此处显示了一个 amp-img-slider 的示例。在这里,我们在 amp-img-slider 内部添加了 2 张图像,其中第一张图像充当滑块,您可以在第二张图像的顶部滑动它。
示例
<!doctype html>
<html amp lang = "en">
<head>
<meta charset = "utf-8">
<script async src = "https://cdn.ampproject.org/v0.js">
</script>
<title>Google AMP - Amp Image Slider</title>
<link rel = "canonical" href =
"http://example.ampproject.org/article-metadata.html">
<meta name = "viewport" content = "width = device-width,
minimum-scale = 1,initial-scale = 1">
<style amp-boilerplate>
body{
-webkit-animation:
-amp-start 8s steps(1,end) 0s 1 normal both;-moz-animation:
-amp-start 8s steps(1,end) 0s 1 normal both;-ms-animation:
-amp-start 8s steps(1,end) 0s 1 normal both;animation:
-amp-start 8s steps(1,end) 0s 1 normal both
}
@-webkit-keyframes
-amp-start{from{visibility:hidden}to{visibility:visible}}@-moz-keyframes
-amp-start{from{visibility:hidden}to{visibility:visible}}@-ms-keyframes
-amp-start{from{visibility:hidden}to{visibility:visible}}@-o-keyframes
-amp-start{from{visibility:hidden}to{visibility:visible}}@keyframes
-amp-start{from{visibility:hidden}to{visibility:visible}}
</style>
<noscript>
<style amp-boilerplate>
body{
-webkit-animation:none;
-moz-animation:none;
-ms-animation:none;
animation:none}
</style>
</noscript>
<script async custom-element = "amp-image-slider" src =
"https://cdn.ampproject.org/v0/amp-image-slider-0.1.js">
</script>
<style amp-custom>
amp-img {
border: 1px solid #ddd;
border-radius: 4px;
padding: 5px;
}
</style>
</head>
<body>
<h3>Google AMP - Amp Image Slider</h3>
<amp-image-slider
width = "300"
height = "200"
layout = "responsive">
<amp-img
src = "images/christmas1.jpg"
layout = "fill">
</amp-img>
<amp-img
src = "images/christmas2.jpg"
layout = "fill">
</amp-img>
</amp-image-slider>
</body>
</html>
输出
Amp-image-slider 有一个名为 seekTo 的操作,您可以使用它来更改图像,如下面的示例所示:
示例
<!doctype html>
<html amp lang = "en">
<head>
<meta charset = "utf-8">
<script async src = "https://cdn.ampproject.org/v0.js">
</script>
<title>Google AMP - Amp Image Slider</title>
<link rel = "canonical" href ="
http://example.ampproject.org/article-metadata.html">
<meta name = "viewport" content = "width = device-width,
minimum-scale = 1,initial-scale = 1">
<style amp-boilerplate>
body{
-webkit-animation:
-amp-start 8s steps(1,end) 0s 1 normal both;-moz-animation:
-amp-start 8s steps(1,end) 0s 1 normal both;-ms-animation:
-amp-start 8s steps(1,end) 0s 1 normal both;animation:
-amp-start 8s steps(1,end) 0s 1 normal both
}
@-webkit-keyframes
-amp-start{from{visibility:hidden}to{visibility:visible}}@-moz-keyframes
-amp-start{from{visibility:hidden}to{visibility:visible}}@-ms-keyframes
-amp-start{from{visibility:hidden}to{visibility:visible}}@-o-keyframes
-amp-start{from{visibility:hidden}to{visibility:visible}}@keyframes
-amp-start{from{visibility:hidden}to{visibility:visible}}
</style>
<noscript>
<style amp-boilerplate>
body{
-webkit-animation:none;
-moz-animation:none;
-ms-animation:none;
animation:none}
</style>
</noscript>
<script async custom-element = "amp-image-slider" src =
"https://cdn.ampproject.org/v0/amp-image-slider-0.1.js">
</script>
<style amp-custom>
amp-img {
border: 1px solid #ddd;
border-radius: 4px;
padding: 5px;
}
button{
background-color: #ACAD5C;
color: white;
padding: 12px 20px;
border: none;
border-radius: 4px;
cursor: pointer;
float: left;
}
.amp-sidebar-toolbar-target-shown {
display: none;
}
</style>
</head>
<body>
<h3>Google AMP - Amp Image Slider</h3>
<amp-image-slider
width = "300"
id="slider1"
height = "200"
layout = "responsive">
<amp-img src = "images/christmas1.jpg" layout = "fill">
</amp-img>
<amp-img src = "images/christmas2.jpg" layout = "fill">
</amp-img>
</amp-image-slider>
<button on = "tap:slider1.seekTo(percent = 1)">
Image 1
</button>
<button on = "tap:slider1.seekTo(percent = 0)">
Image 2
</button>
</body>
</html>
输出
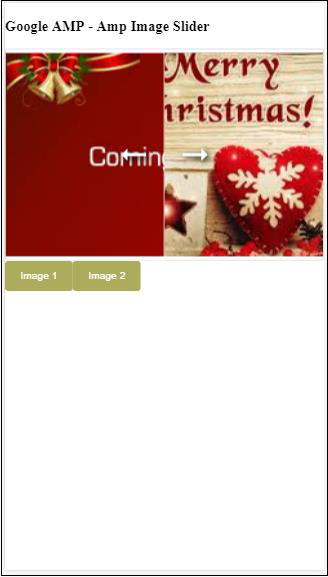
您可以通过点击按钮更改图像。

<button on = "tap:slider1.seekTo(percent = 1)">Image 1</button> <button on = "tap:slider1.seekTo(percent = 0)">Image 2</button> </div>
Google AMP - 广告
广告对于发布者页面起着重要作用,因为它们是发布者收入的来源。对于 amp 页面,情况略有不同。它们不允许添加第三方 javascript 文件。为了在页面上显示广告,有一个名为 amp-ad 的 amp 组件,它有助于在页面上显示广告。大多数提供广告的广告网络都与 amp-ad 标签兼容。
广告工作原理的详细信息如下所示:
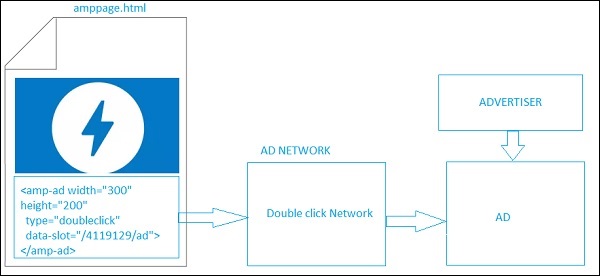
要在发布者页面上显示广告,我们需要添加<amp-ad>,它将充当在页面上投放广告的占位符。<amp-ad> 将调用为 type 指定的广告网络。
广告网络将在内部调用要显示在页面上的广告,该广告由广告客户提供,通常是 html 或 amphtml 广告。
要使其工作,我们需要首先将脚本添加到页面中。
<script async custom-element = "amp-ad" src = " https://cdn.ampproject.org/v0/amp-ad-0.1.js"> </script>
doubleclick 的 amp-ad 标签如下所示:
<amp-ad width = "300"
height = "200"
type = "doubleclick"
data-slot = "/4119129/ad">
<div placeholder>
<b>Placeholder here!!!</b>
</div>
</amp-ad>
许多广告网络支持 amp-ad。请注意,在我们的示例中,我们将介绍doubleclick amp-ad 标签。广告网络名称必须在type属性中指定。
示例
<!doctype html>
<html amp lang = "en">
<head>
<meta charset = "utf-8">
<script async src = "https://cdn.ampproject.org/v0.js">
</script>
<title>Google AMP - AD</title>
<link rel = "canonical" href=
"http://example.ampproject.org/article-metadata.html">
<meta name = "viewport" content = "width = device-width,
minimum-scale = 1,initial-scale = 1">
<style amp-boilerplate>
body{
-webkit-animation:
-amp-start 8s steps(1,end) 0s 1 normal both;-moz-animation:
-amp-start 8s steps(1,end) 0s 1 normal both;-ms-animation:
-amp-start 8s steps(1,end) 0s 1 normal both;animation:
-amp-start 8s steps(1,end) 0s 1 normal both
}
@-webkit-keyframes
-amp-start{from{visibility:hidden}to{visibility:visible}}@-moz-keyframes
-amp-start{from{visibility:hidden}to{visibility:visible}}@-ms-keyframes
-amp-start{from{visibility:hidden}to{visibility:visible}}@-o-keyframes
-amp-start{from{visibility:hidden}to{visibility:visible}}@keyframes
-amp-start{from{visibility:hidden}to{visibility:visible}}
</style>
<noscript>
<style amp-boilerplate>
body{
-webkit-animation:none;
-moz-animation:none;
-ms-animation:none;
animation:none}
</style>
</noscript>
<script async custom-element = "amp-ad" src =
"https://cdn.ampproject.org/v0/amp-ad-0.1.js">
</script>
<style amp-custom>
div {
text-align:center;
}
</style>
</head>
<body>
<h3>Google AMP - AD</h3>
<h3>300x250 - Banner AD</h3>
<p>This is a example of adnetwork doubleclick banner ad</p>
<p>This is a example of adnetwork doubleclick banner ad</p>
<p>This is a example of adnetwork doubleclick banner ad</p>
<p>This is a example of adnetwork doubleclick banner ad</p>
<p>This is a example of adnetwork doubleclick banner ad</p>
<p>This is a example of adnetwork doubleclick banner ad</p>
<div>
<amp-ad
data-slot = /30497360/amp_by_example/AMP_Banner_300x250
height = 250
layout = fixed
style = width:300px;height:250px;
type = doubleclick
width = 300>
</amp-ad>
</div>
<p>This is a example of adnetwork doubleclick banner ad</p>
<p>This is a example of adnetwork doubleclick banner ad</p>
<p>This is a example of adnetwork doubleclick banner ad</p>
<p>This is a example of adnetwork doubleclick banner ad</p>
<p>This is a example of adnetwork doubleclick banner ad</p>
<p>This is a example of adnetwork doubleclick banner ad</p>
<p>This is a example of adnetwork doubleclick banner ad</p>
<p>This is a example of adnetwork doubleclick banner ad</p>
<p>This is a example of adnetwork doubleclick banner ad</p>
</body>
</html>
输出
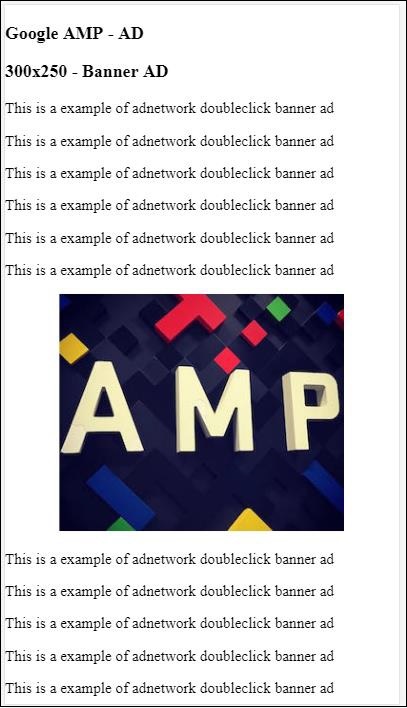
让我们看一下 amp-ad 上的一些重要属性,如以下表格所示:
| 序号 | 属性和描述 |
|---|---|
| 1 | type
广告网络的名称 |
| 2 | width
广告的宽度 |
| 3 | height
广告的高度 |
| 4 | placeholder
用作子元素的占位符,并在广告仍在加载时显示给用户。请注意,此属性必须由广告网络端支持。 |
| 5 | data-*
要传递给广告网络的数据属性。例如,doubleclick 广告网络需要 data-slot=/30497360/amp_by_example/AMP_Banner_300x250 在页面上渲染广告。 每个广告网络都会指定数据参数。 我们还可以使用 data-override-width 和 data-override-height 覆盖使用的宽度和高度。 |
| 6 | fallback
Fallback 用作 amp-ad 的子元素,并在没有广告投放时显示。 |
让我们通过一个使用placeholder的工作示例来了解这一点,该示例在没有广告投放时执行。
示例
<!doctype html>
<html amp lang = "en">
<head>
<meta charset = "utf-8">
<script async src = "https://cdn.ampproject.org/v0.js">
</script>
<title>Google AMP - AD</title>
<link rel = "canonical" href =
"http://example.ampproject.org/article-metadata.html">
<meta name = "viewport" content="width = device-width,
minimum-scale = 1,initial-scale = 1">
<style amp-boilerplate>
body{
-webkit-animation:
-amp-start 8s steps(1,end) 0s 1 normal both;-moz-animation:
-amp-start 8s steps(1,end) 0s 1 normal both;-ms-animation:
-amp-start 8s steps(1,end) 0s 1 normal both;animation:
-amp-start 8s steps(1,end) 0s 1 normal both
}
@-webkit-keyframes
-amp-start{from{visibility:hidden}to{visibility:visible}}@-moz-keyframes
-amp-start{from{visibility:hidden}to{visibility:visible}}@-ms-keyframes
-amp-start{from{visibility:hidden}to{visibility:visible}}@-o-keyframes
-amp-start{from{visibility:hidden}to{visibility:visible}}@keyframes
-amp-start{from{visibility:hidden}to{visibility:visible}}
</style>
<noscript>
<style amp-boilerplate>
body{
-webkit-animation:none;
-moz-animation:none;
-ms-animation:none;
animation:none}
</style>
</noscript>
<script async custom-element = "amp-ad" src =
"https://cdn.ampproject.org/v0/amp-ad-0.1.js">
</script>
<style amp-custom>
div {
text-align:center;
}
</style>
</head>
<body>
<h3>Google AMP - AD</h3>
<h3>300x250 - Banner AD</h3>
<p>This is a example of adnetwork doubleclick banner ad</p>
<p>This is a example of adnetwork doubleclick banner ad</p>
<p>This is a example of adnetwork doubleclick banner ad</p>
<p>This is a example of adnetwork doubleclick banner ad</p>
<p>This is a example of adnetwork doubleclick banner ad</p>
<p>This is a example of adnetwork doubleclick banner ad</p>
<div>
<amp-ad
data-slot = /30497360/amp_by_example/AMP_Banner_300x250
height = 250
layout = fixed
style = width:300px;height:250px;
type = doubleclick
width = 300>
<div placeholder>
<b>Placeholder Example : Ad is loading!!!</b>
</div>
</amp-ad>
</div>
<p>This is a example of adnetwork doubleclick banner ad</p>
<p>This is a example of adnetwork doubleclick banner ad</p>
<p>This is a example of adnetwork doubleclick banner ad</p>
<p>This is a example of adnetwork doubleclick banner ad<p>
<p>This is a example of adnetwork doubleclick banner ad</p>
<p>This is a example of adnetwork doubleclick banner ad</p>
</body>
</html>
输出
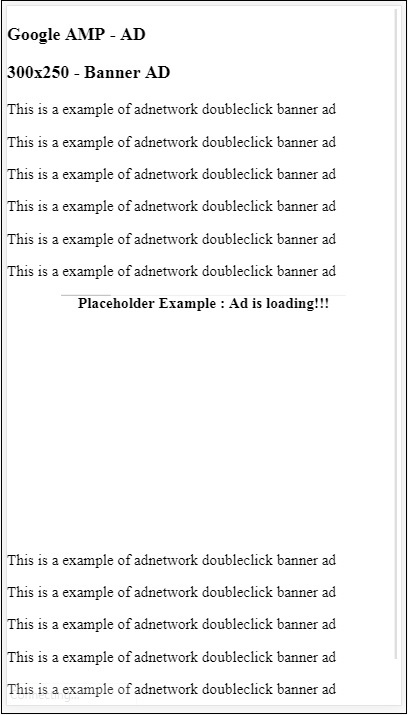
我们可以使用 fallback 属性,它是 amp-ad 的子元素,在没有广告投放时显示。
示例
<!doctype html>
<html amp lang = "en">
<head>
<meta charset = "utf-8">
<script async src = "https://cdn.ampproject.org/v0.js">
</script>
<title>Google AMP - AD</title>
<link rel = "canonical" href =
"http://example.ampproject.org/article-metadata.html">
<meta name = "viewport" content = "width = device-width,
minimum-scale = 1,initial-scale = 1">
<style amp-boilerplate>
body{
-webkit-animation:
-amp-start 8s steps(1,end) 0s 1 normal both;-moz-animation:
-amp-start 8s steps(1,end) 0s 1 normal both;-ms-animation:
-amp-start 8s steps(1,end) 0s 1 normal both;animation:
-amp-start 8s steps(1,end) 0s 1 normal both
}
@-webkit-keyframes
-amp-start{from{visibility:hidden}to{visibility:visible}}@-moz-keyframes
-amp-start{from{visibility:hidden}to{visibility:visible}}@-ms-keyframes
-amp-start{from{visibility:hidden}to{visibility:visible}}@-o-keyframes
-amp-start{from{visibility:hidden}to{visibility:visible}}@keyframes
-amp-start{from{visibility:hidden}to{visibility:visible}}
</style>
<noscript>
<style amp-boilerplate>
body{
-webkit-animation:none;
-moz-animation:none;
-ms-animation:none;
animation:none}
</style>
</noscript>
<script async custom-element = "amp-ad" src =
"https://cdn.ampproject.org/v0/amp-ad-0.1.js">
</script>
<style amp-custom>
div, p{
text-align:center;
}
amp-ad {
border : solid 1px black;
}
</style>
</head>
<body>
<h3>Google AMP - AD</h3>
<h3>300x250 - Banner AD</h3>
<p>This is a example of adnetwork doubleclick banner ad</p>
<p>This is a example of adnetwork doubleclick banner ad</p>
<p>This is a example of adnetwork doubleclick banner ad</p>
<p>This is a example of adnetwork doubleclick banner ad</p>
<p>This is a example of adnetwork doubleclick banner ad</p>
<p>This is a example of adnetwork doubleclick banner ad</p>
<div>
<amp-ad
width = "300"
height = "250"
type = "doubleclick"
data-slot = "/4119129/no-ad">
<div fallback>
<p style = "color:green;font-size:25px;">No ads to Serve!</p>
</div>
</amp-ad>
</div>
<p>This is a example of adnetwork doubleclick banner ad</p>
<p>This is a example of adnetwork doubleclick banner ad</p>
<p>This is a example of adnetwork doubleclick banner ad</p>
<p>This is a example of adnetwork doubleclick banner ad</p>
<p>This is a example of adnetwork doubleclick banner ad</p>
<p>This is a example of adnetwork doubleclick banner ad</p>
</body>
</html>
输出
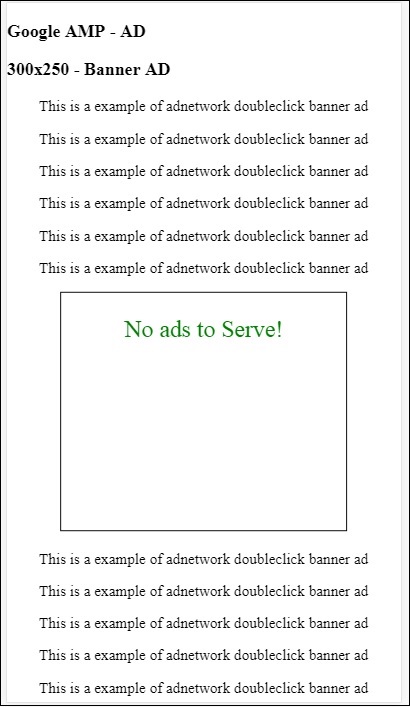
如果广告在视口中,则 fallback 属性将显示 fallback 元素中的消息。
如果广告组件在视口下方,并且没有广告,则 amp-ad 将折叠空间,并且不会显示 fallback 消息。
广告单元仅在没有广告且位于视口下方时才会折叠,这样用户在阅读内容时就不会被打扰,因为折叠可能会导致内容发生偏移。
支持的广告网络列表如下:https://www.ampproject.org/docs/ads/ads_vendors
在本章中,我们将讨论 amp 中以下与广告相关的标签:
Google AMP - 事件跟踪像素
Google AMP - 粘性广告
Google AMP - AMPHTML 广告
事件跟踪像素
Amp 提供了 amp-pixel,它基本上用于触发像素以统计页面浏览量。Amp-pixel 类似于 img 标签,我们需要提供要触发的像素 url,用户可以在调试时在浏览器的网络选项卡中看到触发的 url。像素不会显示在页面上。
要使用 amp-pixel,我们无需添加任何额外的脚本,因为其功能在核心 amp 脚本中可用。
amp-pixel 标签如下所示:
<amp-pixel src = "https://urlhere" layout = "nodisplay"> </amp-pixel>
让我们通过一个工作示例来了解 amp-pixel 的工作原理:
示例
<!doctype html>
<html amp lang = "en">
<head>
<meta charset = "utf-8">
<script async src = "https://cdn.ampproject.org/v0.js">
</script>
<title>Google AMP - Tracking Pixel</title>
<link rel = "canonical" href =
"http://example.ampproject.org/article-metadata.html">
<meta name = "viewport" content = "width = device-width,
minimum-scale = 1,initial-scale = 1">
<style amp-boilerplate>
body{
-webkit-animation:
-amp-start 8s steps(1,end) 0s 1 normal both;-moz-animation:
-amp-start 8s steps(1,end) 0s 1 normal both;-ms-animation:
-amp-start 8s steps(1,end) 0s 1 normal both;animation:
-amp-start 8s steps(1,end) 0s 1 normal both
}
@-webkit-keyframes
-amp-start{from{visibility:hidden}to{visibility:visible}}@-moz-keyframes
-amp-start{from{visibility:hidden}to{visibility:visible}}@-ms-keyframes
-amp-start{from{visibility:hidden}to{visibility:visible}}@-o-keyframes
-amp-start{from{visibility:hidden}to{visibility:visible}}@keyframes
-amp-start{from{visibility:hidden}to{visibility:visible}}
</style>
<noscript>
<style amp-boilerplate>
body{
-webkit-animation:none;
-moz-animation:none;
-ms-animation:none;
animation:none}
</style>
</noscript>
</head>
<body>
<h3>Google AMP - Tracking Pixel</h3>
<amp-pixel src = "https://www.trackerurlhere.com/tracker/foo"
layout = "nodisplay">
</amp-pixel>
</body>
</html>
输出
您将在浏览器网络选项卡中看到 url 触发。这里我们使用了虚拟像素来展示 amp-pixel 的工作原理。在实际环境中,您应该看到针对触发的像素跟踪的数据。因为每次在网页上触发像素时,服务器端都会统计其上的数据。稍后可以从业务角度分析数据。
粘性广告
粘性广告是一种显示广告的格式。广告将粘贴在页面底部,它将调用amp-ad组件作为子组件。这基本上就像我们在页面上经常看到的页脚广告。
要使用 amp-sticky-ad,我们需要添加以下脚本:
<script async custom-element = "amp-sticky-ad" src = " https://cdn.ampproject.org/v0/amp-sticky-ad-1.0.js"> </script>
与 amp-sticky-ad 相关的条件如下:
您只能在页面上使用一个 amp-sticky-ad。
amp-ad 必须是 amp-sticky-ad 的直接子元素。例如:
<amp-sticky-ad> <amp-ad></amp-ad> </amp-sticky-ad>
粘性广告组件将始终位于页面底部。
粘性广告将占据容器的全部宽度,并使用 amp-ad 的宽度和高度填充空间。
粘性广告的高度为 100px。如果 amp-ad 的高度小于 100px,则粘性广告将采用 amp-ad 的高度。如果 amp-ad 的高度大于 100px,则高度将保持为 100px,溢出内容隐藏。无法将粘性广告的高度更改为超过 100px。
可以更改粘性广告的背景颜色。但不允许透明背景。
当用户滚动并到达页面底部时,广告将显示在页面末尾,以便不会隐藏底部内容。
在横向模式下,粘性广告将居中对齐。
如果没有广告要投放,粘性广告的容器将折叠且不可见。
让我们看看如下所示的 amp-sticky-ad 在页面上的工作示例:
示例
<!doctype html>
<html amp lang = "en">
<head>
<meta charset = "utf-8">
<script async src = "https://cdn.ampproject.org/v0.js">
</script>
<title>Google AMP - AD</title>
<link rel = "canonical" href =
"http://example.ampproject.org/article-metadata.html">
<meta name = "viewport" content = "width = device-width,
minimum-scale = 1,initial-scale = 1">
<style amp-boilerplate>
body{
-webkit-animation:
-amp-start 8s steps(1,end) 0s 1 normal both;-moz-animation:
-amp-start 8s steps(1,end) 0s 1 normal both;-ms-animation:
-amp-start 8s steps(1,end) 0s 1 normal both;animation:
-amp-start 8s steps(1,end) 0s 1 normal both
}
@-webkit-keyframes
-amp-start{from{visibility:hidden}to{visibility:visible}}@-moz-keyframes
-amp-start{from{visibility:hidden}to{visibility:visible}}@-ms-keyframes
-amp-start{from{visibility:hidden}to{visibility:visible}}@-o-keyframes
-amp-start{from{visibility:hidden}to{visibility:visible}}@keyframes
-amp-start{from{visibility:hidden}to{visibility:visible}}
</style>
<noscript>
<style amp-boilerplate>
body{
-webkit-animation:none;
-moz-animation:none;
-ms-animation:none;
animation:none}
</style>
</noscript>
<script async custom-element = "amp-sticky-ad" src =
"https://cdn.ampproject.org/v0/amp-sticky-ad-1.0.js">
</script>
<style amp-custom>
div, p{
text-align:center;
}
amp-ad {
border : solid 1px black;
}
</style>
</head>
<body>
<h3>Google AMP - Sticky AD</h3>
<p>This is a example of adnetwork doubleclick banner ad</p>
<p>This is a example of adnetwork doubleclick banner ad</p>
<p>This is a example of adnetwork doubleclick banner ad</p>
<p>This is a example of adnetwork doubleclick banner ad</p>
<p>This is a example of adnetwork doubleclick banner ad</p>
<p>This is a example of adnetwork doubleclick banner ad</p>
<div>
<amp-sticky-ad layout = "nodisplay">
<amp-ad
width = "320"
height = "50"
type = "doubleclick"
data-slot = "/35096353/amptesting/formats/sticky">
</amp-ad>
</amp-sticky-ad>
</div>
<p>This is a example of adnetwork doubleclick banner ad</p>
<p>This is a example of adnetwork doubleclick banner ad</p>
<p>This is a example of adnetwork doubleclick banner ad</p>
<p>This is a example of adnetwork doubleclick banner ad</p>
<p>This is a example of adnetwork doubleclick banner ad</p>
<p>This is a example of adnetwork doubleclick banner ad</p>
<p>This is a example of adnetwork doubleclick banner ad</p>
<p>This is a example of adnetwork doubleclick banner ad</p>
<p>This is a example of adnetwork doubleclick banner ad</p>
<p>This is a example of adnetwork doubleclick banner ad</p>
<p>This is a example of adnetwork doubleclick banner ad</p>
<p>This is a example of adnetwork doubleclick banner ad</p>
<p>This is a example of adnetwork doubleclick banner ad</p>
<p>This is a example of adnetwork doubleclick banner ad</p>
<p>This is a example of adnetwork doubleclick banner ad</p>
<p>This is a example of adnetwork doubleclick banner ad</p>
<p>This is a example of adnetwork doubleclick banner ad</p>
<p>This is a example of adnetwork doubleclick banner ad</p>
<p>This is a example of adnetwork doubleclick banner ad</p>
<p>This is a example of adnetwork doubleclick banner ad</p>
<p>This is a example of adnetwork doubleclick banner ad</p>
<p>This is a example of adnetwork doubleclick banner ad</p>
<p>This is a example of adnetwork doubleclick banner ad</p>
<p>This is a example of adnetwork doubleclick banner ad</p>
<p>This is a example of adnetwork doubleclick banner ad</p>
<p>This is a example of adnetwork doubleclick banner ad</p>
<p>This is a example of adnetwork doubleclick banner ad</p>
<p>This is a example of adnetwork doubleclick banner ad</p>
<p>This is a example of adnetwork doubleclick banner ad</p>
<p>This is a example of adnetwork doubleclick banner ad</p>
<p>This is a example of adnetwork doubleclick banner ad</p>
<p>This is a example of adnetwork doubleclick banner ad</p>
<p>This is a example of adnetwork doubleclick banner ad</p>
<p>This is a example of adnetwork doubleclick banner ad</p>
<p>This is a example of adnetwork doubleclick banner ad</p>
<p>This is a example of adnetwork doubleclick banner ad</p>
<p>This is a example of adnetwork doubleclick banner ad</p>
<p>This is a example of adnetwork doubleclick banner ad</p>
<p>This is a example of adnetwork doubleclick banner ad</p>
<p>This is a example of adnetwork doubleclick banner ad</p>
<p>This is a example of adnetwork doubleclick banner ad</p>
<p>This is a example of adnetwork doubleclick banner ad</p>
<p>This is a example of adnetwork doubleclick banner ad</p>
<p>This is a example of adnetwork doubleclick banner ad</p>
<p>This is a example of adnetwork doubleclick banner ad</p>
<p>This is a example of adnetwork doubleclick banner ad</p>
<p>This is a example of adnetwork doubleclick banner ad</p>
<p>This is a example of adnetwork doubleclick banner ad</p>
<p>This is a example of adnetwork doubleclick banner ad</p>
<p>This is a example of adnetwork doubleclick banner ad</p>
<p>This is a example of adnetwork doubleclick banner ad</p>
<p>This is a example of adnetwork doubleclick banner ad</p>
<p>This is a example of adnetwork doubleclick banner ad</p>
<h2>END OF PAGE IS VISIBLE AND CONTENT IS NOT COVERED</h2>
</body>
</html>
输出
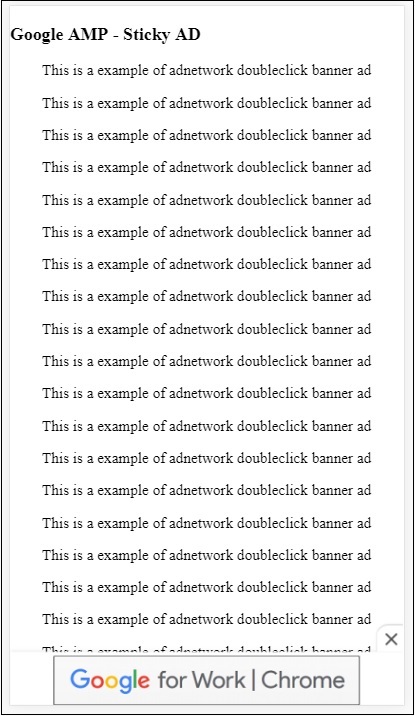
当用户滚动到页面末尾时,它看起来是这样的:

当您到达页面末尾时,广告不会与内容重叠。提供了关闭按钮,允许用户关闭广告。
如果您想更改与关闭按钮相关的任何内容,例如图像或宽度等,可以使用样式组件中的.amp-sticky-ad-close-button来完成。
更改关闭按钮背景颜色的示例
<!doctype html>
<html amp lang = "en">
<head>
<meta charset = "utf-8">
<script async src = "https://cdn.ampproject.org/v0.js">
</script>
<title>Google AMP - AD</title>
<link rel = "canonical" href =
"http://example.ampproject.org/article-metadata.html">
<meta name = "viewport" content = "width = device-width,
minimum-scale = 1,initial-scale = 1">
<style amp-boilerplate>
body{
-webkit-animation:
-amp-start 8s steps(1,end) 0s 1 normal both;-moz-animation:
-amp-start 8s steps(1,end) 0s 1 normal both;-ms-animation:
-amp-start 8s steps(1,end) 0s 1 normal both;animation:
-amp-start 8s steps(1,end) 0s 1 normal both
}
@-webkit-keyframes
-amp-start{from{visibility:hidden}to{visibility:visible}}@-moz-keyframes
-amp-start{from{visibility:hidden}to{visibility:visible}}@-ms-keyframes
-amp-start{from{visibility:hidden}to{visibility:visible}}@-o-keyframes
-amp-start{from{visibility:hidden}to{visibility:visible}}@keyframes
-amp-start{from{visibility:hidden}to{visibility:visible}}
</style>
<noscript>
<style amp-boilerplate>
body{
-webkit-animation:none;
-moz-animation:none;
-ms-animation:none;
animation:none}
</style>
</noscript>
<script async custom-element = "amp-sticky-ad"
src = "https://cdn.ampproject.org/v0/amp-sticky-ad-1.0.js">
</script>
<style amp-custom>
div, p{
text-align:center;
}
amp-ad {
border : solid 1px black;
}
.amp-sticky-ad-close-button {
background-color: red;
}
</style>
</head>
<body>
<h3>Google AMP - Sticky AD</h3>
<p>This is a example of adnetwork doubleclick banner ad</p>
<p>This is a example of adnetwork doubleclick banner ad</p>
<p>This is a example of adnetwork doubleclick banner ad</p>
<p>This is a example of adnetwork doubleclick banner ad</p>
<p>This is a example of adnetwork doubleclick banner ad</p>
<p>This is a example of adnetwork doubleclick banner ad</p>
<div>
<amp-sticky-ad layout = "nodisplay">
<amp-ad
width = "320"
height = "50"
type = "doubleclick"
data-slot = "/35096353/amptesting/formats/sticky">
</amp-ad>
</amp-sticky-ad>
</div>
<p>This is a example of adnetwork doubleclick banner ad</p>
<p>This is a example of adnetwork doubleclick banner ad</p>
<p>This is a example of adnetwork doubleclick banner ad</p>
<p>This is a example of adnetwork doubleclick banner ad</p>
<p>This is a example of adnetwork doubleclick banner ad</p>
<p>This is a example of adnetwork doubleclick banner ad</p>
<p>This is a example of adnetwork doubleclick banner ad</p>
<p>This is a example of adnetwork doubleclick banner ad</p>
<p>This is a example of adnetwork doubleclick banner ad</p>
<p>This is a example of adnetwork doubleclick banner ad</p>
<p>This is a example of adnetwork doubleclick banner ad</p>
<p>This is a example of adnetwork doubleclick banner ad</p>
<p>This is a example of adnetwork doubleclick banner ad</p>
<p>This is a example of adnetwork doubleclick banner ad</p>
<p>This is a example of adnetwork doubleclick banner ad</p>
<p>This is a example of adnetwork doubleclick banner ad</p>
<p>This is a example of adnetwork doubleclick banner ad</p>
<p>This is a example of adnetwork doubleclick banner ad</p>
<p>This is a example of adnetwork doubleclick banner ad</p>
<p>This is a example of adnetwork doubleclick banner ad</p>
<p>This is a example of adnetwork doubleclick banner ad</p>
<p>This is a example of adnetwork doubleclick banner ad</p>
<p>This is a example of adnetwork doubleclick banner ad</p>
<p>This is a example of adnetwork doubleclick banner ad</p>
<p>This is a example of adnetwork doubleclick banner ad</p>
<p>This is a example of adnetwork doubleclick banner ad</p>
<p>This is a example of adnetwork doubleclick banner ad</p>
<p>This is a example of adnetwork doubleclick banner ad</p>
<p>This is a example of adnetwork doubleclick banner ad</p>
<p>This is a example of adnetwork doubleclick banner ad</p>
<p>This is a example of adnetwork doubleclick banner ad</p>
<p>This is a example of adnetwork doubleclick banner ad</p>
<p>This is a example of adnetwork doubleclick banner ad</p>
<p>This is a example of adnetwork doubleclick banner ad</p>
<p>This is a example of adnetwork doubleclick banner ad</p>
<p>This is a example of adnetwork doubleclick banner ad</p>
<p>This is a example of adnetwork doubleclick banner ad</p>
<p>This is a example of adnetwork doubleclick banner ad</p>
<p>This is a example of adnetwork doubleclick banner ad</p>
<p>This is a example of adnetwork doubleclick banner ad</p>
<p>This is a example of adnetwork doubleclick banner ad</p>
<p>This is a example of adnetwork doubleclick banner ad</p>
<p>This is a example of adnetwork doubleclick banner ad</p>
<p>This is a example of adnetwork doubleclick banner ad</p>
<p>This is a example of adnetwork doubleclick banner ad</p>
<p>This is a example of adnetwork doubleclick banner ad</p>
<p>This is a example of adnetwork doubleclick banner ad</p>
<p>This is a example of adnetwork doubleclick banner ad</p>
<p>This is a example of adnetwork doubleclick banner ad</p>
<p>This is a example of adnetwork doubleclick banner ad</p>
<p>This is a example of adnetwork doubleclick banner ad</p>
<p>This is a example of adnetwork doubleclick banner ad</p>
<p>This is a example of adnetwork doubleclick banner ad</p>
<h2>END OF PAGE IS VISIBLE AND CONTENT IS NOT COVERED</h2>
</body>
</html>
输出
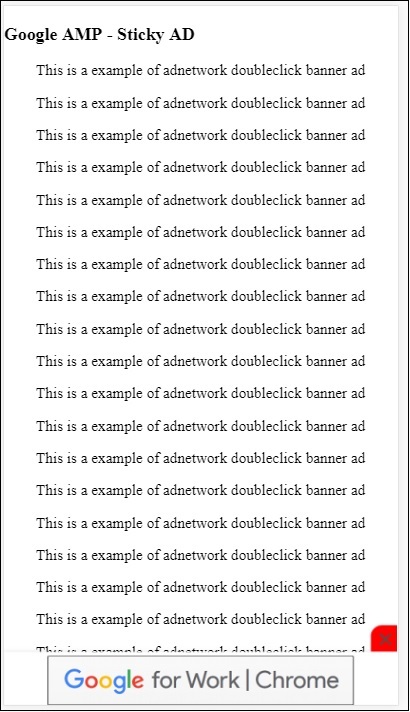
发布者页面上 amp 粘性广告的示例
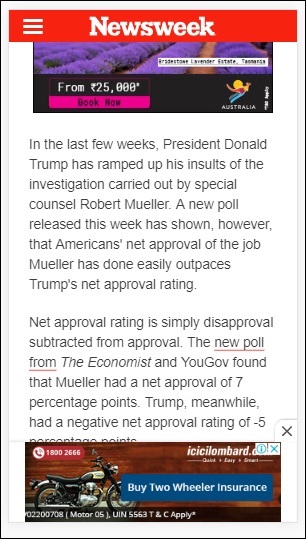
AMPHTML 广告
我们已经看到了<amp-ad>,它用于加载广告。使用<amp-ad>加载的广告内容可以使用非 amp 样式加载广告。如果<amp-ad>加载的广告使用 amp 规范加载广告,则称为 amphtml 广告。AmpHTML 广告比非 amp 广告更快,因为它们遵循 amp 规范。
使用可用的 amp 组件(如灯箱和轮播),我们可以形成多种类型的 amphtml 广告格式,这有助于显示广告。
目前,以下广告投放服务支持 amphtml 广告:
DoubleClick for Publishers
TripleLift
Dianomi
Adzerk
Google AdSense
amphtml 广告将从<amp-ad>组件中投放,如下所示:
示例
<!doctype html>
<html amp lang = "en">
<head>
<meta charset = "utf-8">
<script async src = "https://cdn.ampproject.org/v0.js">
</script>
<title>Google AMP - Amp HTMLAds</title>
<link rel = "canonical" href=
"http://example.ampproject.org/article-metadata.html">
<meta name = "viewport" content = "width=device-width,
minimum-scale = 1,initial-scale = 1">
<style amp-boilerplate>
body{
-webkit-animation:
-amp-start 8s steps(1,end) 0s 1 normal both;-moz-animation:
-amp-start 8s steps(1,end) 0s 1 normal both;-ms-animation:
-amp-start 8s steps(1,end) 0s 1 normal both;animation:
-amp-start 8s steps(1,end) 0s 1 normal both
}
@-webkit-keyframes
-amp-start{from{visibility:hidden}to{visibility:visible}}@-moz-keyframes
-amp-start{from{visibility:hidden}to{visibility:visible}}@-ms-keyframes
-amp-start{from{visibility:hidden}to{visibility:visible}}@-o-keyframes
-amp-start{from{visibility:hidden}to{visibility:visible}}@keyframes
-amp-start{from{visibility:hidden}to{visibility:visible}}
</style>
<noscript>
<style amp-boilerplate>
body{
-webkit-animation:none;
-moz-animation:none;
-ms-animation:none;
animation:none}
</style>
</noscript>
<script async custom-element = "amp-ad" src =
"https://cdn.ampproject.org/v0/amp-ad-0.1.js">
</script>
<style amp-custom>
.ad-container {
background: #FFFFFF;
margin: 0;
padding: 0px;
text-align:center;
}
.article-body{
font-family: avenir, Helvetica, arial, serif, sans-serif !important;
font-weight: 400;
text-align:center;
}
.adv {
text-align:center;
}
</style>
</head>
<body>
<div>
<p>Amphtml ads are faster in comparison to the non
amp ones as they follow the amp specification.</p>
<p>Amphtml ads work fine in amp pages as well as non amp pages</p>
<div class = "ad-container">
<div>Advertising</div>
<amp-ad layout = "fixed"
width = "300"
height = "250"
type = "fake"
id = "i-amphtml-demo-fake"
src = "ampimg.html">
</amp-ad>
</div>
<p>Amphtml ads are faster in comparison to the non amp
ones as they follow the amp specification.</p>
<p>Amphtml ads work fine in amp pages as well as non amp pages</p>
</div>
</body>
</html>
我们调用 amp-ad 来显示广告。amp-ad 中使用的 src 是另一个 amp 页面。我们使用了 type="fake" 和 id="i-amphtml-demo-fake"。amp-ad 标签中使用的 amp 页面详细信息或 ampimg.html 如下所示:
ampimg.html
<!doctype html>
<html amp lang = "en">
<head>
<meta charset = "utf-8">
<script async src = "https://cdn.ampproject.org/v0.js">
</script>
<title>Google AMP - Image</title>
<link rel = "canonical" href =
"http://example.ampproject.org/article-metadata.html">
<meta name = "viewport" content="width = device-width,
minimum-scale = 1,initial-scale = 1">
<style amp-boilerplate>
body{
-webkit-animation:
-amp-start 8s steps(1,end) 0s 1 normal both;-moz-animation:
-amp-start 8s steps(1,end) 0s 1 normal both;-ms-animation:
-amp-start 8s steps(1,end) 0s 1 normal both;animation:
-amp-start 8s steps(1,end) 0s 1 normal both
}
@-webkit-keyframes
-amp-start{from{visibility:hidden}to{visibility:visible}}@-moz-keyframes
-amp-start{from{visibility:hidden}to{visibility:visible}}@-ms-keyframes
-amp-start{from{visibility:hidden}to{visibility:visible}}@-o-keyframes
-amp-start{from{visibility:hidden}to{visibility:visible}}@keyframes
-amp-start{from{visibility:hidden}to{visibility:visible}}
</style>
<noscript>
<style amp-boilerplate>
body{
-webkit-animation:none;
-moz-animation:none;
-ms-animation:none;
animation:none}
</style>
</noscript>
<style amp-custom>
amp-img {
border: 1px solid black;
border-radius: 4px;
padding: 5px;
}
</style>
</head>
<body>
<amp-img alt = "Beautiful Flower"
src = "images/bannerad.png"
width = "246"
height = "205">
</amp-img>
</body>
</html>
输出
我们在 amp-ad 内显示 amp 页面。类似地,我们可以使用 amp-video、amp-carousel 在 amp 页面中显示广告。列出的广告服务器支持调用正确的 amp 页面以在 amphtml 广告下投放广告。
Google AMP - 分析
Amp 分析是一个 amp 组件,用于跟踪页面上的数据。可以记录页面上所有用户交互并保存以分析数据,以便进一步改进或用于业务目的。
要使用 amp-analytics 组件,我们需要在 head 部分添加以下脚本:
<script async custom-element = "amp-analytics" src = "https://cdn.ampproject.org/v0/amp-analytics-0.1.js"> </script>
要记录 amp-analytics 中使用的事件,我们可以使用第三方供应商,也可以拥有内部跟踪系统。
使用 GoogleAnalytics 供应商的 amp-analytics 示例:
<amp-analytics type = googleanalytics>
<script type = application/json>{
"requests": {
"pageview": "${eventId}"
},
"vars": {
"account": "UA-44450152-1"
},
"triggers": {
"trackPageview" : {
"on": "visible",
"request": "pageview",
"vars": {
"eventId": "pageview"
}
}
}
}
</script>
</amp-analytics>
使用 comscore 供应商的 amp-analytics 示例
<amp-analytics type = comscore>
<script type = application/json>
{"vars": {"c2":"7922264"}}
</script>
</amp-analytics>
使用 chartbeat 供应商的 amp-analytics 示例
<amp-analytics type = chartbeat>
<script type = application/json>{
"vars": {
"uid": "230",
"domain": "dummyurl.com",
"sections": "us",
"authors": "Hello World"
}
}</script>
</amp-analytics>
供应商的详细列表在此处提供。
以下是如何使用内部分析供应商的工作示例:
示例
<!doctype html>
<html amp>
<head>
<meta charset = "utf-8">
<title>amp-analytics</title>
<script async src = "https://cdn.ampproject.org/v0.js">
</script>
<script async custom-element = "amp-analytics"
src = "https://cdn.ampproject.org/v0/amp-analytics-0.1.js">
</script>
<link rel = "canonical" href = "ampanalytics.html">
<meta name = "viewport" content = "width = device-width,
minimum-scale = 1,initial-scale = 1">
<style amp-boilerplate>
body{
-webkit-animation:
-amp-start 8s steps(1,end) 0s 1 normal both;-moz-animation:
-amp-start 8s steps(1,end) 0s 1 normal both;-ms-animation:
-amp-start 8s steps(1,end) 0s 1 normal both;animation:
-amp-start 8s steps(1,end) 0s 1 normal both}
@-webkit-keyframes
-amp-start{from{visibility:hidden}to{visibility:visible}}@-moz-keyframes
-amp-start{from{visibility:hidden}to{visibility:visible}}@-ms-keyframes
-amp-start{from{visibility:hidden}to{visibility:visible}}@-o-keyframes
-amp-start{from{visibility:hidden}to{visibility:visible}}@keyframes
-amp-start{from{visibility:hidden}to{visibility:visible}}
</style>
<noscript>
<style amp-boilerplate>
body{
-webkit-animation:none;
-moz-animation:none;
-ms-animation:none;
animation:none}
</style>
</noscript>
</head>
<body>
<h1>Google Amp - Analytics</h1>
<amp-analytics>
<script type = "application/json">
{
"requests": {
"event": "https://:8080/googleamp/tracking.php?
user=test&account=localhost&event=${eventId}"
},
"triggers": {
"trackPageview": {
"on": "visible",
"request": "event",
"vars": {
"eventId": "pageview"
}
}
}
}
</script>
</amp-analytics>
</body>
</html>
当在浏览器中访问页面时,将触发页面浏览量的跟踪器。可以在 Google 网络选项卡中看到,如下所示。

您还可以当页面上的特定元素可见时触发 amp-analytics 事件。以下为此提供的示例:
示例
<!doctype html>
<html amp>
<head>
<meta charset = "utf-8">
<title>amp-analytics</title>
<script async src = "https://cdn.ampproject.org/v0.js">
</script>
<script async custom-element = "amp-analytics"
src = "https://cdn.ampproject.org/v0/amp-analytics-0.1.js">
</script>
<link rel = "canonical" href = "ampanalytics.html">
<meta name = "viewport" content = "width = device-width,
minimum-scale = 1,initial-scale = 1">
<style amp-boilerplate>
body{
-webkit-animation:
-amp-start 8s steps(1,end) 0s 1 normal both;-moz-animation:
-amp-start 8s steps(1,end) 0s 1 normal both;-ms-animation:
-amp-start 8s steps(1,end) 0s 1 normal both;animation:
-amp-start 8s steps(1,end) 0s 1 normal both
}
@-webkit-keyframes
-amp-start{from{visibility:hidden}to{visibility:visible}}@-moz-keyframes
-amp-start{from{visibility:hidden}to{visibility:visible}}@-ms-keyframes
-amp-start{from{visibility:hidden}to{visibility:visible}}@-o-keyframes
-amp-start{from{visibility:hidden}to{visibility:visible}}@keyframes
-amp-start{from{visibility:hidden}to{visibility:visible}}
</style>
<noscript>
<style amp-boilerplate>
body{
-webkit-animation:none;
-moz-animation:none;
-ms-animation:none;
animation:none}
</style>
</noscript>
<script async custom-element = "amp-video"
src = "https://cdn.ampproject.org/v0/amp-video-0.1.js">
</script>
</head>
<body>
<h1>Google Amp - Analytics</h1>
<amp-video controls
id = "videoplayer"
width = "640"
height = "360"
layout = "responsive"
poster = "images/videoposter.png"
autoplay>
<source src = "video/bunny.webm" type = "video/webm" />
<source src = "video/samplevideo.mp4" type = "video/mp4" />
<div fallback>
<p>This browser does not support the video element.</p>
</div>
</amp-video>
<amp-analytics>
<script type = "application/json">
{
"requests": {
"event": "https://:8080/googleamp/tracking.php?
user=test&account=localhost&event=${eventId}"
},
"triggers": {
"trackPageview": {
"on": "visible",
"request": "event",
"visibilitySpec": {
"selector": "#videoplayer",
"visiblePercentageMin": 20,
"totalTimeMin": 2000,
"continuousTimeMin": 200
},
"vars": {
"eventId": "video"
}
}
}
}
</script>
</amp-analytics>
</body>
</html>
输出
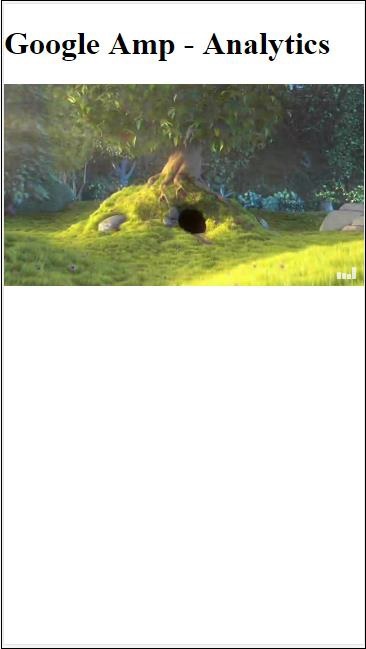
Amp-analytics 组件需要将 json 对象传递给脚本标签。json 的格式如下:
{
"requests": {
request-name: request-value,
...
},
"vars": {
var-name: var-value,
...
},
"extraUrlParams": {
extraurlparam-name: extraurlparam-value,
...
},
"triggers": {
trigger-name: trigger-object,
...
},
"transport": {
"beacon": *boolean*,
"xhrpost": *boolean*,
"image": *boolean*,
}
}
上面指定的所有对象都不必传递给 amp-analytics。如果您使用第三方供应商,则供应商将有其自己的格式,用户需要以这种方式传递数据。
让我们详细了解每个对象:
请求
请求对象具有一个 url,用于在满足条件时触发。以下为请求对象的示例:
"requests": {
"request-name": "https://:8080/googleamp/tracking.php?
user=test&account=localhost&event=${eventId}"
},
请求名称将在触发器对象中指定,并且必须为其使用相同的名称。
变量
要用于请求对象的所有变量都在 vars 对象中指定。
"requests": {
"event": "https://:8080/googleamp/tracking.php?
user=test&account=localhost&event=${eventId}"
},
"vars": {
"eventId": "video"
}
额外 URL 参数
要作为查询字符串附加到请求 url 的任何其他参数都可以在此对象中定义。请观察以下示例
"requests": {
"event": "https://:8080/googleamp/tracking.php?
user=test&account=localhost&event=${eventId}&x=1&y=2&z=3"
},
"vars": {
"eventId": "video"
},
"extraUrlParams": {
"x": "1",
"y": "2",
"z": "3"
}
触发器
此对象将指示何时必须触发请求 url。触发器对象中可用的键值对如下所示:
on - 您应该提及要监听的事件。on 的可用值为 render-start、ini-load、click、scroll、timer、visible、hidden、user-error、access-* 和 video-*
request - 这是请求的名称。这必须与请求对象中的请求名称匹配。
vars - 这是定义要用于触发器对象或用于覆盖定义的 vars 键值的对象。
selector - 这显示了设置触发器的元素的详细信息。
scrollSpec - 这将包含滚动触发器的详细信息。
timerSpec - 这将包含要给定的时间详细信息。
videoSpec - 这将包含要为视频调用的详细信息。
以下是一个示例,其中我们添加了 amp-video。当视频元素在页面上可用、在页面上至少可见 20%、视频至少播放 2 秒且连续在视野中 200 毫秒时,Amp-analytics 将触发跟踪器。当满足所有这些条件时,跟踪器才会被触发。详细信息如下所示:
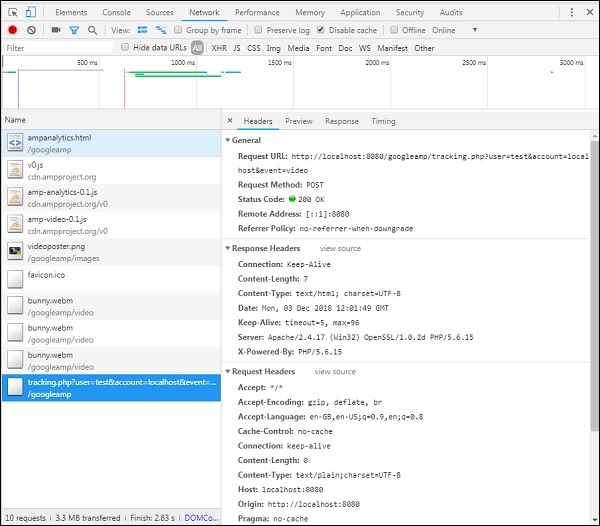
要添加有关元素可见性和其他条件(例如元素必须至少可见 20%、视频应播放 2 秒)的条件,所有这些条件都必须在visibilitySpec中指定,如下所示:
<amp-analytics>
<script type = "application/json">
{
"requests": {
"event": "https://:8080/googleamp/tracking.php?
user=test&account=localhost&event=${eventId}"
},
"triggers": {
"trackPageview": {
"on": "visible",
"request": "event",
"visibilitySpec": {
"selector": "#videoplayer",
"visiblePercentageMin": 20,
"totalTimeMin": 2000,
"continuousTimeMin": 200
},
"vars": {
"eventId": "video"
}
}
}
}
</script>
</amp-analytics>
videoSpec 允许您定义基于其想要触发跟踪器触发的条件。条件列出如下:
waitFor
此属性用于可见性触发器,在触发之前等待特定情况。waitFor 的可用选项为none、ini-load和render-start。默认情况下,waitFor 的值为 ini-load。
reportWhen
此属性用于可见性触发器,在触发之前等待特定情况。支持的值为 documentExit。您不能在visibilitySpec中同时使用reportWhen和repeat属性。
continuousTimeMin 和 continuousTimeMax
此属性指示可见性跟踪器要触发它,需要元素连续位于视口中,介于continuousTimeMin和continuousTimeMax之间。如果未指定 continousTimeMin,则默认设置为 0。值为毫秒。
totalTimeMin 和 totalTimeMin
此属性指示可见性跟踪器要触发它,需要元素在视口中总时间位于totalTimeMin和totalTimeMin之间。如果未指定 totalTimeMin,则默认为 0。值为毫秒。
visiblePercentageMin 和 visiblePercentageMax
此属性指示可见性跟踪器要触发它,需要元素在视口中可见,介于分配给 visiblePercetageMin 和 visiblePercentageMax 的百分比之间。visiblePercentageMin的默认值为 0,visibilePercentageMax的默认值为 100。如果两者都为 0,则元素不可见时将触发可见性触发器;如果两者都为 100,则元素完全可见时将触发可见性触发器。
Repeat
如果设置为 true,则每次满足 visibilitySpec 条件时都会触发触发器。默认情况下,repeat 的值为 false。它不能与 reportWhen 属性一起使用。
以下为点击触发器的示例:
<!doctype html>
<html amp>
<head>
<meta charset = "utf-8">
<title>amp-analytics</title>
<script async src = "https://cdn.ampproject.org/v0.js">
</script>
<script async custom-element = "amp-analytics"
src="https://cdn.ampproject.org/v0/amp-analytics-0.1.js">
</script>
<link rel = "canonical" href = "ampanalytics.html">
<meta name = "viewport" content = "width = device-width,
minimum-scale = 1,initial-scale = 1">
<style amp-boilerplate>
body{
-webkit-animation:
-amp-start 8s steps(1,end) 0s 1 normal both;-moz-animation:
-amp-start 8s steps(1,end) 0s 1 normal both;-ms-animation:
-amp-start 8s steps(1,end) 0s 1 normal both;animation:
-amp-start 8s steps(1,end) 0s 1 normal both
}
@-webkit-keyframes
-amp-start{from{visibility:hidden}to{visibility:visible}}@-moz-keyframes
-amp-start{from{visibility:hidden}to{visibility:visible}}@-ms-keyframes
-amp-start{from{visibility:hidden}to{visibility:visible}}@-o-keyframes
-amp-start{from{visibility:hidden}to{visibility:visible}}@keyframes
-amp-start{from{visibility:hidden}to{visibility:visible}}
</style>
<noscript>
<style amp-boilerplate>
body{
-webkit-animation:none;
-moz-animation:none;
-ms-animation:none;
animation:none}
</style>
</noscript>
<script async custom-element = "amp-video"
src = "https://cdn.ampproject.org/v0/amp-video-0.1.js">
</script>
<style amp-custom>
a {
color: blue;
}
</style>
</head>
<body>
<h1>Google Amp - Analytics</h1>
<a>Click Here</a>
<amp-analytics>
<script type = "application/json">
{
"requests": {
"event": "https://:8080/googleamp/tracking.php?
user=test&account=localhost&event=${eventId}"
},
"triggers": {
"trackAnchorClicks": {
"on": "click",
"selector": "a",
"request": "event",
"vars": {
"eventId": "clickonlink"
}
}
}
}
</script>
</amp-analytics>
</body>
</html>
输出

单击链接后,将触发事件,如下所示:
Google AMP - 社交小部件
Amp 提供了在页面上显示社交小部件的支持,而无需加载任何外部库。在本章中,我们将讨论此处列出的一些流行的社交小部件:
Google AMP - Facebook
Google AMP - Twitter
Google AMP - Pinterest
Google Amp - Facebook
使用 amp-facebook 组件,我们可以连接到 Facebook 并显示 amp 页面中的帖子、视频、评论。
要使用 amp-facebook,我们需要将以下脚本添加到页面:
<script async custom-element = "amp-facebook" src = "https://cdn.ampproject.org/v0/amp-facebook-0.1.js"> </script>
Amp-facebook 标签格式
<amp-facebook width = "552" height = "310" layout = "responsive" data-href = "https://#/tutorialspointindia/ posts/1784197988358159"> </amp-facebook>
以下为 amp-facebook 的工作示例:
示例:显示来自 Facebook 的帖子
<!doctype html>
<html amp lang = "en">
<head>
<meta charset = "utf-8">
<script async src = "https://cdn.ampproject.org/v0.js">
</script>
<title>Google AMP - Amp Facebook</title>
<link rel = "canonical" href =
"http://example.ampproject.org/article-metadata.html">
<meta name = "viewport" content = "width = device-width,
minimum-scale = 1,initial-scale = 1">
<style amp-boilerplate>
body{
-webkit-animation:
-amp-start 8s steps(1,end) 0s 1 normal both;-moz-animation:
-amp-start 8s steps(1,end) 0s 1 normal both;-ms-animation:
-amp-start 8s steps(1,end) 0s 1 normal both;animation:
-amp-start 8s steps(1,end) 0s 1 normal both
}
@-webkit-keyframes
-amp-start{from{visibility:hidden}to{visibility:visible}}@-moz-keyframes
-amp-start{from{visibility:hidden}to{visibility:visible}}@-ms-keyframes
-amp-start{from{visibility:hidden}to{visibility:visible}}@-o-keyframes
-amp-start{from{visibility:hidden}to{visibility:visible}}@keyframes
-amp-start{from{visibility:hidden}to{visibility:visible}}
</style>
<noscript>
<style amp-boilerplate>
body{
-webkit-animation:none;
-moz-animation:none;
-ms-animation:none;
animation:none}
</style>
</noscript>
<script async custom-element = "amp-facebook"
src = "https://cdn.ampproject.org/v0/amp-facebook-0.1.js">
</script>
</head>
<body>
<h3>Google AMP - Amp Facebook</h3>
<h2>Learn Python webscrapping</h2>
<amp-facebook
width = "552"
height = "310"
layout = "responsive"
data-href = "https://#/tutorialspointindia/posts/1784197988358159">
</amp-facebook>
</body>
</html>
输出
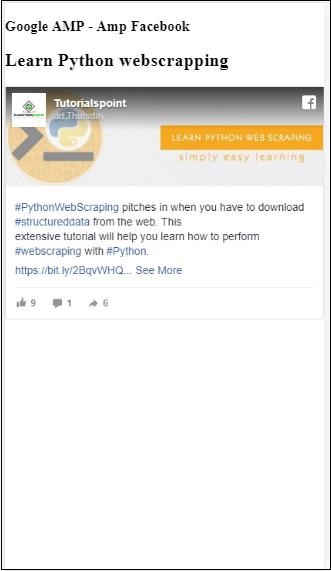
示例:显示来自 Facebook 的视频
<!doctype html>
<html amp lang = "en">
<head>
<meta charset = "utf-8">
<script async src = "https://cdn.ampproject.org/v0.js">
</script>
<title>Google AMP - Amp Facebook>/title>
<link rel = "canonical" href =
"http://example.ampproject.org/article-metadata.html">
<meta name = "viewport" content = "width = device-width,
minimum-scale = 1,initial-scale = 1">
<style amp-boilerplate>
body{
-webkit-animation:
-amp-start 8s steps(1,end) 0s 1 normal both;-moz-animation:
-amp-start 8s steps(1,end) 0s 1 normal both;-ms-animation:
-amp-start 8s steps(1,end) 0s 1 normal both;animation:
-amp-start 8s steps(1,end) 0s 1 normal both
}
@-webkit-keyframes
-amp-start{from{visibility:hidden}to{visibility:visible}}@-moz-keyframes
-amp-start{from{visibility:hidden}to{visibility:visible}}@-ms-keyframes
-amp-start{from{visibility:hidden}to{visibility:visible}}@-o-keyframes
-amp-start{from{visibility:hidden}to{visibility:visible}}@keyframes
-amp-start{from{visibility:hidden}to{visibility:visible}}
</style>
<noscript>
<style amp-boilerplate>
body{
-webkit-animation:none;
-moz-animation:none;
-ms-animation:none;
animation:none}
</style>
</noscript>
<script async custom-element = "amp-facebook"
src = "https://cdn.ampproject.org/v0/amp-facebook-0.1.js">
</script>
</head>
<body>
<h3<Google AMP - Amp Facebook Video</h3>
<h2<Learn Python</h2>
<amp-facebook
width = "476"
height = "316"
layout = "responsive"
data-embed-as = "video"
data-href = "https://#/thetutorialkings/videos/701545820223256">
</amp-facebook>
</body>
</html>
输出
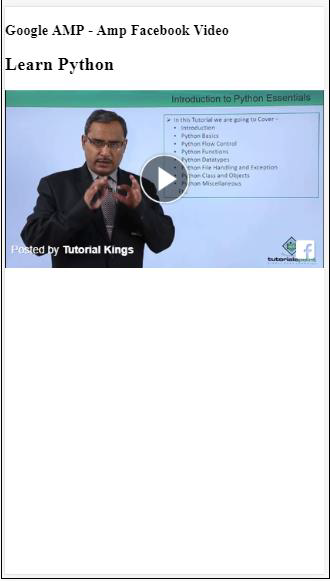
示例:显示 Facebook 帖子的评论
<!doctype html>
<html amp lang = "en">
<head>
<meta charset = "utf-8">
<script async src = "https://cdn.ampproject.org/v0.js">
</script>
<title>Google AMP - Amp Facebook</title>
<link rel = "canonical" href =
"http://example.ampproject.org/article-metadata.html">
<meta name = "viewport" content = "width = device-width,
minimum-scale = 1,initial-scale = 1">
<style amp-boilerplate>
body{
-webkit-animation:
-amp-start 8s steps(1,end) 0s 1 normal both;-moz-animation:
-amp-start 8s steps(1,end) 0s 1 normal both;-ms-animation:
-amp-start 8s steps(1,end) 0s 1 normal both;animation:
-amp-start 8s steps(1,end) 0s 1 normal both
}
@-webkit-keyframes
-amp-start{from{visibility:hidden}to{visibility:visible}}@-moz-keyframes
-amp-start{from{visibility:hidden}to{visibility:visible}}@-ms-keyframes
-amp-start{from{visibility:hidden}to{visibility:visible}}@-o-keyframes
-amp-start{from{visibility:hidden}to{visibility:visible}}@keyframes
-amp-start{from{visibility:hidden}to{visibility:visible}}
</style>
<noscript>
<style amp-boilerplate>
body{
-webkit-animation:none;
-moz-animation:none;
-ms-animation:none;
animation:none}
</style>
</noscript>
<script async custom-element = "amp-facebook"
src = "https://cdn.ampproject.org/v0/amp-facebook-0.1.js">
</script>
</head>
<body>
<h3>Google AMP - Amp Facebook comment for post</h3>
<h2>Learn Microprocessor</h2>
<amp-facebook
width = "552"
height = "500"
layout = "responsive"
data-embed-type = "comment"
data-href = "https://#/tutorialspointindia/posts/1744145745696717?
comment_id=1744179789026646&include_parent=false">
</amp-facebook>
</body>
</html>
输出

amp-facebook 上可用的属性为
data-href(必填) - 您需要在此处指定 Facebook url。
data-embed-as− 可选值包括 post、video 和 comment。默认值为 post。
data-locale(必填)− 用于显示本地化语言的内容,您可以根据需要进行更改。
data-include-comment-parent− 可接受 true 或 false 值。默认值为 false。当您使用 data-embed-as 选项设置为 comment 时,如果您需要显示评论的父回复,可以将此选项设置为 true。
到目前为止,我们已经了解了如何在 AMP 页面中添加帖子/视频和评论。如果需要添加 Facebook 页面,AMP 提供了一个名为 amp-facebook-page 的组件。
AMP Facebook 页面插件
Amp-facebook-page 组件可以提供我们想要的 Facebook 页面详细信息。要使用 amp-facebook-page,我们需要添加以下脚本:
<script async custom-element = "amp-facebook-page" src = " https://cdn.ampproject.org/v0/amp-facebook-page-0.1.js"> </script>
这里展示了一个使用 amp-facebook-page 的工作示例:
示例
<!doctype html>
<html amp lang = "en">
<head>
<meta charset = "utf-8">
<script async src = "https://cdn.ampproject.org/v0.js">
</script>
<title>Google AMP - Amp Facebook</title>
<link rel = "canonical" href =
"http://example.ampproject.org/article-metadata.html">
<meta name = "viewport" content = "width = device-width,
minimum-scale = 1,initial-scale = 1">
<style amp-boilerplate>
body{
-webkit-animation:
-amp-start 8s steps(1,end) 0s 1 normal both;-moz-animation:
-amp-start 8s steps(1,end) 0s 1 normal both;-ms-animation:
-amp-start 8s steps(1,end) 0s 1 normal both;animation:
-amp-start 8s steps(1,end) 0s 1 normal both
}
@-webkit-keyframes
-amp-start{from{visibility:hidden}to{visibility:visible}}@-moz-keyframes
-amp-start{from{visibility:hidden}to{visibility:visible}}@-ms-keyframes
-amp-start{from{visibility:hidden}to{visibility:visible}}@-o-keyframes
-amp-start{from{visibility:hidden}to{visibility:visible}}@keyframes
-amp-start{from{visibility:hidden}to{visibility:visible}}
</style>
<noscript>
<style amp-boilerplate>
body{
-webkit-animation:none;
-moz-animation:none;
-ms-animation:none;
animation:none}
</style>
</noscript>
<script async custom-element = "amp-facebook-page"
src = "https://cdn.ampproject.org/v0/amp-facebook-page-0.1.js">
</script>
</head>
<body>
<h3>Google AMP - Amp Facebook Page</h3>
<h3>Welcome to Tutorialspoint Facebook Page</h3>
<amp-facebook-page
width = "340"
height = "130"
layout = "responsive"
data-href = "https://#/tutorialspointindia/">
</amp-facebook-page>
</body>
</html>
输出

AMP Facebook 点赞
要嵌入 Facebook 页面点赞按钮插件,我们可以使用 amp-facebook-like 组件。要使用 amp-facebook-like,我们需要添加以下脚本:
"<script async custom-element = "amp-facebook-like" src = "https://cdn.ampproject.org/v0/amp-facebook-like-0.1.js"> </script>
示例
<!doctype html>
<html amp lang = "en">
<head>
<meta charset = "utf-8">
<script async src = "https://cdn.ampproject.org/v0.js">
</script>
<title>Google AMP - Amp Facebook</title>
<link rel = "canonical"
href = "http://example.ampproject.org/article-metadata.html">
<meta name = "viewport" content = "width = device-width,
minimum-scale = 1,initial-scale = 1">
<style amp-boilerplate>
body{
-webkit-animation:
-amp-start 8s steps(1,end) 0s 1 normal both;-moz-animation:
-amp-start 8s steps(1,end) 0s 1 normal both;-ms-animation:
-amp-start 8s steps(1,end) 0s 1 normal both;animation:
-amp-start 8s steps(1,end) 0s 1 normal both
}
@-webkit-keyframes
-amp-start{from{visibility:hidden}to{visibility:visible}}@-moz-keyframes
-amp-start{from{visibility:hidden}to{visibility:visible}}@-ms-keyframes
-amp-start{from{visibility:hidden}to{visibility:visible}}@-o-keyframes
-amp-start{from{visibility:hidden}to{visibility:visible}}@keyframes
-amp-start{from{visibility:hidden}to{visibility:visible}}
</style>
<noscript>
<style amp-boilerplate>
body{
-webkit-animation:none;
-moz-animation:none;
-ms-animation:none;
animation:none}
</style>
</noscript>
<script async custom-element = "amp-facebook-like"
src = "https://cdn.ampproject.org/v0/amp-facebook-like-0.1.js">
</script>
<style amp-custom>
amp-facebook-like {
margin: 1rem
}
</style>
</head>
<body>
<h3>Google AMP - Amp Facebook Likes</h3>
<h3>Welcome to Tutorialspoint Facebook Likes</h3>
<amp-facebook-like
width = "110"
height = "20"
layout = "fixed"
data-layout = "button_count"
data-href = "https://#/tutorialspointindia">
</amp-facebook-like>
</body>
</html>
输出
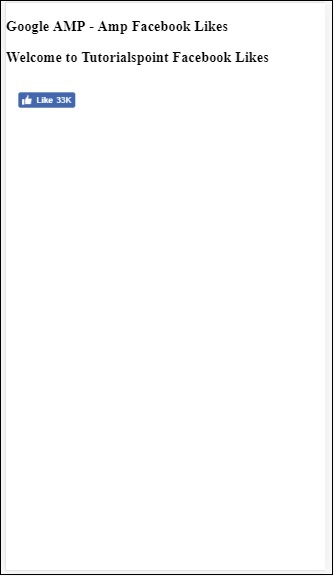
AMP Facebook 评论插件
Amp-facebook-comments 组件将显示指定页面的评论。
要使用 amp-facebook-comments,我们需要添加以下脚本:
<script async custom-element = "amp-facebook-comments" src = "https://cdn.ampproject.org/v0/amp-facebook-comments-0.1.js"> </script>
示例
<!doctype html>
<html amp lang = "en">
<head>
<meta charset = "utf-8">
<script async src = "https://cdn.ampproject.org/v0.js">
</script>
<title>Google AMP - Amp Facebook</title>
<link rel = "canonical" href =
"http://example.ampproject.org/article-metadata.html">
<meta name = "viewport" content = "width = device-width,
minimum-scale = 1,initial-scale = 1">
<style amp-boilerplate>
body{
-webkit-animation:
-amp-start 8s steps(1,end) 0s 1 normal both;-moz-animation:
-amp-start 8s steps(1,end) 0s 1 normal both;-ms-animation:
-amp-start 8s steps(1,end) 0s 1 normal both;animation:
-amp-start 8s steps(1,end) 0s 1 normal both
}
@-webkit-keyframes
-amp-start{from{visibility:hidden}to{visibility:visible}}@-moz-keyframes
-amp-start{from{visibility:hidden}to{visibility:visible}}@-ms-keyframes
-amp-start{from{visibility:hidden}to{visibility:visible}}@-o-keyframes
-amp-start{from{visibility:hidden}to{visibility:visible}}@keyframes
-amp-start{from{visibility:hidden}to{visibility:visible}}
</style>
<noscript>
<style amp-boilerplate>
body{
-webkit-animation:none;
-moz-animation:none;
-ms-animation:none;
animation:none}
</style>
</noscript>
<script async custom-element = "amp-facebook-comments"
src = "https://cdn.ampproject.org/v0/amp-facebook-comments-0.1.js">
</script>
<style amp-custom>
amp-facebook-like {
margin: 1rem
}
</style>
</head>
<body>
<h3>Google AMP - Amp Facebook Likes</h3>
<amp-facebook-comments
width = 486
height = 657
layout = "responsive"
data-numposts = "2"
data-href = "https://developers.facebook.com/docs/plugins/comments">
</amp-facebook-comments>
</body>
</html>
输出
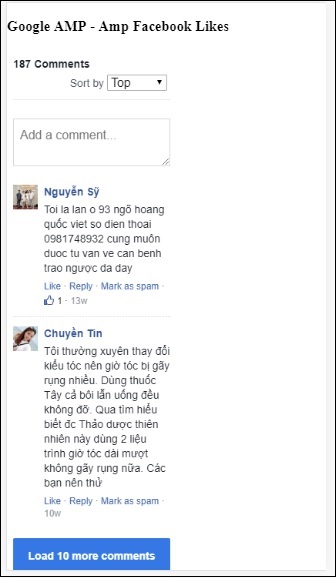
属性 data-numposts 用于决定屏幕上显示的评论数量。如果您想要获取所有评论,可以移除此属性。
Google AMP - Pinterest
AMP 通过 amp-pinterest 组件提供 Pinterest 小部件。我们可以使用此组件来显示 Pinterest 小部件、Pinterest 保存按钮和 Pinterest 关注按钮。
要开始使用 amp-pinterest,我们需要添加以下脚本:
<script async custom-element="amp-pinterest" src="https://cdn.ampproject.org/v0/amp-pinterest-0.1.js"> </script>
Amp-pinterest 标签
<amp-pinterest width = 300 height = 450 data-do = "embedPin" data-url = "https://in.pinterest.com/pin/856739529089490354/"> </amp-pinterest>
Pinterest 小部件
示例
要显示 Pinterest 小部件,我们需要使用属性 data-do="embedPin"。这里展示了一个工作示例:
<!doctype html>
<html amp lang = "en">
<head>
<meta charset = "utf-8">
<script async src = "https://cdn.ampproject.org/v0.js">
</script>
<title>Google AMP - Amp Pinterest Widget</title>
<link rel = "canonical" href =
"http://example.ampproject.org/article-metadata.html">
<meta name = "viewport" content = "width = device-width,
minimum-scale = 1,initial-scale = 1">
<style amp-boilerplate>
body{
-webkit-animation:
-amp-start 8s steps(1,end) 0s 1 normal both;-moz-animation:
-amp-start 8s steps(1,end) 0s 1 normal both;-ms-animation:
-amp-start 8s steps(1,end) 0s 1 normal both;animation:
-amp-start 8s steps(1,end) 0s 1 normal both}@-webkit-keyframes
-amp-start 8s steps(1,end) 0s 1 normal both
}
@-webkit-keyframes
-amp-start{from{visibility:hidden}to{visibility:visible}}@-moz-keyframes
-amp-start{from{visibility:hidden}to{visibility:visible}}@-ms-keyframes
-amp-start{from{visibility:hidden}to{visibility:visible}}@-o-keyframes
-amp-start{from{visibility:hidden}to{visibility:visible}}@keyframes
-amp-start{from{visibility:hidden}to{visibility:visible}}
</style>
<noscript>
<style amp-boilerplate>
body{
-webkit-animation:none;
-moz-animation:none;
-ms-animation:none;
animation:none}
</style>
</noscript>
<script async custom-element = "amp-pinterest"
src = "https://cdn.ampproject.org/v0/amp-pinterest-0.1.js">
</script>
<style amp-custom>
amp-facebook-like {
margin: 1rem
}
</style>
</head>
<body>
<h3>Google AMP - Amp Pinterest Widget</h3>
<amp-pinterest
width = 300
height = 450
data-do = "embedPin"
data-url = "https://in.pinterest.com/pin/856739529089490354/">
</amp-pinterest>
</body>
</html>
输出
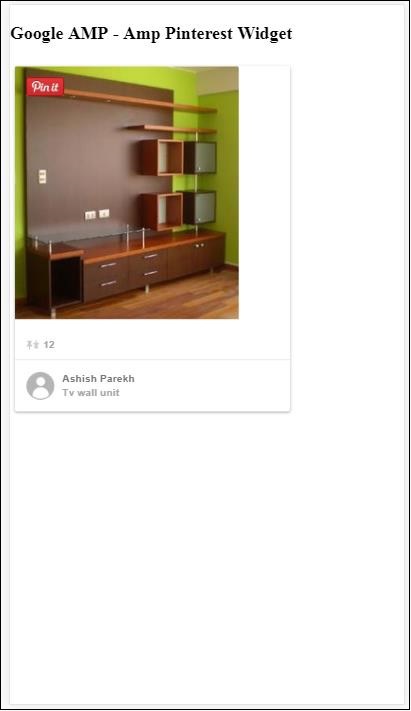
Pinterest 保存按钮
要显示 Pinterest 的保存按钮,我们需要使用属性 data-do="buttonPin"。这里展示了一个 Pinterest 保存按钮的工作示例:
示例
<!doctype html>
<html amp lang = "en">
<head>
<meta charset = "utf-8">
<script async src = "https://cdn.ampproject.org/v0.js">
</script>
<title>Google AMP - Amp Pinterest Widget</title>
<link rel = "canonical" href =
"http://example.ampproject.org/article-metadata.html">
<meta name = "viewport" content = "width = device-width,
minimum-scale = 1,initial-scale = 1">
<style amp-boilerplate>
body{
-webkit-animation:
-amp-start 8s steps(1,end) 0s 1 normal both;-moz-animation:
-amp-start 8s steps(1,end) 0s 1 normal both;-ms-animation:
-amp-start 8s steps(1,end) 0s 1 normal both;animation:
-amp-start 8s steps(1,end) 0s 1 normal both
}
@-webkit-keyframes
-amp-start{from{visibility:hidden}to{visibility:visible}}@-moz-keyframes
-amp-start{from{visibility:hidden}to{visibility:visible}}@-ms-keyframes
-amp-start{from{visibility:hidden}to{visibility:visible}}@-o-keyframes
-amp-start{from{visibility:hidden}to{visibility:visible}}@keyframes
-amp-start{from{visibility:hidden}to{visibility:visible}}
</style>
<noscript>
<style amp-boilerplate>
body{
-webkit-animation:none;
-moz-animation:none;
-ms-animation:none;
animation:none}
</style>
</noscript>
<script async custom-element = "amp-pinterest"
src = "https://cdn.ampproject.org/v0/amp-pinterest-0.1.js">
</script>
<style amp-custom>
amp-facebook-like {
margin: 1rem
}
</style>
</head>
<body>
<h3>Google AMP - Amp Pinterest Save Button</h3>
<h3>TutorialsPoint - ReactJS</h3>
<amp-img
src = "images/reactjs.png"
width = "100"
height = "100"
alt = "blockchain image">
</amp-img>
<amp-pinterest
height = "18"
width = "56"
data-do = "buttonPin"
data-url = "https://tutorialspoint.com/"
data-media = "https://tutorialspoint.com/images/tp-logo-diamond.png"
data-description = "amp-pinterest in action">
</amp-pinterest>
</body>
</html>
输出
Pinterest 关注按钮
要显示 Pinterest 的关注按钮,我们需要使用属性 data-do="buttonFollow"。这里展示了一个 Pinterest 关注按钮的工作示例:
示例
<!doctype html>
<html amp lang = "en">
<head>
<meta charset = "utf-8">
<script async src = "https://cdn.ampproject.org/v0.js">
</script>
<title>Google AMP - Amp Pinterest Widget</title>
<link rel = "canonical" href =
"http://example.ampproject.org/article-metadata.html">
<meta name = "viewport" content = "width = device-width,
minimum-scale = 1,initial-scale = 1">
<style amp-boilerplate>
body{
-webkit-animation:
-amp-start 8s steps(1,end) 0s 1 normal both;-moz-animation:
-amp-start 8s steps(1,end) 0s 1 normal both;-ms-animation:
-amp-start 8s steps(1,end) 0s 1 normal both;animation:
-amp-start 8s steps(1,end) 0s 1 normal both
}
@-webkit-keyframes
-amp-start{from{visibility:hidden}to{visibility:visible}}@-moz-keyframes
-amp-start{from{visibility:hidden}to{visibility:visible}}@-ms-keyframes
-amp-start{from{visibility:hidden}to{visibility:visible}}@-o-keyframes
-amp-start{from{visibility:hidden}to{visibility:visible}}@keyframes
-amp-start{from{visibility:hidden}to{visibility:visible}}
</style>
<noscript>
<style amp-boilerplate>
body{
-webkit-animation:none;
-moz-animation:none;
-ms-animation:none;
animation:none}
</style>
</noscript>
<script async custom-element = "amp-pinterest"
src = "https://cdn.ampproject.org/v0/amp-pinterest-0.1.js">
</script>
<style amp-custom>
amp-facebook-like {
margin: 1rem
}
</style>
</head>
<body>
<h3>Google AMP - Amp Pinterest Follow Button</h3>
<amp-pinterest
height = 50
width = 130
data-do = "buttonFollow"
data-href = "https://in.pinterest.com/wedgehairstyles/"
data-label = "wedgehairstyles">
</amp-pinterest>
</body>
</html>
输出
Google AMP - Twitter
AMP 提供了一个使用 amp-twitter 显示 Twitter 信息流的组件。
要使用 amp-twitter,我们需要添加以下脚本:
<script async custom-element = "amp-twitter" src = "https://cdn.ampproject.org/v0/amp-twitter-0.1.js"> </script>
Amp-twitter 标签
<amp-twitter width = "375" height = "472" layout = "responsive" data-tweetid = "885634330868850689"> </amp-twitter>
这里展示了一个显示推文的工作示例。
示例
<!doctype html>
<html amp lang = "en">
<head>
<meta charset = "utf-8">
<script async src = "https://cdn.ampproject.org/v0.js">
</script>
<title>Google AMP - Amp Twitter</title>
<link rel = "canonical" href =
"http://example.ampproject.org/article-metadata.html">
<meta name = "viewport" content = "width = device-width,
minimum-scale = 1,initial-scale = 1">
<style amp-boilerplate>
body{
-webkit-animation:
-amp-start 8s steps(1,end) 0s 1 normal both;-moz-animation:
-amp-start 8s steps(1,end) 0s 1 normal both;-ms-animation:
-amp-start 8s steps(1,end) 0s 1 normal both;animation:
-amp-start 8s steps(1,end) 0s 1 normal both
}
@-webkit-keyframes
-amp-start{from{visibility:hidden}to{visibility:visible}}@-moz-keyframes
-amp-start{from{visibility:hidden}to{visibility:visible}}@-ms-keyframes
-amp-start{from{visibility:hidden}to{visibility:visible}}@-o-keyframes
-amp-start{from{visibility:hidden}to{visibility:visible}}@keyframes
-amp-start{from{visibility:hidden}to{visibility:visible}}
</style>
<noscript>
<style amp-boilerplate>
body{
-webkit-animation:none;
-moz-animation:none;
-ms-animation:none;
animation:none}
</style>
</noscript>
<script async custom-element = "amp-twitter" src =
"https://cdn.ampproject.org/v0/amp-twitter-0.1.js">
</script>
<style amp-custom>
amp-facebook-like {
margin: 1rem
}
</style>
</head>
<body>
<h3>Google AMP - Amp Twitter</h3>
<amp-twitter
width = "375"
height = "472"
layout = "responsive"
data-tweetid = "885634330868850689">
</amp-twitter>
</body>
</html>
输出
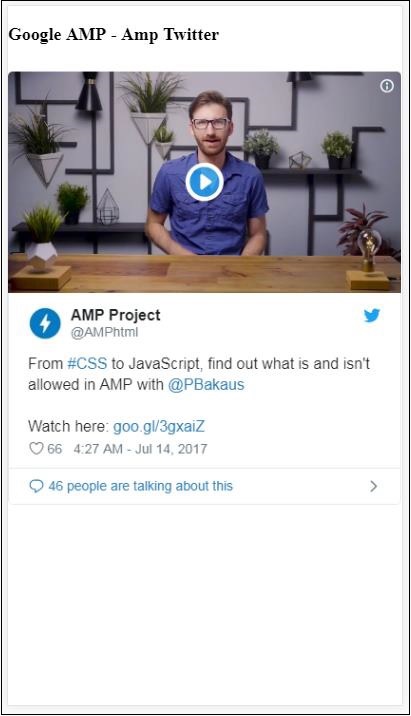
Google AMP - 媒体
在本节中,我们将讨论如何显示来自第三方合作伙伴(如 JW Player 和 YouTube)的视频和音频。让我们详细了解以下内容:
Google AMP - JW Player
Google AMP - YouTube
Google AMP - 音频
Google AMP - JW Player
如果您想使用 JW Player 在页面上显示视频,AMP 提供了 amp-jwplayer 来实现。
要使用 amp-jwplayer,请在您的页面中包含以下脚本:
<script async custom-element = "amp-jwplayer" src = " https://cdn.ampproject.org/v0/amp-jwplayer-0.1.js"> </script>
Amp-jwplayer 标签
<amp-jwplayer data-playlist-id = "482jsTAr" data-player-id = "uoIbMPm3" layout = "responsive" width = "16" height = "9"> </amp-jwplayer>
下面显示了在 AMP 页面中使用 JW Player 的工作示例:
示例
<!doctype html>
<html amp lang = "en">
<head>
<meta charset = "utf-8">
<script async src = "https://cdn.ampproject.org/v0.js">
</script>
<title>Google AMP - Amp Jwplayer</title>
<link rel = "canonical" href =
"http://example.ampproject.org/article-metadata.html">
<meta name = "viewport" content = "width = device-width,
minimum-scale = 1,initial-scale = 1">
<style amp-boilerplate>
body{
-webkit-animation:
-amp-start 8s steps(1,end) 0s 1 normal both;-moz-animation:
-amp-start 8s steps(1,end) 0s 1 normal both;-ms-animation:
-amp-start 8s steps(1,end) 0s 1 normal both;animation:
-amp-start 8s steps(1,end) 0s 1 normal both
}
@-webkit-keyframes
-amp-start{from{visibility:hidden}to{visibility:visible}}@-moz-keyframes
-amp-start{from{visibility:hidden}to{visibility:visible}}@-ms-keyframes
-amp-start{from{visibility:hidden}to{visibility:visible}}@-o-keyframes
-amp-start{from{visibility:hidden}to{visibility:visible}}@keyframes
-amp-start{from{visibility:hidden}to{visibility:visible}}
</style>
<noscript>
<style amp-boilerplate>
body{
-webkit-animation:none;
-moz-animation:none;
-ms-animation:none;
animation:none}
</style>
</noscript>
<script async custom-element = "amp-jwplayer" src =
"https://cdn.ampproject.org/v0/amp-jwplayer-0.1.js">
</script>
</head>
<body>
<h3>Google AMP - Amp Jwplayer</h3>
<amp-jwplayer
data-playlist-id = "482jsTAr"
data-player-id = "uoIbMPm3"
layout = "responsive"
width = "16"
height = "9">
</amp-jwplayer>
</body>
</html>
输出

对于 amp-jwplayer,有三个重要的属性
data-player-id
data-media-id
data-playlist-id
要获取播放器、媒体和播放列表的 ID,您需要在 JW Player 中登录,可以通过以下链接进行操作:https://dashboard.jwplayer.com/#/players
播放器 ID 将在 JW Player 播放器部分提供。媒体 ID 将在JW Player 内容部分提供,播放列表 ID 将在JW Player 播放列表部分.
JW Player 提供一个 8 位字母数字 ID,需要在 amp-jwplayer 中用于相应的属性。
Google AMP - YouTube
如果您想在您的 AMP 页面上显示 YouTube 视频,AMP 提供了 amp-youtube 来在页面上嵌入 YouTube 视频。
要使用 amp-youtube,您需要将以下脚本添加到您的页面中:
<script async custom-element = "amp-youtube" src = " https://cdn.ampproject.org/v0/amp-youtube-0.1.js"> </script>
Amp-youtube 标签
<amp-youtube width = "480" height = "270" layout = "responsive" autoplay = "true" data-videoid = "fWZ6-p7mGK0"> </amp-youtube>
现在让我们来看一个展示 amp-youtube 在页面上工作原理的示例。
示例
<!doctype html>
<html amp lang = "en">
<head>
<meta charset = "utf-8">
<script async src = "https://cdn.ampproject.org/v0.js">
</script>
<title>Google AMP - Youtube</title>
<link rel = "canonical" href =
"http://example.ampproject.org/article-metadata.html">
<meta name = "viewport" content = "width = device-width,
minimum-scale = 1,initial-scale = 1">
<style amp-boilerplate>
body{
-webkit-animation:
-amp-start 8s steps(1,end) 0s 1 normal both;-moz-animation:
-amp-start 8s steps(1,end) 0s 1 normal both;-ms-animation:
-amp-start 8s steps(1,end) 0s 1 normal both;animation:
-amp-start 8s steps(1,end) 0s 1 normal both
}
@-webkit-keyframes
-amp-start{from{visibility:hidden}to{visibility:visible}}@-moz-keyframes
-amp-start{from{visibility:hidden}to{visibility:visible}}@-ms-keyframes
-amp-start{from{visibility:hidden}to{visibility:visible}}@-o-keyframes
-amp-start{from{visibility:hidden}to{visibility:visible}}@keyframes
-amp-start{from{visibility:hidden}to{visibility:visible}}
</style>
<noscript>
<style amp-boilerplate>
body{
-webkit-animation:none;
-moz-animation:none;
-ms-animation:none;
animation:none}
</style>
</noscript>
<script async custom-element = "amp-youtube" src =
"https://cdn.ampproject.org/v0/amp-youtube-0.1.js">
</script>
</head>
<body>
<h3>Google AMP - Youtube</h3>
<h3>Youtube Videos from Tutorialspoint</h3>
<amp-youtube
width = "480"
height = "270"
layout = "responsive"
autoplay = "true"
data-videoid = "fWZ6-p7mGK0">
</amp-youtube>
</body>
</html>
输出
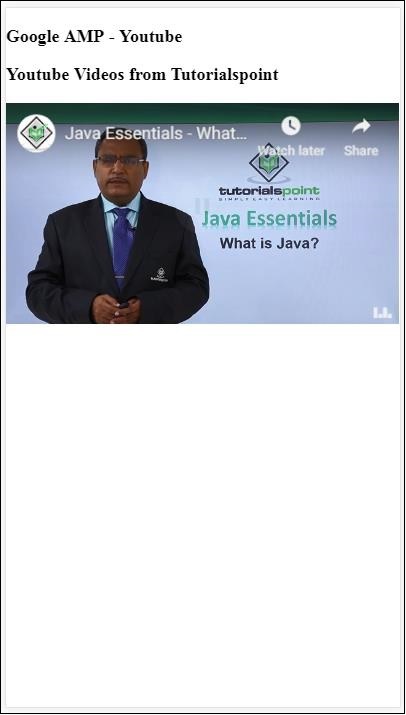
要显示 YouTube 视频,您需要像下面这样将 videoid 提供给 amp-youtube:
<amp-youtube width = "480" height = "270" layout = "responsive" autoplay = "true" data-videoid = "fWZ6-p7mGK0"> </amp-youtube>
如何获取 data-videoid?
以任何 YouTube URL 为例,例如:https://www.youtube.com/watch?v=fWZ6-p7mGK0。高亮显示的部分是需要在您的 amp-youtube 中使用的 ID。
我们使用了 autoplay 属性并将其设置为 true。视频将在浏览器支持的情况下自动播放,并且视频将以静音模式播放。您需要点击视频才能取消静音。当视频超出视野时,它将暂停,并在回到视野时从暂停状态恢复播放。如果用户暂停视频并进出视野,视频将保持暂停状态。静音/取消静音也是如此。
Google AMP - 音频
AMP 提供了一个用于播放音频的标签,它是 HTML5 音频标签的替代品。要在 AMP 页面中播放音频,我们可以使用 amp-audio。
要使用 amp-audio,我们需要添加以下脚本:
<script async custom-element = "amp-audio" src = " https://cdn.ampproject.org/v0/amp-audio-0.1.js"> </script>
Amp-audio 标签
<amp-audio
width = "auto"
height = "50"
src = "audio/test.mp3">
<div fallback>
<p>HTML5 audio is not supported on your browser!</p>
</div>
</amp-audio>
因此,amp-audio 将使用 src 属性,该属性是一个指向音频文件的 HTTP 请求。我们使用 amp-audio 而不是标准的 HTML5 音频的原因是,AMP 为需要 HTTP 请求的元素引入了延迟加载的概念。
它将根据优先级开始加载请求。它将在即将到达视口之前或到达视口时加载。
这里展示了在您的页面中使用 amp-audio 的工作示例:
示例
<!doctype html>
<html amp lang = "en">
<head>
<meta charset = "utf-8">
<script async src = "https://cdn.ampproject.org/v0.js">
</script>
<title>Google AMP - Audio</title>
<link rel = "canonical" href =
"http://example.ampproject.org/article-metadata.html">
<meta name = "viewport" content = "width = device-width,
minimum-scale = 1,initial-scale = 1">
<style amp-boilerplate>
body{
-webkit-animation:
-amp-start 8s steps(1,end) 0s 1 normal both;-moz-animation:
-amp-start 8s steps(1,end) 0s 1 normal both;-ms-animation:
-amp-start 8s steps(1,end) 0s 1 normal both;animation:
-amp-start 8s steps(1,end) 0s 1 normal both
}
@-webkit-keyframes
-amp-start{from{visibility:hidden}to{visibility:visible}}@-moz-keyframes
-amp-start{from{visibility:hidden}to{visibility:visible}}@-ms-keyframes
-amp-start{from{visibility:hidden}to{visibility:visible}}@-o-keyframes
-amp-start{from{visibility:hidden}to{visibility:visible}}@keyframes
-amp-start{from{visibility:hidden}to{visibility:visible}}
</style>
<noscript>
<style amp-boilerplate>
body{
-webkit-animation:none;
-moz-animation:none;
-ms-animation:none;
animation:none}
</style>
</noscript>
<script async custom-element = "amp-audio"
src = "https://cdn.ampproject.org/v0/amp-audio-0.1.js">
</script>
</head>
<body>
<h3>Google AMP - Audio</h3>
<amp-audio
width = "auto"
height = "50"
src="audio/test.mp3">
<div fallback>
<p>HTML5 audio is not supported on your browser!</p>
</div>
</amp-audio>
</body>
</html>
输出
这里显示了 amp-audio 的标签,其中指定了 width、height、src 等属性。我们还添加了一个带有 fallback 属性的 div,如果浏览器不支持 amp-audio,它将作为后备。
<amp-audio
width = "auto"
height = "50"
src = "audio/test.mp3">
<div fallback>
<p>HTML5 audio is not supported on your browser!</p>
</div>
</amp-audio>
请注意,默认情况下会向音频标签添加控件,可用于播放/暂停以及静音/取消静音音频。您还可以获取音频标签的下载选项,如下所示:

点击下载,您可以下载使用的媒体文件。要禁用下载,可以使用属性 controlsList="nodownload",如下面的示例所示:
示例
<!doctype html>
<html amp lang = "en">
<head>
<meta charset = "utf-8">
<script async src = "https://cdn.ampproject.org/v0.js">
</script>
<title>Google AMP - Audio</title>
<link rel = "canonical" href =
"http://example.ampproject.org/article-metadata.html">
<meta name = "viewport" content = "width = device-width,
minimum-scale = 1,initial-scale = 1">
<style amp-boilerplate>
body{
-webkit-animation:
-amp-start 8s steps(1,end) 0s 1 normal both;-moz-animation:
-amp-start 8s steps(1,end) 0s 1 normal both;-ms-animation:
-amp-start 8s steps(1,end) 0s 1 normal both;animation:
-amp-start 8s steps(1,end) 0s 1 normal both
}
@-webkit-keyframes
-amp-start{from{visibility:hidden}to{visibility:visible}}@-moz-keyframes
-amp-start{from{visibility:hidden}to{visibility:visible}}@-ms-keyframes
-amp-start{from{visibility:hidden}to{visibility:visible}}@-o-keyframes
-amp-start{from{visibility:hidden}to{visibility:visible}}@keyframes
-amp-start{from{visibility:hidden}to{visibility:visible}}
</style>
<noscript>
<style amp-boilerplate>
body{
-webkit-animation:none;
-moz-animation:none;
-ms-animation:none;
animation:none}
</style>
</noscript>
<script async custom-element = "amp-audio"
src = "https://cdn.ampproject.org/v0/amp-audio-0.1.js">
</script>
</head>
<body>
<h3>Google AMP - Audio</h3>
<amp-audio
width = "auto"
height = "50"
src = "audio/test.mp3"
controlsList = "nodownload">
<div fallback>
<p>HTML5 audio is not supported on your browser!</p>
</div>
</amp-audio>
</body>
</html>
输出

使用 controlsList="nodownload",右侧的三个垂直点将消失。
还有一些属性,如 preload 和 autoplay,如果将它们添加到音频标签中,则音频文件将在页面加载时加载,并在浏览器支持的情况下自动播放。以下示例显示了音频自动播放。
示例
<!doctype html>
<html amp lang = "en">
<head>
<meta charset="utf-8">
<script async src = "https://cdn.ampproject.org/v0.js">
</script>
<title>Google AMP - Audio</title>
<link rel = "canonical" href =
"http://example.ampproject.org/article-metadata.html">
<meta name = "viewport" content = "width = device-width,
minimum-scale = 1,initial-scale = 1">
<style amp-boilerplate>
body{
-webkit-animation:
-amp-start 8s steps(1,end) 0s 1 normal both;-moz-animation:
-amp-start 8s steps(1,end) 0s 1 normal both;-ms-animation:
-amp-start 8s steps(1,end) 0s 1 normal both;animation:
-amp-start 8s steps(1,end) 0s 1 normal both
}
@-webkit-keyframes
-amp-start{from{visibility:hidden}to{visibility:visible}}@-moz-keyframes
-amp-start{from{visibility:hidden}to{visibility:visible}}@-ms-keyframes
-amp-start{from{visibility:hidden}to{visibility:visible}}@-o-keyframes
-amp-start{from{visibility:hidden}to{visibility:visible}}@keyframes
-amp-start{from{visibility:hidden}to{visibility:visible}}
</style>
<noscript>
<style amp-boilerplate>
body{
-webkit-animation:none;
-moz-animation:none;
-ms-animation:none;
animation:none}
</style>
</noscript>
<script async custom-element = "amp-audio"
src = "https://cdn.ampproject.org/v0/amp-audio-0.1.js">
</script>
</head>
<body>
<h3>Google AMP - Audio</h3>
<amp-audio
width = "auto"
height = "50"
src = "audio/test.mp3" preload autoplay>
<div fallback>
<p>HTML5 audio is not supported on your browser!</p>
</div>
</amp-audio>
</body>
</html>
输出

如果存在属性 loop,则音频播放完成后将再次播放。
示例
<amp-audio
width = "auto"
height = "50"
src = "audio/test.mp3" loop>
<div fallback>
<p>HTML5 audio is not supported on your browser!</p>
</div>
</amp-audio>
Google AMP - HTML 页面转换为 AMP 页面
在本节中,我们将了解如何将普通的 HTML 页面转换为 AMP 页面。我们还将验证 AMP 页面,并在最后检查输出。
首先,让我们使用以下所示的普通 HTML 页面:
test.html
<!DOCTYPE html>
<html>
<head>
<meta charset = "utf-8">
<title>Tutorials</title>
<link href = "style.css" rel = "stylesheet" />
<meta name = "viewport" content = "width = device-width, initial-scale = 1.0">
<script src = "js/jquery.js"></script>
</head>
<body>
<header role = "banner">
<h2>Tutorials</h2>
</header>
<h2>Some Important Tutorials List</h2>
<article>
<section>
<img src = "images/tut1.png" width="90%" height = "90%"/>
</section>
<section>
<img src = "images/tut2.png" width="90%" height = "90%"/>
</section>
<section>
<img src = "images/tut3.png" width="90%" height = "90%"/>
</section>
<section>
<img src = "images/tut4.png" width="90%" height = "90%"/>
</section>
</article>
<footer>
<p>For More tutorials Visit <a href =
"https://tutorialspoint.com/">Tutorials Point</a></p>
</footer>
</body>
</html>
请注意,我们正在其中使用 style.css,CSS 文件的详细信息如下所示:
h1 {color: blue;text-align: center;}
h2 {text-align: center;}
img {
border: 1px solid #ddd;
border-radius: 4px;
padding: 5px;
}
article {
text-align: center;
}
header{
width: 100%;
height: 50px;
margin: 5px auto;
border: 1px solid #000000;
text-align: center;
background-color: #ccc;
}
footer {
width: 100%;
height: 35px;
margin: 5px auto;
border: 1px solid #000000;
text-align: center;
background-color: yellow;
}
请注意,我们还在上面列出的 .html 中使用了 jquery.js 文件。
现在,在本地主机 test.html 并查看以下链接中显示的输出:
https://:8080/googleamp/test.html
现在,让我们逐步将上述 test.html 文件更改为 test_amp.html 文件。
首先,我们必须将 test.html 保存为 test_amp.html 并按照以下步骤操作。
步骤 1 - 在 head 部分添加 AMP 库,如下所示:
<script async src = "https://cdn.ampproject.org/v0.js"> </script>
例如,添加到 test_amp.html 后,它将如下所示:
<head>
<meta charset = "utf-8">
<title>Tutorials</title>
<script async src = "https://cdn.ampproject.org/v0.js">
</script>
<link href = "style.css" rel = "stylesheet" />
<meta name = "viewport" content = "width = device-width, initial-scale = 1.0">
<script src = "js/jquery.js"></script>
</head>
现在在浏览器中运行 test_amp.html 页面并打开浏览器控制台。它将显示如下所示的控制台消息:
要了解您的 HTML 文件是否为有效的 AMP,请在 HTML 页面 URL 末尾添加 #development=1,如下所示:
https://:8080/googleamp/test_amp.html#development=1
在浏览器中访问上述 URL,并在 Google Chrome 控制台中查看。它将列出 AMP 认为从 AMP 规范角度来看无效的错误。
我们为 test_amp.html 获取的错误如下所示:
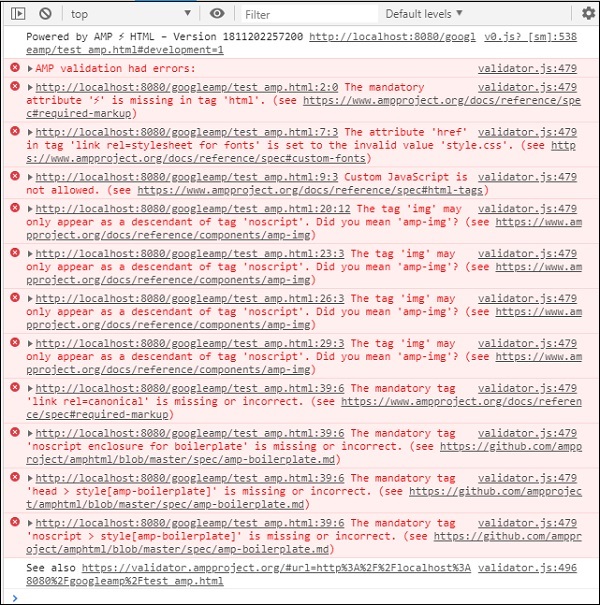
现在让我们一个一个地修复它们,直到我们获得 AMP 成功消息。
步骤 2 - 我们可以在控制台中看到以下错误:

我们可以通过为 HTML 标签添加 ⚡ 或 amp 来修复它。我们将向 HTML 标签添加 amp,如下所示:
<html amp>
步骤 3 - 请确保在 head 标签中具有包含字符集和 name="viewport" 的元标签,如下所示:
<head> <meta charset = "utf-8"> <meta name = "viewport" content = "width = device-width, initial-scale = 1.0"> </head>
步骤 4 - 我们遇到的下一个错误如下所示:

它表示 link rel=stylesheet 中的 href,即以下链接引发了错误。这是因为 AMP 不允许在页面内部使用带有 href 的 link 来引用外部样式表。
<link href = "style.css" rel = "stylesheet" />
We can add the all the css in style.css as follows −
<style amp-custom> /*All styles from style.css please add here */ </style>
因此,style.css 中存在的 CSS 数据必须添加到带有 amp-custom 属性的 style 中。
<style amp-custom>
h1 {color: blue;text-align: center;}
h2 {text-align: center;}
img {
border: 1px solid #ddd;
border-radius: 4px;
padding: 5px;
}
article {
text-align: center;
}
header{
width: 100%;
height: 50px;
margin: 5px auto;
border: 1px solid #000000;
text-align: center;
background-color: #ccc;
}
footer {
width: 100%;
height: 35px;
margin: 5px auto;
border: 1px solid #000000;
text-align: center;
background-color: yellow;
}
</style>
将 style 标签添加到您的 AMP 页面中。现在让我们在浏览器中使用上述 style 标签测试它。到目前为止,我们对 test_amp.html 所做的更改如下所示:
<!DOCTYPE html>
<html amp>
<head>
<meta charset = "utf-8">
<title>Tutorials</title>
<script async src = "https://cdn.ampproject.org/v0.js">
</script>
<meta name = "viewport" content = "width = device-width, initial-scale = 1.0">
<script src = "js/jquery.js"></script>
<style amp-custom>
h1 {color: blue;text-align: center;}
h2 {text-align: center;}
img {
border: 1px solid #ddd;
border-radius: 4px;
padding: 5px;
}
article {
text-align: center;
}
header{
width: 100%;
height: 50px;
margin: 5px auto;
border: 1px solid #000000;
text-align: center;
background-color: #ccc;
}
footer {
width: 100%;
height: 35px;
margin: 5px auto;
border: 1px solid #000000;
text-align: center;
background-color: yellow;
}
</style>
</head>
<body>
<header role = "banner">
<h2>Tutorials</h2>
</header>
<h2>Some Important Tutorials List</h2>
<article>
<section>
<img src = "images/tut1.png" width = "90%" height = "90%"/>
</section>
<section>
<img src = "images/tut2.png" width = "90%" height = "90%"/>
</section>
<section>
<img src = "images/tut3.png" width = "90%" height = "90%"/>
</section>
<section>
<img src = "images/tut4.png" width="90%" height = "90%"/>
</section>
</article>
<footer>
<p>For More tutorials Visit <a href =
"https://tutorialspoint.com/">Tutorials Point</a></p>
</footer>
</body>
</html>
让我们查看上述页面在控制台中的输出和错误。请查看以下屏幕截图:
控制台中显示的错误如下:
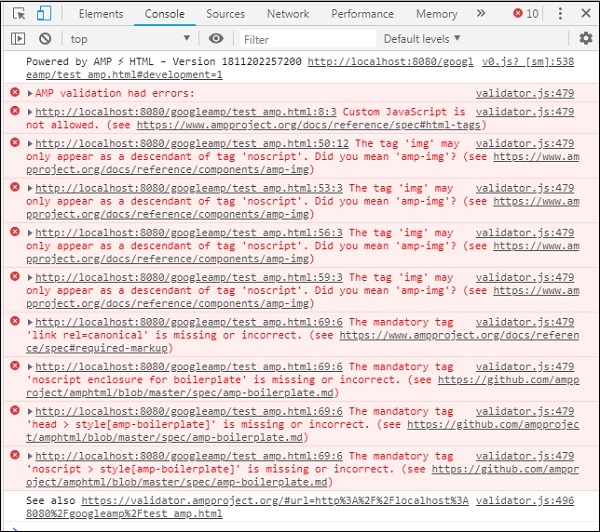
现在,您可以看到对于某些 AMP 错误,样式已被移除。现在让我们修复其余的错误。
步骤 5 - 我们在列表中看到的下一个错误如下:

我们添加了调用 jquery 文件的 script 标签。请注意,AMP 页面不允许在页面中使用任何自定义 JavaScript。我们将不得不将其删除,并确保使用可用的 AMP 组件。
例如,如果需要任何动画,我们有 amp-animation;如果想要将 Google Analytics 代码添加到页面中,我们有 amp-analytics。同样,我们有 amp-ad 组件来显示要显示在页面上的广告。还有一个 amp-iframe 组件,我们可以将 src 指向同一来源并在 amp-iframe 中调用任何所需的自定义 JavaScript。
现在,让我们从页面中删除 script 标签。
步骤 6 - 显示的下一个错误如下:
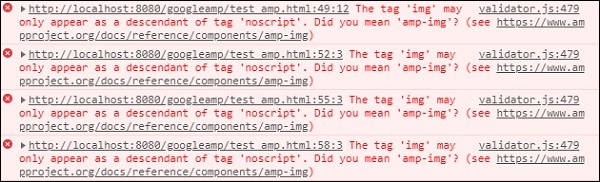
上述错误指向我们在页面上使用的 image 标签。AMP 不允许在页面内部使用 <img src="" /> 标签。请注意,我们需要改用 amp-img 标签。
让我们将 <img> 标签替换为 <amp-img>,如下所示:
<section>
<amp-img alt = "Beautiful Flower"
src = "images/tut1.png"
width = "500"
height = "160"
layout = "responsive">
</amp-img>
</section>
<section>
<amp-img alt = "Beautiful Flower"
src = "images/tut2.png"
width = "500"
height = "160"
layout = "responsive">
</amp-img>
</section>
<section>
<amp-img alt = "Beautiful Flower"
src = "images/tut3.png"
width = "500"
height = "160"
layout = "responsive">
</amp-img>
</section>
<section>
<amp-img alt = "Beautiful Flower"
src = "images/tut4.png"
width = "500"
height = "160"
layout = "responsive">
</amp-img>
</section>
我们已将所有 <img> 标签替换为 <amp-img>,如上所示。现在,让我们在浏览器中运行该页面以查看输出和错误:
错误
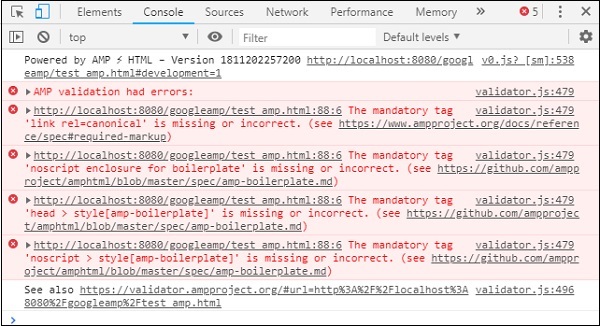
观察到错误现在越来越少了。
步骤 7 - 控制台中显示的下一个错误如下:

我们需要在头部区域添加 link rel=canonical 标签。请注意,这是一个必填标签,应始终按以下方式添加到头部中:
<link rel = "canonical" href = "http://example.ampproject.org/article-metadata.html">
步骤 8 - 控制台显示的下一个错误是缺少noscript 标签,如下所示:

我们需要在头部区域添加<noscript>标签,并将其包含在 amp-boilerplate 中,如下所示:
<noscript>
<style amp-boilerplate>
body{
-webkit-animation:none;
-moz-animation:none;
-ms-animation:none;
animation:none}
</style>
</noscript>
步骤 9 - 下一个显示的错误如下所示:

另一个必填标签是带有 amp-boilerplate 的 style 标签,并且必须放在 noscript 标签之前。带有 amp-boilerplate 的 style 标签如下所示:
<style amp-boilerplate>
body{
-webkit-animation:
-amp-start 8s steps(1,end) 0s 1 normal both;-moz-animation:
-amp-start 8s steps(1,end) 0s 1 normal both;-ms-animation:
-amp-start 8s steps(1,end) 0s 1 normal both;animation:
-amp-start 8s steps(1,end) 0s 1 normal both
}
@-webkit-keyframes
-amp-start{from{visibility:hidden}to{visibility:visible}}@-moz-keyframes
-amp-start{from{visibility:hidden}to{visibility:visible}}@-ms-keyframes
-amp-start{from{visibility:hidden}to{visibility:visible}}@-o-keyframes
-amp-start{from{visibility:hidden}to{visibility:visible}}@keyframes
-amp-start{from{visibility:hidden}to{visibility:visible}}
</style>
将上述 style 标签添加到 test_amp.html 页面中。
完成后,在浏览器中测试页面以查看输出和控制台:
控制台详细信息如下所示:

因此,我们最终解决了所有错误,现在页面 test_amp.html 是一个有效的 amp 页面。
需要添加一些样式,因为页眉和页脚被截断了,我们可以在我们添加的自定义样式中更新它。因此,我们从页眉和页脚中删除了 width:100%。
这是最终输出:
最终的 test_amp.html 文件
<!DOCTYPE html>
<html amp>
<head>
<meta charset = "utf-8">
<title>Tutorials</title>
<link rel = "canonical" href=
"http://example.ampproject.org/article-metadata.html">
<script async src = "https://cdn.ampproject.org/v0.js">
</script>
<meta name = "viewport" content = "width = device-width,
initial-scale = 1.0">
<style amp-boilerplate>
body{
-webkit-animation:
-amp-start 8s steps(1,end) 0s 1 normal both;-moz-animation:
-amp-start 8s steps(1,end) 0s 1 normal both;-ms-animation:
-amp-start 8s steps(1,end) 0s 1 normal both;animation:
-amp-start 8s steps(1,end) 0s 1 normal both
}
@-webkit-keyframes
-amp-start{from{visibility:hidden}to{visibility:visible}}@-moz-keyframes
-amp-start{from{visibility:hidden}to{visibility:visible}}@-ms-keyframes
-amp-start{from{visibility:hidden}to{visibility:visible}}@-o-keyframes
-amp-start{from{visibility:hidden}to{visibility:visible}}@keyframes
-amp-start{from{visibility:hidden}to{visibility:visible}}
</style>
<noscript>
<style amp-boilerplate>
body{
-webkit-animation:none;
-moz-animation:none;
-ms-animation:none;
animation:none}
</style>
</noscript>
<style amp-custom>
h1 {color: blue;text-align: center;}
h2 {text-align: center;}
amp-img {
border: 1px solid #ddd;
border-radius: 4px;
padding: 5px;
}
article {
text-align: center;
}
header{
height: 50px;
margin: 5px auto;
border: 1px solid #000000;
text-align: center;
background-color: #ccc;
}
footer {
height: 35px;
margin: 5px auto;
border: 1px solid #000000;
text-align: center;
background-color: yellow;
}
</style>
</head>
<body>
<header role = "banner">
<h2>Tutorials</h2>
</header>
<h2>Some Important Tutorials List</h2>
<article>
<section>
<amp-img
alt = "Beautiful Flower"
src = "images/tut1.png"
width = "500"
height = "160"
layout = "responsive">
</amp-img>
</section>
<section>
<amp-img
alt = "Beautiful Flower"
src = "images/tut2.png"
width = "500"
height = "160"
layout = "responsive">
</amp-img>
</section>
<section>
<amp-img
alt = "Beautiful Flower"
src = "images/tut3.png"
width = "500"
height = "160"
layout = "responsive">
</amp-img>
</section>
<section>
<amp-img
alt = "Beautiful Flower"
src = "images/tut4.png"
width = "500"
height = "160"
layout = "responsive">
</amp-img>
</section>
</article>
<footer>
<p>For More tutorials Visit <a href =
"https://tutorialspoint.com/">
Tutorials Point</a>
</p>
</footer>
</body>
</html>
因此,我们终于完成了将普通 html 文件转换为 amp 的过程。
Google AMP - 基本语法
在本章中,我们将讨论开始使用 Google AMP 页面的一些基本要求。
AMP 页面示例
amp 页面的基本示例如下所示:
<!doctype html>
<html amp>
<head>
<meta charset = "utf-8">
<title>Amp Sample Page</title>
<link rel = "canonical" href = "./regular-html-version.html">
<meta name = "viewport" content = "width = device-width,
minimum-scale = 1,initial-scale = 1">
<style amp-custom>
h1 {color: red}
</style>
<style amp-boilerplate>
body{
-webkit-animation:
-amp-start 8s steps(1,end) 0s 1 normal both;-moz-animation:
-amp-start 8s steps(1,end) 0s 1 normal both;-ms-animation:
-amp-start 8s steps(1,end) 0s 1 normal both;animation:
-amp-start 8s steps(1,end) 0s 1 normal both
}
@-webkit-keyframes
-amp-start{from{visibility:hidden}to{visibility:visible}}@-moz-keyframes
-amp-start{from{visibility:hidden}to{visibility:visible}}@-ms-keyframes
-amp-start{from{visibility:hidden}to{visibility:visible}}@-o-keyframes
-amp-start{from{visibility:hidden}to{visibility:visible}}@keyframes
-amp-start{from{visibility:hidden}to{visibility:visible}}
</style>
<noscript>
<style amp-boilerplate>
body{
-webkit-animation:none;
-moz-animation:none;
-ms-animation:none;
animation:none}
</style>
</noscript>
<script async src = "https://cdn.ampproject.org/v0.js">
</script>
</head>
<body>
<h1>Amp Sample Page</h1>
<p>
<amp-img
src = "images/christmas1.jpg"
width = "300"
height = "300"
layout = "responsive">
</amp-img>
</p>
</body>
</html>
必填标签
amp 页面中需要包含一些必填标签。本节将详细讨论它们:
我们必须确保在 html 标签中添加amp 或⚡,如下所示
<html amp> OR <html ⚡>
我们应该将<head>和<body>标签添加到 html 页面中。
如果缺少任何必填元标签,则 amp 验证可能会失败。一些需要添加到页面头部区域的必填元标签如下所示:
<meta charset="utf-8">
<meta name = "viewport"
content = "width = device-width,
minimum-scale = 1,
initial-scale = 1">
rel="canonical" 的链接需要添加到 head 标签内
<link rel = "canonical" href = "./regular-html-version.html">
带有 amp-boilerplate 的 style 标签:
<style amp-boilerplate>
body{
-webkit-animation:
-amp-start 8s steps(1,end) 0s 1 normal both;-moz-animation:
-amp-start 8s steps(1,end) 0s 1 normal both;-ms-animation:
-amp-start 8s steps(1,end) 0s 1 normal both;animation:
-amp-start 8s steps(1,end) 0s 1 normal both
}
@-webkit-keyframes
-amp-start{from{visibility:hidden}to{visibility:visible}}@-moz-keyframes
-amp-start{from{visibility:hidden}to{visibility:visible}}@-ms-keyframes
-amp-start{from{visibility:hidden}to{visibility:visible}}@-o-keyframes
-amp-start{from{visibility:hidden}to{visibility:visible}}@keyframes
-amp-start{from{visibility:hidden}to{visibility:visible}}
</style>
带有 amp-boilerplate 的 noscript 标签:
<noscript>
<style amp-boilerplate>
body{
-webkit-animation:none;
-moz-animation:none;
-ms-animation:none;
animation:none}
</style>
</noscript>
添加了 async 属性的 amp 脚本标签,如下所示。这是所有标签中最重要的一个:
<script async src = "https://cdn.ampproject.org/v0.js"> </script>
如果您想向页面添加自定义 css,则应使用此标签。请在此处注意,我们不能在 amp 页面中调用外部样式表。要添加自定义 css,所有 css 都必须放在这里:
<style amp-custom>
   //all your styles here
</style>
您可以在浏览器中使用页面 url 末尾的 #developement=1 来验证上述页面。
现在,让我们在浏览器中测试它。我已将页面本地托管并将其保存为 amppage.html。
要测试的上述 url 为
https:///googleamp/amppage.html#development=1
示例
<!doctype html>
<html amp>
<head>
<meta charset = "utf-8">
<title>Amp Sample Page</title>
<link rel = "canonical" href = "./regular-html-version.html">
<meta name = "viewport" content = "width=device-width,
minimum-scale = 1,initial-scale = 1">
<style amp-custom>
h1 {color: red}
</style>
<style amp-boilerplate>
body{
-webkit-animation:
-amp-start 8s steps(1,end) 0s 1 normal both;-moz-animation:
-amp-start 8s steps(1,end) 0s 1 normal both;-ms-animation:
-amp-start 8s steps(1,end) 0s 1 normal both;animation:
-amp-start 8s steps(1,end) 0s 1 normal both
}
@-webkit-keyframes
-amp-start{from{visibility:hidden}to{visibility:visible}}@-moz-keyframes
-amp-start{from{visibility:hidden}to{visibility:visible}}@-ms-keyframes
-amp-start{from{visibility:hidden}to{visibility:visible}}@-o-keyframes
-amp-start{from{visibility:hidden}to{visibility:visible}}@keyframes
-amp-start{from{visibility:hidden}to{visibility:visible}}
</style>
<noscript>
<style amp-boilerplate>
body{
-webkit-animation:none;
-moz-animation:none;
-ms-animation:none;
animation:none}
</style>
</noscript>
<script async src = "https://cdn.ampproject.org/v0.js">
</script>
</head>
<body>
<h1>Amp Sample Page</h1>
<p>
<amp-img
src = "images/christmas1.jpg"
width = "300"
height = "250"
layout = "responsive">
</amp-img>
</p>
</body>
</html>
输出

您可以在开发者控制台中看到 amp 验证状态,如下所示:
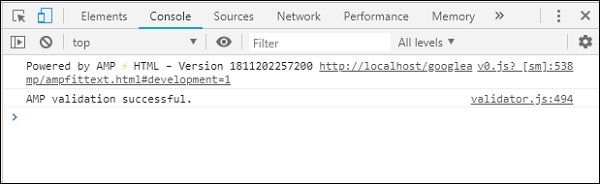
由于我们添加了所有有效的 amp 页面所需的必填标签,因此它显示 AMP 验证成功。
Google AMP - 验证
Google AMP 是一种使网页在设备上加载更快的速度的方法。要使用 amp,我们可以利用 HTML5、CSS 和 amp 组件。
Google Amp 提供了许多验证 amp 页面的方法。我们将在这章中讨论的一些重要方法是:
使用 #development=1
使用 Amp 验证器
使用命令行
让我们详细讨论每一个。
使用 #development =1
一旦您知道您的页面已准备好进行验证,只需将 #development=1 添加到页面 url 的末尾并在 Chrome 开发者工具中进行测试。
您可以在 html 页面 url 的末尾添加#development=1,如下例所示:
https://:8080/googleamp/test_amp.html#development=1
在浏览器和 Google Chrome 控制台中访问上述 url。它将列出 amp 认为从 amp 规范角度来看无效的错误。
以下是我们为 test_amp.html 获取的错误。

您可以修复显示的错误,一旦所有错误都得到修复,它将显示如下:
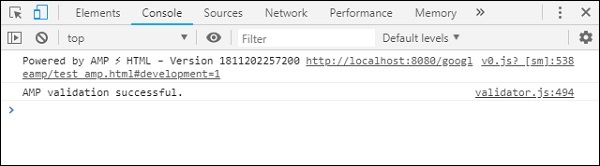
使用 Amp 验证器
Amp 有一个验证器工具,我们可以在其中输入 HTML 内容,它会将状态显示为 PASS 或 ERROR,并在页面上显示错误。链接为:https://validator.ampproject.org/
amp 验证器工具的显示如下所示:
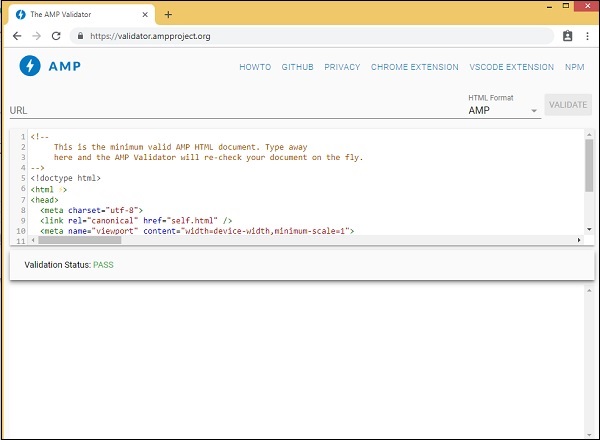
页面内容中错误的示例如下所示:
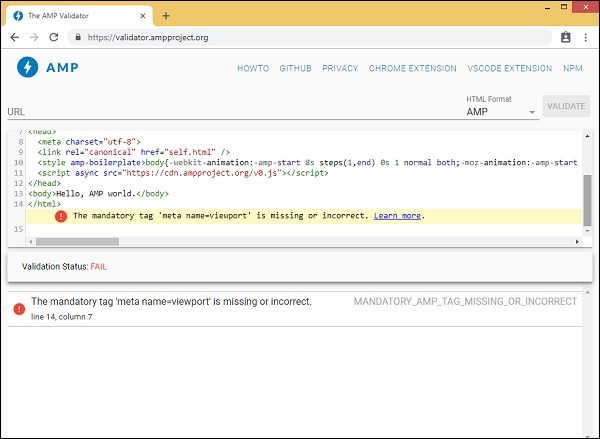
使用命令行
您可以使用以下命令安装 npm 包:
npm install -g amphtml-validator
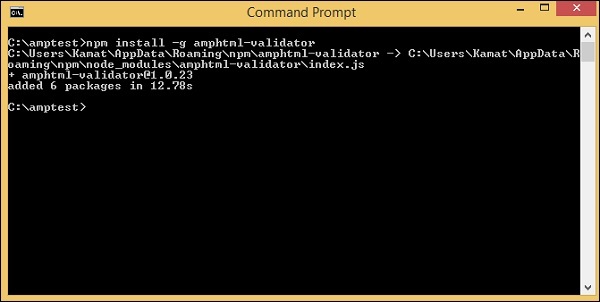
我们创建了一个文件夹 amptest/ 并将 amp_test.html 文件保存在该文件夹中。让我们在命令行中使用以下命令验证 amp_test.html。
amphtml-validator youramppage.html
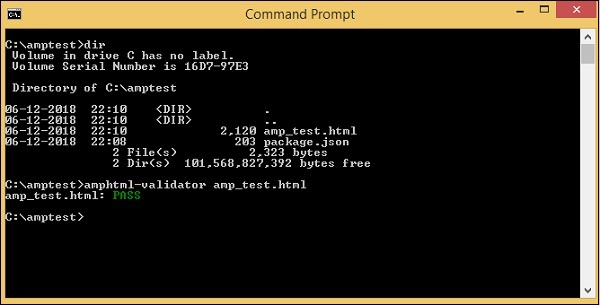
让我们从页面中删除一些标签,看看它是否显示错误。
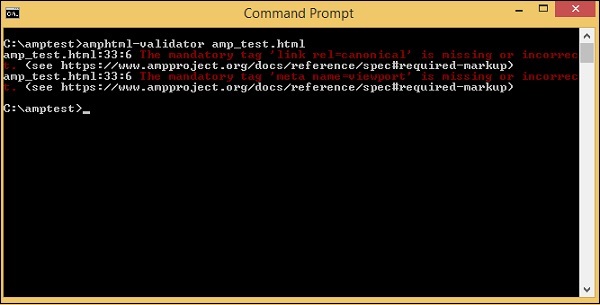
显示的错误可以修复,直到我们获得 PASS 状态。
Google AMP - 缓存
Google amp 提供缓存功能,这是一种基于代理的内容交付网络,用于提供纯 amp 页面。Amp 缓存默认情况下对所有有效的 amp 页面可用。与非 amp 页面相比,它有助于更快地呈现页面。
目前,有 2 个 amp 缓存提供商Google AMP Cache 和Cloudflare AMP Cache。如前所述,amp 缓存对所有有效的 amp 页面都可用。如果用户不想使用 amp 缓存功能,则需要使 amp 页面无效。无效的 amp 页面不应用 amp 缓存。
一旦 Google 搜索抓取并找到 html 内容的 amp (),它就会考虑进行缓存。
在本节中,我们将讨论 Google amp 缓存 URL 的各个组件。
子域名
Google AMP 会向请求的 url 添加一个子域名。amp 缓存子域名 url 遵循一些规则。它们如下所示:
子域名缓存 URL 的规则
将 AMP 文档域名从 IDN(Punycode)转换为 UTF-8。
url 中的破折号 (-) 将替换为两个破折号 (--)。
url 中的点 (.) 将替换为破折号 (-)。
转换回 IDN(Punycode)。
例如,pub.mypage 将替换为pub-mypage.cdn.ampproject.com。这里 cdn.ampproject.com 是 Google amp 添加的子域名。现在缓存的 url 为 Pub-mypage.cdn.ampproject.com。
内容类型
可用的内容类型有:c 表示 AMP HTML 文档,i 表示图像,r 表示资源(例如字体)。如果内容类型与指定的类型不匹配,您将收到 404 错误。
可选的“s”
如果存在 s,则内容将从 origin https:// 获取;否则,将从 http:// 获取。
从 https 和 http 缓存图像的请求示例如下所示:
示例
https://pub-mypage-com.cdn.ampproject.org/i/s/examples/images/testimage.png
因此,在上述示例中,url 中包含 i 表示图像,s 表示 https -
示例
http://pub-mypage-com.cdn.ampproject.org/i/examples/images/testimage.png
因此,在上述示例中,url 中包含 i 表示图像,并且没有 s,因此 url 将从 http 获取。
对于字体缓存文件,url 将如下所示:
示例
https://pub-mypage-com.cdn.ampproject.org/r/s/examples/themes/lemon/fonts/Genericons.ttf
内容类型r用于字体等资源,s用于安全 url。
对于 html 文档,url 如下所示:
示例
https://pub-mypage-com.cdn.ampproject.org/c/s/trends/main.html
它在 url 中有 c 表示 HTML 文档,后跟 s 表示 https://
Google AMP 缓存使用 http 标头(如Max-age)来确定内容缓存是否已过时或最新,并自动发送最新请求并更新内容,以便下一个用户获得更新的内容。
Google AMP - 自定义 JavaScript
在前面的章节中,我们学习了许多 amp 组件。我们还看到,对于每个组件的工作,我们需要添加一个 javascript 文件。
例如,对于 amp-iframe,添加的脚本如下所示:
<script async custom-element="amp-iframe" src="https://cdn.ampproject.org/v0/amp-iframe-0.1.js"> </script>
我们在脚本标签中添加了async。这是 amp 的标准,因为它们异步加载所有 javascript 文件。添加了一个custom-element属性,其中包含它用于的组件的名称。
要使用任何 amp 组件,如果它不是核心 amp javascript 文件的一部分,则必须按上述方式添加脚本。
我们大多习惯于在页面中编写大量 javascript 代码,并使用 script 标签包含 javascript 文件。
我们如何在 amp 中做到这一点?因此,对于 amp,不允许编写任何脚本代码或从外部加载 script 标签。
Amp 有自己的组件来处理应该由添加到页面上的附加脚本完成的任务。这主要是出于性能原因,以便更快地加载页面内容,并且不会让 javascript 延迟渲染或对 DOM 进行任何更改。
这是 AMP 根据其官方网站为脚本标签提供的规范:
除非类型为 application/ld+json,否则禁止使用。(根据需要可以添加其他非可执行值。)例外情况是加载 AMP 运行时的必填脚本标签和加载扩展组件的脚本标签。
一个工作示例,我们可以在 amp 页面中使用application/ld+json,如下所示。请注意,我们正在使用类型为“application/ld+json”的 script 标签,以便 amp-analytics 组件触发跟踪器。
类似地,我们可以在其他 amp 组件上根据需要使用类型为“application/ld+json”的 script 标签。
示例
<!doctype html>
<html amp>
<head>
<meta charset = "utf-8">
<title>amp-analytics</title>
<script async src = "https://cdn.ampproject.org/v0.js">
</script>
<script async custom-element = "amp-analytics"
src = "https://cdn.ampproject.org/v0/amp-analytics-0.1.js">
</script>
<link rel = "canonical" href = "ampanalytics.html">
<meta name = "viewport" content = "width=device-width,
minimum-scale = 1,initial-scale = 1">
<style amp-boilerplate>
body{
-webkit-animation:
-amp-start 8s steps(1,end) 0s 1 normal both;-moz-animation:
-amp-start 8s steps(1,end) 0s 1 normal both;-ms-animation:
-amp-start 8s steps(1,end) 0s 1 normal both;animation:
-amp-start 8s steps(1,end) 0s 1 normal both
}
@-webkit-keyframes
-amp-start{from{visibility:hidden}to{visibility:visible}}@-moz-keyframes
-amp-start{from{visibility:hidden}to{visibility:visible}}@-ms-keyframes
-amp-start{from{visibility:hidden}to{visibility:visible}}@-o-keyframes
-amp-start{from{visibility:hidden}to{visibility:visible}}@keyframes
-amp-start{from{visibility:hidden}to{visibility:visible}}
</style>
<noscript>
<style amp-boilerplate>
body{
-webkit-animation:none;
-moz-animation:none;
-ms-animation:none;
animation:none}
</style>
</noscript>
</head>
<body>
<h1>Google Amp - Analytics</h1>
<amp-analytics>
<script type = "application/json">
{
"requests": {
"event": "https://:8080/googleamp/tracking.php?
user=test&account=localhost&event=${eventId}"
},
"triggers": {
"trackPageview": {
"on": "visible",
"request": "event",
"vars": {
"eventId": "pageview"
}
}
}
}
</script>
</amp-analytics>
</body>
</html>
当在浏览器中访问页面时,将为页面浏览触发跟踪器。它可以在 Google 网络选项卡中看到,如下所示。
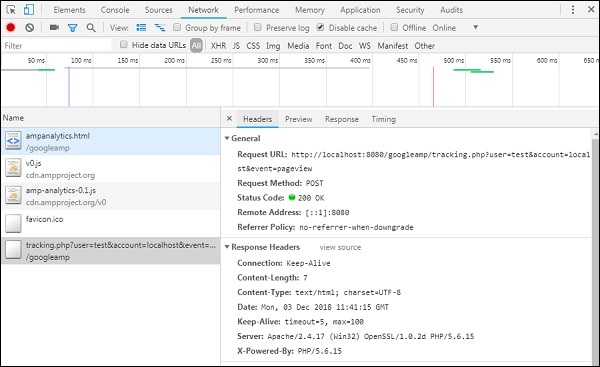
Google AMP - CORS
在本章中,我们将尝试了解 AMP 中的 CORS。在我们深入了解细节之前,让我们先了解 CORS 的基础知识以及它如何发挥作用。
什么是 CORS?
CORS 代表跨源资源共享。CORS 是一种需要额外 HTTP 标头数据来告诉浏览器,由在例如xyz.com来源运行的网页发出的 url 请求是否应该被授予权限以访问请求 url 的数据。我们从网页发出许多 http 请求,为此我们需要部署 CORS 以获取所需的数据。
当我们向与主机不同的服务器发出 http 请求时,我们将其称为跨源请求,这意味着域名、协议和端口与主机来源不同。在这种情况下,请求的 url 应允许访问数据;这意味着发出的 GET/PUT/POST/DELETE 请求。
此额外数据在发出的 http 请求的浏览器标头中可用。此权限步骤主要是出于安全原因,以便任何网页都不能在没有必要权限的情况下从另一个域名发出或获取数据。
浏览器头部应该包含一些详细信息,例如Access-Control-Allow-Origin,其值可以如下所示:
Access-Control-Allow-Origin : *
在请求 URL 头部中将值设置为 * 表示告诉浏览器允许任何来源请求数据以访问资源。
Access-Control-Allow-Origin: https://www.example.com
将值设置为以上内容,表示浏览器只允许来自网页 www.example.com 的请求获取请求 URL 的数据。
CORS 的服务器配置必须考虑到共享数据的用途。根据用途,需要在服务器端设置必要的头部。
现在我们知道了什么是 CORS,让我们更进一步。在 AMP 的情况下,我们有像 amp-form、amp-list 这样的组件,它们使用 HTTP 端点动态加载数据。
在 AMP 页面中,即使 HTTP 请求来自同一来源,也需要设置 CORS。这里会出现一些问题——即使请求和响应来自同一来源,为什么也需要启用 CORS?从技术上讲,在这种情况下我们不需要启用 CORS,因为我们正在请求和显示同一域名、来源等的数据。
AMP 有一个称为缓存的功能,它可以加快访问页面用户的获取数据速度。如果用户之前访问过该页面,数据将缓存在 Google CDN 上,下一个用户将从缓存中获取服务数据。
数据存储在 AMP 端,现在它拥有不同的域名。当用户点击任何按钮以获取最新数据时,AMP 缓存 URL 会与网页域名进行比较以获取新数据。现在,如果 CORS 未启用,因为它处理 AMP 缓存 URL 和网页域名,则请求将无效,并且由于 CORS 权限而失败。这就是为什么即使在 AMP 页面中对于同一来源也需要启用 CORS 的原因。
此处显示了一个启用 CORS 的表单工作示例:
<!doctype html>
<html amp lang = "en">
<head>
<meta charset = "utf-8">
<script async src = "https://cdn.ampproject.org/v0.js">
</script>
<title>Google AMP - Form</title>
<link rel = "canonical" href = "ampform.html">
<meta name = "viewport" content = "width = device-width,
minimum-scale = 1,initial-scale = 1">
<style amp-boilerplate>
body{
-webkit-animation:
-amp-start 8s steps(1,end) 0s 1 normal both;-moz-animation:
-amp-start 8s steps(1,end) 0s 1 normal both;-ms-animation:
-amp-start 8s steps(1,end) 0s 1 normal both;animation:
-amp-start 8s steps(1,end) 0s 1 normal both
}
@-webkit-keyframes
-amp-start{from{visibility:hidden}to{visibility:visible}}@-moz-keyframes
-amp-start{from{visibility:hidden}to{visibility:visible}}@-ms-keyframes
-amp-start{from{visibility:hidden}to{visibility:visible}}@-o-keyframes
-amp-start{from{visibility:hidden}to{visibility:visible}}@keyframes
-amp-start{from{visibility:hidden}to{visibility:visible}}
</style>
<noscript>
<style amp-boilerplate>
body{
-webkit-animation:none;
-moz-animation:none;
-ms-animation:none;
animation:none}
</style>
</noscript>
<script async custom-element = "amp-form"
src = "https://cdn.ampproject.org/v0/amp-form-0.1.js">
</script>
<script async custom-template = "amp-mustache"
src = "https://cdn.ampproject.org/v0/amp-mustache-0.2.js">
</script>
<style amp-custom>
form.amp-form-submit-success [submit-success],
form.amp-form-submit-error [submit-error]{
margin-top: 16px;
}
form.amp-form-submit-success [submit-success] {
color: white;
background-color:gray;
}
form.amp-form-submit-error [submit-error] {
color: red;
}
form.amp-form-submit-success.hide-inputs > input {
display: none;
}
</style>
</head>
<body>
<h3>Google AMP - Form</h3>
<form
method = "post"
class = "p2"
action-xhr = "submitform.php"
target = "_top">
<p>AMP - Form Example</p>
<div>
<input
type = "text"
name = "name"
placeholder = "Enter Name" required>
<br/>
<br/>
<input
type = "email"
name = "email"
placeholder = "Enter Email"
required>
<br/>
<br/>
</div>
<input type = "submit" value = "Submit">
<div submit-success>
<template type = "amp-mustache">
Form Submitted! Thanks {{name}}.
</template>
</div>
<div submit-error>
<template type = "amp-mustache">
Error! {{name}}, please try again.
</template>
</div>
</form>
</body>
</html>
submitform.php
<?php
   if(!empty($_POST)){
      $domain_url = (isset($_SERVER['HTTPS']) ? "https" : "http") .      "://$_SERVER[HTTP_HOST]";
      header("Content-type: application/json");
      header("AMP-Access-Control-Allow-Source-Origin: " . $domain_url);
      header("Access-Control-Expose-Headers: AMP-Access-Control-Allow-Source-Origin");
      $myJSON = json_encode($_POST);
      echo $myJSON;
   }
?>
输出
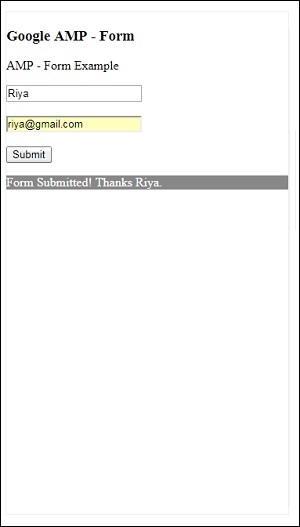
添加到 submitform.php 的响应头部的详细信息:

为了使表单正常工作,我们需要添加诸如 access-control-expose-headers(其值为 AMP-Access-Control-Allow-Source-Origin)和 amp-access-control-allow-source-origin 之类的头部,例如:https://:8080。
这里我们使用 PHP 文件,并且 Apache 是使用的服务器。在 PHP 文件中,我们添加了如下所示的必要头部:
<?php
if(!empty($_POST)){
$domain_url = (isset($_SERVER['HTTPS']) ? "https" : "http") .
"://$_SERVER[HTTP_HOST]";
header("Content-type: application/json");
header("AMP-Access-Control-Allow-Source-Origin: " . $domain_url);
header("Access-Control-Expose-Headers:
AMP-Access-Control-Allow-Source-Origin");
$myJSON = json_encode($_POST);
echo $myJSON;
}
?>
添加必要的头部后,来源https://:8080将被允许交互并获取数据。