- Google AMP 教程
- Google AMP - 首页
- Google AMP - 概述
- Google AMP - 简介
- Google AMP - 图片
- Google AMP - 表单
- Google AMP - 内嵌框架 (iframe)
- Google AMP - 视频
- Google AMP - 按钮
- Google AMP - 时间标记 (Timeago)
- Google AMP - MathML
- Google AMP - 自动调整文本大小 (Fit Text)
- Google AMP - 日期倒计时
- Google AMP - 日期选择器
- Google AMP - 故事 (Story)
- Google AMP - 选择器
- Google AMP - 链接
- Google AMP - 字体
- Google AMP - 列表
- Google AMP - 用户通知
- Google AMP - 下一页
- Google AMP - 属性
- 样式和自定义 CSS
- Google AMP - 动态 CSS 类
- Google AMP - 动作和事件
- Google AMP - 动画
- Google AMP - 数据绑定
- Google AMP - 布局
- Google AMP - 广告
- Google AMP - 分析
- Google AMP - 社交小工具
- Google AMP - 媒体
- HTML 页面转换为 AMP 页面
- Google AMP - 基本语法
- Google AMP - 验证
- Google AMP - 缓存
- Google AMP - 自定义 JavaScript
- Google AMP - CORS
- Google AMP 有用资源
- Google AMP - 快速指南
- Google AMP - 有用资源
- Google AMP - 讨论
Google AMP - 简介
Google Accelerated Mobile Pages (Google-AMP) 是 Google 推出的一个新的开源项目,专门用于使用 AMP HTML 构建轻量级网页。该项目的主要目标是确保 AMP 代码在所有可能的设备(如智能手机和平板电脑)上都能正常运行并快速加载。
AMP 只是对标准 HTML 的扩展。一些 HTML 标签已更改,AMP 对其用法添加了限制。本章将列出已更改的 HTML 标签以及对其添加的限制。处理加载外部资源(例如图像、CSS、JS、表单提交、视频、音频等)的标签已更改。
此外,AMP 还添加了许多新功能,例如 amp-date-picker、amp-facebook、amp-ad、amp-analytics、amp-ad、amp-lightbox 等,可以直接在 HTML 页面中使用。其余用于显示的功能则保持不变。
通过所有这些更改和新功能,AMP 有望在实际环境中使用时为页面提供更快的加载速度和更好的性能。
当您在手机上使用 Google 搜索引擎搜索任何内容时,在 Google 顶部轮播显示的内容大多是 AMP 页面,如下所示:
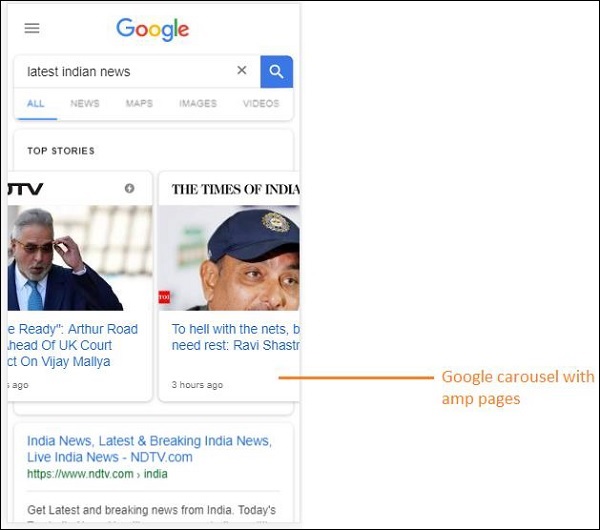
点击 AMP 页面后,您在地址栏中看到的 URL 如下所示:
https://www.google.co.in/amp/s/m.timesofindia.com/sports/cricket/india-in-australia/to-hell-with-the-nets-boys-need-rest-ravi-shastri/amp_articleshow/67022458.cms

该 URL 不是直接来自发布者,而是 Google 指向其在 Google 服务器上的副本(缓存版本),这有助于与非 AMP 页面相比更快地呈现内容。这仅在设备或 Google 模拟器模式下才会发生。
AMP 页面示例
AMP 页面的示例如下所示:
<!doctype html>
<html amp>
   <head>
      <meta charset = "utf-8">
      <title>Amp Sample Page</title>
      <link rel = "canonical" href = "./regular-html-version.html">
      <meta name = "viewport" content = "width = device-width,
         minimum-scale = 1,initial-scale = 1">
      <style amp-custom>
         h1 {color: red}
      </style>
      <script type = application/json>{
         "vars": {
            "uid": "23870",
            "domain": "dummyurl.com",
            "sections": "us",
            "authors": "Hello World"
         }
      }
      </script>
      <style amp-boilerplate>
         body{
            -webkit-animation:
            -amp-start 8s steps(1,end) 0s 1 normal both;-moz-animation:
            -amp-start 8s steps(1,end) 0s 1 normal both;-ms-animation:
            -amp-start 8s steps(1,end) 0s 1 normal both;animation:
            -amp-start 8s steps(1,end) 0s 1 normal both
         }
         @-webkit-keyframes
         -amp-start{from{visibility:hidden}to{visibility:visible}}@-moz-keyframes
         -amp-start{from{visibility:hidden}to{visibility:visible}}@-ms-keyframes
         -amp-start{from{visibility:hidden}to{visibility:visible}}@-o-keyframes
         -amp-start{from{visibility:hidden}to{visibility:visible}}@keyframes
         -amp-start{from{visibility:hidden}to{visibility:visible}}
      </style>
      <noscript>
         <style amp-boilerplate>
            body{
               -webkit-animation:none;
               -moz-animation:none;
               -ms-animation:none;
               animation:none}
         </style>
      </noscript>

      <script async src = "https://cdn.ampproject.org/v0.js"></script>
   </head>
   <body>
      <h1>Amp Sample Page</h1>
      <p>
         <amp-img src = "imgurl.jpg" width = "300" height = "300"
            layout = "responsive"></amp-img>
      </p>
      <amp-ad width = "300" height = "250" type = "doubleclick"
         data-slot = "/4119129/no-ad">
         <div fallback>
            <p style = "color:green;font-size:25px;">No ads to Serve!</p>
         </div>
      </amp-ad>
   </body>
</html>
AMP 页面中的注意事项
让我们了解程序员在 AMP 页面中必须遵循的一些注意事项。
必填标签
AMP 页面中必须包含一些必填标签,如下所示:
我们必须确保在 html 标签中添加了 amp 或 ⚡,如下所示:
<html amp>
   OR
<html ⚡>
<head> 和 <body> 标签应添加到 HTML 页面中。
以下必填元标签应添加到页面的 head 部分;否则,AMP 验证将失败
<meta charset = "utf-8">
<meta name = "viewport" content = "width=device-width, minimum-scale = 1, initial-scale = 1">
在 head 标签内添加 rel = "canonical" 链接
<link rel = "canonical" href = "./regular-html-version.html">
带有 amp-boilerplate 的 style 标签:
<style amp-boilerplate>
   body{
      -webkit-animation:
      -amp-start 8s steps(1,end) 0s 1 normal both;-moz-animation:
      -amp-start 8s steps(1,end) 0s 1 normal both;-ms-animation:
      -amp-start 8s steps(1,end) 0s 1 normal both;animation:
      -amp-start 8s steps(1,end) 0s 1 normal both
   }
   @-webkit-keyframes
   -amp-start{from{visibility:hidden}to{visibility:visible}}@-moz-keyframes
   -amp-start{from{visibility:hidden}to{visibility:visible}}@-ms-keyframes
   -amp-start{from{visibility:hidden}to{visibility:visible}}@-o-keyframes
   -amp-start{from{visibility:hidden}to{visibility:visible}}@keyframes
   -amp-start{from{visibility:hidden}to{visibility:visible}}
</style>
带有 amp-boilerplate 的 noscript 标签:
<noscript>
   <style amp-boilerplate>
      body{
         -webkit-animation:none;
         -moz-animation:none;
         -ms-animation:none;
         animation:none
      }
   </style>
</noscript>
非常重要的是带有 async 属性的 amp script 标签,如下所示:
<script async src = "https://cdn.ampproject.org/v0.js"> </script>
如果您想向页面添加自定义 CSS,请注意,我们不能在 AMP 页面中调用外部样式表。要添加自定义 CSS,所有 CSS 代码都必须放在这里,如下所示:
<style amp-custom>
   //all your styles here
</style>
style 标签应添加 amp-custom 属性。
AMP 组件的脚本
请注意,在 AMP 页面中严格不允许使用带有 src 和 type = ”text/javascript” 的 script 标签。仅允许在 head 部分添加带有 async 属性并与 AMP 组件相关的 script 标签。
本节列出了用于 AMP 组件的一些脚本,如下所示:
amp-ad
<script async custom-element = "amp-ad"
   src = "https://cdn.ampproject.org/v0/amp-ad-0.1.js">
</script>
amp-iframe
<script async custom-element = "amp-iframe"
   src = "https://cdn.ampproject.org/v0/amp-iframe-0.1.js">
</script>
请注意,该脚本具有 async 和 custom-element 属性以及要加载的 AMP 组件的名称。AMP 根据 async 和 custom-element 属性验证 script 标签,并且不允许加载任何其他脚本。它确实接受我们在示例文件中添加的 type=application/json,如下所示
<type = application/json>
{
   "vars": {
      "uid": "23870",
      "domain": "dummyurl.com",
      "sections": "us",
      "authors": "Hello World"
   }
}
</script>
如果需要,上述脚本可以与其他 AMP 组件一起使用,例如 amp-analytics。
HTML 标签
到目前为止,我们已经看到了 AMP 页面中所需的必填标签。现在我们将讨论允许/不允许的 HTML 元素以及对其施加的限制。
以下是允许/不允许的 HTML 标签列表:
| 序号 | HTML 标签及说明 |
|---|---|
| 1 | img 此标签被 amp-img 替换。在 AMP 页面中不允许使用直接的 img 标签 |
| 2 | video 被 amp-video 替换 |
| 3 | audio 被 amp-audio 替换 |
| 4 | iframe 被 amp-iframe 替换 |
| 5 | object 不允许 |
| 6 | embed 不允许 |
| 7 | form 可以使用 <form>。我们需要添加脚本才能在 AMP 页面中使用表单。 示例: <script async custom-element = "amp-form" src = "https://cdn.ampproject.org/v0/amp-form-0.1.js"> </script> |
| 8 | 输入元素 Allowed.<input[type = image]>, <input[type = button]>, <input[type = password]>, <input[type = file]> are not allowed |
| 9 | <fieldset> 允许 |
| 10 | <label> 允许 |
| 11 | P, div, header, footer, section 允许 |
| 12 | button 允许 |
| 13 | a <a> 标签在满足以下条件时允许使用:href 不应以 javascript 开头。如果存在 target 属性,则其值必须为 _blank。 |
| 14 | svg 不允许 |
| 15 | meta 允许 |
| 16 | Link 允许。但不允许加载外部样式表。 |
| 17 | style 允许。它需要具有 amp-boilerplate 或 amp-custom 属性。 |
| 18 | base 不允许 |
| 19 | noscript 允许 |
注释
条件 HTML 注释不允许。例如:
<!--[if Chrome]>
   This browser is chrome (any version)
<![endif]-->
HTML 事件
在 HTML 页面中使用的事件(如 onclick、onmouseover)在 AMP 页面中不允许使用。
我们可以按如下方式使用事件:
on = "eventName:elementId[.methodName[(arg1 = value, arg2 = value)]]"
以下是在输入元素上使用的事件示例:
<input id = "txtname" placeholder = "Type here"
   on = "inputthrottled:
   AMP.setState({name: event.value})">
使用的事件是 input-throlled。
类
您不能在页面中使用以 -amp- 或 i-amp- 开头的类。此外,您可以根据需要使用类名。
ID
您不能为以 -amp 或 i-amp- 开头的 HTML 元素设置 ID。此外,您可以根据需要为 HTML 元素使用 ID。
链接
在 AMP 页面中不允许在 href 中使用 JavaScript。
示例
<a href = "javascript:callfunc();">click me</a>
样式表
AMP 页面不允许使用外部样式表。可以在内部添加页面所需的样式:
<style amp-custom>
   //all your styles here
</style>
style 标签应添加 amp-custom 属性。
@规则
样式表中允许使用以下 @规则:
@font-face、@keyframes、@media、@page、@supports。@import 不允许使用。对相同内容的支持将在未来添加。
允许在 <style amp-custom> 内使用 @keyframes。如果 @keyframes 太多,最好创建 <style amp-keyframes> 标签,并在 AMP 文档末尾调用此标签。
类名、ID、标签名和属性不应以 -amp- 和 i-amp- 为前缀,因为它们在 AMP 代码中用于内部用途,如果在运行时也在页面上定义,则可能导致冲突。
!important 属性在样式中不允许使用,因为 AMP 需要在必要时控制元素大小。
自定义字体
AMP 页面允许使用自定义字体的样式表。
示例
<link rel = "stylesheet"
   href = "https://fonts.googleapis.ac.cn/css?family=Tangerine">
可以从以下来源使用在 AMP 页面中使用的字体:
Fonts.com - https://fast.fonts.net
Google Fonts - https://fonts.googleapis.ac.cn
Font Awesome - https://maxcdn.bootstrap.ac.cn
Typekit - https://use.typekit.net/kitId.css(相应地替换 kitId)
注意 - AMP 页面允许使用 @font-face 自定义字体。
示例
@font-face {
   font-family: myFirstFont;
   src: url(dummyfont.woff);
}
AMP 运行时
加载 AMP 核心文件后,将确定 AMP 运行时环境:
<script async src = "https://cdn.ampproject.org/v0.js"></script>
核心文件负责加载外部资源,确定加载它们的优先级,并在向 AMP URL 添加 #development=1 时帮助验证 AMP 文档。
示例
https://:8080/googleamp/amppage.html#development=1
在浏览器中执行上述 URL 将列出 AMP 验证失败的错误,或者如果没有任何错误,则显示 AMP 验证成功的消息。
AMP 组件
AMP 添加了许多 AMP 组件。它们基本上用于以有效的方式处理资源的加载。它还包含用于处理动画、显示数据、显示广告、社交小工具等的组件。
AMP 中有两种类型的组件。
- 内置
- 外部
注意 - 如果添加了核心 AMP js 文件,则可以使用 <amp-img>(内置组件)。外部组件(如 <amp-ad>、<amp-facebook>、<amp-video> 等)需要添加与该组件相关的 js 文件。
常用属性
几乎所有可用的 AMP 组件都将提供 width、height、layout、placeholder 和 fallback 等属性。这些属性对于任何 AMP 组件都非常重要,因为它决定了组件在 AMP 页面中的显示方式。
本教程后面的章节将详细讨论上述所有列出的 AMP 功能。
请注意,本教程中的所有示例都在设备上进行了测试,并使用了 Google 移动模拟器模式。现在让我们详细了解一下。
Google 移动模拟器
要使用 Google 移动模拟器,请打开 Chrome 浏览器,右键单击并打开开发者控制台,如下所示:
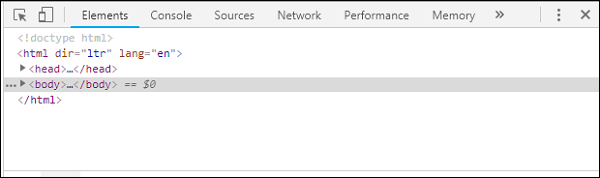
我们可以看到 Chrome 的开发者工具,如上所示。点击您想在浏览器中测试的链接。注意页面在桌面模式下显示。
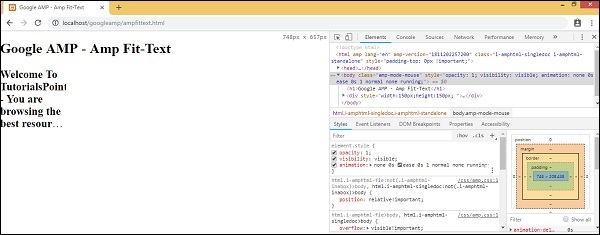
要获取上述页面以测试设备,请点击切换设备工具栏,如下所示:
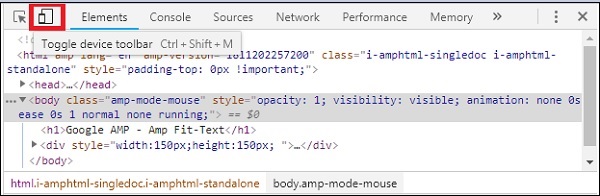
您也可以使用快捷键 Ctrl+shift+M。这将把桌面模式更改为设备模式,如下所示:

您可以看到设备列表,如下所示:
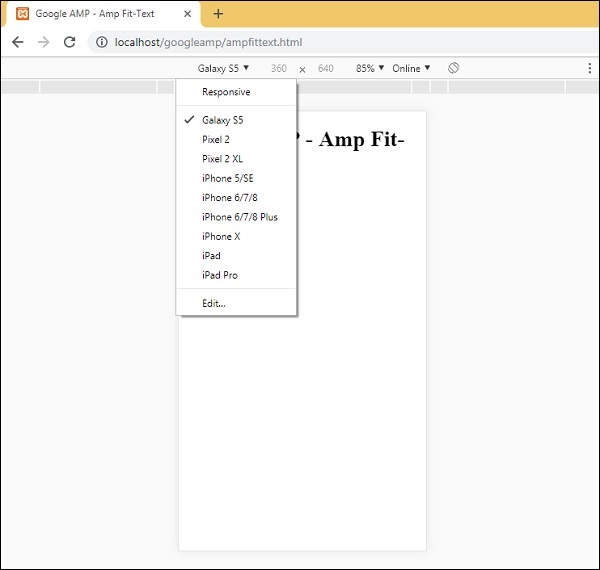
您可以选择要测试页面的设备。请注意,本教程中的所有页面都在如上所示的 Google 移动模拟器上进行了测试。Firefox 和最近的 Internet Explorer 浏览器也提供相同的功能。