- Python Pillow 教程
- Python Pillow - 首页
- Python Pillow - 概述
- Python Pillow - 环境设置
- 基本图像操作
- Python Pillow - 图像处理
- Python Pillow - 调整图像大小
- Python Pillow - 翻转和旋转图像
- Python Pillow - 裁剪图像
- Python Pillow - 为图像添加边框
- Python Pillow - 识别图像文件
- Python Pillow - 合并图像
- Python Pillow - 剪切和粘贴图像
- Python Pillow - 滚动图像
- Python Pillow - 在图像上写入文本
- Python Pillow - ImageDraw 模块
- Python Pillow - 连接两张图像
- Python Pillow - 创建缩略图
- Python Pillow - 创建水印
- Python Pillow - 图像序列
- Python Pillow 颜色转换
- Python Pillow - 图像上的颜色
- Python Pillow - 使用颜色创建图像
- Python Pillow - 将颜色字符串转换为 RGB 颜色值
- Python Pillow - 将颜色字符串转换为灰度值
- Python Pillow - 通过更改像素值来更改颜色
- 图像处理
- Python Pillow - 降噪
- Python Pillow - 更改图像模式
- Python Pillow - 图像合成
- Python Pillow - 使用 Alpha 通道
- Python Pillow - 应用透视变换
- 图像滤波
- Python Pillow - 为图像添加滤镜
- Python Pillow - 卷积滤波器
- Python Pillow - 模糊图像
- Python Pillow - 边缘检测
- Python Pillow - 浮雕图像
- Python Pillow - 增强边缘
- Python Pillow - 锐化蒙版滤镜
- 图像增强和校正
- Python Pillow - 增强对比度
- Python Pillow - 增强锐度
- Python Pillow - 增强色彩
- Python Pillow - 校正色彩平衡
- Python Pillow - 去噪
- 图像分析
- Python Pillow - 提取图像元数据
- Python Pillow - 识别颜色
- 高级主题
- Python Pillow - 创建动画 GIF
- Python Pillow - 批量处理图像
- Python Pillow - 转换图像文件格式
- Python Pillow - 为图像添加填充
- Python Pillow - 颜色反转
- Python Pillow - 使用 NumPy 进行机器学习
- Python Pillow 与 Tkinter BitmapImage 和 PhotoImage 对象
- 图像模块
- Python Pillow - 图像混合
- Python Pillow 有用资源
- Python Pillow - 快速指南
- Python Pillow - 函数参考
- Python Pillow - 有用资源
- Python Pillow - 讨论
Python Pillow - ImageChops.darker() 函数
PIL.ImageChops.darker 函数逐像素比较两个输入图像,并返回一个新图像,其中包含每个对应像素对中较暗的值。
操作定义如下:
$$\mathrm{Out\:=\:min(image1,image2)}$$
语法
以下是函数的语法:
PIL.ImageChops.darker(image1, image2)
参数
以下是此函数参数的详细信息:
image1 - 第一个输入图像。
image2 - 第二个输入图像。
返回值
此函数的返回类型为 Image。
示例
示例 1
在此示例中,ImageChops.darker() 函数应用于两个随机的 RGB 图像(image1 和 image2),以创建一个新图像,其中包含两个输入图像中较暗的值。在这里,我们将使用 getpixel() 函数观察两个输入图像以及输出图像在指定位置的像素值。
from PIL import Image, ImageChops
import numpy as np

# Create two random RGB images
image1 = Image.fromarray(np.array([(35, 64, 3), (255, 0, 0), (255, 255, 0), (255, 255, 255), (164, 0, 3)]), mode="RGB")
print("Pixel values of image1 at (0, 0):", image1.getpixel((0, 0)))

image2 = Image.fromarray(np.array([(25, 14, 3), (25, 222, 0), (255, 155, 0), (255, 55, 100), (180, 0, 78)]), mode="RGB")
print("Pixel values of image2 at (0, 0):", image2.getpixel((0, 0)))

# Get the darker values of the two images
result = ImageChops.darker(image1, image2)
print("Pixel values of the result at (0, 0) after darker:", result.getpixel((0, 0)))
输出
Pixel values of image1 at (0, 0): (35, 0, 0)
Pixel values of image2 at (0, 0): (25, 0, 0)
Pixel values of the result at (0, 0) after darker: (25, 0, 0)
示例 2
在此示例中,ImageChops.darker() 函数用于比较两个输入像素的像素值,以选择每个对应像素对中较暗的值。
from PIL import Image, ImageChops
# Open two image files
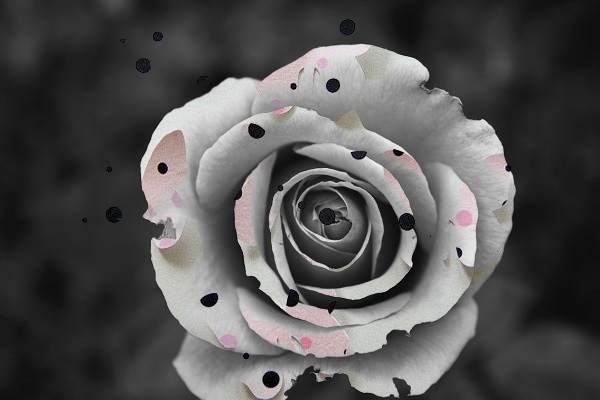
image1 = Image.open('Images/black rose.jpg')
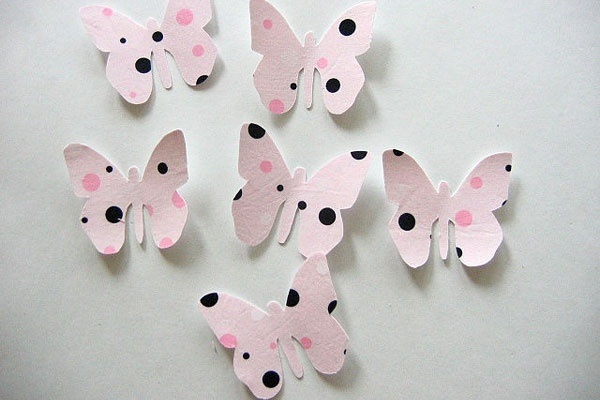
image2 = Image.open('Images/black-doted-butterflies.jpg')
# Compare the two images pixel by pixel and get the darker values
result = ImageChops.darker(image1, image2)
# Display the input and resulting images
image1.show()
image2.show()
输出
输入图像 1

输入图像 2
输出图像
示例 3
这是一个使用 ImageChops.darker() 函数对两个 PNG 图像文件获取具有较暗值的新图像的示例。
from PIL import Image, ImageChops
# Open two image files
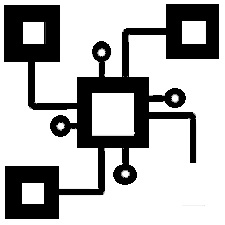
image1 = Image.open('Images/dark_img1.png')
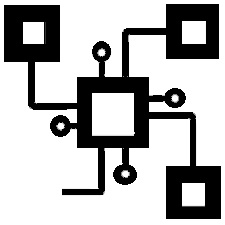
image2 = Image.open('Images/dark_img2.png')
# Compare the two images pixel by pixel and get the darker values
result = ImageChops.darker(image1, image2)
# Display the input and resulting images
image1.show()
image2.show()
result.show()
输出
输入图像 1
输入图像 2
输出图像

python_pillow_function_reference.htm
广告