
- Unix Commands Reference
- Unix Commands - Home
automount Command in Linux
The automount utility in Linux is a powerful tool that simplifies the management of mount points, especially for network file systems. It allows file systems to be mounted on-demand when they are accessed and unmounted after a certain period of inactivity, which can be particularly useful in environments with a large number of mount points and helps to reduce the system's boot time, which can improve boot times and reduce resource usage.
Here's a comprehensive guide to using the automount command in Linux, complete with examples to illustrate its versatility.
Table of Contents
- Installing Automount Command in Linux
- How to use Automount Command in Linux?
- Alternatives to Automount Command in Linux
The automount works by automatically mounting file systems when a file or directory within that file system is accessed and unmounting it after a certain period of inactivity. This is particularly useful for network file systems, removable storage, and large numbers of mount points that are not always in use.
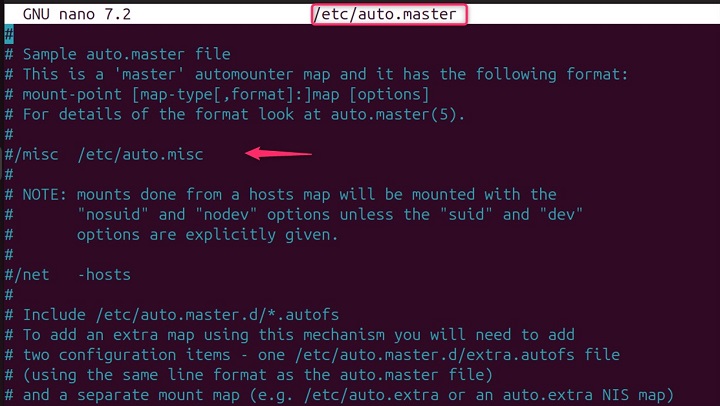
The main configuration file for automount is /etc/auto.master. This file contains a list of mount points managed by autofs, along with references to other configuration files or direct maps that contain specific mount options for different file systems.
For each entry in the auto.masterfile, you can create a corresponding file, such as /etc/auto.misc, which will contain the specific mount options for each mount point.
Installing automount Command in Linux
The automount command can be installed on Linux systems by installing the autofs package using your default Linux distribution’s package manager.
Debian, Ubuntu, and similar
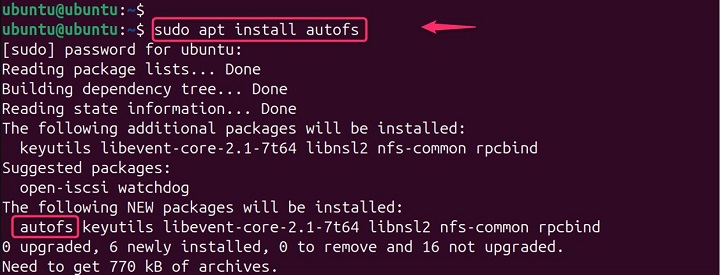
For instance, on Debian-based systems like Ubuntu, you can install autofs using the following command −
sudo apt update
sudo apt install autofs
Red Hat Enterprise Linux (RHEL), CentOS, Fedora −
sudo dnf install autofs
SUSE Linux Enterprise (SLE) −
sudo zypper install autofs
Oracle Linux −
sudo yum install autofs
Once the installation is complete, you'll have the autofs service and tools to manage automatic mounting. Remember, configuring autofs to mount specific directories requires editing configuration files.
After installation, autofs creates several configuration files in the /etc directory, such as “auto.master”, “auto.net”, and “auto.misc” −
ls /etc
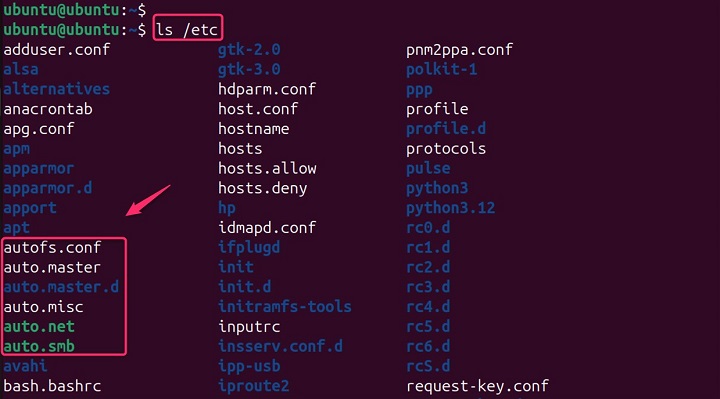
Note − It also creates the autofs service in systemd and adds the automount entry to the “nsswitch.conf” file.
Configuring Autofs
The main configuration file for autofs is “/etc/auto.master”. This file contains a list of mount points and map files that define the actual mount configurations −
The automount functionality is usually provided by a package called autofs. Here's how to install it on different Linux distributions −
Starting and Stopping Autofs
To apply changes made to the configuration files, you need to restart the autofs service −
sudo systemctl restart autofs

You can also stop or start the service using systemctl.
How to use automount Command in Linux?
The automount utility is part of the autofs service in Linux. It works by reading the configuration files that define the mount points and their corresponding options. The primary configuration file is /etc/auto.master, which lists the directories to be automounted and references other configuration files, known as maps, that provide detailed mount options for each mount point.
Syntax
The basic syntax for the automount command is as follows −
automount [options] [master_map_name]
Here, options can include various parameters that control the behavior of the autofs service, and master_map_name is the name of the master map file, typically /etc/auto.master.
- master_map_name − The directory where the file system will be mounted.
- options − Mount options such as read-only ( ro ) or read-write ( rw ).
- location − The location of the file system to be mounted.
Options and Usage
Some common options used with automount are −
| Options | Descriptions |
|---|---|
| -v or --verbose | Provides verbose output, useful for debugging. Shows more information about what autofs is doing. |
| -f or --foreground | Runs automount in the foreground, which is also useful for debugging. |
| -t or --timeout | Sets the timeout value in seconds after which an unused mount point will be unmounted. |
| -h, --help | Shows a quick guide on how to use autofs. |
| -p, --pid-file <file>: | Saves a file with the autofs process ID (useful for stopping it later). |
| -t, --timeout <seconds>: | Sets the default time (in seconds) autofs waits before unmounting unused directories. Defaults to 10 minutes. Set to 0 to disable unmounting. |
| -n <seconds>, --negative-timeout <seconds> | Sets the default time (in seconds) autofs remembers failed mount attempts before trying again. Defaults to 60 seconds. |
| -d, --debug | Shows even more information about autofs, including debugging messages (for advanced users). |
| -D variable=value | Creates a custom variable that can be used throughout the autofs configuration. |
| -f, --foreground | Runs autofs in the foreground instead of the background (useful for troubleshooting). |
| -r, --random-multimount-selection | When mounting from multiple servers, randomly choose one instead of a fixed order. |
| -O, --global-options <options>: | Sets default options used for all mounted directories. |
| -V, --version | Shows the autofs version number. |
| -l, --set-log-priority <priority> [path,...] | Controls how much information autofs logs. Higher numbers or keywords like "debug" mean more details, while lower numbers mean less information. |
Tip − Using -v (verbose) is a good way to start if you want to see what autofs is doing without getting overloaded with information.
Advanced Options
Automount also supports a range of advanced options, which can be specified in the map files −
| --timeout | The number of seconds of inactivity after which the mount point will be unmounted. |
| --ghost | Creates a ghost directory for the mount point even when it's not mounted. |
| --browse | Allows the mount points to be browsable. |
Some advanced options used with automount are −
- Getting Help
- Verbose Output (Debugging)
- Displaying Version
- Foreground Operation (Debugging)
- Setting Timeout
- Saving Process ID
- Custom Variable
- Random Server Selection (Multimount)
- Global Mount Options
- Setting Log Level
- Mounting an NFS File System
- Automounting with Specific Options
- Mounting a USB Drive
Getting Help
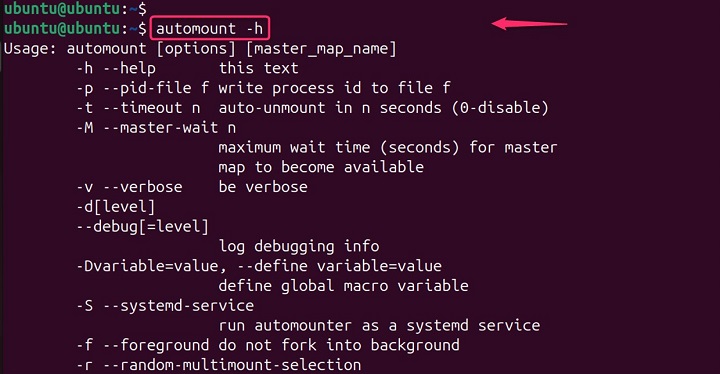
The automount -h or automount --help command displays a brief overview of how to use the automount command and its available options −
automount -h
Verbose Output (Debugging)
The automount -v command enables verbose logging, showing more information about autofs actions like mount attempts and unmounts. This is helpful for troubleshooting any issues with automounting directories −
sudo automount --verbose

Displaying Version
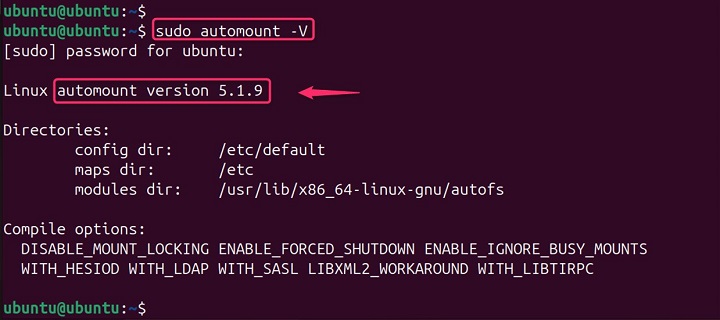
The automount -V command displays the version number of the installed automount package −
sudo automount -V
Foreground Operation (Debugging)
The automount -f command runs the automount daemon in the foreground instead of the background. This allows you to see the autofs process output directly in the terminal, which can be useful for debugging purposes −
sudo automount -f

Setting Timeout
The automount -t 3600 command sets the global timeout to 3600 seconds (1 hour). After this time of inactivity, unused automounted directories will be unmounted automatically −
sudo automount -t 3600

The “automount -t 0” disables the automatic unmounting of unused directories by setting the timeout to 0 seconds −
sudo automount -t 0
Saving Process ID
The automount -p /var/run/automount.pid command saves the process ID (PID) of the automount daemon to the file /var/run/automount.pid. This file can be useful for stopping the automount process later if needed −
sudo automount -p /var/run/automount.pid
Custom Variable
The below command defines a custom variable named MyVar with a value of /home/user/data. This variable can be used within the autofs configuration files to reference this path −
automount -DMyVar=/home/user/data
Random Server Selection (Multimount)
The automount -r command enables the random selection of a server from a list of replicated servers for mounting. This can be helpful for load balancing across multiple servers −
sudo automount -r

Global Mount Options
The automount -O rw,noexec command sets the default mount options for all automounted directories to read/write (rw) and disables executable permission (noexec) −
sudo automount -O rw,noexec

Setting Log Level
The below command sets the log priority for the mount point /mnt/autodir to debug. This will log all autofs messages related to this specific mount point −
automount -l debug /mnt/autodir
Mounting an NFS File System
In /etc/auto.master, you might have an entry like this −
/misc /etc/auto.misc --timeout=300
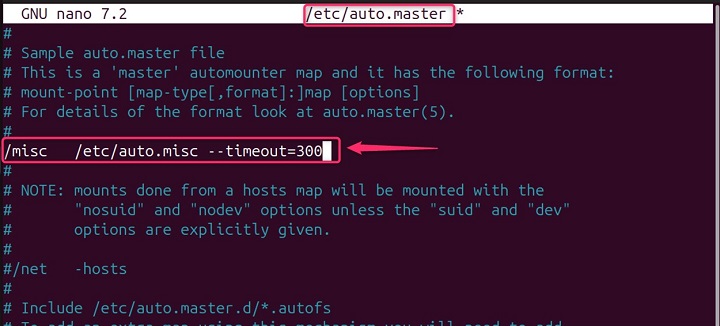
This means that the /misc directory will be automounted using the map file /etc/auto.misc with a timeout of 300 seconds.
Then, in /etc/auto.misc, you could have −
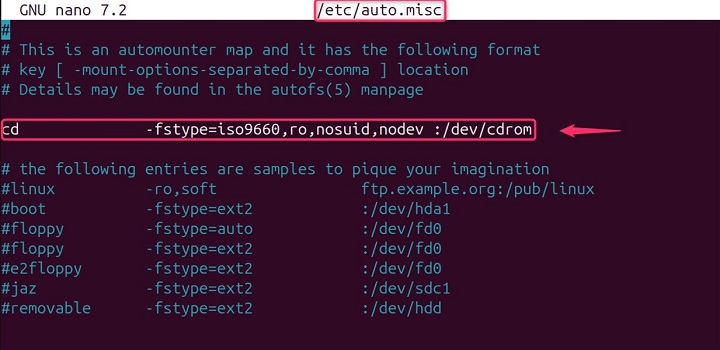
This will mount the NFS share from the server to read-write permissions. This would mount the NFS file system located at server:/dev/cdrom to /misc/data when accessed.
Automounting with Specific Options
You can specify options directly in the map file. For example −
work -fstype=nfs,rw,soft,intr,rsize=8192,wsize=8192 server:/path/to/work
This mounts the NFS share with additional options like soft and intr , which control how the system handles NFS request timeouts and interrupts.
Mounting a USB Drive
For a USB drive, you might have an entry in /etc/auto.master like −
/media /etc/auto.usb
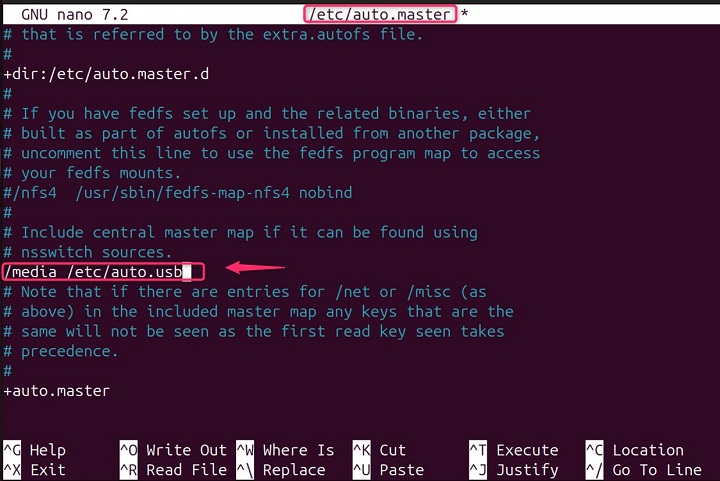
Remember − These are just a few examples. The specific options you use will depend on your desired configuration and troubleshooting needs. It's recommended to consult the autofs documentation for your specific Linux distribution for detailed information on all available options and configuration details.
Advantages of Using Automount
- Reduced Boot Time − Since file systems are not mounted at boot time, the system can boot faster.
- On-Demand Access − Resources are only mounted when needed, which can save network and system resources.
- Flexibility − It's easy to add or remove mount points without affecting the system's operation.
Alternatives to automount Command in Linux
There are other methods to achieve automounting in Linux. For example, udisksctl is a command-line utility that can be used to mount devices. Another option is pysdm, a graphical tool that allows users to configure the automounting of partitions at startup.
Conclusion
The automount utility is a versatile tool that can greatly enhance the management of file systems in Linux. By understanding its configuration and options, system administrators can ensure that resources are available on-demand without unnecessary overhead.
The automount command in Linux is a flexible tool that can greatly enhance the management of file systems, particularly in environments where many file systems are used intermittently. By understanding the configuration files and options available, administrators can ensure that resources are used efficiently and that file systems are available when needed without manual intervention.