
- Unix Commands Reference
- Unix Commands - Home
display Command in Linux
The Linux display command displays the image or image sequence on the X server. It is also used for batch processing and scripting. An X server is a software component of the X Window system that creates graphical user interfaces on bitmap displays.
The display command is a part of the ImageMagick suite of tools that primarily display images or image sequences through the terminal and perform various operations.
Table of Contents
Here is a comprehensive guide to the options available with the display command −
- Prerequisites to Use the display Command
- Syntax of display Command
- display Command Options
- Examples of display Command in Linux
Prerequisites to Use the display Command
The display command line tool is included in the ImageMagick tool suite. So, to use this command, the ImageMagick needs to be installed. In many Linux distributions, it comes by default, however, if it is not, then install it using the instructions given below −
To install ImageMagick in Ubuntu, Debian, and other Debian or Ubuntu-based distributions −
sudo apt install imagemagick
On RHEL and CentOS −
sudo yum install epel-release
sudo yum install ImageMagick
On Fedora −
sudo dnf install ImageMagick
On Arch Linux −
sudo pacman -S imagemagick
To install it on openSUSE, use −
sudo zypper install ImageMagick
To verify the installation, check the version −
convert --version
The display command is now available to use.
Syntax of display Command
The syntax for the Linux display command is as follows −
display [options] [image]
The [options] field is used to specify the options to change the display command output. While the [image] field is used to specify the image file.
display Command Options
The useful display command options are listed in the following table −
| Options | Description |
|---|---|
| -alpha | It is used to activate, deactivate, on, off, extract, or shape the alpha channel |
| -anti-aliasing | It removes pixel aliasing |
| -backdrop | It displays the image centered on the backdrop |
| -background color | It changes the image’s background color by the color value |
| -border geometry | It adds a border to the image |
| -bordercolor color | It adds color to the border |
| -coalesce | It merges the sequence of images |
| -comment string | It annotates the image with a comment |
| -compress type | It is used to specify the pixel compression type |
| -colorspace type | It sets the color space of the image (CMYK, Gray, sRGB etc) |
| -+contrast | It enhances the image contrast with + and reduces it with - |
| -crop geometry | It crops the image |
| -despeckle | It reduces the speckle in the image |
| -delay centiseconds | It adds delay to display the image sequence |
| -enhance | It applies a digital filter to enhance the image |
| -equalize | It performs histogram equalization to the image |
| -extract geometry | It extracts specific areas of the image |
| -flatten | It flattens the sequence of images (GIF) |
| -flip | It flips the image vertically |
| -flop | It flips the image horizontally |
| -frame geometry | It frames the images with an ornamental frame |
| -gamma value | It manages the gamma value (<1 darken the image: >1 lighten the image) |
| -help | It displays the command help |
| -identify | It identifies the characteristics of the image |
| -immutable type | It prohibits the image edit |
| -label name | It assigns a label to the image |
| -map type | It transforms the image colors to the specified types |
| -negate | It replaces each pixel of the image with the complementary color |
| -profile filename | It modifies the image profile (add, delete, apply) |
| -raise value | It adds 3D edges to the image |
| -resample geometry | It changes the resolution of the image |
| -resize geometry | It resizes the image |
| -roll geometry | It rolls the image vertically or horizontally |
| -size geometry | It sets the width and height of the image |
| -thumbnail geometry | It creates a thumbnail of the image |
| -transparent color | It makes the specified color transparent in the image |
| -trim | It trims the image's edges |
| -verbose | It displays details information about the image |
Examples of display Command in Linux
This section focuses on various ways to use the display command in Linux −
- Display Image from Terminal
- Display a Sequence of Images
- Display a Resized Image
- Display a Cropped Image
- Flip the Images
- Rotate the Images
- Display the Image Characteristics
- Display the Image with 3D Edges
- Display Image with a Border and Border Color
- Change Display Window Title
- Display the Thumbnail Size Image
- Display the Monochrome Image
- Display Image in Black & White
Display Image from Terminal
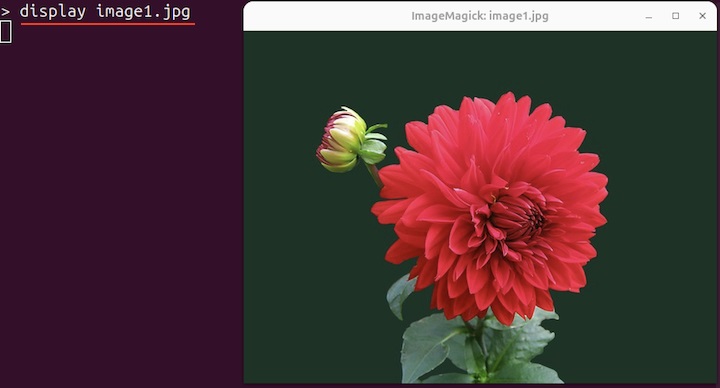
To display the image from the terminal, the display command is used. It opens the image using an X server.
Type the display command followed by the image name or path −
display image1.jpg
Display a Sequence of Images
To display the sequence of images with a delay, use the -delay option with time in milliseconds.
In the following example, an image sequence will be displayed with a delay of 3 seconds −
display -delay 300 image1.jpg image2.jpg image3.jpg
Display a Resized Image
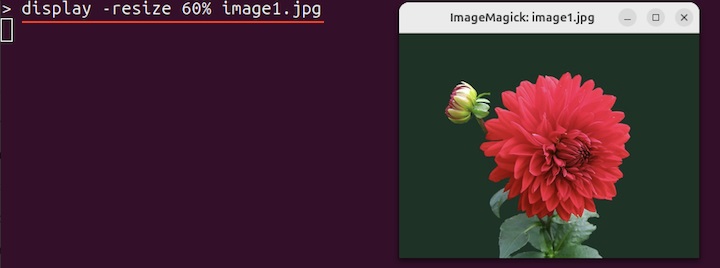
The -resize option is used with the desired size in pixels or percentages to display a resized image. For example, to display a resized image with a dimension of 460x210, use −
display -resize 460x210 image1.jpg

In the same way, to resize an image by a percentage of the original size, use −
display -resize 60% image1.jpg
Display a Cropped Image
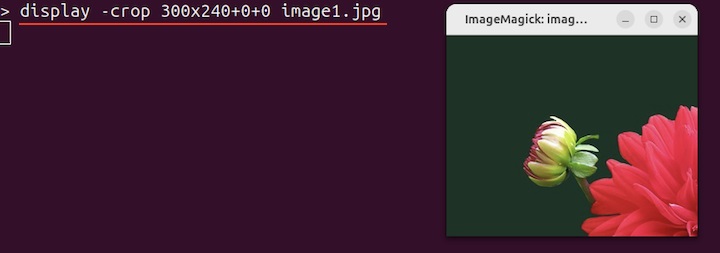
Use the -crop option to display the cropped part of the image. The syntax of using -crop option with the display command is as follows −
display -crop [WidthxHeight+offset(top)+offset(left)] [File]
To display an image with a width of 300 and height of 240 pixels, use −
display -crop 300x240+0+0 image1.jpg
To specify the top offset of 160 and left offset of 80 pixels, use −
display -crop 300x240+160+80 image1.jpg

Flip the Images
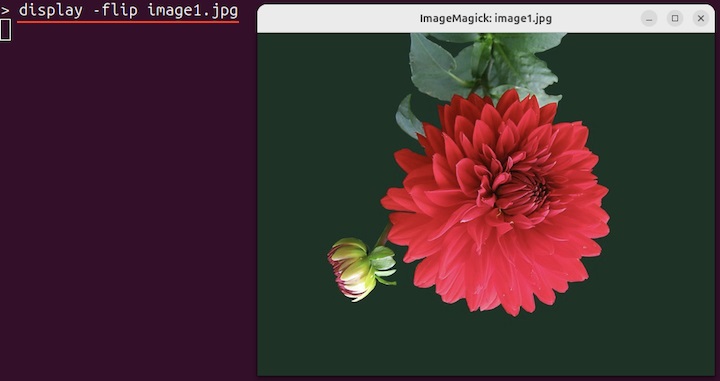
The -flip option flips the image vertically −
display -flip image1.jpg
Similarly, the -flop option flips the image horizontally −
display -flop image1.jpg
Rotate the Images
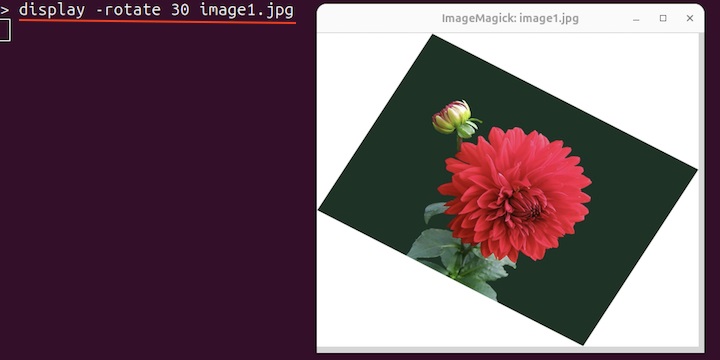
The -rotate option displays the rotated image at a specified angle. To display an image rotated at an angle of 30 degrees, use −
display -rotate 30 image1.jpg
Display the Image Characteristics
The -identify option is used to display the various characteristics of the image −
display -identify image1.jpg

It displays the following information about the image −
| Image Name | image1.jpg |
| Format | JPEG |
| Dimensions | 600x450 |
| Size + Offset | Size 600x450 Offset +0+0 (+0 top & +0 left) |
| 8-bit | Color Depth |
| Color Space | sRGB |
| File Size (bytes) | 38592 bytes |
| CPU time to process the image | 0.010 microseconds |
| The elapsed time to process the image | 0.004 Seconds |
Display the Image with 3D Edges
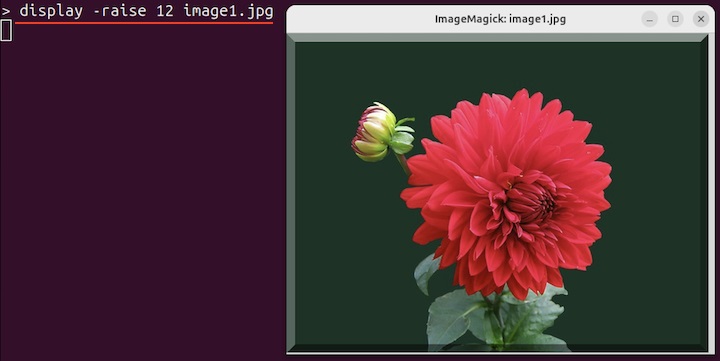
To add 3D edges to the image, the -raise option is used with a value −
display -raise 12 image1.jpg
Display Image with a Border and Border Color
The -border option is used to add a border to the image. For example, to add the border around all the sides of the image, use −
display -border 12 image1.jpg

The default border color is #DFDFDF. To change the border color, -bordercolor option is employed −
display -border 12 -bordercolor "#B0E0E6" image1.jpg

Change Display Window Title
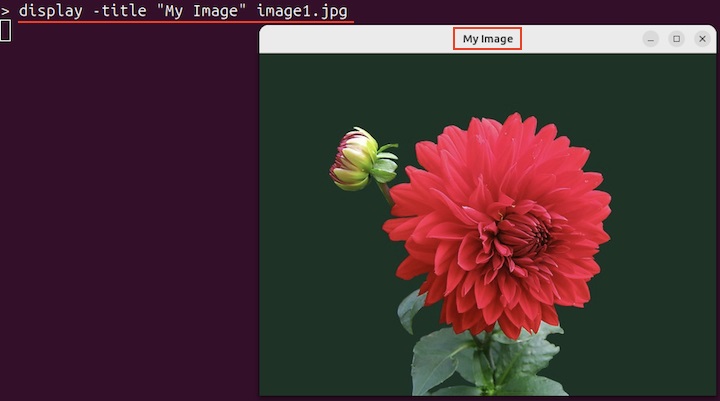
To change the display windows title, the -title option is used −
display -title "My Image" image1.jpg
Display the Thumbnail Size Image
To display the image in thumbnail size, use the -thumbnail option −
display -thumbnail 200x100 image1.jpg

Display the Monochrome Image
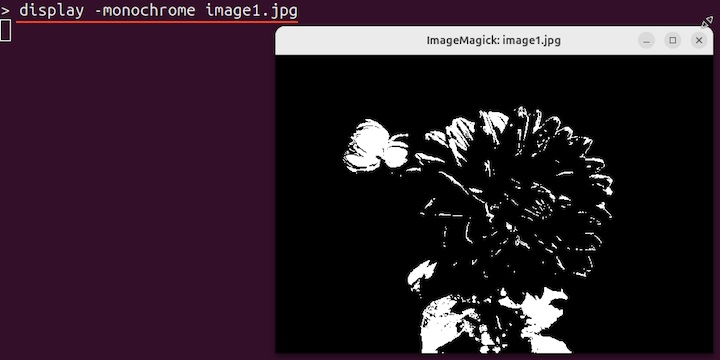
To display the image in the monochrome format, the -monochrome option is used −
display -monochrome image1.jpg
Display Image in Black & White
To display the image in black and white, use the -colorspace option −
display -colorspace Gray image1.jpg
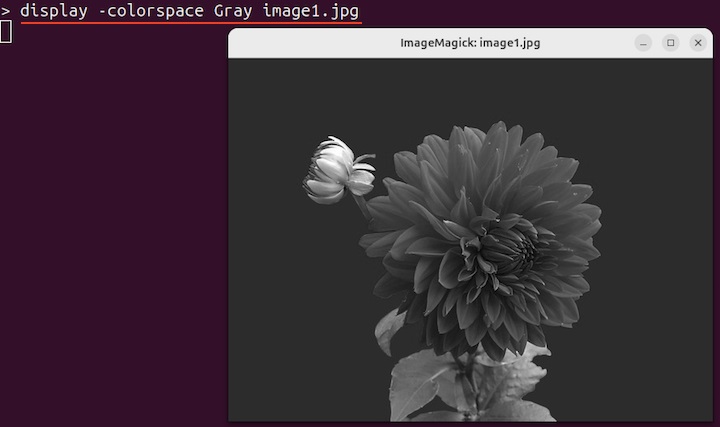
Other commonly used color-spaces options are, CMYK, HSL, sRGB, HSV, HSB, HSI, Lab, Log, or YCBCr.
Conclusion
The display command in Linux displays the image on the X server. It is a part of the ImageMagick tools suite. It comes with tons of option to modify the image and display it.
Note that the display command does not alter the original image. It applies the changes and displays them.
This tutorial covered the display command syntax, its options, and its usage with various examples.