
- Unix Commands Reference
- Unix Commands - Home
autoreconf Command in Linux
The autoreconf command is a vital tool in the Linux environment, especially for developers working with the Autotools suite. Autotools, which includes autoconf, automake, and other utilities, is used to make source code packages automatically buildable on Unix-like systems. The autoreconf command essentially serves as a wrapper script that runs autoconf (and autoheader, aclocal, automake, libtoolize if they are applicable) on all subdirectories that contain the configure.ac or configure.in files.
It's important to note that autoreconf is a powerful tool, and its misuse can lead to building system files that do not work correctly. Therefore, it is recommended to be familiar with the GNU Build System and the Autotools suite before using autoreconf.
Here's a comprehensive guide to explain how you can use the autoreconf command in Linux, complete with examples to illustrate its versatility.
Table of Contents
- Understanding autoreconf Command in Linux
- Installing autoreconf Command in Linux
- How to Use autoreconf Command in Linux?
- Configure a Project Using autoreconf Command
- Alternatives to autoreconf Command in Linux
Understanding autoreconf Command in Linux
Understanding and utilizing the options of autoreconf can significantly streamline the development process, ensuring that software builds are consistent and reproducible. Whether you are a seasoned developer or new to the Linux environment, mastering autoreconf is a step towards efficient software development practices.
The primary function of autoreconf is to run autoconf and other required tools like autoheader, aclocal, automake, autopoint (formerly gettextize), and libtoolize to update the GNU Build System files automatically. This is especially useful when you have made changes to the configure.ac or makefile.am files and need to regenerate the configure script and other build system files to reflect those changes.
Installing autoreconf Command in Linux
autoreconf is a handy tool that automatically regenerates configuration files used in building software projects. Here's how to install it on Linux. To install autoreconf, you typically need to have the Autotools suite installed on your system. Here's a step-by-step guide to installing autoreconf on a Linux system −
Step 1: Update Your Package Lists
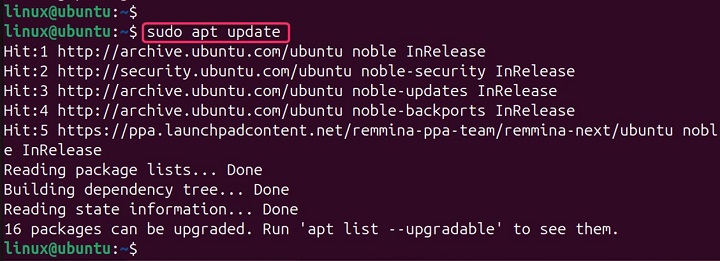
Before you install any new software, it is always a good idea to update your package lists. You can do this with the following command −
sudo apt update
Step 2: Install Autoconf
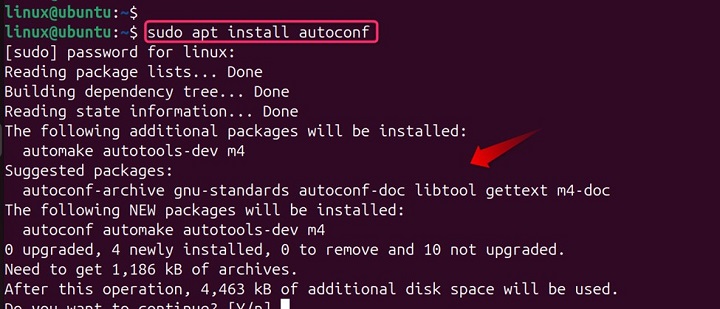
autoreconf is part of the autoconf tool. To install autoconf on Linux, use the below command −
sudo apt install autoconf
Step 3: Verify the Installation
After installation, you can verify that autoreconf is correctly installed by checking its version −
autoreconf --version

How to Use autoreconf Command in Linux?
The autoreconf command is a powerful component of the Autotools suite, providing developers with the capability to manage the build process of software across different platforms. It abstracts away the complexities of generating the necessary scripts and files for building and installing software, making it easier to distribute and share code.
Options and Usage
Some common options used with autoreconf are −
| Options | Description |
|---|---|
| -h, --help | Display the help message and exit. This option is useful when you need a quick reminder of the command’s syntax and options. |
| -V, --version | Show the version number of Autoconf and exit. This can be helpful to ensure that you are using the correct version for your project. |
| -v, --verbose | Verbosely report processing. This option will give you detailed output about what autoreconf is doing, which can be very useful for debugging purposes. |
| -d, --debug | Don't remove temporary files. Normally, autoreconf cleans up after itself, but with this option, you can keep the temporary files around for inspection. |
| -f, --force | Consider all files obsolete. This forces a rerun of all Autotools, regardless of the timestamps of the files. |
| -i, --install | Copy missing auxiliary files. This is particularly useful when you have a fresh checkout from a version control system and you need to populate the auxiliary build infrastructure. |
| --no-recursive | Don't recursively run on subdirectories. By default, autoreconf will run on all subdirectories, but this option limits it to the top-level directory. |
| -s, --symlink | With the -i option, this will install symbolic links instead of copies, which can save space and time if you are working with multiple checkouts of the same project. |
| -m, --make | When applicable, re-run ./configure && make. This option is a shortcut to rebuild the project from scratch using the newly generated configure script. |
The autoreconf command in Linux automates the regeneration of configuration files used during the build process of software projects. Here is a breakdown of some commonly used options −
Example 1: Basic Usage
By default, autoreconf re-runs various Autotools (like autoconf, automake, etc.) in the current directory and its subdirectories to regenerate configuration files −
autoreconf

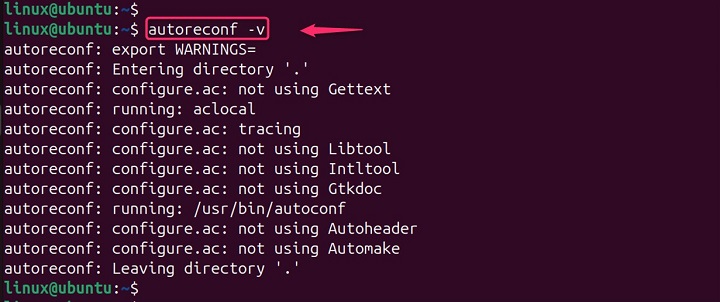
Example 2: Verbosity (-v or --verbose)
Provides detailed information about the processing steps involved.
autoreconf -v
Example 3: Forcing Regeneration (-f or --force)
Even if existing configuration files are up-to-date, it forces their regeneration.
autoreconf -f # Useful if you modified Autotool macro files

Example 4: Specifying Directories
You can specify directories (instead of the current directory) where autoreconf should operate −
autoreconf path/to/directory1 path/to/directory2
Example 5: Installing Auxiliary Files (-i or --install)
Copies missing auxiliary files (like configure) needed for the build process.
autoreconf -i # Useful if you're missing required files

Example 6: Creating Symbolic Links (-s or --symlink (used with -i))
Creates symbolic links to auxiliary files instead of copying them −
autoreconf -is # Saves disk space but requires manual link management

Example 7: Re-running make after Regeneration
-m or --make: After regenerating configuration files, attempts to run ./configure && make.
Note − This option requires that your project has a configure script and a Makefile at the top level. It might not always be successful depending on your project setup.
autoreconf -m # Convenient but might not work for all projects

Example 8: Specifying Include Paths
-B or --prepend-include=DIR: Adds the directory DIR to the search path for header files.
autoreconf -B/usr/local/include # Useful for custom header files

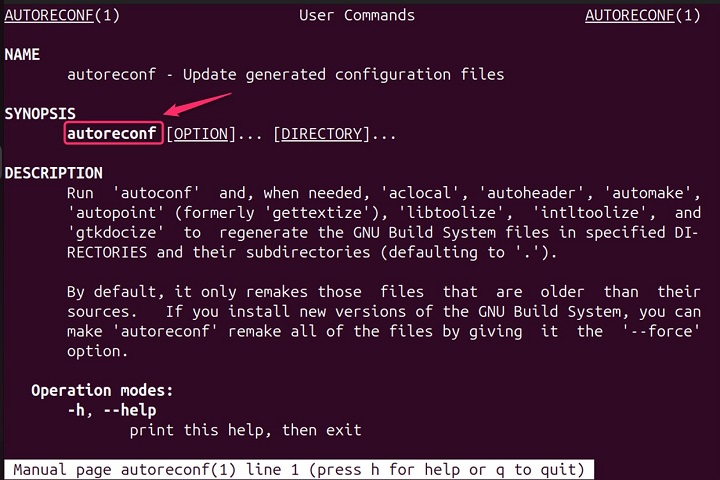
These are some of the common options for autoreconf. Refer to the autoreconf man page for a complete list and detailed descriptions −
man autoreconf
Configure a Project Using autoreconf Command
Here's a step-by-step example of how autoreconf might be used in a typical project −
Step 1: Create a directory and a C Program File
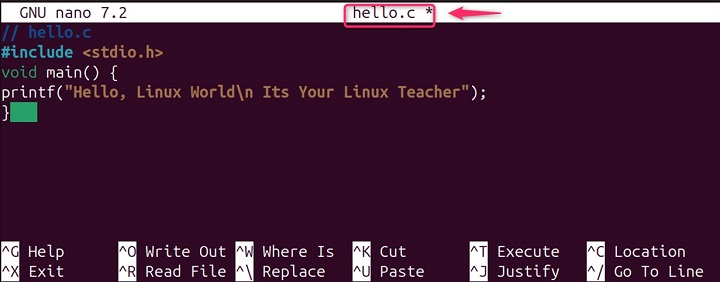
Firstly, you would create a directory for your project and write a simple "Hello, World" program in C. For instance, setting up the project −
sudo nano hello.c

Now, add a program in C language −
// hello.c
#include <stdio.h>
void main() {
   printf("Hello, Linux World\n Its Your Linux Teacher");
}
Step 2: Create a configure.ac File
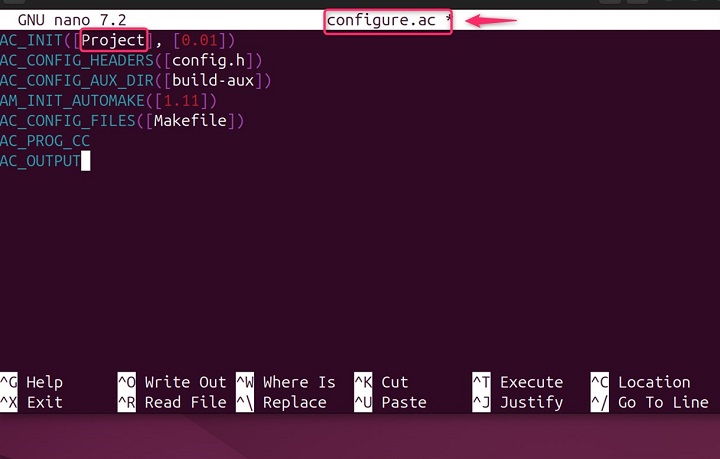
Next, you would create a configure.ac file, which is a key file that autoconf uses to generate the configure script. A simple configure.ac might look like this −
AC_INIT([Project], [0.01])
AC_CONFIG_HEADERS([config.h])
AC_CONFIG_AUX_DIR([build-aux])
AM_INIT_AUTOMAKE([1.11])
AC_CONFIG_FILES([Makefile])
AC_PROG_CC
AC_OUTPUT
Step 3: Create a Makefile.am File
Then, you would write a Makefile.am file, which automake uses to generate the Makefile.in template that will be processed by configure to produce the final Makefile.
bin_PROGRAMS = Project
hello_SOURCES = hello.c

Step 4: Run autoreconf
With these files in place, you can run autoreconf to generate the configure script and Makefile.in. You would typically use the -i option to copy missing auxiliary files and the -v option for verbose output −
sudo autoreconf -iv
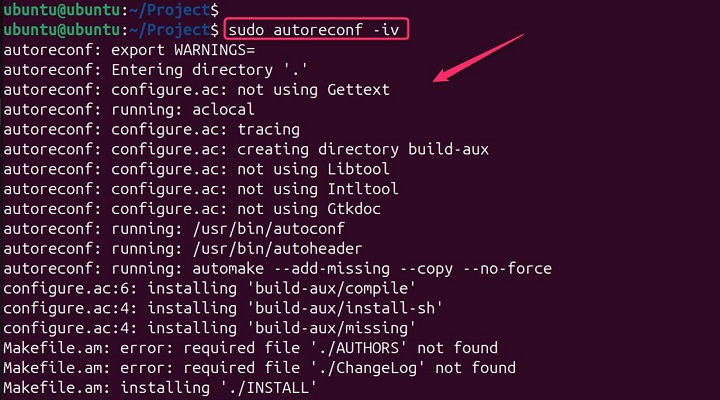
This generates the configure script and other necessary files. You may need to use the -i option to copy missing auxiliary files and the -f option to force the regeneration of all files.
Step 5: Run ./configure
After running autoreconf, you can run the configure script to adapt the software to your system −
sudo ./configure
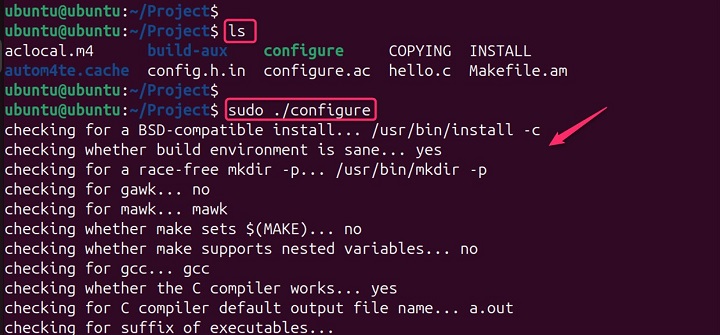
This configures the package for your system, creating a Makefile based on the system configuration and your Makefile.am.
Step 6: Building the Project
Finally, you would build the project using make −
make
This will compile the source code into an executable based on the instructions in the Makefile.
Step 7: Run the Executable
After successful compilation, you can run the generated executable to see the output. And if all goes well, you can then run your program −
./hello
This process demonstrates how autoreconf streamlines the preparation of software for building from source, handling many of the complexities involved in the process. It's a powerful tool that, when used correctly, can greatly simplify the distribution and installation of software across different Unix-like systems.
Remember, autoreconf is a tool that requires understanding of the build process and should be used with care, especially when dealing with complex projects.
Alternatives to autoreconf Command in Linux
Remember, autoreconf is just one part of the larger GNU Build System, and understanding how it interacts with other tools like autoconf, automake, and libtool is crucial for any developer working with Linux and UNIX-like systems.
Conclusion
The autoreconf command is a vital tool in the Linux environment, particularly for developers who work with software that needs to be compiled from a source. It is part of the GNU Autotools suite, a collection of programming tools designed to assist in making source code packages portable and buildable on a wide variety of UNIX-like systems.