- Matplotlib 基础
- Matplotlib - 首页
- Matplotlib - 简介
- Matplotlib - 与 Seaborn 的比较
- Matplotlib - 环境设置
- Matplotlib - Anaconda 发行版
- Matplotlib - Jupyter Notebook
- Matplotlib - Pyplot API
- Matplotlib - 简单绘图
- Matplotlib - 保存图形
- Matplotlib - 标记
- Matplotlib - 图形
- Matplotlib - 样式
- Matplotlib - 图例
- Matplotlib - 颜色
- Matplotlib - 颜色图
- Matplotlib - 颜色图归一化
- Matplotlib - 选择颜色图
- Matplotlib - 颜色条
- Matplotlib - 文本
- Matplotlib - 文本属性
- Matplotlib - 子图标题
- Matplotlib - 图像
- Matplotlib - 图像蒙版
- Matplotlib - 注释
- Matplotlib - 箭头
- Matplotlib - 字体
- Matplotlib - 什么是字体?
- 全局设置字体属性
- Matplotlib - 字体索引
- Matplotlib - 字体属性
- Matplotlib - 比例尺
- Matplotlib - 线性和对数比例尺
- Matplotlib - 对称对数和logit比例尺
- Matplotlib - LaTeX
- Matplotlib - 什么是LaTeX?
- Matplotlib - 用于数学表达式的LaTeX
- Matplotlib - 注释中的LaTeX文本格式
- Matplotlib - PostScript
- 启用注释中的LaTeX渲染
- Matplotlib - 数学表达式
- Matplotlib - 动画
- Matplotlib - 艺术家
- Matplotlib - 使用Cycler进行样式设置
- Matplotlib - 路径
- Matplotlib - 路径效果
- Matplotlib - 变换
- Matplotlib - 刻度和刻度标签
- Matplotlib - 弧度刻度
- Matplotlib - 日期刻度
- Matplotlib - 刻度格式化器
- Matplotlib - 刻度定位器
- Matplotlib - 基本单位
- Matplotlib - 自动缩放
- Matplotlib - 反转坐标轴
- Matplotlib - 对数坐标轴
- Matplotlib - Symlog
- Matplotlib - 单位处理
- Matplotlib - 带单位的椭圆
- Matplotlib - 脊柱
- Matplotlib - 坐标轴范围
- Matplotlib - 坐标轴比例尺
- Matplotlib - 坐标轴刻度
- Matplotlib - 格式化坐标轴
- Matplotlib - Axes 类
- Matplotlib - 双坐标轴
- Matplotlib - Figure 类
- Matplotlib - 多图
- Matplotlib - 网格
- Matplotlib - 面向对象接口
- Matplotlib - PyLab 模块
- Matplotlib - subplots() 函数
- Matplotlib - subplot2grid() 函数
- Matplotlib - 锚定艺术家
- Matplotlib - 手动等高线
- Matplotlib - 坐标报告
- Matplotlib - AGG 过滤器
- Matplotlib - 矩形框
- Matplotlib - 填充螺旋线
- Matplotlib - findobj 演示
- Matplotlib - 超链接
- Matplotlib - 图像缩略图
- Matplotlib - 使用关键字绘图
- Matplotlib - 创建徽标
- Matplotlib - 多页 PDF
- Matplotlib - 多进程
- Matplotlib - 打印标准输出
- Matplotlib - 复合路径
- Matplotlib - Sankey 类
- Matplotlib - 带 EEG 的 MRI
- Matplotlib - 样式表
- Matplotlib - 背景颜色
- Matplotlib - Basemap
- Matplotlib 事件处理
- Matplotlib - 事件处理
- Matplotlib - 关闭事件
- Matplotlib - 鼠标移动
- Matplotlib - 点击事件
- Matplotlib - 滚动事件
- Matplotlib - 按键事件
- Matplotlib - 选择事件
- Matplotlib - 透视镜
- Matplotlib - 路径编辑器
- Matplotlib - 多边形编辑器
- Matplotlib - 定时器
- Matplotlib - viewlims
- Matplotlib - 缩放窗口
- Matplotlib 部件
- Matplotlib - 游标部件
- Matplotlib - 带注释的游标
- Matplotlib - 按钮部件
- Matplotlib - 复选框
- Matplotlib - 套索选择器
- Matplotlib - 菜单部件
- Matplotlib - 鼠标光标
- Matplotlib - 多光标
- Matplotlib - 多边形选择器
- Matplotlib - 单选按钮
- Matplotlib - RangeSlider
- Matplotlib - 矩形选择器
- Matplotlib - 椭圆选择器
- Matplotlib - 滑块部件
- Matplotlib - Span Selector
- Matplotlib - 文本框
- Matplotlib 绘图
- Matplotlib - 条形图
- Matplotlib - 直方图
- Matplotlib - 饼图
- Matplotlib - 散点图
- Matplotlib - 箱线图
- Matplotlib - 小提琴图
- Matplotlib - 等高线图
- Matplotlib - 3D 绘图
- Matplotlib - 3D 等高线
- Matplotlib - 3D 线框图
- Matplotlib - 3D 曲面图
- Matplotlib - Quiver 图
- Matplotlib 有用资源
- Matplotlib - 快速指南
- Matplotlib - 有用资源
- Matplotlib - 讨论
Matplotlib - 按钮部件
什么是按钮部件?
在 Matplotlib 库中,按钮部件允许在绘图或图形中创建交互式按钮。单击这些按钮可以触发特定操作或函数,为用户提供了一种直观的方式来控制绘图元素或执行操作,而无需编写额外的代码。
按钮部件的关键方面
交互式界面 - 按钮通过增强用户探索数据的交互性,在绘图中提供用户友好的界面。
函数触发 - 每个按钮都与一个特定函数或操作相关联,该函数或操作在单击按钮时执行。
自定义 - 可以根据特定应用程序的需求自定义按钮的外观、位置、标签和功能。
Matplotlib 库中的Button部件位于matplotlib.widgets模块中。这允许用户将交互式按钮直接集成到他们的绘图中。这些按钮可以通过提供一种向可视化添加交互性和控制的方法,在单击时触发特定操作或函数。
按钮部件的基本用法
以下是如何在 Matplotlib 库中使用 Button 部件的细分,让我们逐一看看。
导入必要的库
要在 Matplotlib 中使用 Button 部件,我们需要从 Matplotlib 导入必要的模块。以下是导入处理按钮部件所需库的方法。
import matplotlib.pyplot as plt
from matplotlib.widgets import Button
其中,
matplotlib.pyplot - 此模块在 Matplotlib 中提供类似 MATLAB 的绘图框架。它通常作为plt导入,并提供创建图形、坐标轴、绘图和绘图中部件的函数。
matplotlib.widgets.Button - Button 类是matplotlib.widgets模块的一部分,该模块包含各种交互式部件,例如按钮。从这个模块导入 Button 允许我们在我们的绘图中创建和自定义按钮。
导入这些库后,我们就可以根据需要在 Matplotlib 绘图中创建按钮并定义其功能。Button 部件集成到绘图中后,为触发用户交互时特定操作或函数的交互式元素提供了支持。
创建图形和坐标轴
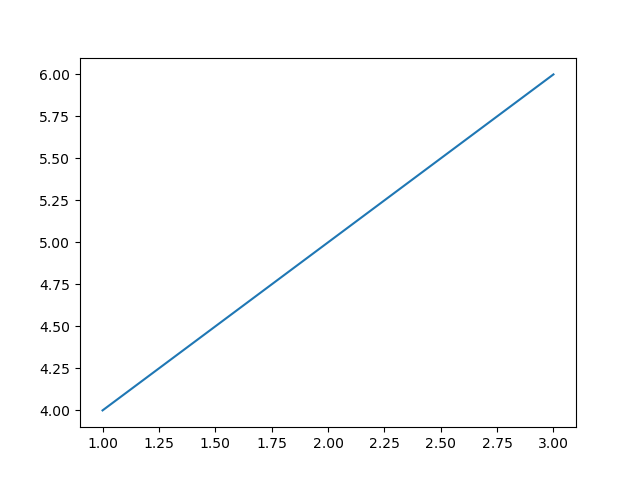
在 Matplotlib 中创建图形和坐标轴涉及设置画布(图形)和绘图区域(坐标轴),可视化内容将在其中显示。以下是创建图形和坐标轴的示例。
示例
import matplotlib.pyplot as plt
# Create a figure and axes
fig, ax = plt.subplots()
# Plotting on the axes
ax.plot([1, 2, 3], [4, 5, 6])
# Show the plot
plt.show()
输出

定义按钮点击的功能
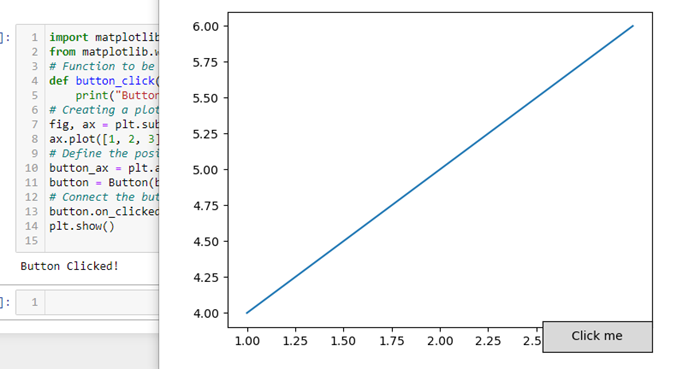
为 Matplotlib 中的按钮定义功能涉及创建一个函数,该函数指定单击按钮时要执行的操作。以下是为按钮点击定义功能的示例。
示例
import matplotlib.pyplot as plt
from matplotlib.widgets import Button
# Function to be triggered by the button click
def button_click(event):
   print("Button Clicked!")  # Perform actions or call functions here
# Creating a plot
fig, ax = plt.subplots()
ax.plot([1, 2, 3], [4, 5, 6])
# Define the position and dimensions of the button
button_ax = plt.axes([0.7, 0.05, 0.2, 0.075])  # [left, bottom, width, height]
button = Button(button_ax, 'Click me')  # Create a button object
# Connect the button's click event to the function
button.on_clicked(button_click)
plt.show()
输出

创建按钮
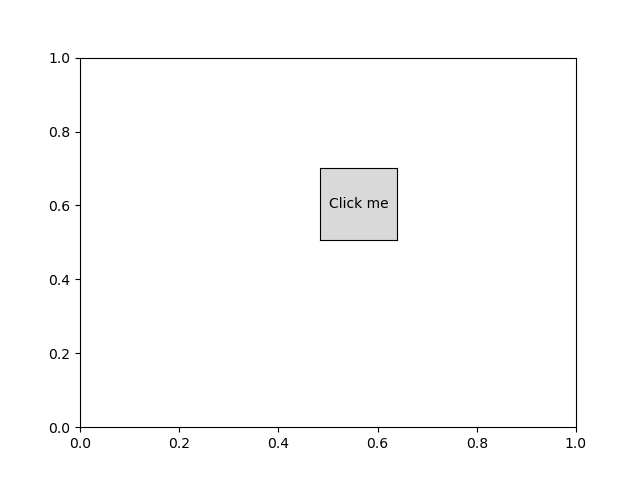
通过使用matplotlib.widgets模块中的Button类,创建一个按钮对象并定义其在绘图中的位置和尺寸。这是一个演示如何创建按钮的示例。
示例
import matplotlib.pyplot as plt
from matplotlib.widgets import Button
# Function to be triggered by the button click
def button_click(event):
   print("Button Clicked!")  # Perform actions or call functions here
# Creating a figure and axes
fig, ax = plt.subplots()
# Define the position and dimensions of the button
button_ax = plt.axes([0.5, 0.5, 0.12, 0.15])  # [left, bottom, width, height]
# Create a button object
button = Button(button_ax, 'Click me')  # 'Click me' is the text displayed on the button
# Connect the button's click event to the function
button.on_clicked(button_click)
# Show the plot
plt.show()
输出

现在,当我们运行此代码并显示绘图时,我们将看到一个标有“Click me”的按钮。单击此按钮将触发button_click函数,并将“Button Clicked!”打印到控制台。我们可以根据我们的具体需求自定义`button_click`函数以执行不同的操作。
连接按钮点击事件
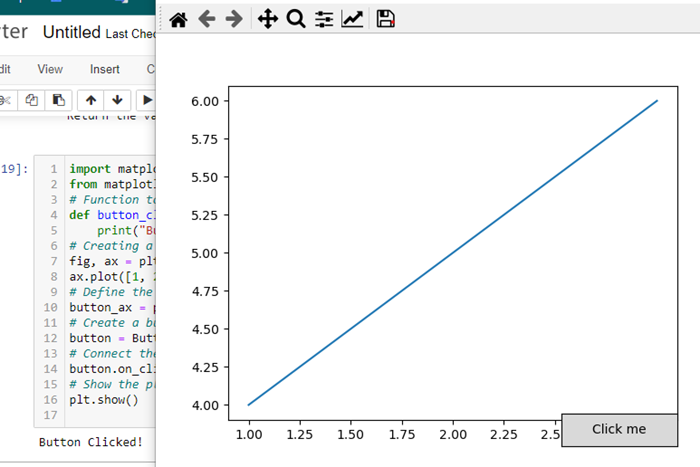
将按钮的点击事件连接到函数涉及使用 Matplotlib 中 Button 部件提供的on_clicked方法。这是一个演示如何将按钮的点击事件连接到函数的示例。
示例
import matplotlib.pyplot as plt
from matplotlib.widgets import Button
# Function to be triggered by the button click
def button_click(event):
   print("Button Clicked!")  # Perform actions or call functions here
# Creating a figure and axes
fig, ax = plt.subplots()
ax.plot([1, 2, 3], [4, 5, 6])
# Define the position and dimensions of the button
button_ax = plt.axes([0.7, 0.05, 0.2, 0.075])  # [left, bottom, width, height]
# Create a button object
button = Button(button_ax, 'Click me')  # 'Click me' is the text displayed on the button
# Connect the button's click event to the function
button.on_clicked(button_click)
# Show the plot
plt.show()
输出

自定义和功能
位置和大小 - 使用 [left, bottom, width, height] 坐标调整按钮的位置和大小。
按钮文本 - 指定按钮上显示的文本。
按钮操作 - 定义单击按钮时执行的函数。这可以包括诸如更新绘图、计算新数据或触发其他事件等操作。
Button部件通过允许用户直接从绘图界面触发操作或函数,在 Matplotlib 绘图中提供了一个交互式元素。它对于控制各种功能或执行与可视化相关的特定任务非常有用。