
- Selenium 教程
- Selenium - 首页
- Selenium - 概述
- Selenium - 组件
- Selenium - 自动化测试
- Selenium - 环境设置
- Selenium - 远程控制
- Selenium IDE 教程
- Selenium - IDE 简介
- Selenium - 特性
- Selenium - 限制
- Selenium - 安装
- Selenium - 创建测试
- Selenium - 创建脚本
- Selenium - 控制流
- Selenium - 存储变量
- Selenium - 警报和弹出窗口
- Selenium - Selenese 命令
- Selenium - Actions 命令
- Selenium - Accessors 命令
- Selenium - Assertions 命令
- Selenium - Assert/Verify 方法
- Selenium - 定位策略
- Selenium - 脚本调试
- Selenium - 验证点
- Selenium - 模式匹配
- Selenium - JSON 数据文件
- Selenium - 浏览器执行
- Selenium - 用户扩展
- Selenium - 代码导出
- Selenium - 代码输出
- Selenium - JavaScript 函数
- Selenium - 插件
- Selenium WebDriver 教程
- Selenium - 简介
- Selenium WebDriver vs RC
- Selenium - 安装
- Selenium - 第一个测试脚本
- Selenium - 驱动程序会话
- Selenium - 浏览器选项
- Selenium - Chrome 选项
- Selenium - Edge 选项
- Selenium - Firefox 选项
- Selenium - Safari 选项
- Selenium - 双击
- Selenium - 右键单击
- Python 中的 HTML 报告
- 处理编辑框
- Selenium - 单个元素
- Selenium - 多个元素
- Selenium Web 元素
- Selenium - 文件上传
- Selenium - 定位策略
- Selenium - 相对定位器
- Selenium - 查找器
- Selenium - 查找所有链接
- Selenium - 用户交互
- Selenium - WebElement 命令
- Selenium - 浏览器交互
- Selenium - 浏览器命令
- Selenium - 浏览器导航
- Selenium - 警报和弹出窗口
- Selenium - 处理表单
- Selenium - 窗口和标签页
- Selenium - 处理链接
- Selenium - 输入框
- Selenium - 单选按钮
- Selenium - 复选框
- Selenium - 下拉框
- Selenium - 处理 iframe
- Selenium - 处理 Cookie
- Selenium - 日期时间选择器
- Selenium - 动态 Web 表格
- Selenium - Actions 类
- Selenium - Action 类
- Selenium - 键盘事件
- Selenium - 按键上/下
- Selenium - 复制和粘贴
- Selenium - 处理特殊按键
- Selenium - 鼠标事件
- Selenium - 拖放
- Selenium - 笔事件
- Selenium - 滚动操作
- Selenium - 等待策略
- Selenium - 显式/隐式等待
- Selenium - 支持特性
- Selenium - 多选
- Selenium - 等待支持
- Selenium - 选择支持
- Selenium - 颜色支持
- Selenium - ThreadGuard
- Selenium - 错误和日志记录
- Selenium - 异常处理
- Selenium - 其他
- Selenium - 处理 Ajax 调用
- Selenium - JSON 数据文件
- Selenium - CSV 数据文件
- Selenium - Excel 数据文件
- Selenium - 跨浏览器测试
- Selenium - 多浏览器测试
- Selenium - 多窗口测试
- Selenium - JavaScript 执行器
- Selenium - 无头执行
- Selenium - 捕获屏幕截图
- Selenium - 捕获视频
- Selenium - 页面对象模型
- Selenium - 页面工厂
- Selenium - 录制和回放
- Selenium - 框架
- Selenium - 浏览上下文
- Selenium - DevTools
- Selenium Grid 教程
- Selenium - 概述
- Selenium - 架构
- Selenium - 组件
- Selenium - 配置
- Selenium - 创建测试脚本
- Selenium - 测试执行
- Selenium - 端点
- Selenium - 自定义节点
- Selenium 报告工具
- Selenium - 报告工具
- Selenium - TestNG
- Selenium - JUnit
- Selenium - Allure
- Selenium & 其他技术
- Selenium - Java 教程
- Selenium - Python 教程
- Selenium - C# 教程
- Selenium - Javascript 教程
- Selenium - Kotlin 教程
- Selenium - Ruby 教程
- Selenium - Maven 和 Jenkins
- Selenium - 数据库测试
- Selenium - LogExpert 日志记录
- Selenium - Log4j 日志记录
- Selenium - Robot Framework
- Selenium - AutoIT
- Selenium - Flash 测试
- Selenium - Apache Ant
- Selenium - Github 教程
- Selenium - SoapUI
- Selenium - Cucumber
- Selenium - IntelliJ
- Selenium - XPath
- Selenium 其他概念
- Selenium - IE 驱动程序
- Selenium - 自动化框架
- Selenium - 基于关键字的框架
- Selenium - 数据驱动框架
- Selenium - 混合驱动框架
- Selenium - SSL 证书错误
- Selenium - 替代方案
- Selenium 有用资源
- Selenium - 问答
- Selenium - 快速指南
- Selenium - 有用资源
- Selenium - 自动化实践
- Selenium - 讨论
Selenium IDE - 存储变量
Selenium 集成开发环境 (IDE) 可用于在创建自动化测试时存储和访问变量。为了存储和访问变量,我们可以在 Selenium IDE 中使用 **store** 命令及其相关命令。我们使用 **echo** 命令在 Selenium IDE 的“日志”选项卡中打印变量的存储值。我们还可以访问网页上的元素并使用 **store Text** 命令获取其文本,并使用 **store Value** 命令获取元素的值。
示例
让我们来看一下下面的页面示例,我们将在 **First Name:** 标签旁边输入文本 **Selenium**,在 **Last Name:** 标签旁边输入文本 **Tutorialspoint**。此外,我们将使用 Selenium IDE 和其变量存储功能获取文本 **Selenium - Automation Practice Form**。
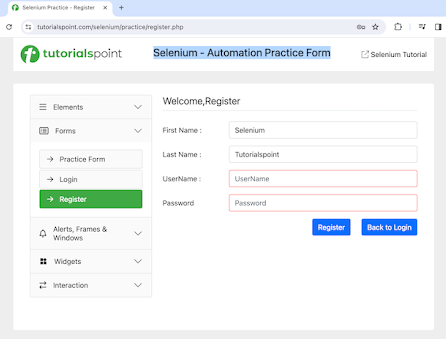
在 Selenium IDE 中存储和访问变量
在 Selenium IDE 中存储和访问变量的步骤如下所示:
**步骤 1** - 点击安装后在浏览器上显示的 Selenium IDE 扩展。
**步骤 2** - Selenium IDE 应该启动,并显示包含工具版本的欢迎消息。在下图中,安装的版本为 3.17.2。
此外,它还提供了一些选项,例如在新项目中录制新测试、打开现有项目、创建新项目和关闭 Selenium IDE。
此外,还提供了一个带有文本“Selenium IDE 项目页面”的链接,点击该链接后,将跳转到 Selenium 集成开发环境的文档页面。
https://selenium.net.cn/selenium-ide/
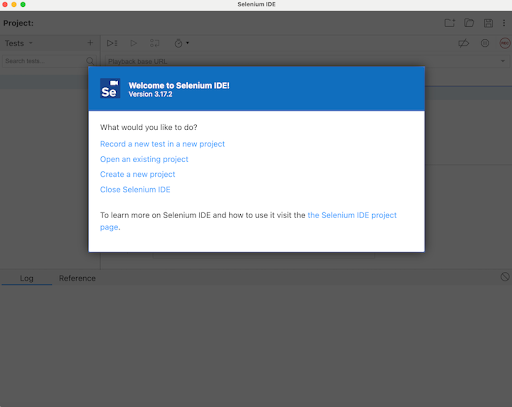
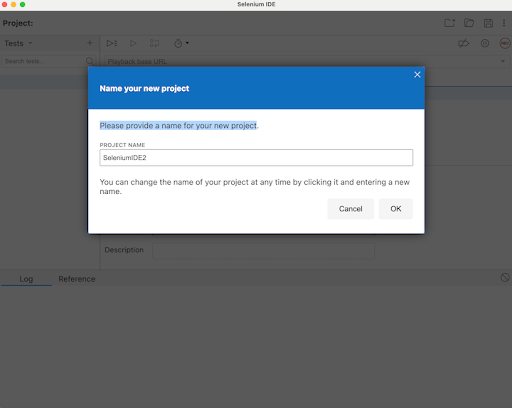
**步骤 3** - 点击“创建新项目”链接,然后在“请为您的新项目提供一个名称”下输入项目名称。最后,点击“确定”。
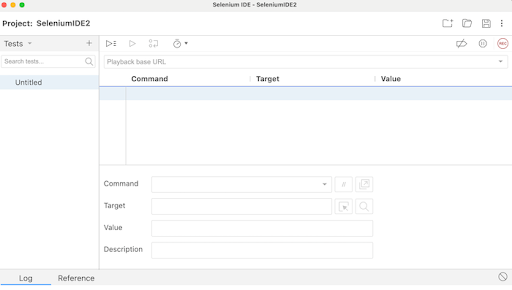
**步骤 4** - 我们将在 Selenium IDE 中准备好工作区,如下图所示。
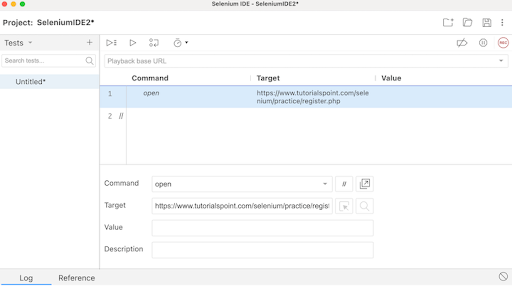
**步骤 5** - 在“命令”字段中输入 open,在“目标”字段中输入 https://tutorialspoint.com/selenium/,以启动应用程序。
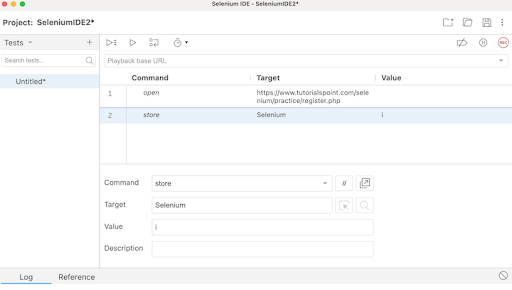
**步骤 6** - 在“命令”字段中输入 store,在“目标”字段中输入 Selenium,在“值”字段中输入 i。请注意,Selenium 是我们想使用变量 i 输入的值。
**步骤 7** - 在“命令”字段中输入 type,在“目标”字段中输入 id=firstname,在“值”字段中输入 ${i}。请注意,id=firstname 是输入框的定位器值,${i} 用于引用我们想使用变量 i 输入的值。
**步骤 8** - 在“命令”字段中输入 store,在“目标”字段中输入 Tutorialspoint,在“值”字段中输入 j。请注意,Tutorialspoint 是我们想使用变量 j 输入的值。
**步骤 9** - 在“命令”字段中输入 type,在“目标”字段中输入 id=lastname,在“值”字段中输入 ${j}。请注意,id=lastname 是输入框的定位器值,${j} 用于引用我们想使用变量 j 输入的值。
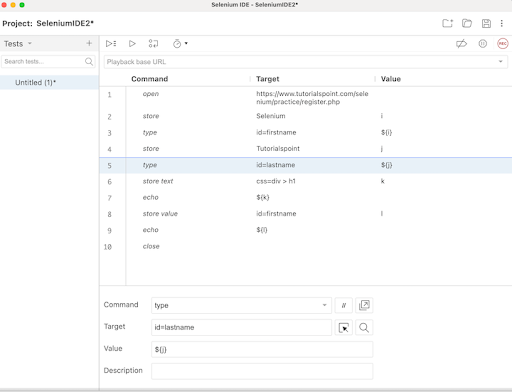
**步骤 10** - 在“命令”字段中输入 store Text,在“目标”字段中输入 css=div > h1,在“值”字段中输入 k。请注意,css=div > h1 是我们将获取的文本的定位器值,k 用于引用我们将存储获取文本的变量值。
**步骤 11** - 在“命令”字段中输入 echo,在“目标”字段中输入 ${k}。请注意,这将在 Selenium IDE 的“日志”中打印我们在步骤 10 中访问的网页文本。
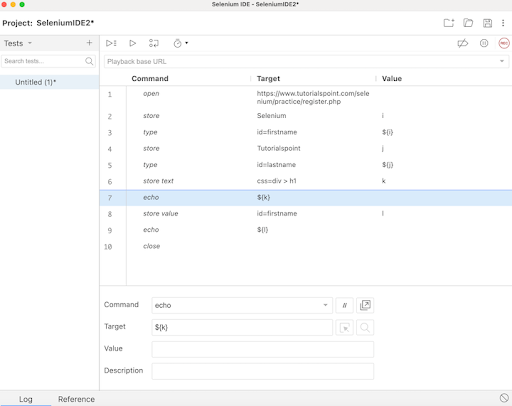
**步骤 12** - 在“命令”字段中输入 store value,在“目标”字段中输入 id=firstname,在“值”字段中输入 l。请注意,id=firstname 是输入框的定位器值,l 用于引用我们将用来获取输入框中输入值的变量。
**步骤 13** - 在“命令”字段中输入 echo,在“目标”字段中输入 ${l}。请注意,这将在 Selenium IDE 的“日志”中打印在步骤 7 中输入的值。
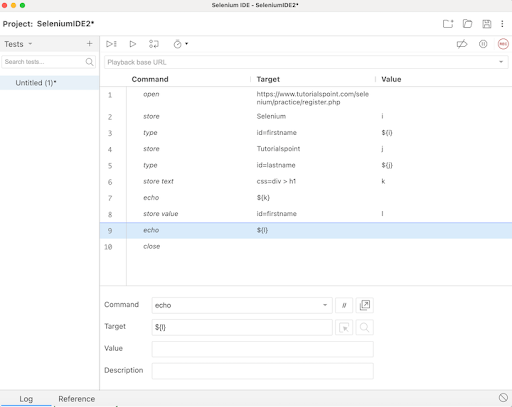
**步骤 14** - 在“命令”字段中输入 close 以关闭浏览器窗口。
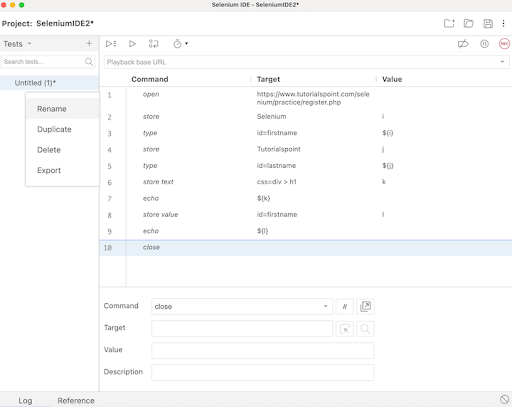
**步骤 15** - 点击左窗格中显示的三个点,然后选择“重命名”选项。
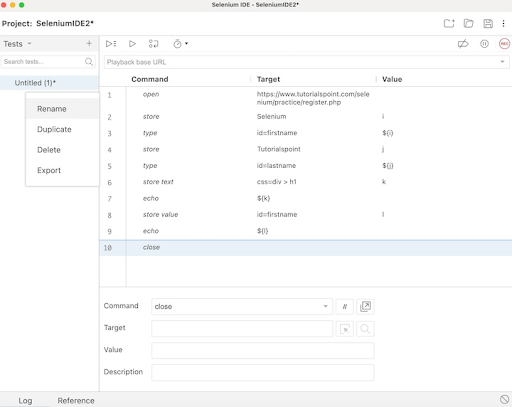
**步骤 16** - 在“重命名测试用例”字段中输入一个名称,例如 TestCase2,然后点击“重命名”。输入的名称将显示在 Selenium IDE 的左侧。
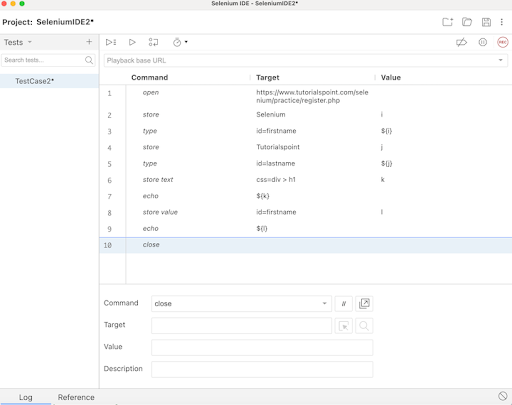
**步骤 17** - 点击顶部的“运行所有测试”,然后等待测试执行完成。在我们的示例中,我们将看到“运行:1”、“失败:0”和一个绿条,表示测试成功运行且没有任何失败。此外,“日志”下还会显示消息“TestCase2 成功完成”。
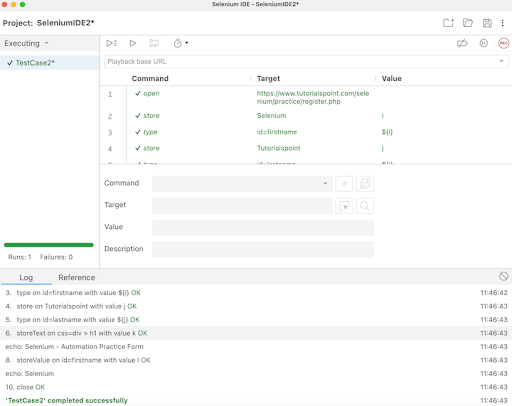
在上例中,我们获取了网页上显示的文本 **Selenium - Automation Practice Form**,并在“日志”中检索了在 **First Name:** 标签旁边的输入框中输入的值 **Selenium**。此外,我们在测试用例名称 **TestCase2** 旁边获得了绿色的勾号,表示测试通过。
除此之外,所有测试步骤以及测试用例名称都变为绿色,反映所有步骤都 PASS 了。日志选项卡下反映的所有步骤都显示为绿色的 OK。
因此,在 Selenium IDE 中,我们将获得测试结果的步骤级信息,并且只有在所有步骤都成功执行后,我们才能在测试用例级别获得 PASS。
此外,我们可以推断,在一个步骤中使用的变量可以使用语法`${<变量名>}`在后续步骤中访问。在步骤6、7、8、9、10、11、12和13中,我们在测试中采用了这种方法。此外,我们还使用了store和与store相关的命令,例如store Text、store Value等来存储变量。echo命令用于在“日志”选项卡下打印这些值。
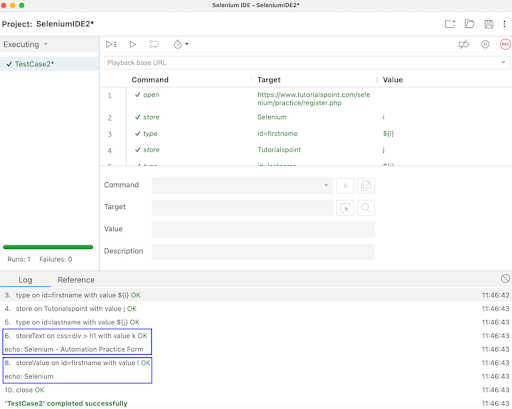
因此,在本教程中,我们讨论了如何使用Selenium IDE存储变量。
