
- Selenium 教程
- Selenium - 首页
- Selenium - 概述
- Selenium - 组件
- Selenium - 自动化测试
- Selenium - 环境设置
- Selenium - 远程控制
- Selenium IDE 教程
- Selenium - IDE 简介
- Selenium - 特性
- Selenium - 限制
- Selenium - 安装
- Selenium - 创建测试
- Selenium - 创建脚本
- Selenium - 控制流
- Selenium - 存储变量
- Selenium - 警报和弹出窗口
- Selenium - Selenese 命令
- Selenium - 操作命令
- Selenium - 访问器命令
- Selenium - 断言命令
- Selenium - Assert/Verify 方法
- Selenium - 定位策略
- Selenium - 脚本调试
- Selenium - 验证点
- Selenium - 模式匹配
- Selenium - JSON 数据文件
- Selenium - 浏览器执行
- Selenium - 用户扩展
- Selenium - 代码导出
- Selenium - 代码输出
- Selenium - JavaScript 函数
- Selenium - 插件
- Selenium WebDriver 教程
- Selenium - 简介
- Selenium WebDriver vs RC
- Selenium - 安装
- Selenium - 第一个测试脚本
- Selenium - 驱动程序会话
- Selenium - 浏览器选项
- Selenium - Chrome 选项
- Selenium - Edge 选项
- Selenium - Firefox 选项
- Selenium - Safari 选项
- Selenium - 双击
- Selenium - 右键单击
- Python 中的 HTML 报告
- 处理编辑框
- Selenium - 单个元素
- Selenium - 多个元素
- Selenium Web 元素
- Selenium - 文件上传
- Selenium - 定位器策略
- Selenium - 相对定位器
- Selenium - 查找器
- Selenium - 查找所有链接
- Selenium - 用户交互
- Selenium - WebElement 命令
- Selenium - 浏览器交互
- Selenium - 浏览器命令
- Selenium - 浏览器导航
- Selenium - 警报和弹出窗口
- Selenium - 处理表单
- Selenium - 窗口和标签页
- Selenium - 处理链接
- Selenium - 输入框
- Selenium - 单选按钮
- Selenium - 复选框
- Selenium - 下拉框
- Selenium - 处理 Iframe
- Selenium - 处理 Cookie
- Selenium - 日期时间选择器
- Selenium - 动态 Web 表格
- Selenium - Actions 类
- Selenium - Action 类
- Selenium - 键盘事件
- Selenium - 键上/下
- Selenium - 复制和粘贴
- Selenium - 处理特殊键
- Selenium - 鼠标事件
- Selenium - 拖放
- Selenium - 笔事件
- Selenium - 滚动操作
- Selenium - 等待策略
- Selenium - 显式/隐式等待
- Selenium - 支持功能
- Selenium - 多选
- Selenium - 等待支持
- Selenium - 选择支持
- Selenium - 颜色支持
- Selenium - ThreadGuard
- Selenium - 错误和日志记录
- Selenium - 异常处理
- Selenium - 杂项
- Selenium - 处理 Ajax 调用
- Selenium - JSON 数据文件
- Selenium - CSV 数据文件
- Selenium - Excel 数据文件
- Selenium - 跨浏览器测试
- Selenium - 多浏览器测试
- Selenium - 多窗口测试
- Selenium - JavaScript 执行器
- Selenium - 无头执行
- Selenium - 捕获屏幕截图
- Selenium - 捕获视频
- Selenium - 页面对象模型
- Selenium - 页面工厂
- Selenium - 记录和回放
- Selenium - 框架
- Selenium - 浏览上下文
- Selenium - DevTools
- Selenium Grid 教程
- Selenium - 概述
- Selenium - 架构
- Selenium - 组件
- Selenium - 配置
- Selenium - 创建测试脚本
- Selenium - 测试执行
- Selenium - 端点
- Selenium - 自定义节点
- Selenium 报告工具
- Selenium - 报告工具
- Selenium - TestNG
- Selenium - JUnit
- Selenium - Allure
- Selenium 及其他技术
- Selenium - Java 教程
- Selenium - Python 教程
- Selenium - C# 教程
- Selenium - Javascript 教程
- Selenium - Kotlin 教程
- Selenium - Ruby 教程
- Selenium - Maven 和 Jenkins
- Selenium - 数据库测试
- Selenium - LogExpert 日志记录
- Selenium - Log4j 日志记录
- Selenium - Robot Framework
- Selenium - AutoIT
- Selenium - Flash 测试
- Selenium - Apache Ant
- Selenium - Github 教程
- Selenium - SoapUI
- Selenium - Cucumber
- Selenium - IntelliJ
- Selenium - XPath
Selenium 与 Ruby 教程
Selenium 可以与多种语言一起使用,例如 Java、Python、Kotlin、JavaScript、Ruby 等。Selenium 广泛用于 Web 自动化测试。Selenium 是一款开源且可移植的自动化软件测试工具,用于测试 Web 应用程序。它能够跨不同的浏览器和操作系统运行。Selenium 不仅仅是一个工具,而是一套工具,帮助测试人员更有效地自动化基于 Web 的应用程序。
从 Selenium 4 版本开始,整个架构完全兼容 W3C - 万维网联盟,这意味着 Selenium 4 遵循 W3C 提供的所有标准和指南。
如何使用 Ruby 设置 Selenium?
步骤 1 - 使用以下链接在本地系统中下载并安装 Ruby:
https://ruby-lang.cn/en/downloads/.
通过运行以下命令确认已安装的 Ruby 版本:
ruby -v
执行的命令输出将表示系统中安装的 Ruby 版本。
步骤 2 - 从以下链接下载并安装 Ruby 代码编辑器 RubyMine 以编写和运行 Selenium 测试:
https://www.jetbrains.com/ruby/download.
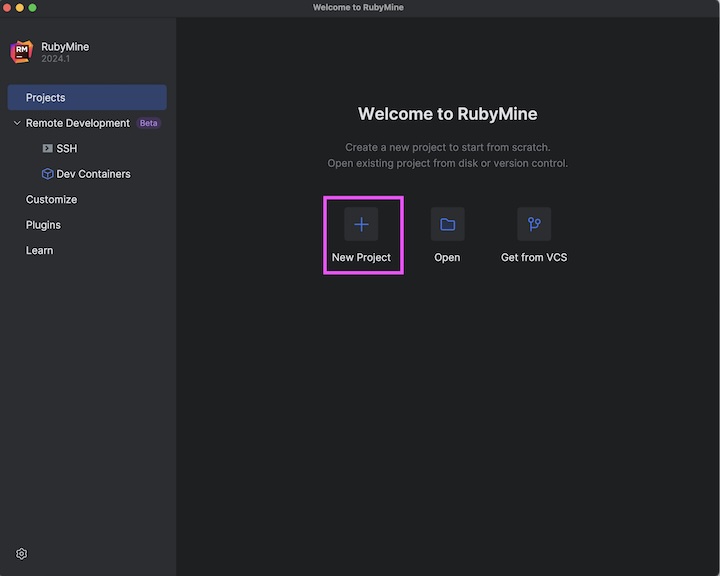
步骤 3 - 启动 RubyMine 并单击“新建项目”按钮。
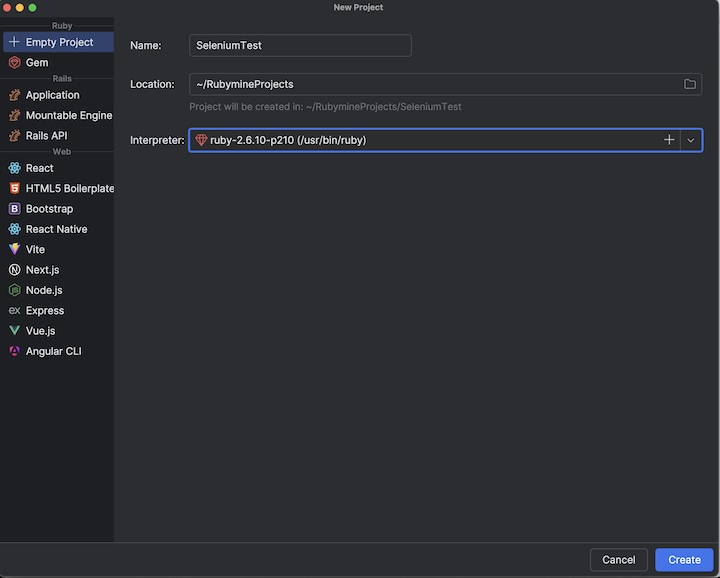
步骤 4 - 输入项目名称,例如 SeleniumTest,选择 Ruby 解释器,然后单击“创建”按钮。
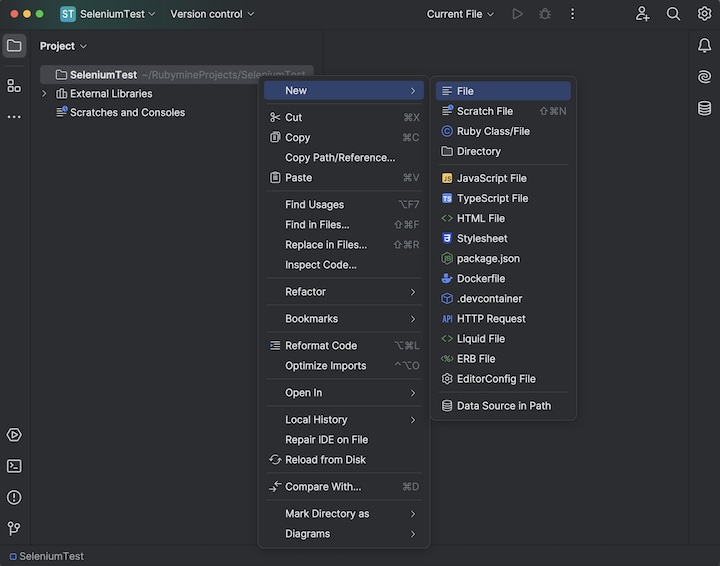
步骤 5 - 右键单击 SeleniumTest 项目,单击“新建”选项,然后单击“文件”选项。
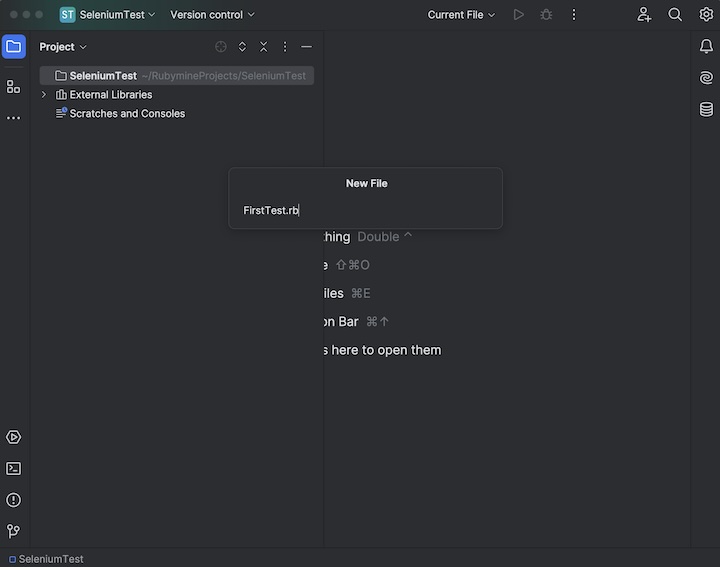
步骤 6 - 在“新建文件”字段中输入文件名,例如 FirstTest.rb,然后按 Enter 键。
步骤 7 - 通过在 FirstTest.rb 文件中添加以下代码段确认 Ruby 解释器是否已正确配置:
puts 'Tutorialspoint'
步骤 8 - 通过右键单击并选择“运行 FirstTest”选项来运行代码。
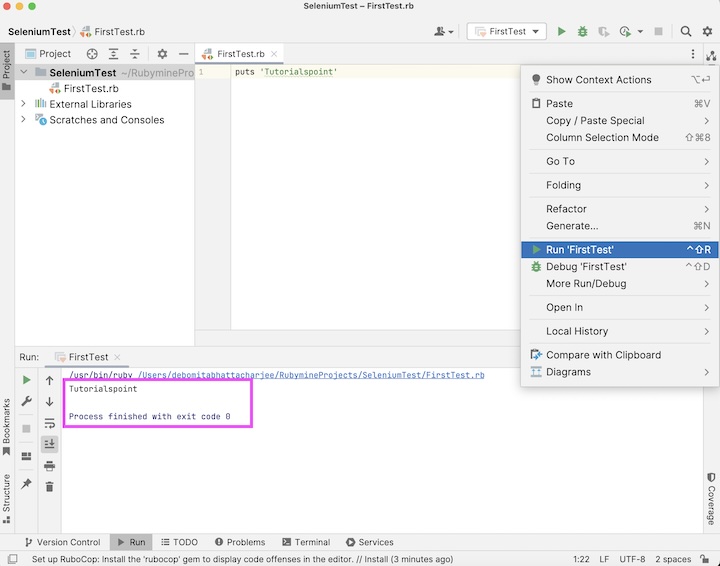
它将显示以下输出:
Tutorialspoint

Process finished with exit code 0
在上面的示例中,消息“Tutorialspoint”已捕获到控制台中,并且收到了消息“进程已退出,退出代码为 0”,表示代码已成功执行。
步骤 9 - 要安装 Selenium,请从终端运行以下命令:
gem install selenium-webdriver
步骤 10 - 在 FirstTest.rb 文件中添加以下代码。
require 'selenium-webdriver'

# Initiate Webdriver
driver = Selenium::WebDriver.for :edge

# adding implicit wait of 15 seconds
driver.manage.timeouts.implicit_wait = 15

# launch an application
driver.get 'https://tutorialspoint.com/selenium/practice/text-box.php'

# get page title
puts 'Page Title: ' + driver.title
它将显示以下输出:
Page title: Selenium Practice - Text Box

Process finished with exit code 0
在上面的示例中,我们首先启动了 Edge 浏览器并打开了一个应用程序,然后检索了浏览器标题并在控制台中显示消息“页面标题:Selenium 实践 - 文本框”。此外,Chrome 浏览器启动时在顶部显示消息“Edge 正在受自动化测试软件控制”。
最后,收到了消息“进程已退出,退出代码为 0”,表示代码已成功执行。
使用 Selenium Ruby 启动浏览器并退出驱动程序
我们可以使用 get 方法启动浏览器并打开应用程序,最后使用 quit 方法退出浏览器。
代码实现
require 'selenium-webdriver'

# Initiate Webdriver
driver = Selenium::WebDriver.for :edge

# adding implicit wait of 15 seconds
driver.manage.timeouts.implicit_wait = 15

# launch an application
driver.get 'https://tutorialspoint.com/selenium/practice/selenium_automation_practice.php'

# get page title
puts 'Browser title after launch: ' + driver.title

# close browser
driver.quit
它将显示以下输出:
Browser title after launch: Selenium Practice - Student Registration Form

Process finished with exit code 0
在上面的示例中,我们首先启动了 Edge 浏览器,然后检索了浏览器标题,最后退出了浏览器,并在控制台中收到了消息“启动后浏览器标题:Selenium 实践 - 学生注册表单”。
最后,收到了消息“进程已退出,退出代码为 0”,表示代码已成功执行。
使用 Selenium Ruby 识别元素并检查其功能
导航到网页后,我们必须与页面上可用的 Web 元素进行交互,例如单击链接/按钮、在编辑框中输入文本等,以完成我们的自动化测试用例。
为此,我们的首要任务应该是识别元素。我们可以使用链接的链接文本进行识别,并使用 find_element(name: '<value of name attributes>') 方法。这样,将返回第一个具有与 name 属性值匹配的值的元素。
如果不存在具有与 name 属性值匹配的值的元素,则将抛出 NoSuchElementException。
让我们看看下图中编辑框的 html 代码:
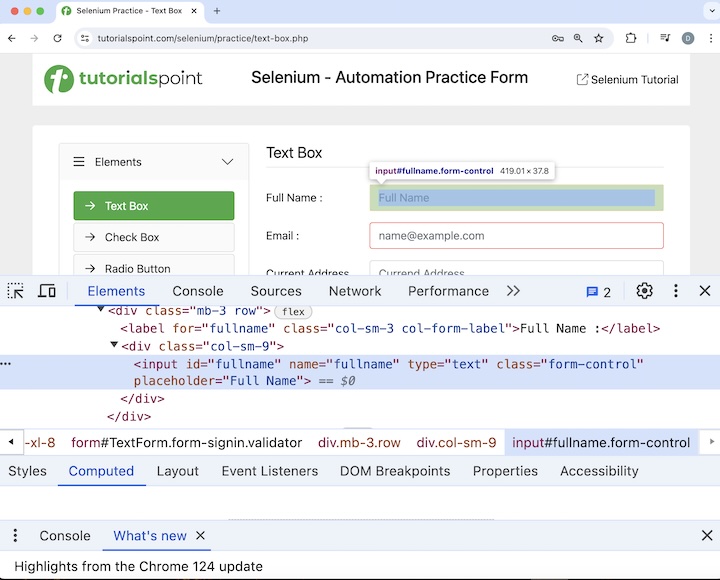
<input id="fullname" name="fullname" type="text" class="form-control" placeholder="Full Name">
上图中突出显示的“FullName:”标签旁边的编辑框具有一个名为“fullname”的 name 属性。让我们在识别它后将文本“Selenium”输入到此编辑框中。最后我们将退出浏览器。
代码实现
require 'selenium-webdriver'

# Initiate Webdriver
driver = Selenium::WebDriver.for :edge

# adding implicit wait of 15 seconds
driver.manage.timeouts.implicit_wait = 15

# launch an application
driver.get'https://tutorialspoint.com/selenium/practice/text-box.php'

# identify element then enter text
name = driver.find_element(:name ,'fullname')
name.send_keys("Selenium")

# close browser
driver.quit
在上面的示例中,我们首先启动了 Edge 浏览器并打开了一个应用程序,然后在输入框中输入了文本 Selenium。
最后,收到了消息“进程已退出,退出代码为 0”,表示代码已成功执行。
结论
至此,我们完成了有关 Selenium Ruby 教程的全面讲解。我们从介绍如何使用 Ruby 设置 Selenium 并使用 Selenium Ruby 退出会话开始,然后介绍了如何使用 Selenium Ruby 启动浏览器并退出会话,以及如何使用 Selenium Ruby 识别元素并检查其功能。
这为您提供了有关 Selenium Ruby 教程的深入知识。明智的做法是不断练习您学到的知识,并探索与 Selenium 相关的其他内容,以加深您的理解并拓宽您的视野。
